

Blue almond nail ideas work best when they stay restrained. The almond shape already gives the hand a longer, softer line, so a little blue goes a long way. You do not need rhinestones piled halfway up the nail or a dozen shades of polish to make the set look finished.
Blue is one of those colors that can go in a lot of directions without getting fussy. Pale sky blue feels airy, navy feels tailored, denim blue feels lived-in, and icy blue can look almost glossy enough to make people stare at your hands for a second longer than usual. On almond nails, those shades behave differently than they do on square or round shapes because the taper changes how the color reads from tip to cuticle.
That taper is the reason simple designs work so well here. A thin French line, a tiny dot, a soft fade, or a single stripe can echo the curve of the nail and make the whole manicure look intentional without turning it into a project. I keep coming back to that idea because it saves a lot of bad manicures: let the shape do some of the work.
And if you like a manicure that still looks neat on day nine, simple blue nail art is your friend. Grow-out is easier to live with when the design is small, the lines are clean, and the finish feels polished instead of crowded.
1. Sheer Sky Blue Almond Nails

A sheer sky blue wash is one of those manicures that looks calm from across the room and a little more interesting up close. It gives you color without hiding the shape, which matters on almond nails because the taper is half the point.
I like this version with two thin coats over a milky nude base. The color should sit lightly on the nail, almost like blue glass, not a thick block of polish. If the brush starts pooling near the sidewalls, wipe it on the bottle neck first and come in with a light hand. That keeps the sides clean and helps the almond shape stay slim.
A tiny crescent of negative space near the cuticle can make the whole thing feel fresher. Not a huge gap. Just enough to stop the color from pressing too hard against the nail bed. That little breathing room is especially nice if your nails are shorter, because it keeps the set from feeling heavy.
This is the blue almond nail idea I’d pick for someone who wants color but hates fuss. It’s soft, easy to wear, and forgiving when your nails start to grow out.
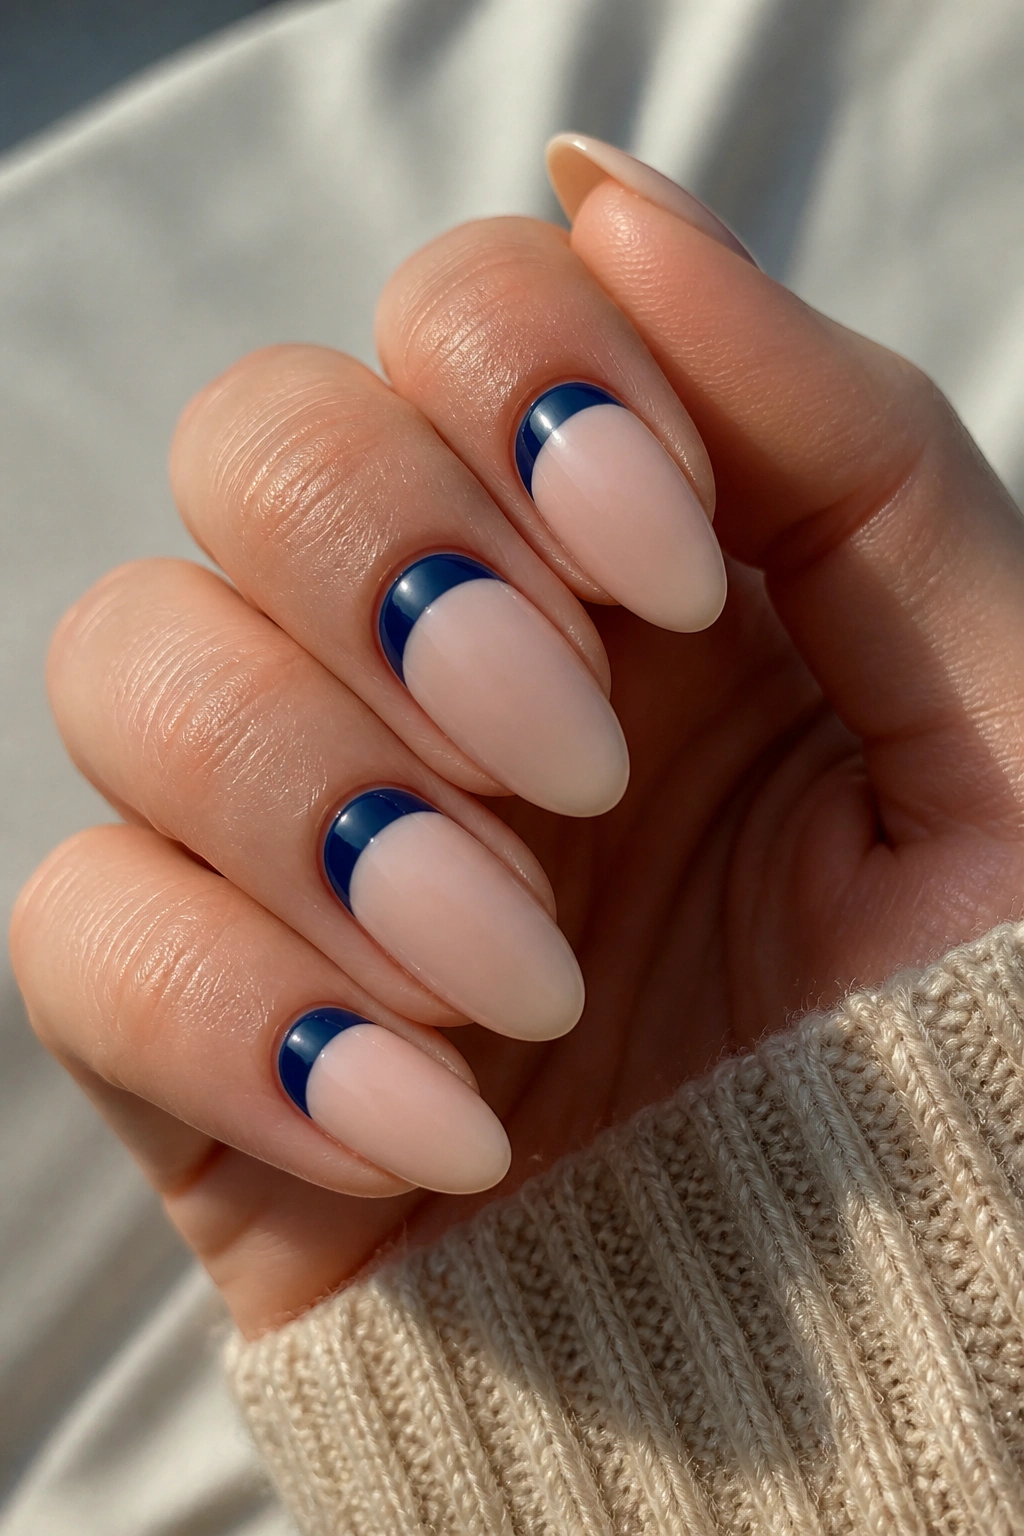
2. Navy Micro-French Tips

Want blue almond nail ideas that look tidy from across the room and even better close up? Navy micro-French tips are the move.
Keep the Line Tiny
The entire design depends on restraint. A 1 to 2 millimeter tip is enough; anything thicker starts to read more like a full-color block than a simple French. On almond nails, that narrow line follows the curve nicely, so the tip feels sharp without getting severe.
I like a milky nude or sheer pink base under navy because the contrast does the work for you. You do not need nail art on every finger, either. Five identical micro-French nails can look crisp, but adding just one bare accent nail on each hand gives the set a little more air.
- Use a fine liner brush or nail art pen for the tip.
- Keep the smile line shallow so the nail still looks long.
- Finish with a glossy top coat for a smoother edge.
- Skip thick white underlayers; navy already has enough contrast.
A navy micro-French is especially good if you like polished nails that do not scream for attention. It’s neat, practical, and one of the easiest blue almond nail designs to wear with denim, black, or silver jewelry.
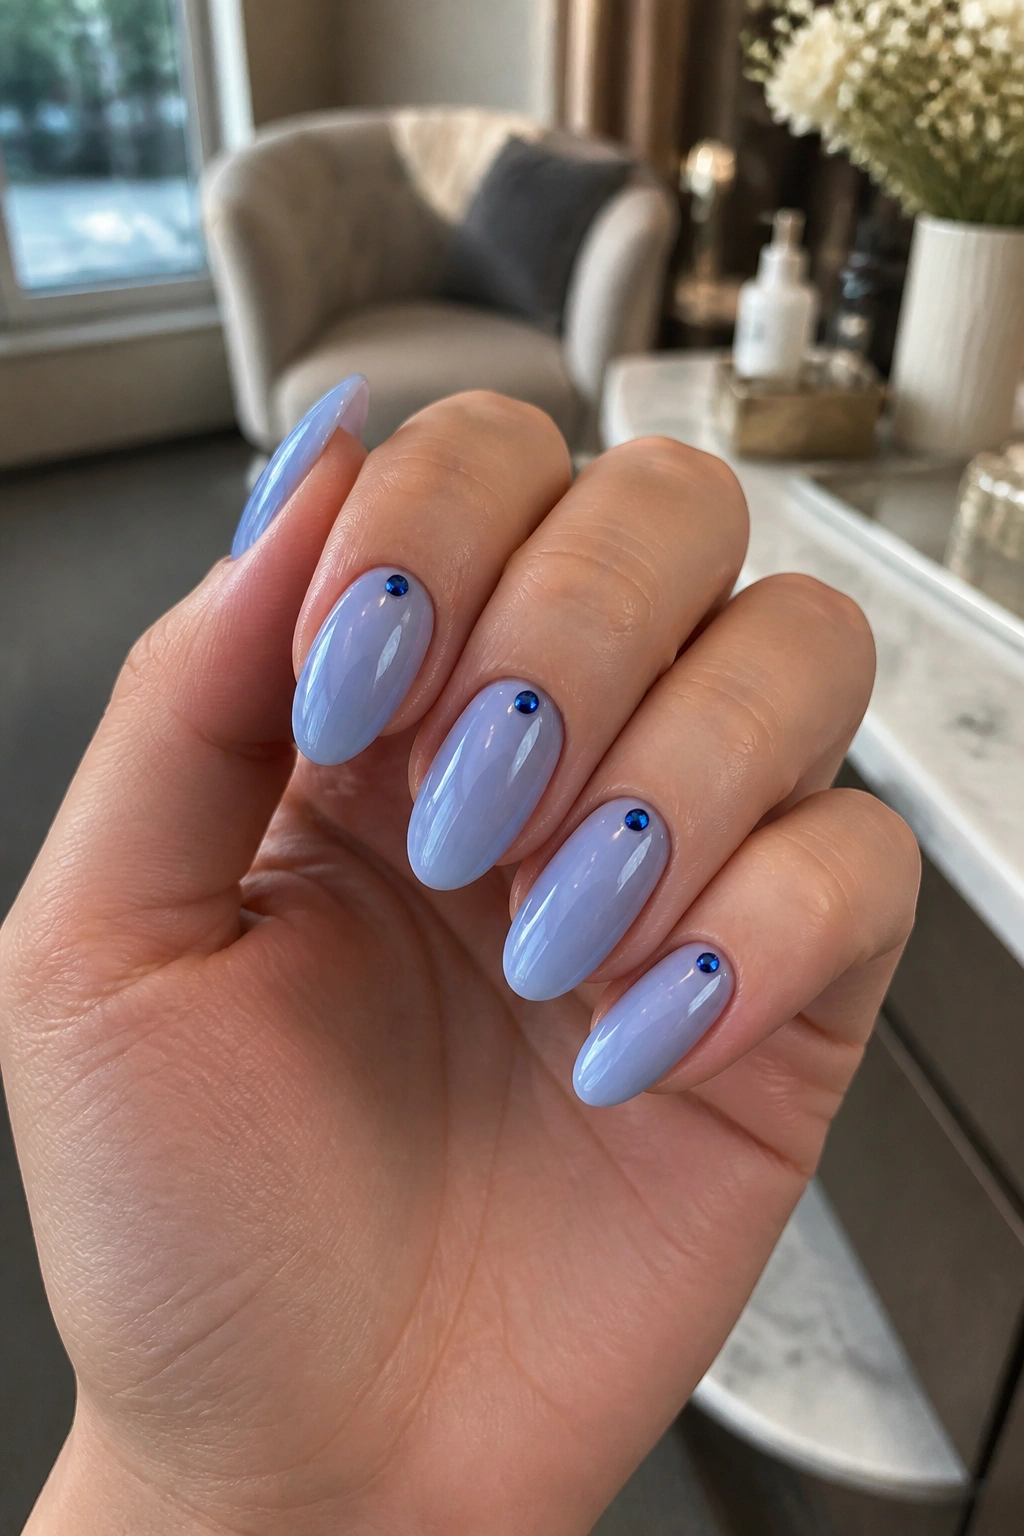
3. Powder Blue With One Tiny Dot
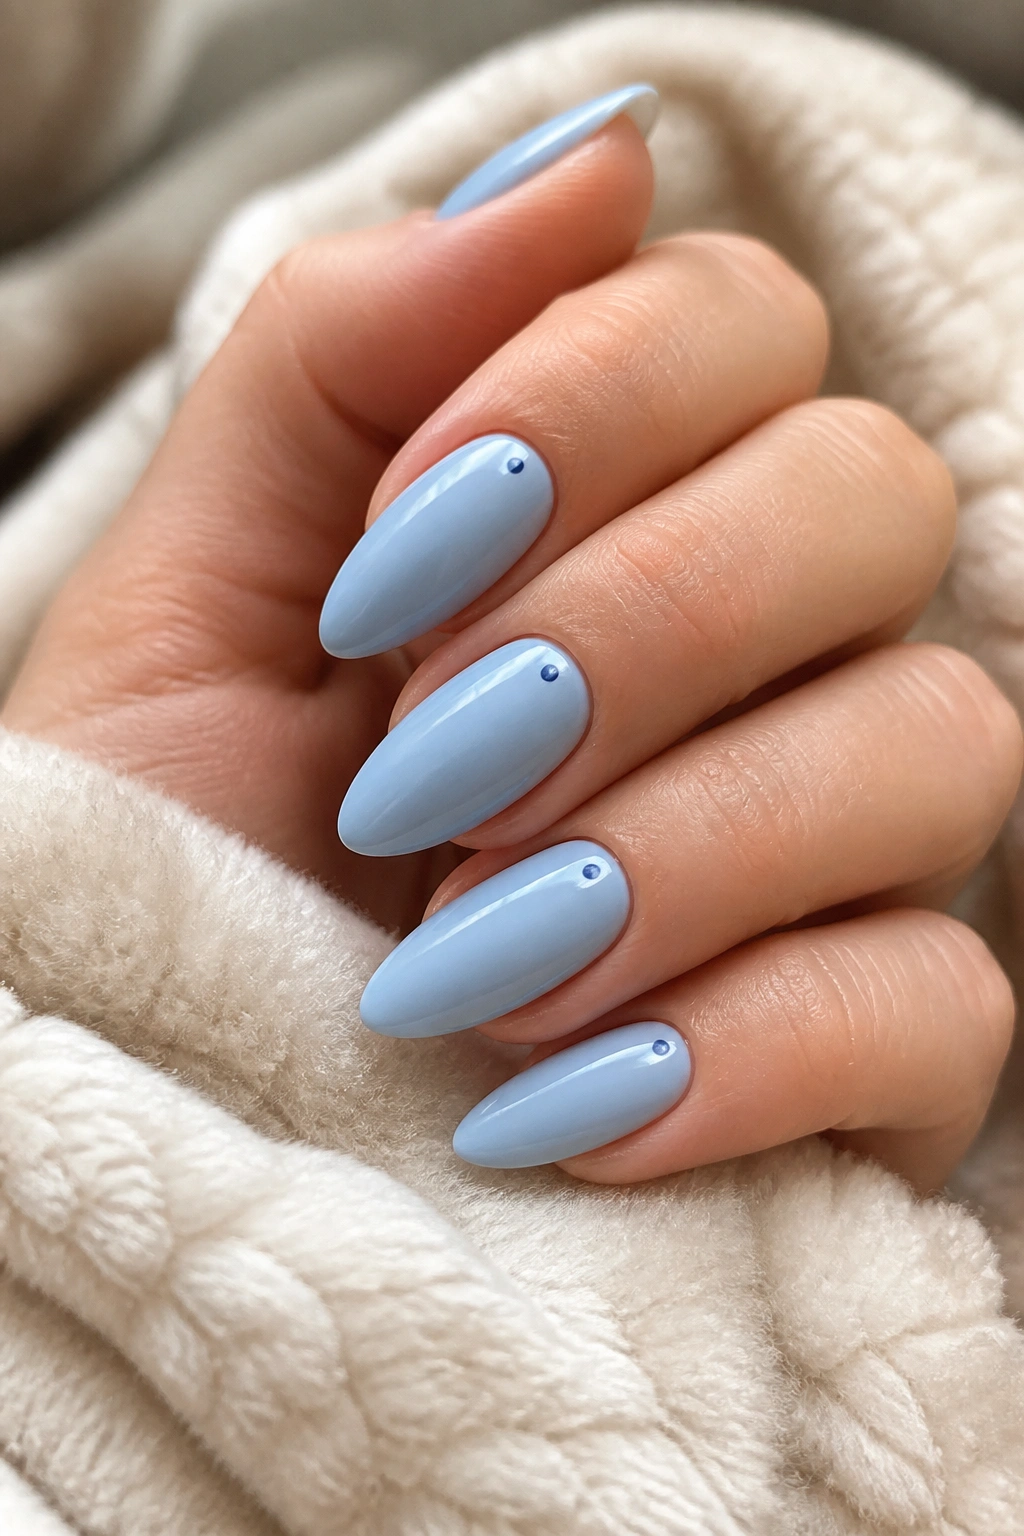
If you hate nail art that looks busy, this is the one to steal. A powder blue base with one tiny dot near the cuticle or at the tip keeps the manicure playful without turning it into a theme.
The dot should be small. Really small. Think 2 millimeters wide, no more, because a big dot starts to feel cartoonish on a narrow almond nail. A dotting tool is best, but the end of a bobby pin or a toothpick will work if you’re careful and keep the polish from flooding.
Why It Works
The eye likes repetition, but it also likes a pause. A single dot gives the manicure that pause. It breaks up the blue just enough to make the set feel deliberate, and it does it without crowding the nail bed.
If you want the whole thing to stay clean, place the dot in the same spot on every nail. Near the cuticle looks neat. Off to one side feels a little softer. I’d avoid placing it halfway down the nail, because that can make the almond shape look chopped up.
This design is easy to do at home, easy to repaint, and easy to live with if you’re the type who gets bored fast.
4. Cobalt Side Sweep

A diagonal cobalt sweep does more for almond nails than a full glitter accent ever will. It pulls the eye from one side of the nail to the other, which makes the taper feel longer and sharper.
The trick is to keep the sweep narrow and intentional. Start low on one sidewall, then bring the color up toward the opposite tip in a smooth curve. The rest of the nail can stay nude, sheer pink, or milky white. That contrast is what makes the blue pop.
One of the reasons I like this design is that it feels tailored. Not flashy. Tailored. A cobalt stripe on one or two nails looks like you made a choice, not like you ran out of ideas halfway through the manicure. On almond shapes, that asymmetry looks especially good because the nail already has a soft point to guide the line.
If your hand is shaky, use striping tape first and remove it while the polish is still slightly wet. The edge comes out cleaner that way. A glossy top coat helps the diagonal line look smoother, too.
5. Baby Blue Ombre Fade
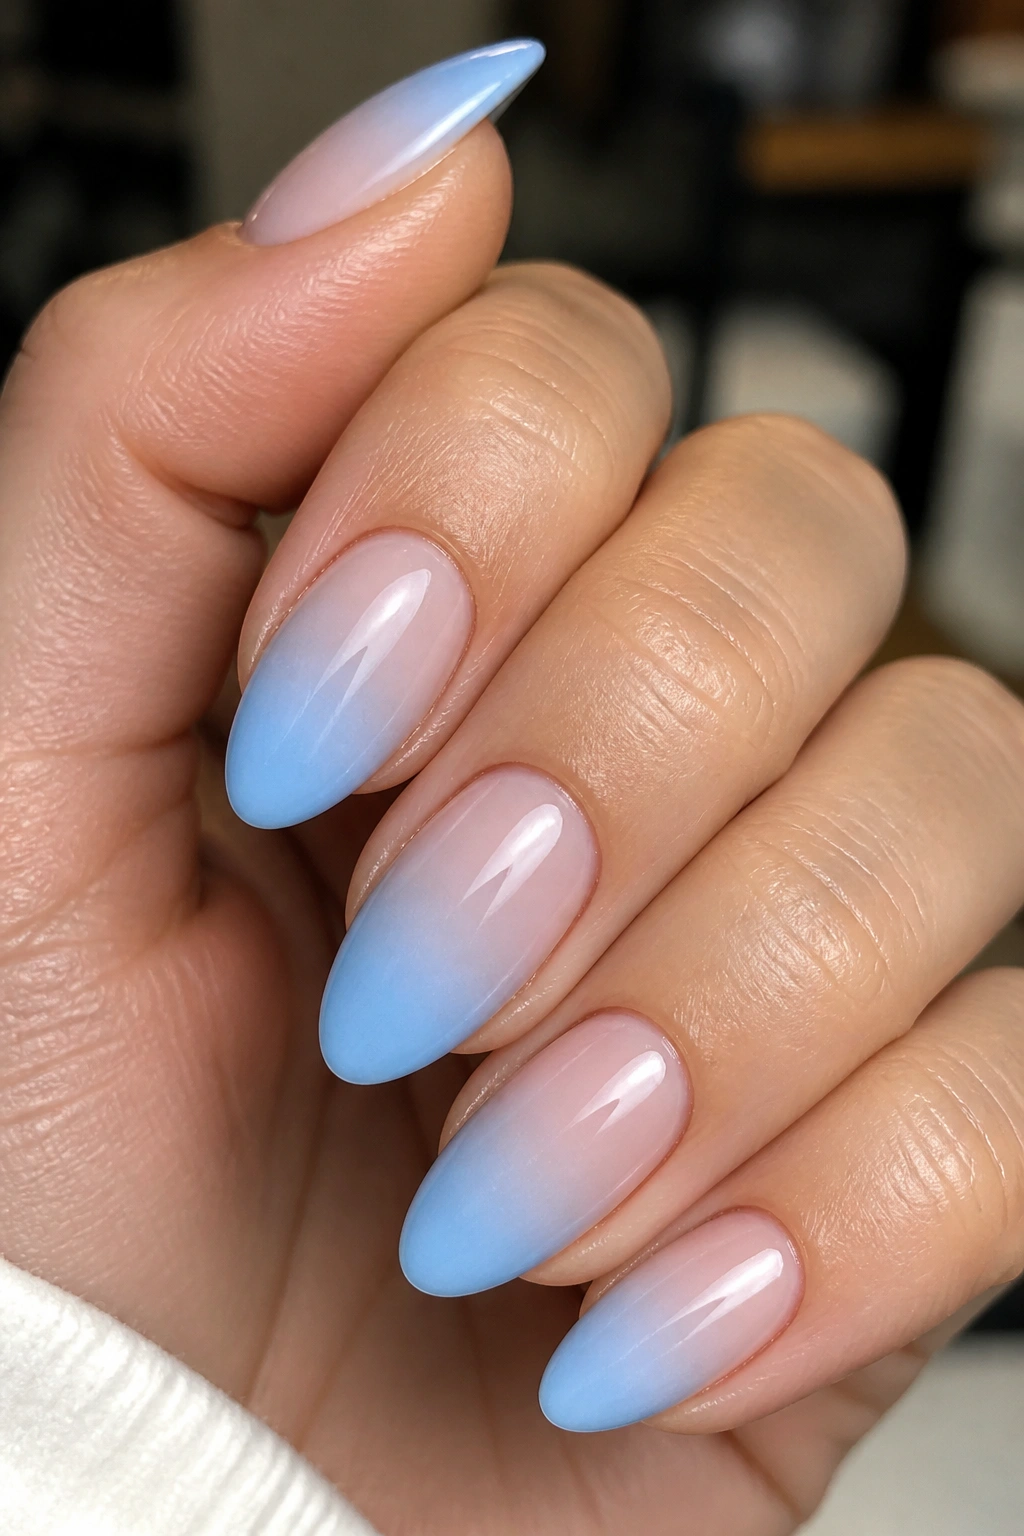
The polish change should look like mist, not stripes. That’s the whole appeal of a baby blue ombre on almond nails.
What Makes the Fade Soft
Start with a sheer nude or milky pink base. Then sponge or brush the baby blue from the tip upward, keeping the first pass light and the second pass lighter than you think. If you go in too heavy at the start, the fade turns blocky and you lose that airy look.
I usually think of ombre as a manicure that needs patience more than skill. Two or three thin layers will look cleaner than one thick one, even if the thick one seems faster in the moment. It won’t. It just gives you a cloudy edge and more cleanup around the skin.
What to Skip
- Opaque blue on the first coat.
- Sponge chunks that leave a line.
- Pressing the color too far down toward the cuticle.
- A matte top coat, unless you want the fade to look flatter.
This is one of those blue almond nail ideas that reads soft without going pale. The shape matters here because the fade naturally pulls toward the tip, so the almond point ends up looking longer and smoother than it would with a square edge.
6. Midnight Blue Half-Moons
Most people put the color on the tip. Flipping it to the base changes the whole mood.
A midnight blue half-moon at the cuticle gives you a manicure that feels neat and a little unexpected, but still simple enough to wear every day. The rest of the nail can stay sheer nude or soft blush, which keeps the dark blue from taking over. On almond nails, the curved moon follows the natural base of the nail bed, so the design looks tidy even when it’s small.
I like this one because it grows out well. The bare tip hides the regrowth a bit better than a full solid manicure would, and the moon shape near the cuticle gives the nail a clean anchor point. If you’re using regular polish, let the first coat dry for five to seven minutes before tracing the curve again. That extra pause keeps the edge from dragging.
This design can lean elegant or cool depending on the finish. Glossy midnight blue feels sharper. A satin top coat makes it look quieter. Both work.
7. Blue and White Wave Lines
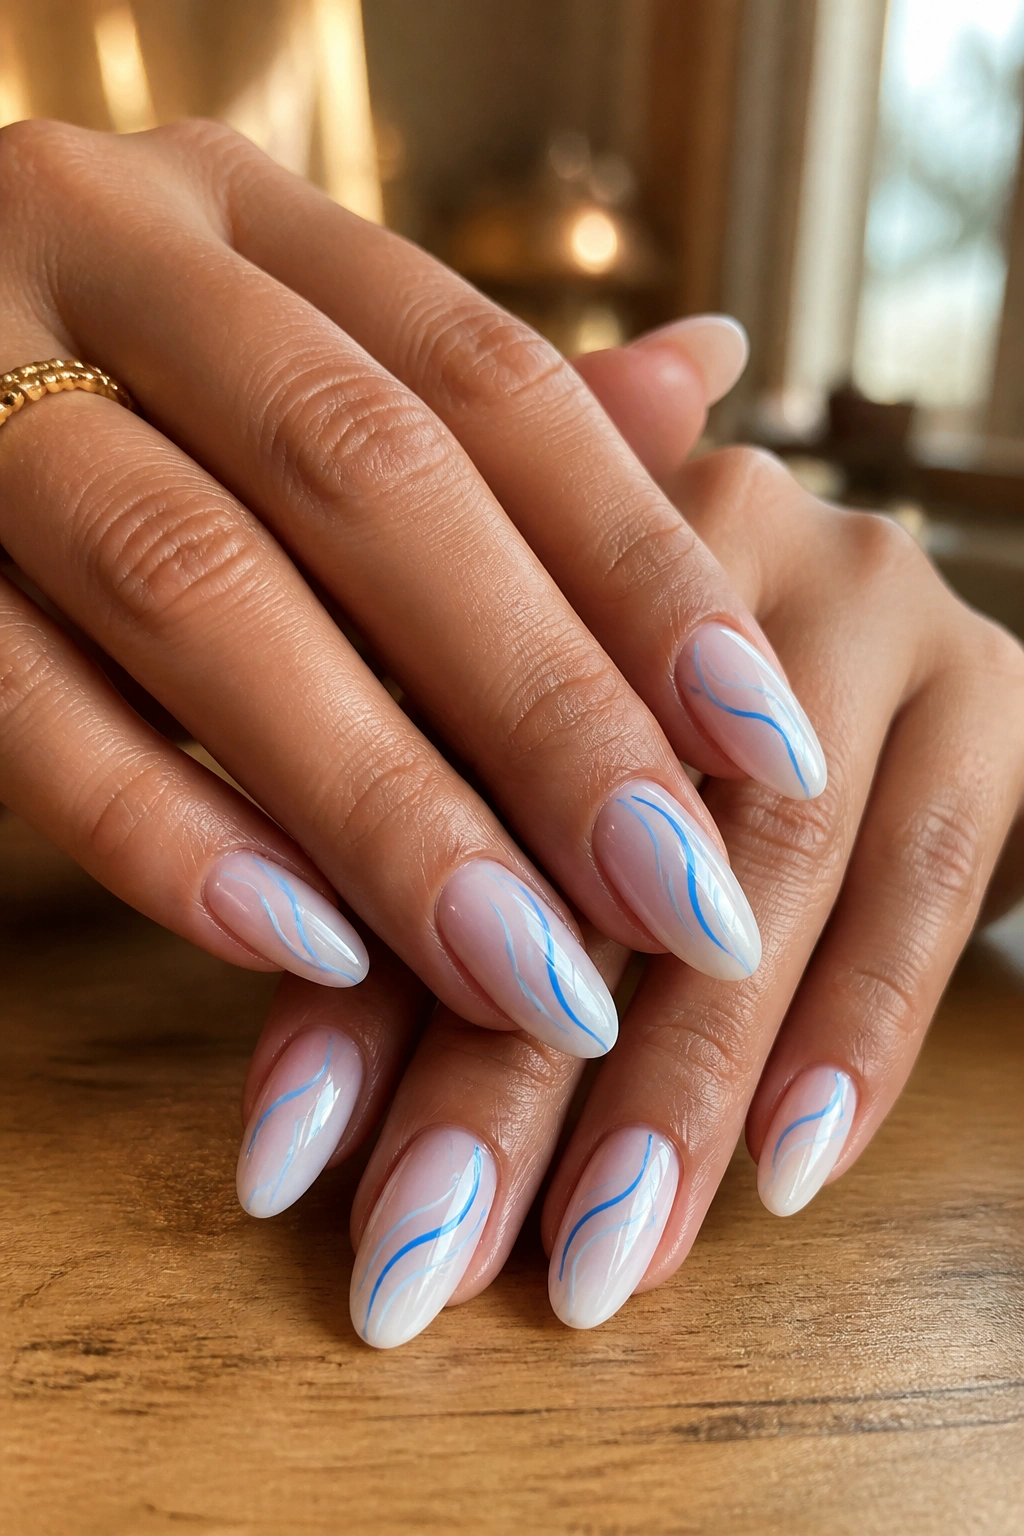
Waves are friendly. That’s why this manicure works so well on almond nails.
A soft blue wave line crossing a white or sheer base gives you movement without turning the whole set into a pattern. The line can sit near the center of the nail, sweep toward the tip, or curl a little off to one side. I’d keep the design to one or two waves per nail, though. Once the lines multiply, the look starts to feel crowded.
A Steady Hand Helps, But Not Much
A liner brush with a long, thin tip makes this easier than it looks. Load it with just enough polish to draw one smooth curve, then stop. Do not keep going over the same line ten times. That’s how the edge turns muddy.
- Use a 5 to 7 mm liner brush if you have one.
- Keep the wave thinner near the cuticle.
- Repeat the pattern on only three nails if you want a lighter look.
- Pair it with a glossy top coat so the line stays crisp.
I like blue and white waves on almond nails because the shape gives the line a natural path. It feels a little playful, but not childish.
8. Periwinkle With Tiny Gold Dots
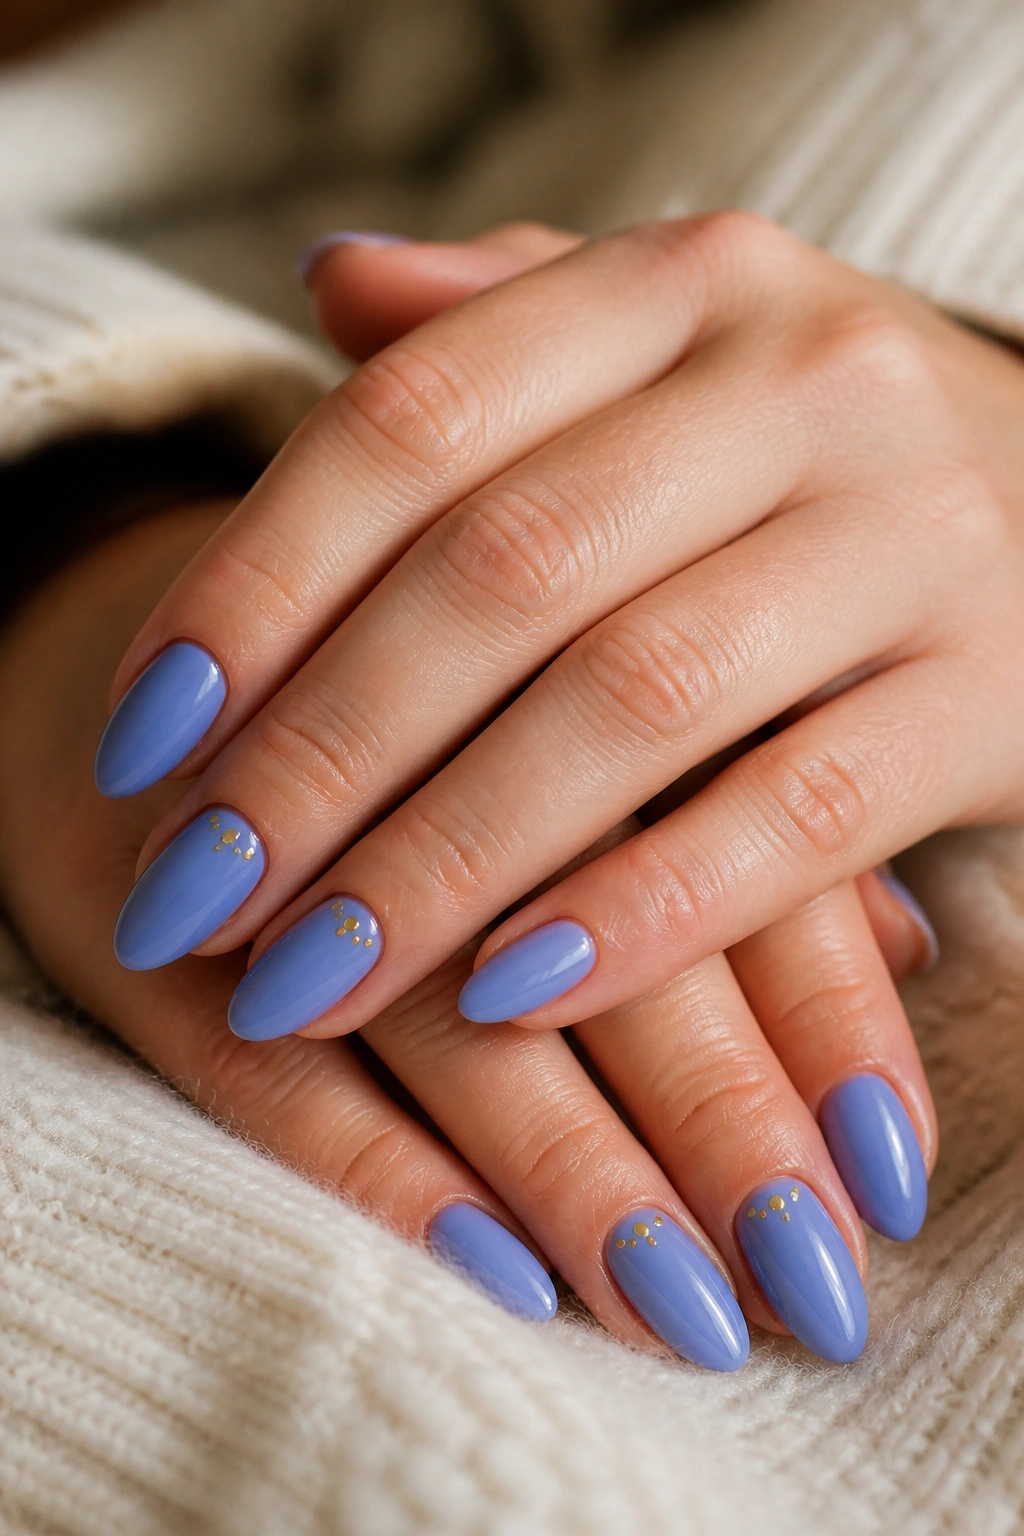
Periwinkle already sits in that sweet spot between blue and lavender, so it never feels flat. Add a couple of tiny gold dots and the manicure starts to look finished in a way that a plain solid color sometimes doesn’t.
The gold should stay small. A single dot near the cuticle on the ring finger, or a tiny pair of dots on alternating nails, is enough. You are not trying to make the manicure sparkle from a block away. You’re giving the blue a warm note so it plays nicely with rings, watches, or a gold bracelet.
I also like this design because it softens the blue without making it pastel-heavy. Periwinkle can lean chilly if you keep it by itself. A little gold warms it up and keeps the manicure from feeling flat under indoor light.
This is a good option if you wear mixed metals and want your nails to sit in the middle instead of arguing with the rest of your jewelry. It’s subtle, but not sleepy. That’s the sweet spot.
9. Matte Denim Blue Almond Nails
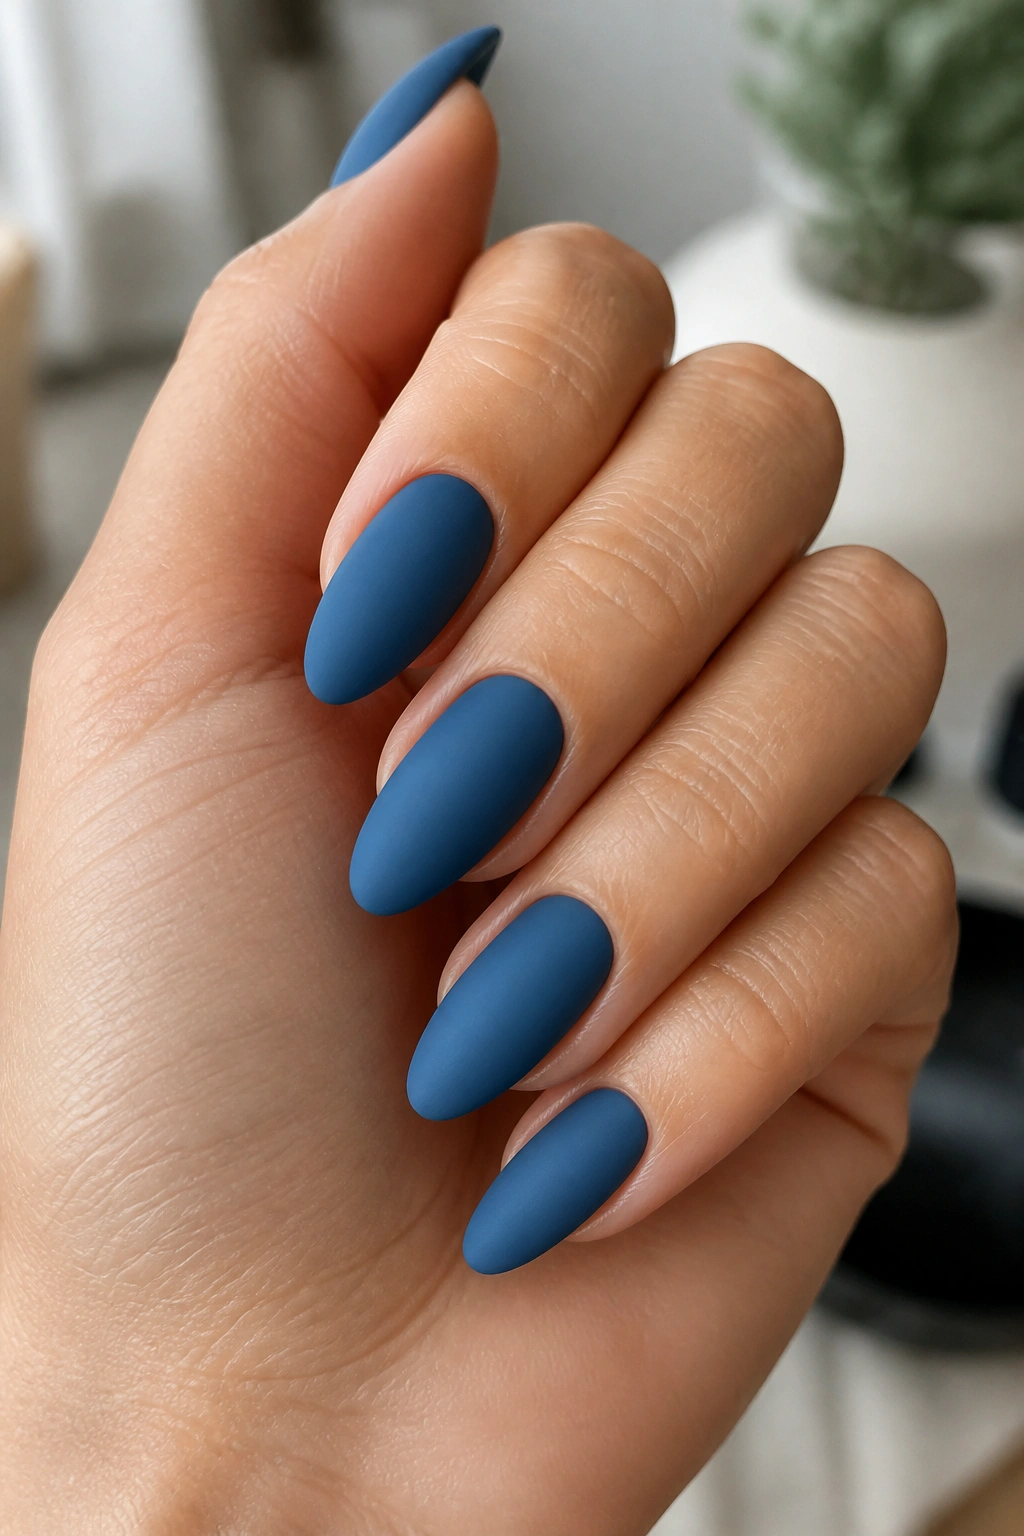
What if you want blue almond nail ideas that feel a little more worn-in and less shiny? Matte denim blue does exactly that.
Matte Only Works When the Base Is Smooth
Matte top coat is unforgiving. Every ridge, dent, and uneven patch shows up faster than it does under gloss, so the prep matters more here than on other finishes. Buff the nail gently, wipe away dust, and use a base coat that levels a bit if your surface is rough.
A denim blue shade works because it already has that lived-in look. It feels familiar, like a favorite jacket or a pair of broken-in jeans. That makes the matte finish easier to wear than a bright primary blue, which can look chalky if the polish formula is off.
- Choose a blue with a gray undertone for the softest matte look.
- Keep coats thin so the finish cures evenly.
- Use cuticle oil after the top coat dries; matte polish can make the skin around it look drier than it is.
- Avoid thick shimmer in the polish. Matte and shimmer fight each other.
I keep coming back to this one for almond nails because the shape gives denim blue a little refinement. It’s casual, but not sloppy.
10. Royal Blue Accent Nail
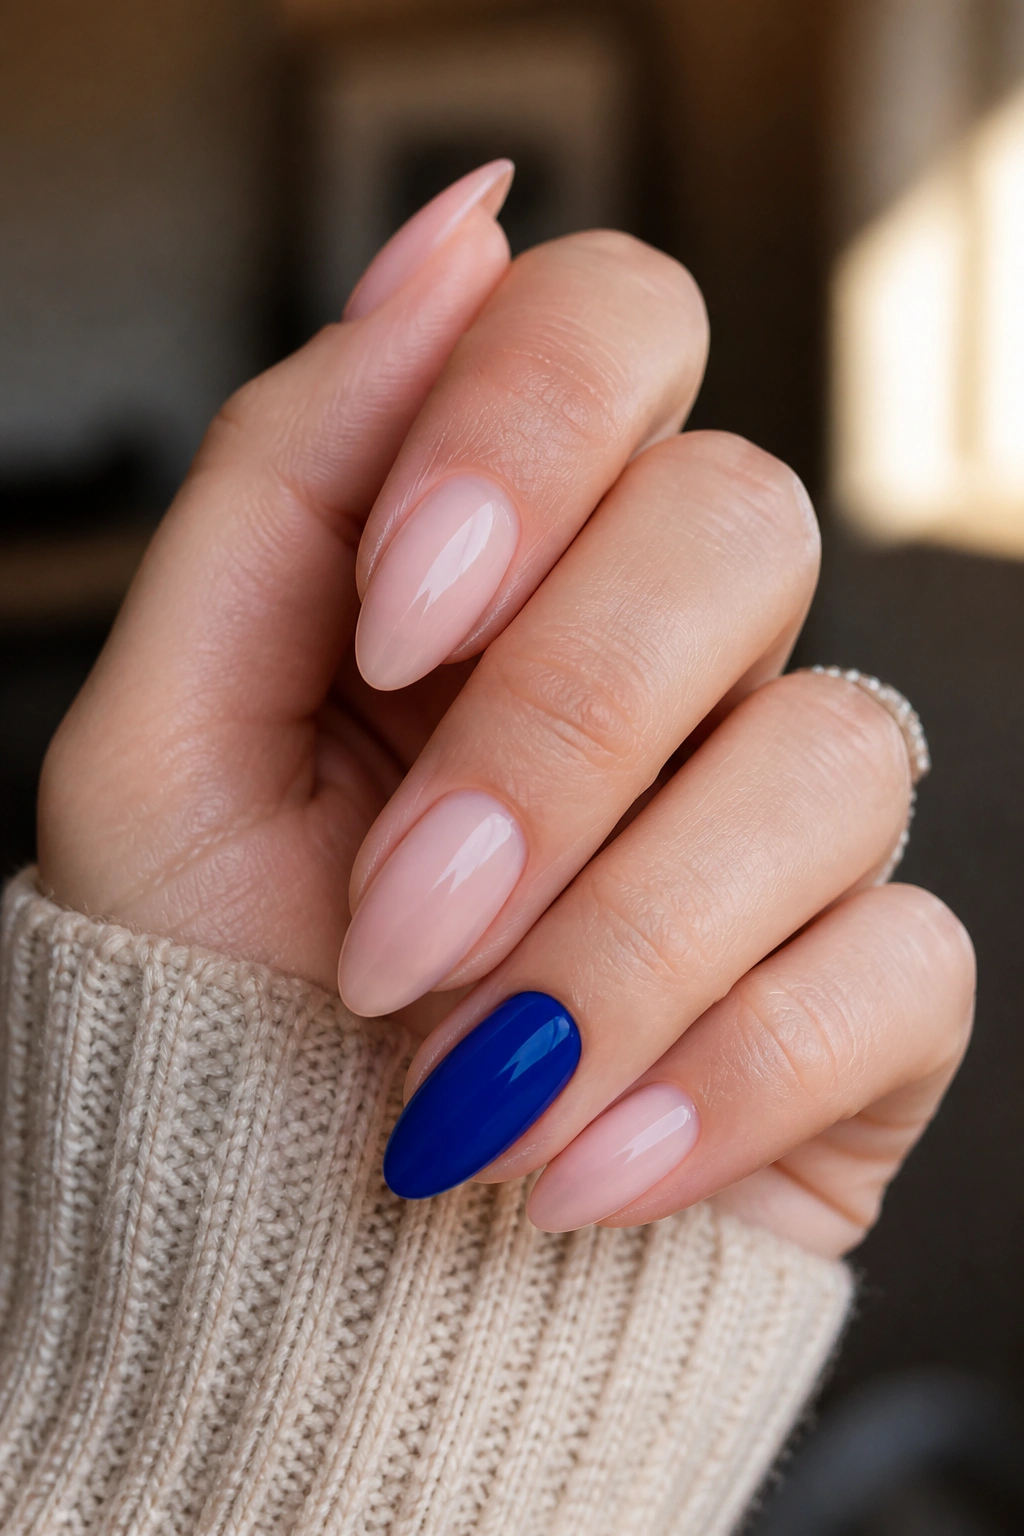
I keep coming back to one accent nail when a whole set feels like too much work. Royal blue on just one finger can change the mood of the entire manicure.
The easiest version is simple: four or eight nails in nude or sheer pink, then one royal blue accent nail on each hand. Ring finger is the usual pick, but middle finger works too if you want the color to show more when you gesture. On almond nails, that single blue panel looks clean because the shape already narrows toward the tip.
Where the Accent Should Go
- Ring finger if you want the most classic balance.
- Middle finger if you want more visibility.
- Thumb if you want a small surprise that pops when you hold a cup or phone.
- One hand only if you want the design to feel less symmetrical.
The thing I like about this look is that it lets you wear a strong blue without committing the whole manicure to it. That can be a relief when you’re not in the mood for a full set of color. And if the accent nail chips first, which happens, you still have a manicure that looks intentional.
11. Icy Blue Chrome Stripe
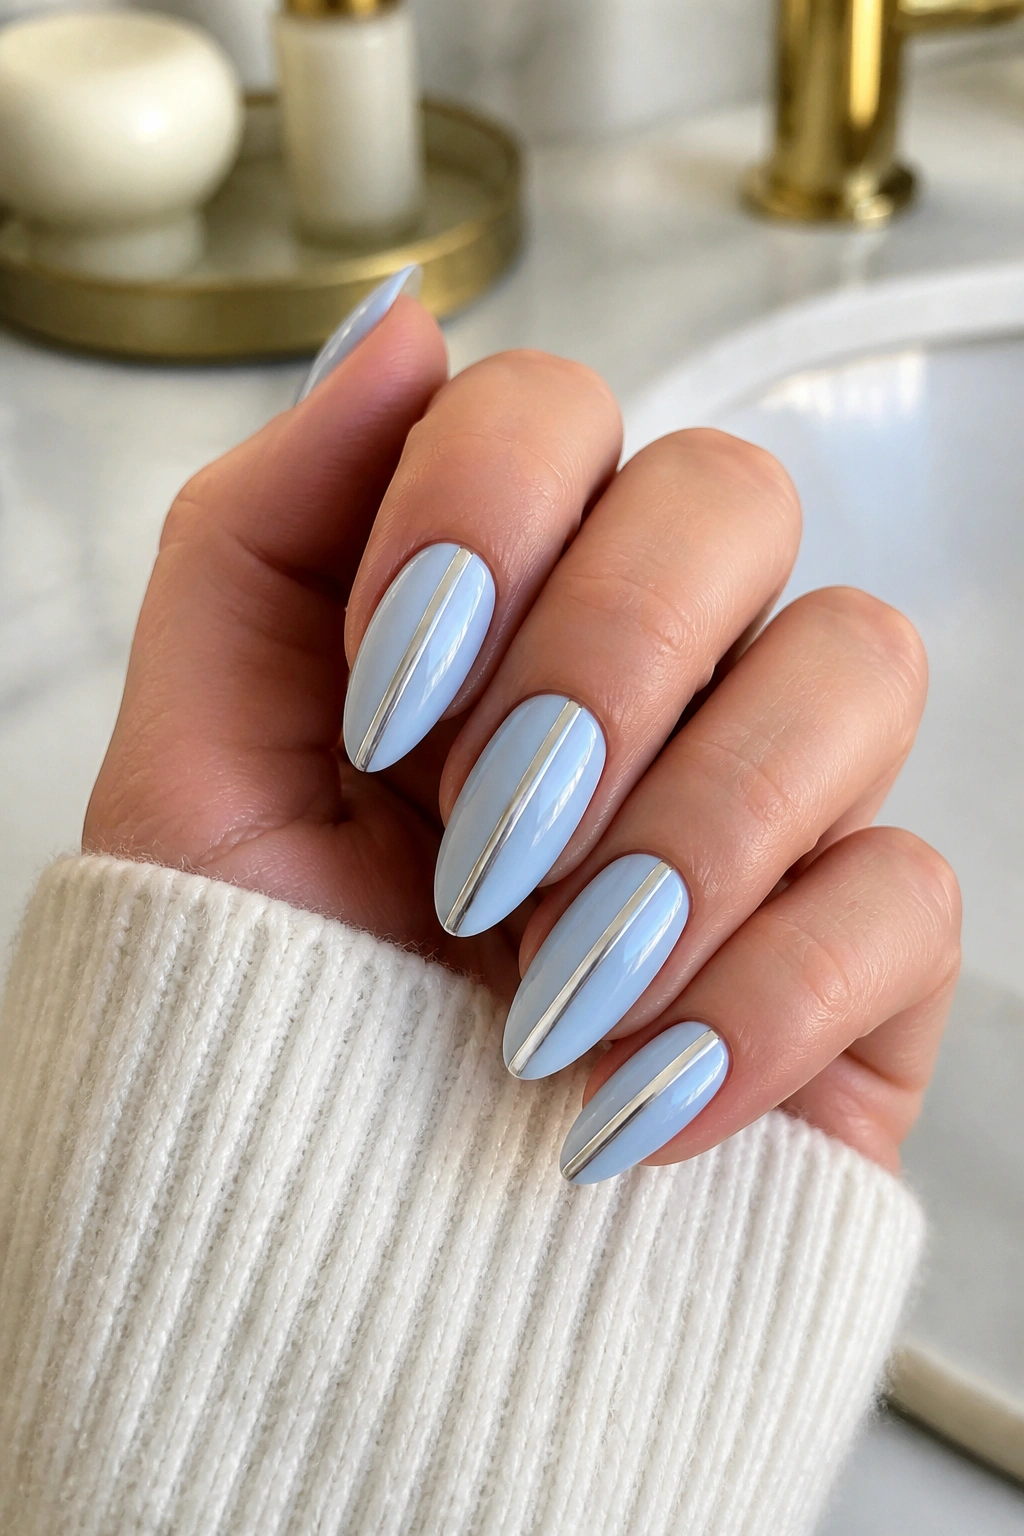
A thin chrome stripe down the center of an icy blue almond nail gives you shine without needing a whole metallic set. I prefer it when the rest of the nail stays soft and pale, because the stripe does the heavy lifting all by itself.
The stripe should be narrow. About 2 millimeters is enough. Wider than that, and the chrome starts to feel loud instead of neat. A silver or pale pearl chrome works better than a harsh mirror finish, especially if your base is light blue. The contrast stays gentle.
One thing I like about this design is how controlled it feels. There’s no glitter fallout, no chunky texture, no need to cover every inch of the nail. Just one straight line, or maybe a slight curve if you want it to follow the almond taper a little more closely.
A glossy top coat helps seal the effect and keeps the stripe from looking scratched up. If you’re doing this at home, apply the stripe last and let it sit for a minute before top coating. That keeps the metallic edge from smearing.
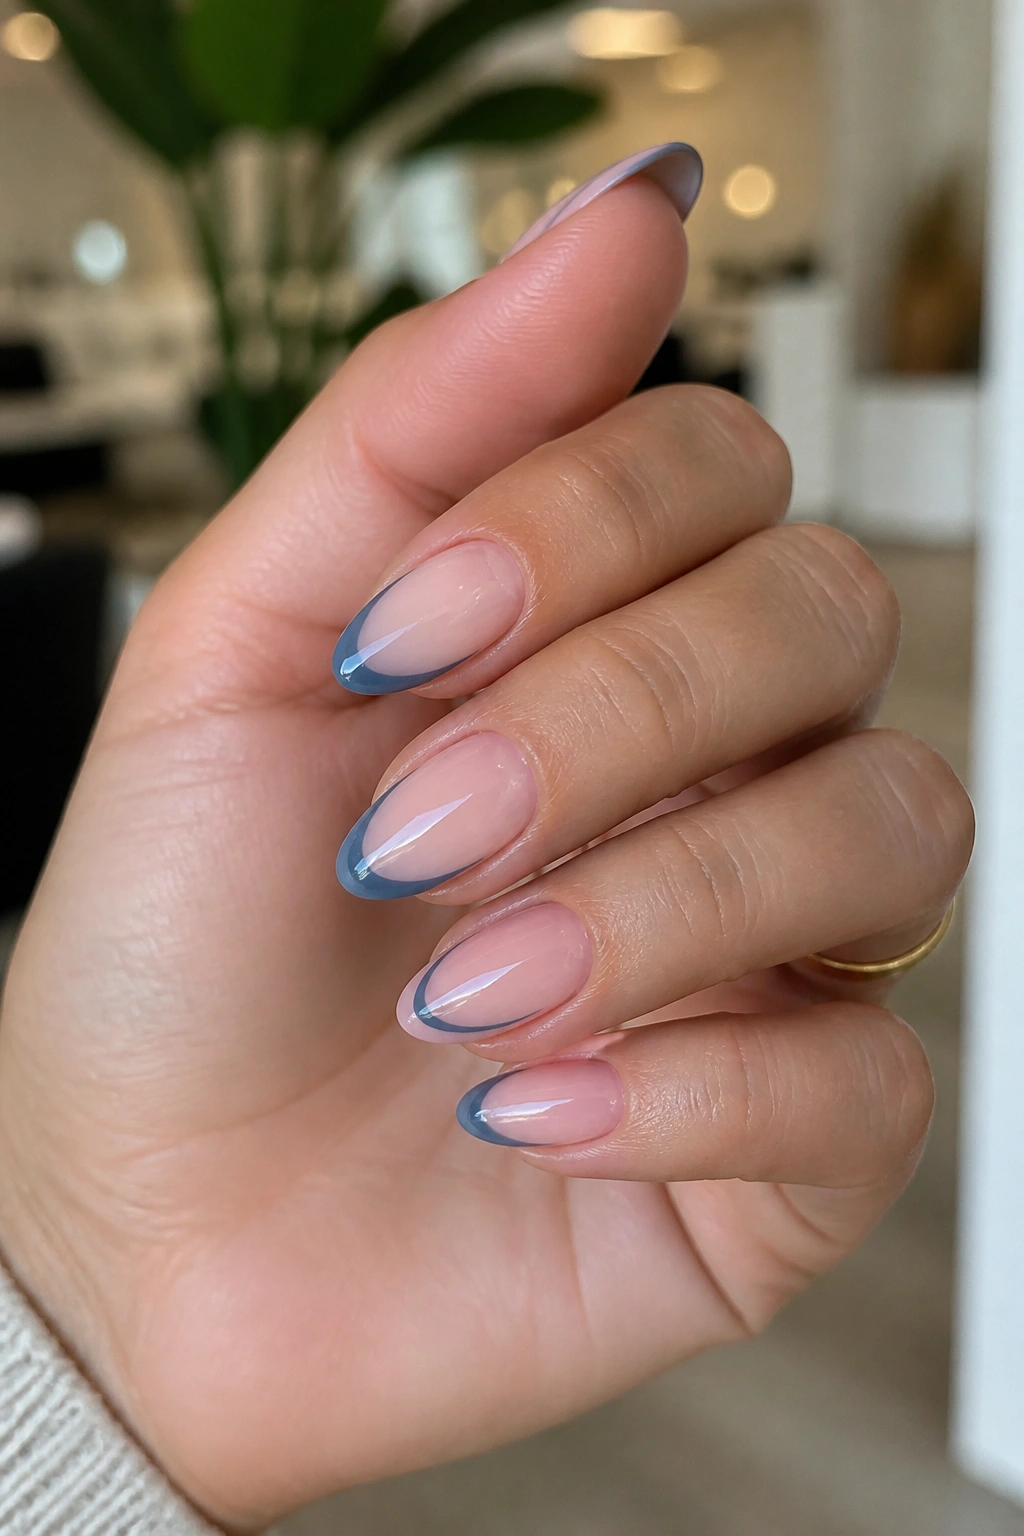
12. Slate Blue Outline French
The outline French is the easiest way to make simple nail art look deliberate.
Instead of filling the tip, you trace the outer edge of the almond shape with slate blue. That means the nail stays mostly nude or sheer, while the blue acts like a frame. The effect is neat, especially on longer almond nails where the tip has room to show off the curve.
I like slate blue for this because it has enough depth to read clearly, but it isn’t so dark that it swallows the design. Bright blue can feel too loud here. Slate keeps the outline calm and a little modern-looking.
If your hands shake, this is still one of the more forgiving designs. You are following the shape of the nail instead of inventing a new line across it, so small wobbles disappear once the top coat goes on. That’s one reason I’d pick it over a more complicated stripe set.
This is the manicure I’d suggest for someone who wants a blue detail but does not want their nails to look decorated. There’s a difference.
13. Blue Swirl on a Clear Base
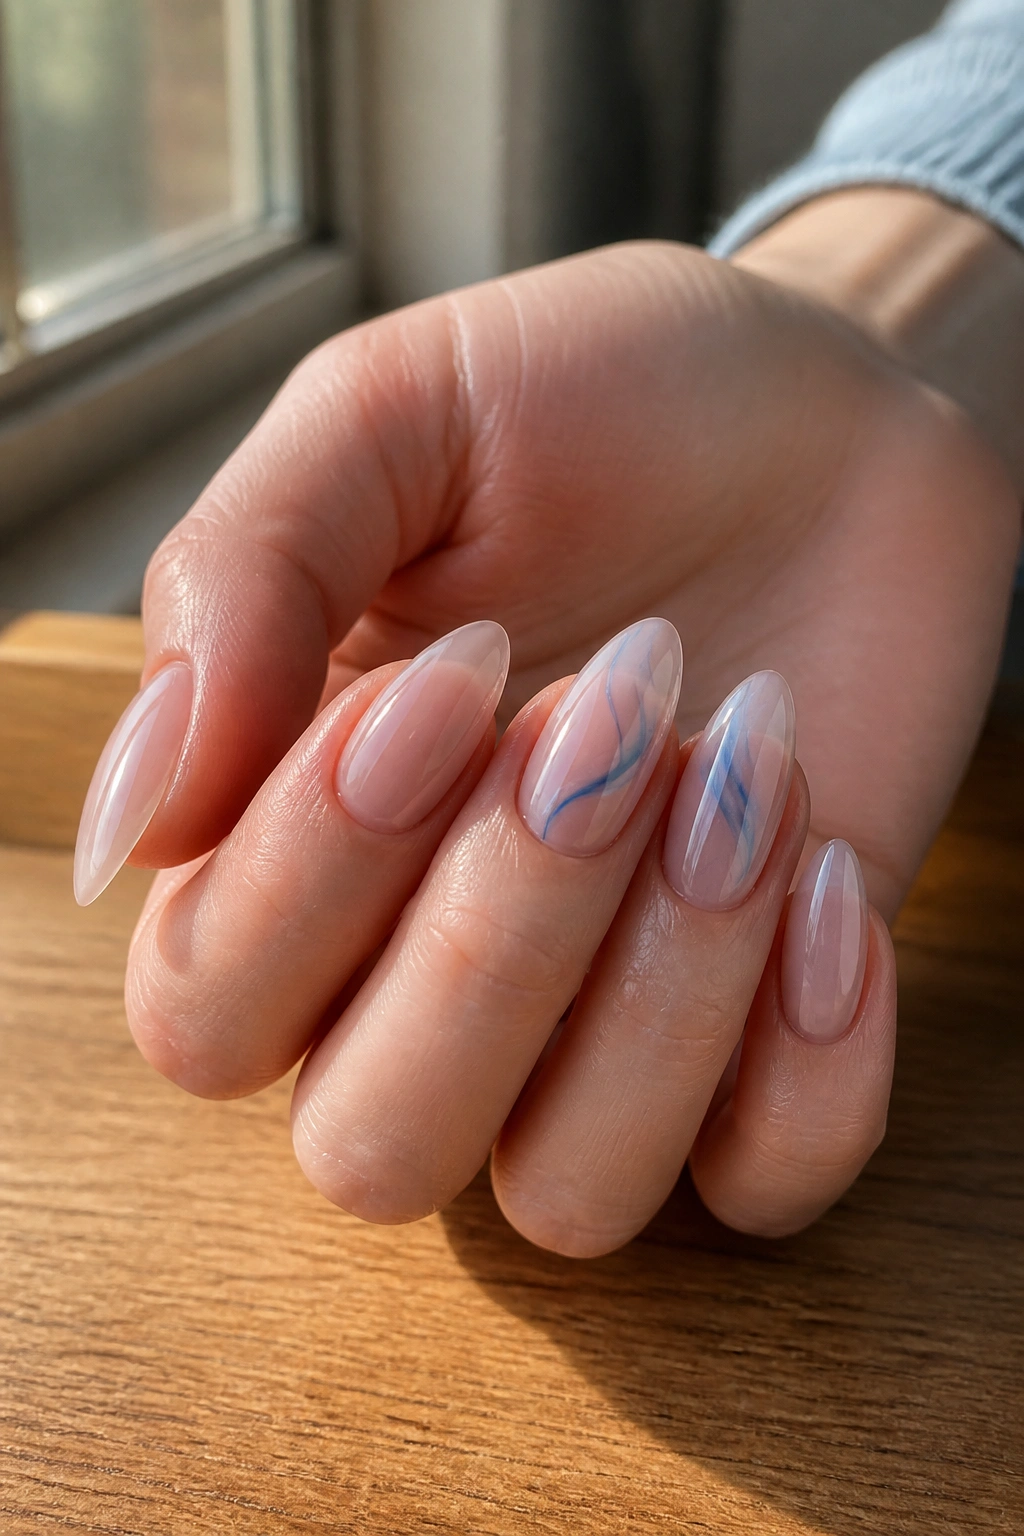
Do you want something playful without turning the whole manicure into a pattern? A blue swirl on a clear base is the answer.
The trick is to keep the swirl loose and limited. One or two curved lines per nail is plenty. If you add more, the design starts to feel crowded and the almond shape loses some of its clean line. A clear or milky base gives the swirl space, which is half the appeal.
How to Keep It Balanced
- Put the swirl on two or three nails, not every finger.
- Use a fine liner brush so the line doesn’t wobble.
- Let the swirl cross the nail once, then stop.
- Match the blue shade to the rest of your manicure if you mix finishes.
I especially like this on almond nails because the shape makes the swirl look more fluid. A square nail can make a curve look stiff if the line is too heavy. Almond softens that problem right away.
Keep the base clean and the swirl light. That’s the whole point. The manicure should look like it moved, not like it was overdesigned.
14. Sapphire Cuticle Dots
This design looks almost too simple until you see it on actual hands. Then it makes sense.
A tiny sapphire dot placed right at the cuticle line gives the nail a little anchor without covering the surface. On almond nails, that small circle sits neatly under the taper and makes the whole set feel finished. You can repeat it on every nail, or place it on alternating fingers if you want less symmetry.
One dot should be enough. Maybe 3 millimeters wide, maybe slightly smaller if your nails are short. Bigger than that and the dot starts to compete with the rest of the nail instead of sitting quietly on top of it. A glossy finish makes the blue look richer and keeps the dot from reading flat.
I like this because it’s the sort of design people notice only after a second look. It doesn’t demand attention. It earns it. That’s a better deal.
If you’ve got a hand-heavy job or spend a lot of time typing, this is also a smart choice. The art stays out of the way, and touch-ups are simple.
15. Glazed Baby Blue Almond Nails
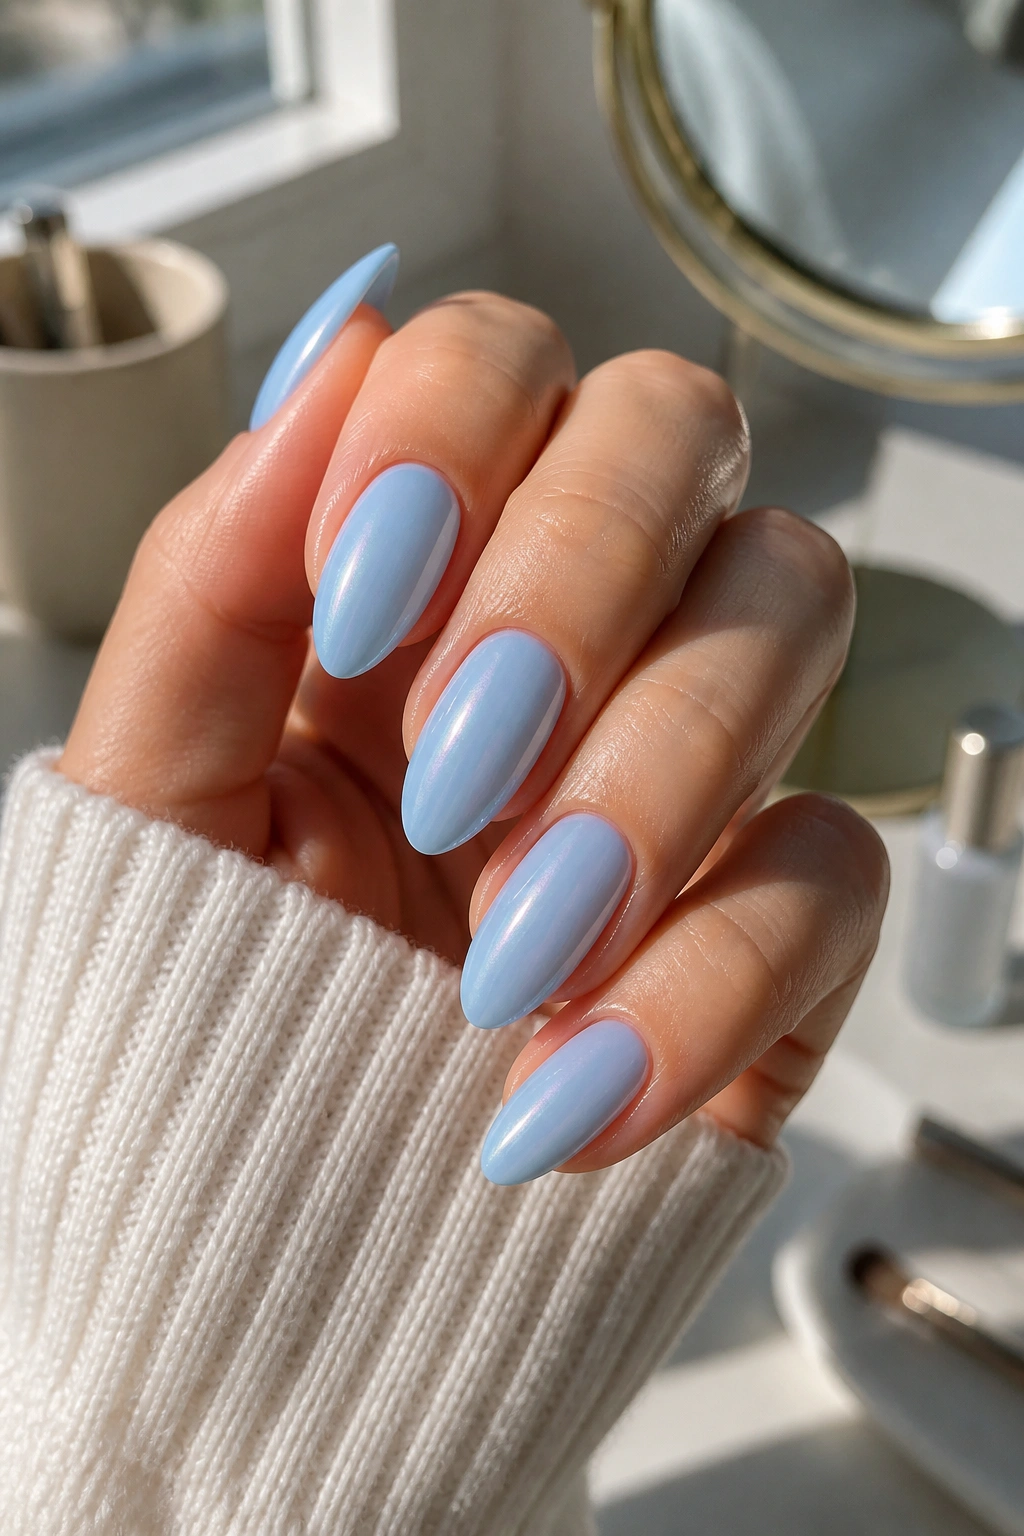
If powder blue is soft, glazed baby blue is the version with a little shine on top. It keeps the manicure light, but there’s a pearly layer that makes the color look smoother.
The Shine Should Stay Thin
A glazed finish can go wrong fast if the shimmer is too heavy. You want a barely-there pearl effect, not a coat that turns the polish chalky. Start with a baby blue base, then add a sheer shimmer top coat or a very light chrome layer. The nail should still look blue first and shiny second.
I’d avoid anything too silver here. A cool silver chrome can pull the color toward gray, and that’s not the point of this look. You want the blue to stay sweet and clean, with the shine sitting on top like a thin film.
- Use a smooth, opaque baby blue base.
- Apply the glazed layer in one even pass.
- Finish with a no-wipe top coat if you’re using chrome powder.
- Keep the cuticle area clean so the finish doesn’t look cloudy.
This is one of my favorite blue almond nail ideas because it feels polished without feeling stiff. The almond shape and the glaze work well together.
16. Teal-Tinted French Tips
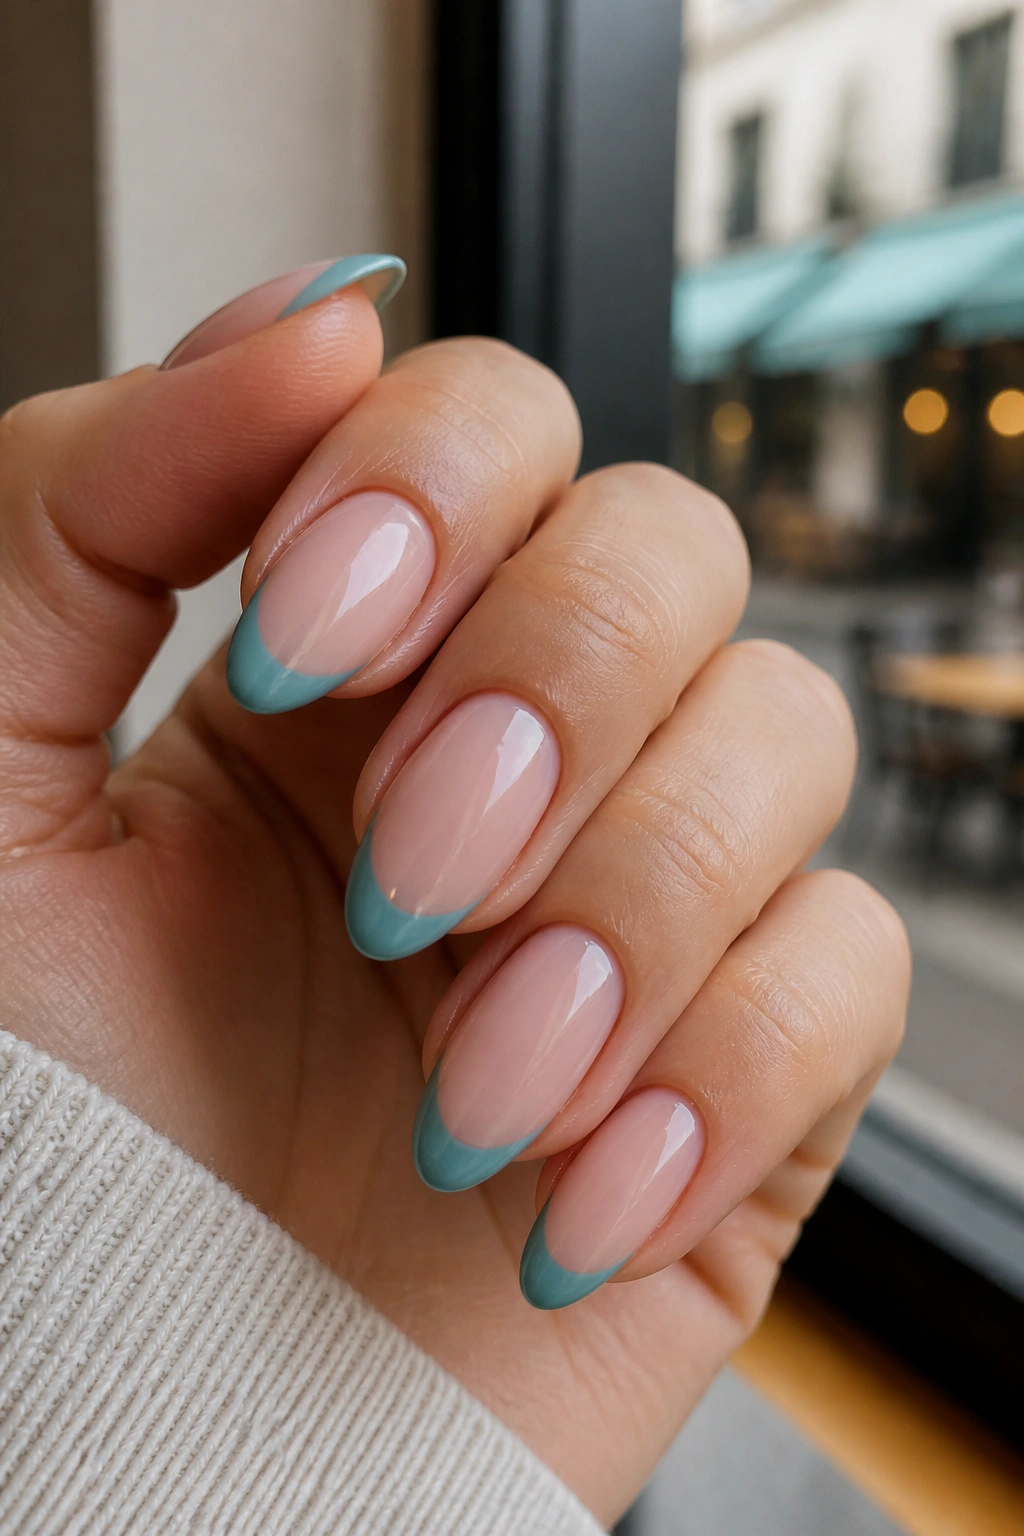
French tips do not have to be white to stay clean. A teal-tinted tip proves that fast.
This version keeps the base sheer and light, then swaps the white edge for a soft teal or sea-blue line. On almond nails, the curve of the tip already does some of the styling for you, so the color shift feels fresh without becoming complicated. The line can be thin and still have a lot of presence.
I’d choose a dusty teal over a neon one if you want the manicure to feel easy to wear. Bright aqua can be fun, but it pulls the whole set into a louder place. Dusty teal stays calmer and works better if you’re wearing the nails every day, not just for one event.
The nice thing here is that it still counts as a French, so the shape stays familiar. It’s just got a color tweak. That small change makes a bigger difference than people expect, especially on almond nails where the tip line already looks elegant.
If you want one blue manicure that feels a little different but won’t make you feel overdone, this is a solid pick.
17. Cornflower and White Daisy
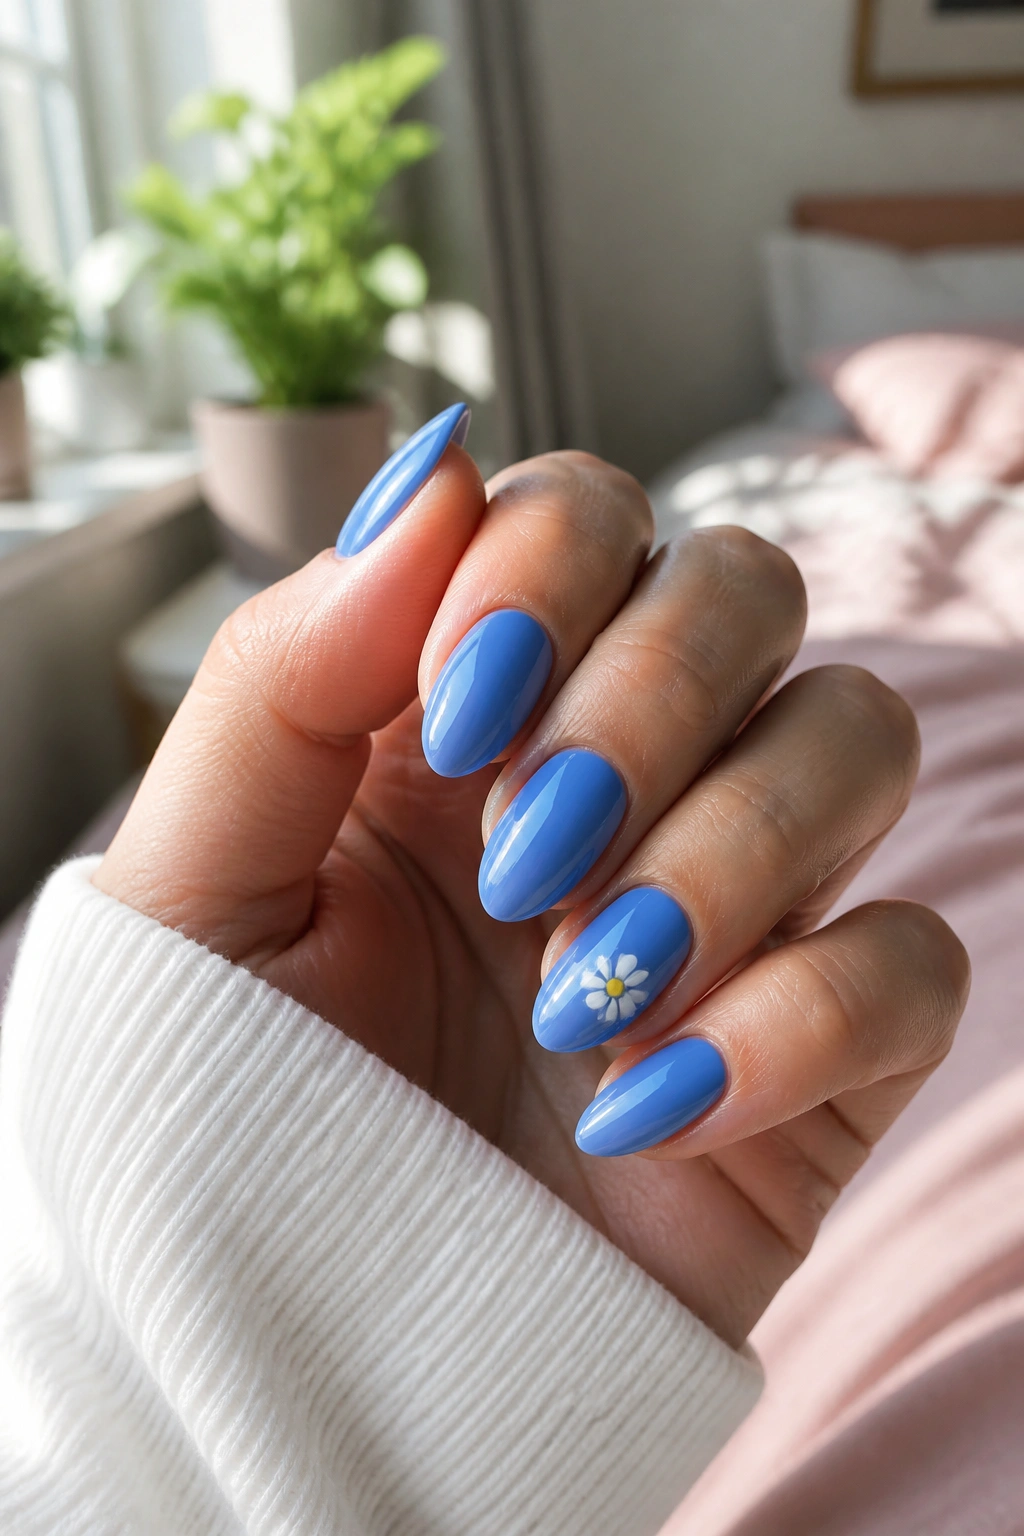
A single daisy can carry more charm than a full garden of nail art.
Cornflower blue gives the set a cheerful base, and one white daisy on an accent nail keeps it simple. I’d put the flower on the ring finger and leave the other nails solid. That keeps the design from drifting into craft-project territory. The daisy should be small, with a tiny yellow or blue center if you want a little contrast.
One flower is enough. Maybe two if your nails are long and you want the accent to feel balanced. More than that, and the look starts to feel busy. On almond nails, a small daisy feels especially nice because the curved shape softens the flower’s edges a little.
This is the manicure I’d point someone to if they want a blue set with a friendly feel. It’s not loud. It’s not serious. It just works.
If you’re doing it yourself, a dotting tool makes the petals easier than a brush. Five little teardrops around a center dot, done slowly, and you’re there.
18. Deep Blue Marble Accent
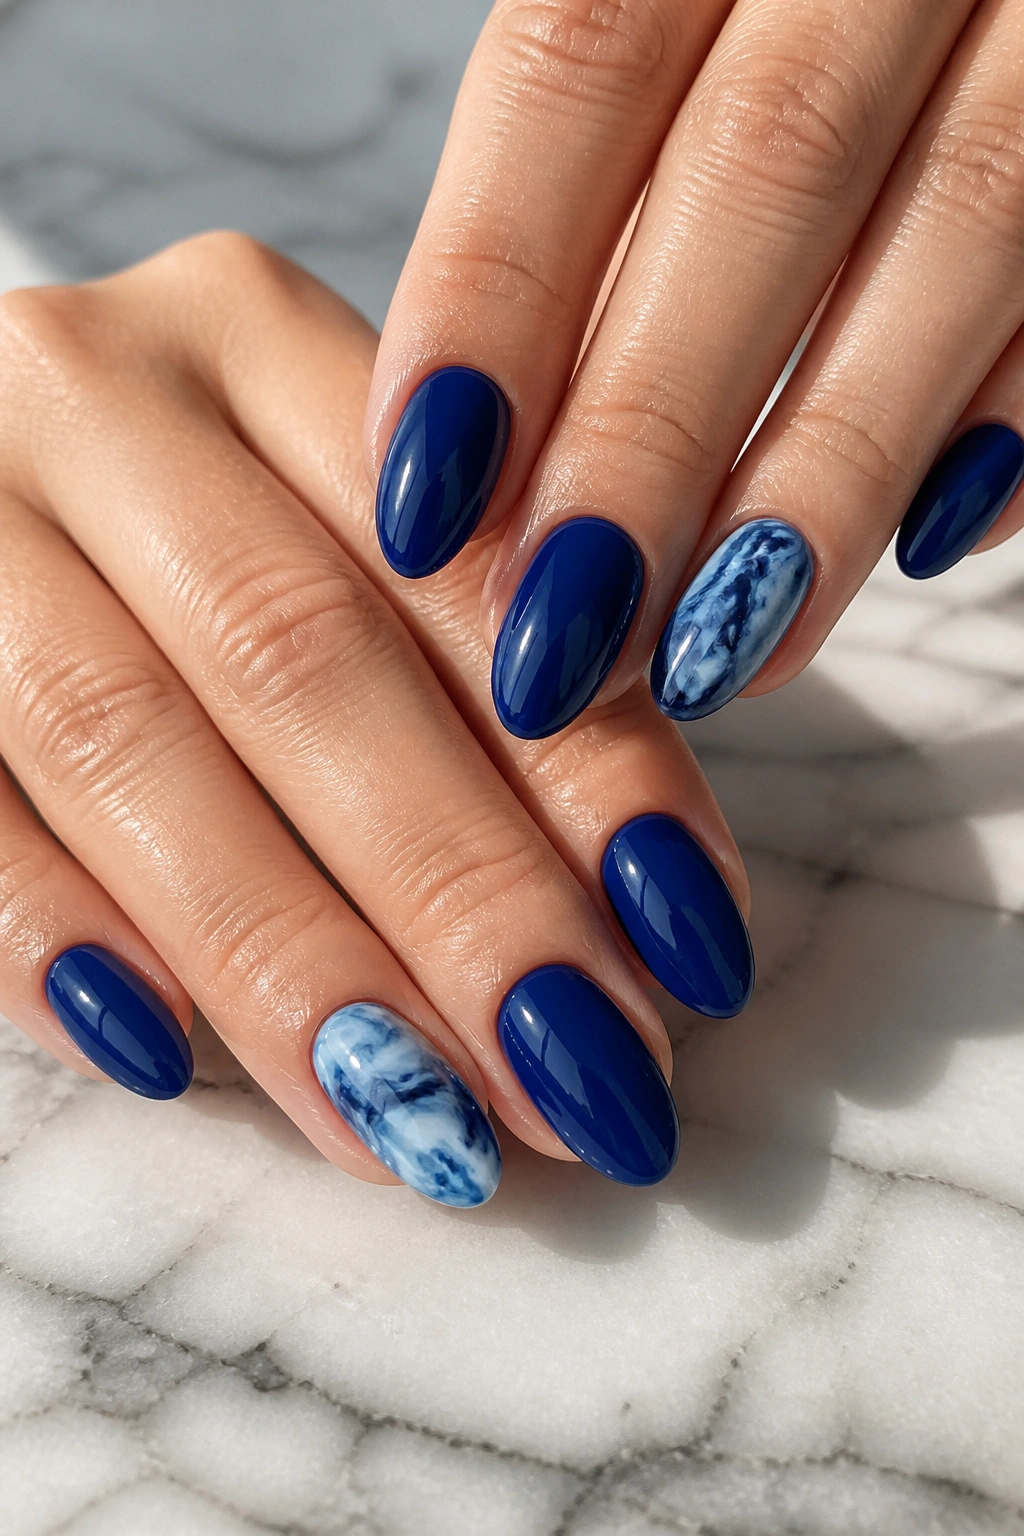
Unlike a full marble set, one marbled accent nail keeps the whole manicure from getting busy. That’s the version I prefer.
Use a deep blue base on most nails, then give one accent nail a marble mix of navy, white, and a touch of lighter blue. The goal is to make the colors drift into each other, not blend into one muddy shade. A thin brush or a small detail tool helps you drag the colors just enough to look fluid.
The rest of the nails should stay solid. That contrast matters. If every finger has marble, the design loses its edge and starts to feel crowded. On almond nails, one marble accent gives the hand a focal point while the pointed shape keeps the look neat.
I also like that this design hides a little wear. A marbled nail is forgiving if the swirl isn’t identical on both hands, and that can be a relief if you’re doing it yourself. It’s meant to look a little organic.
Keep the marble accent to one nail on each hand. That’s the sweet spot.
19. Storm Blue Tiny Hearts
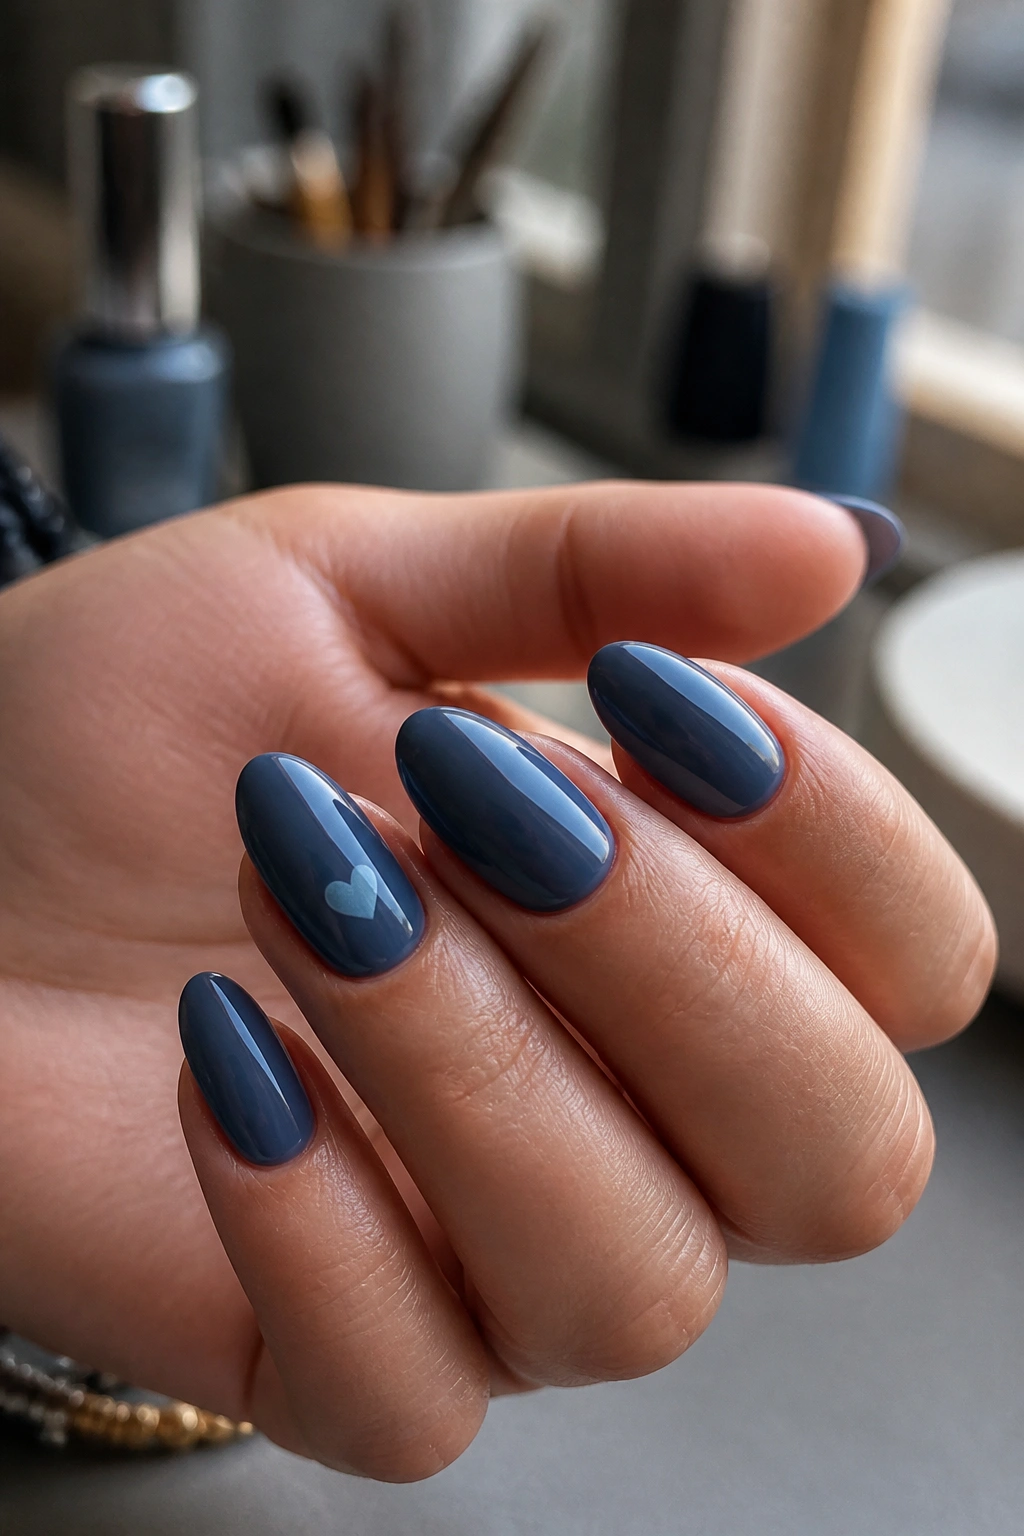
A tiny heart is the kind of detail that looks simple until you try to paint it. Then you realize how little is needed.
Storm blue gives the manicure a deeper, moodier base, and the tiny heart keeps it from feeling too serious. I’d place one heart on an accent nail, or repeat it on both ring fingers only. The shape should stay small—about 4 millimeters wide—so it reads as a detail, not the whole point.
A Small Heart Needs Space
If you crowd the heart near the edge of the nail, it can look awkward. Give it a bit of breathing room near the center or close to the cuticle. That way, the almond shape still has room to show. A glossy top coat helps the little shape look sharper, too.
- Use a dotting tool to make the top curves.
- Pull the point down with a thin liner brush.
- Keep the heart slightly uneven if your hand is not steady; it still reads as a heart.
- Leave the other nails solid so the design stays light.
I like this one because it’s easy to customize. One heart is minimal. Two hearts are a little sweeter. Either way, it stays simple.
20. Soft Blue Mix-and-Match Set
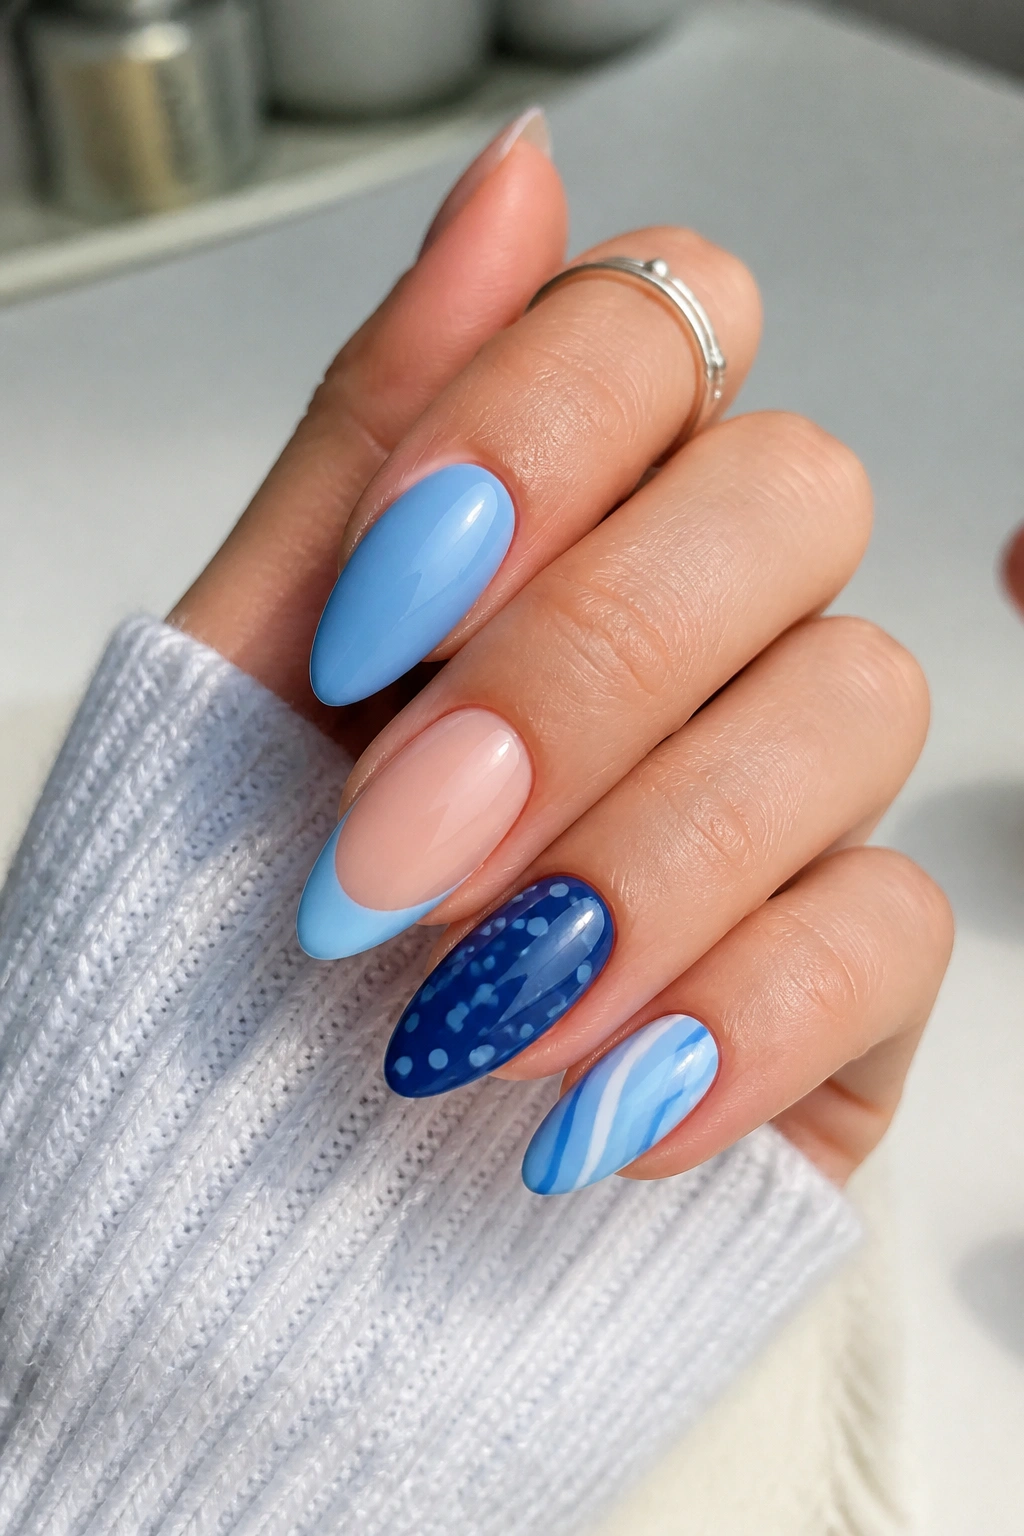
If you like variety but hate clutter, a soft blue mix-and-match set is the one to end on. It ties together all the easiest blue almond nail ideas without making any single nail do too much.
The trick is to keep the colors in the same family. Think sky blue, baby blue, and navy, not five unrelated shades fighting each other. Then mix three or four simple finishes across the hand: one solid nail, one micro-French, one tiny dot, and one soft swirl. That’s enough. You do not need to fill every finger with a different design to make the set feel thoughtful.
I’d also keep the finish consistent. All glossy, or all matte, or all glazed. Mixing finishes can work, but it can also make the manicure feel patchy if the shades are already busy. On almond nails, consistency helps the shape stay smooth from finger to finger.
This is the version I’d choose when I wanted the manicure to feel personal but not loud. It gives you options, but it still respects the nail shape. And that, honestly, is the whole reason blue almond nails work so well when the design stays simple.
