

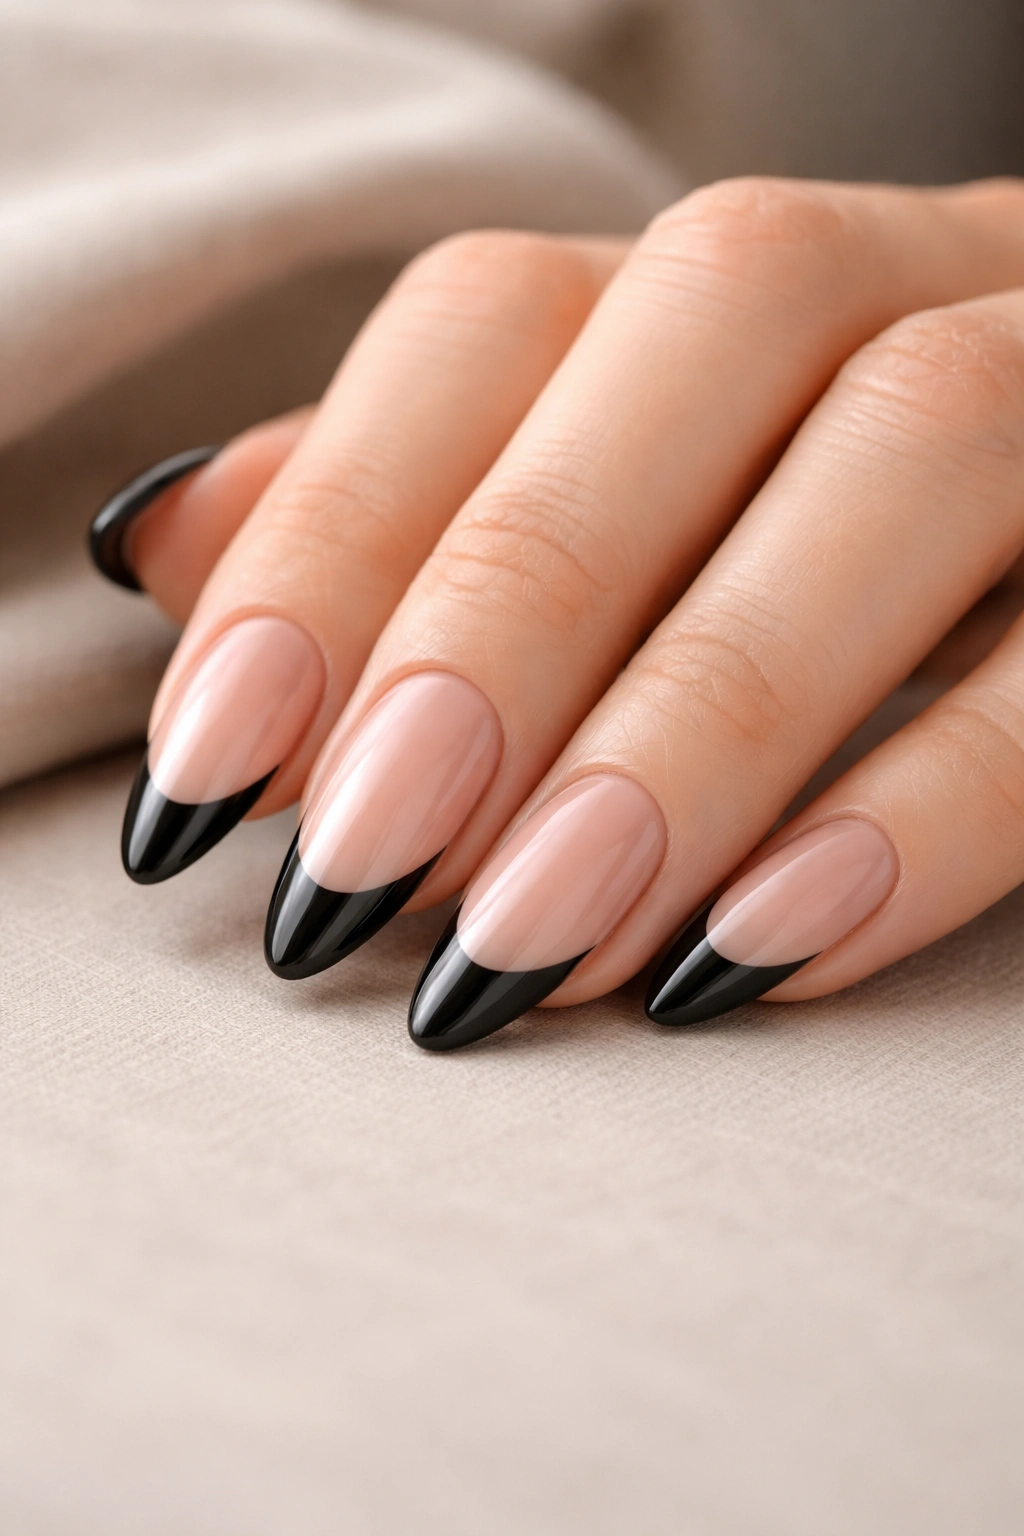
Long, tapered almond nails already do half the work for you. Add a black French tip, and suddenly the whole manicure feels sharper, cleaner, and a little bit unapologetic. That’s the appeal here: it’s a simple nail look with a lot of range, and it works on short extensions, natural lengths, glossy gel, matte finishes, and just about every hand shape that can carry an almond silhouette.
Black French tip almond nails are also one of those designs that look more expensive than they are. The contrast does the heavy lifting. A crisp black edge can make the nail bed look longer, the fingertips look slimmer, and the whole hand read as more polished without needing rhinestones, gradients, or ten extra minutes of fussing around. I’ve always liked that kind of manicure. It doesn’t beg for attention, but it gets it anyway.
And yes, these designs are doable at home. Some need a steady hand and a thin liner brush. Some are easier than they look because the shape of the almond nail does part of the framing for you. A few are forgiving enough for beginners who still get a little shaky at the sidewalls. The trick is picking the right version for your skill level, your nail length, and how much patience you actually have.
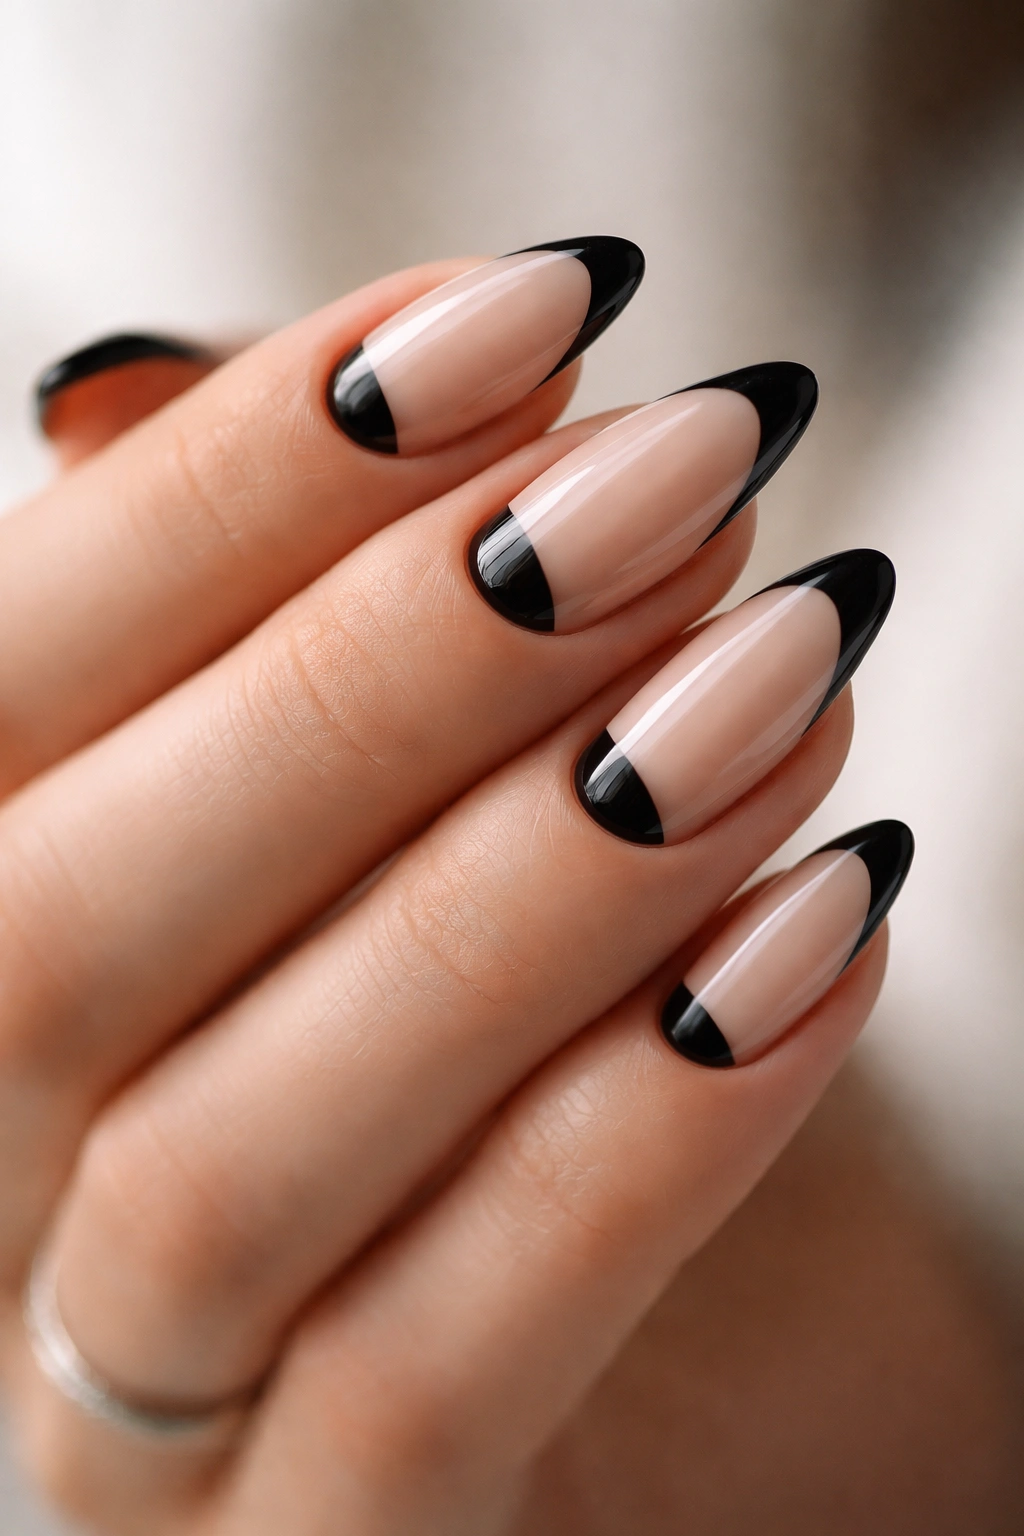
1. Classic Thin Black French Tips
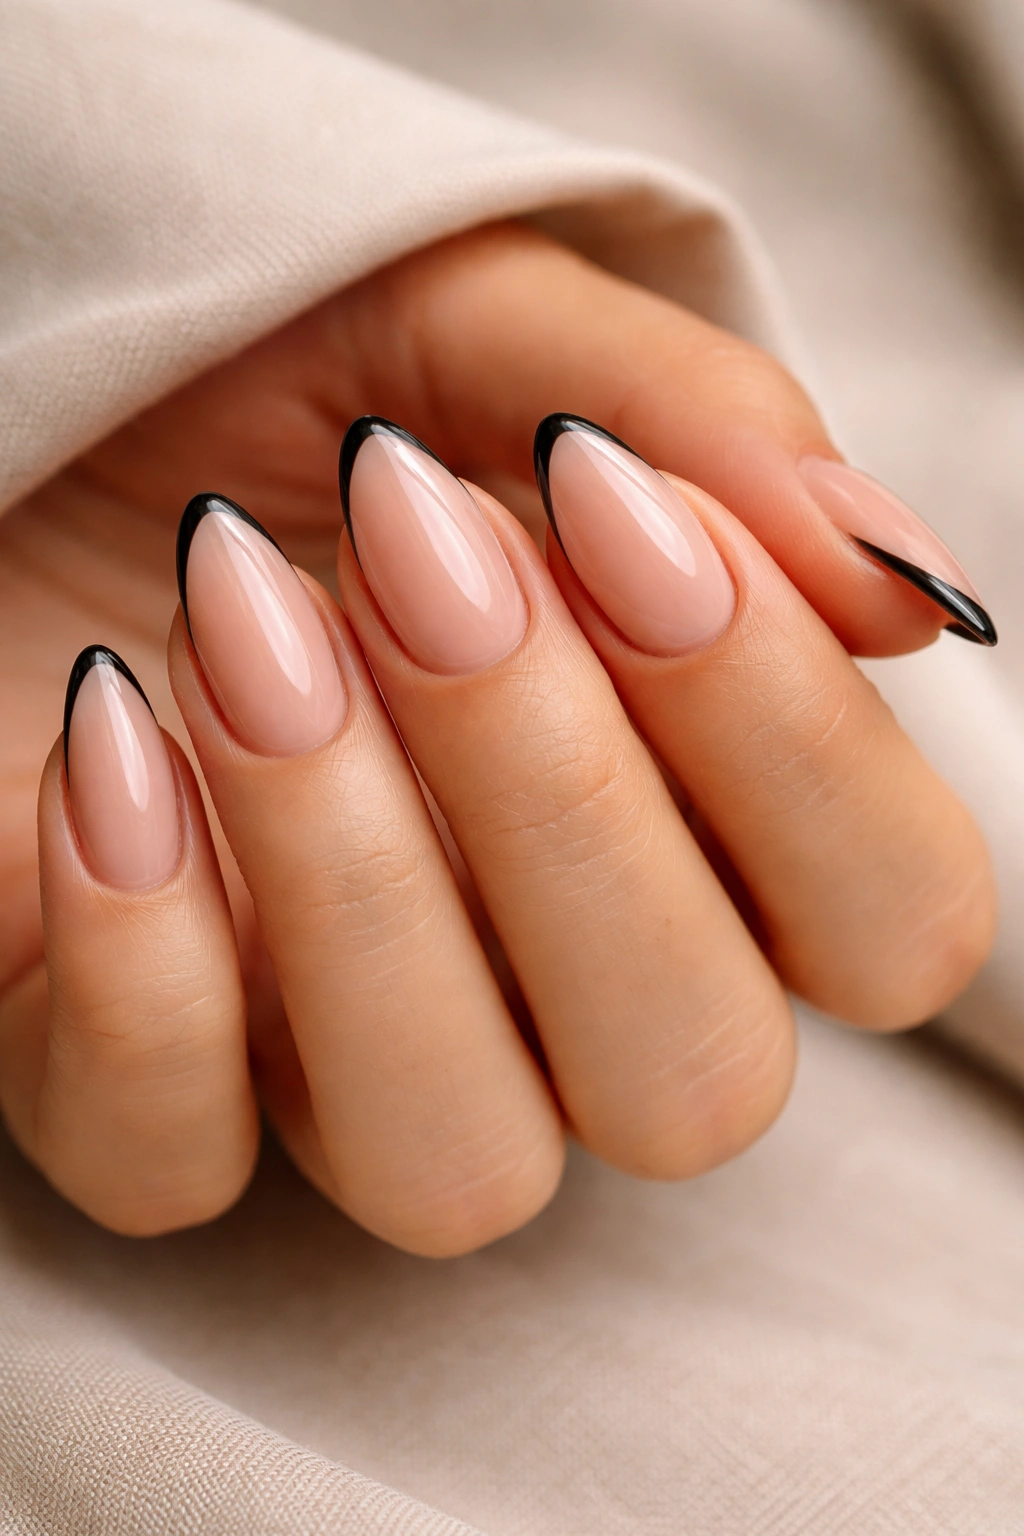
The cleanest version is often the best one. A thin black French tip on an almond nail looks crisp, balanced, and easy to wear with almost anything, which is why it keeps showing up even when flashier designs cycle out of favor. The almond shape makes the black edge feel elegant instead of harsh.
Why It Works
The thinner the tip, the more the nail keeps its soft almond curve. That matters. If the black line is too thick, the whole design can start to look heavy, and you lose that airy pointed shape that makes almond nails so flattering in the first place. A slim smile line leaves more negative space, which is doing a lot of visual work here.
This is also the best place to start if you’re new to nail art. You only need a fine liner brush, black polish, and a steady wrist. Seriously. A thin tip is easier to correct than a chunky one, because small wobbles get hidden in the curve rather than staring you in the face.
How to Wear It
- Keep the base sheer pink, milky nude, or clear builder gel.
- Aim for a tip width of about 2 to 4 millimeters.
- Seal it with a glossy top coat for a glassy finish.
- Choose this look if you want something office-friendly but not boring.
Best for: first-time DIY nail artists, short-to-medium almond nails, and anyone who likes a clean manicure more than a decorated one.
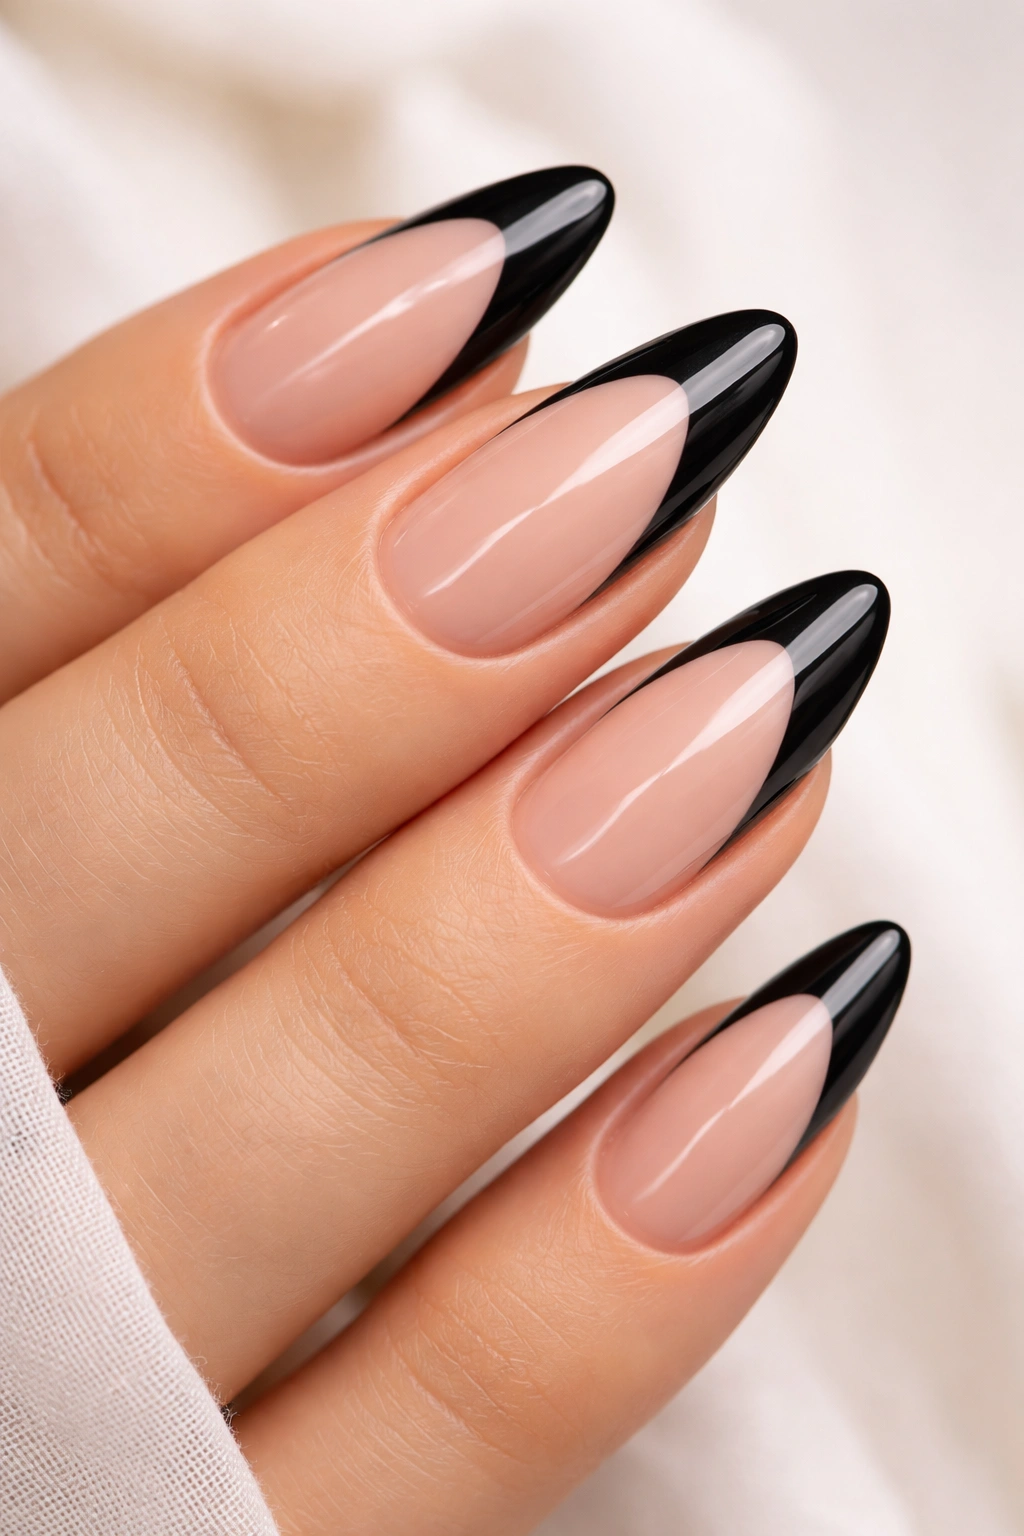
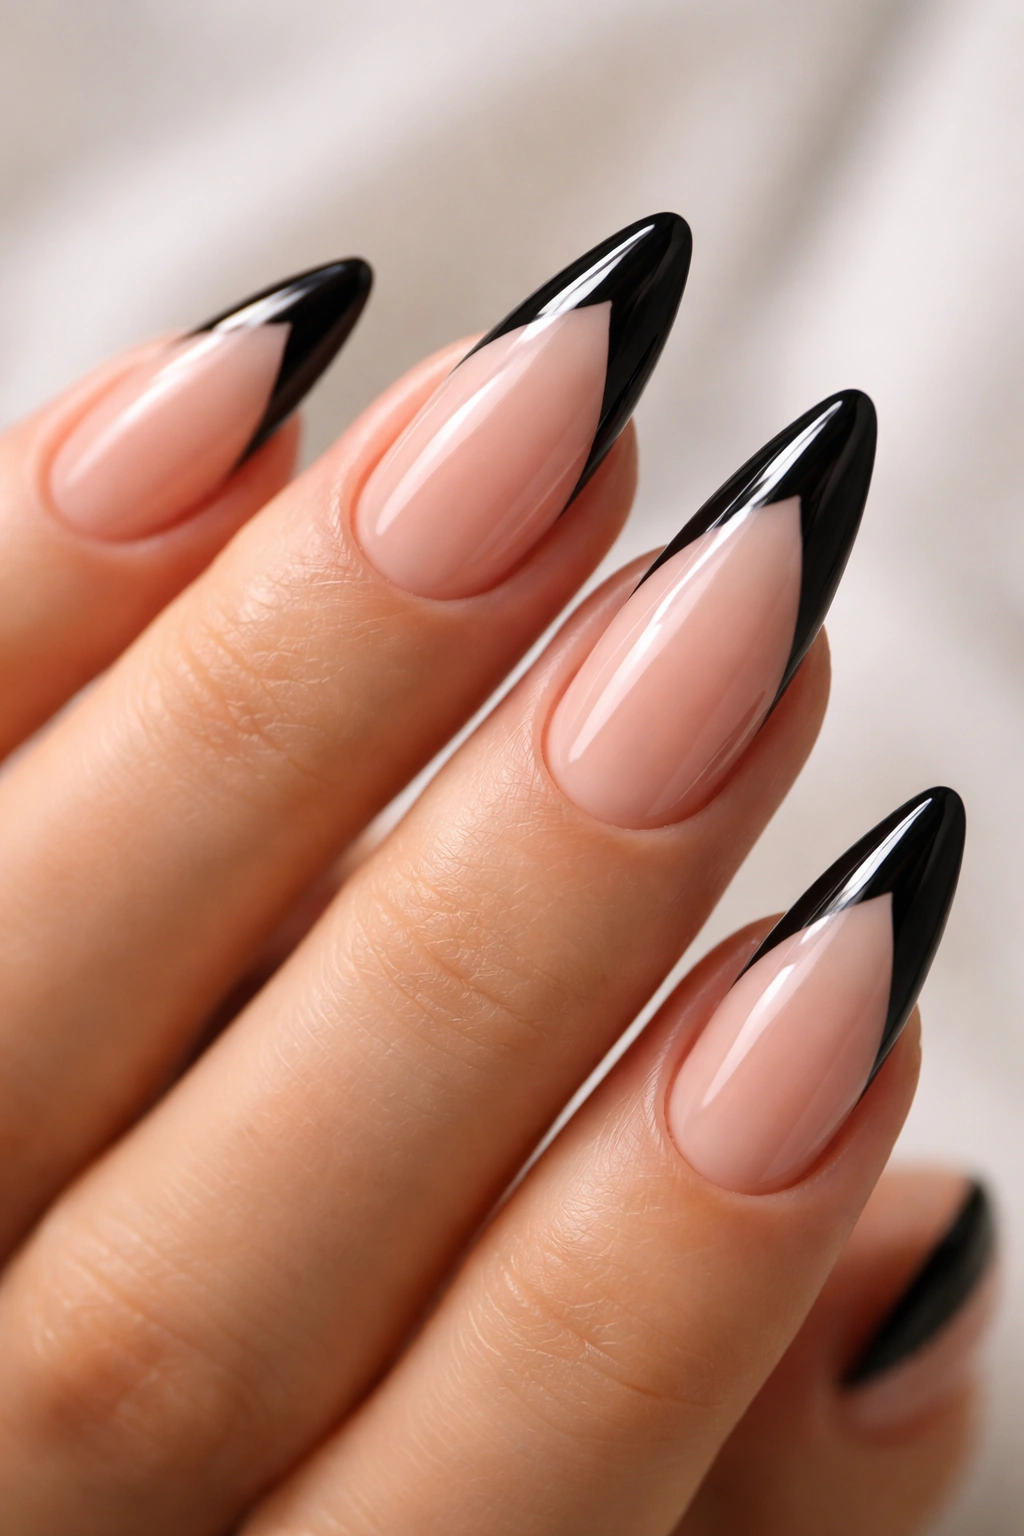
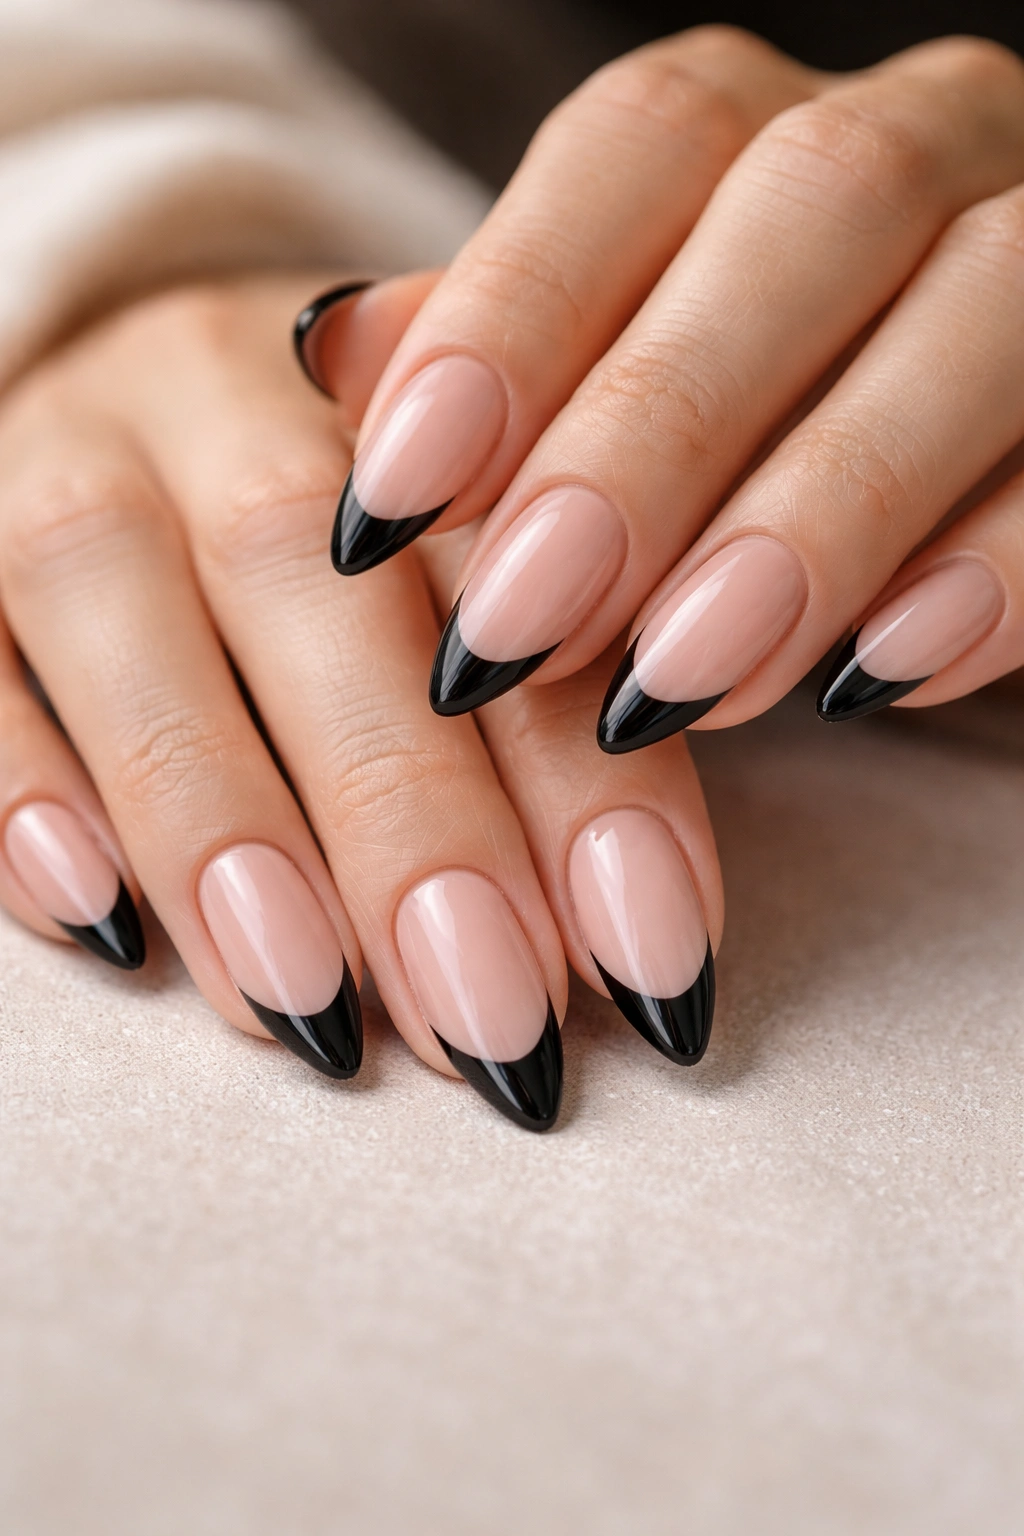
2. Deep Black Curve French Tips
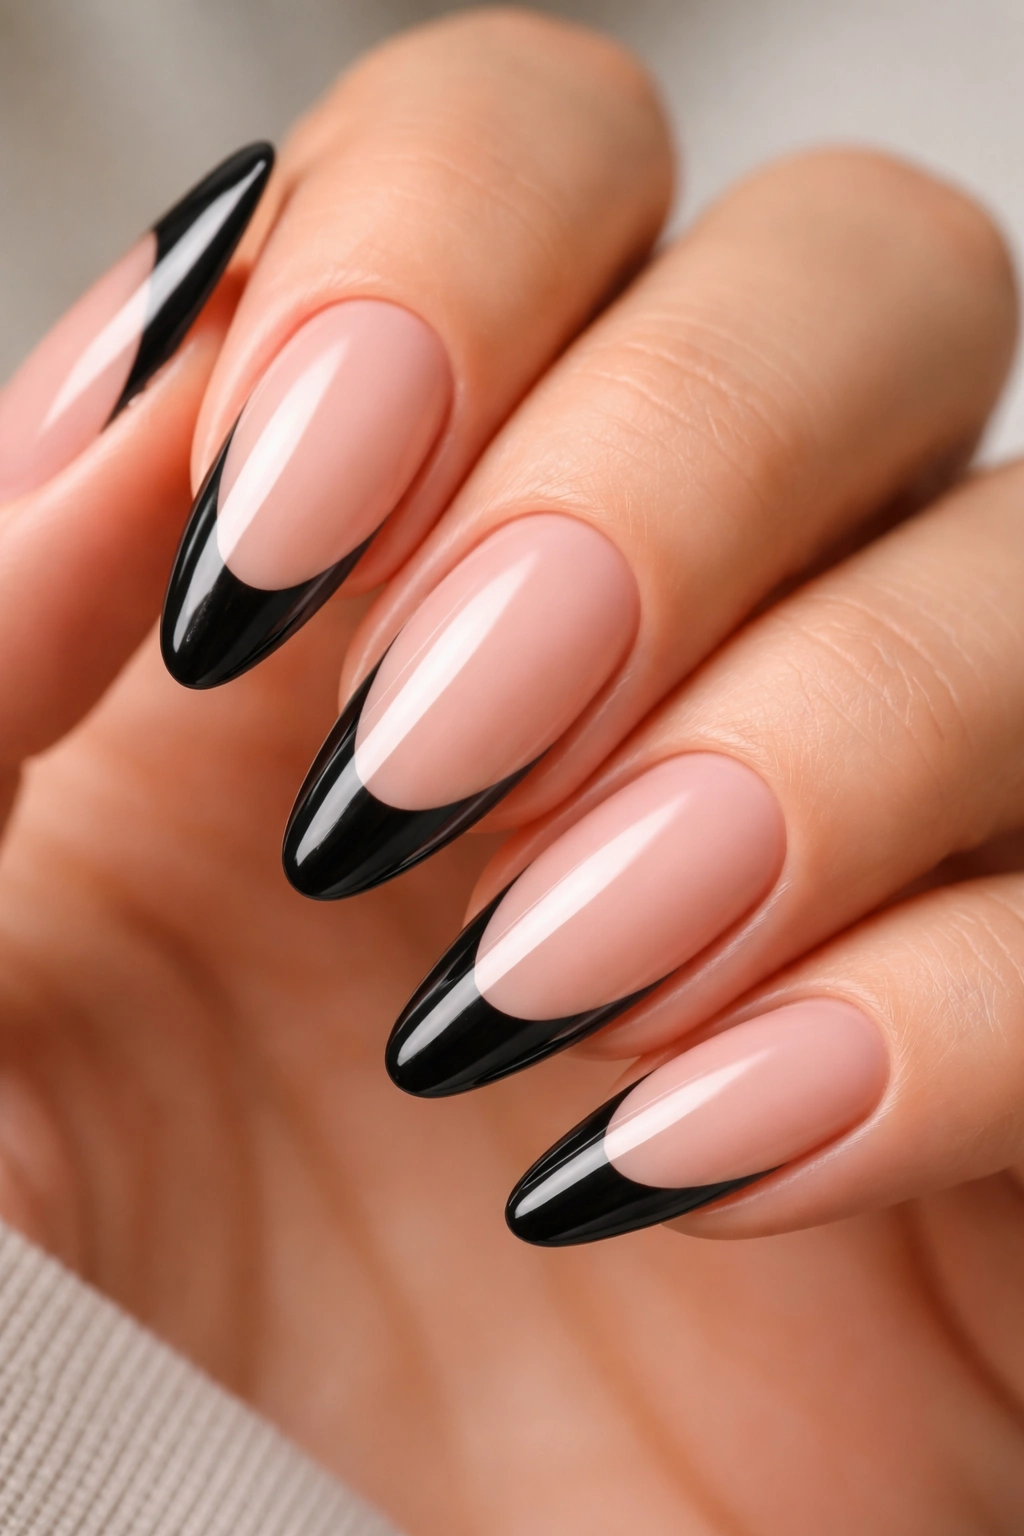
A deeper smile line changes the whole mood. Instead of sitting lightly at the edge, the black tip dips farther down the nail, which gives the manicure a more dramatic, almost clawed shape. On almond nails, that extra depth can look gorgeous if you want something bolder without adding extra color.
This version is especially good on longer almond nails, because the added black balances the extra length. On shorter nails, the deep curve can make fingers look even more tapered, though it does take a bit of judgment. Too much depth and the design starts to swallow the nail bed. Not enough, and it can look like a regular French tip that got bumped by accident.
The easiest way to keep this looking clean is to mark both corners first, then connect the center. If you freehand the full curve in one go, the sides tend to drift unevenly. A nail art guide sticker or a silicone stamper can help if your hands are still learning the line.
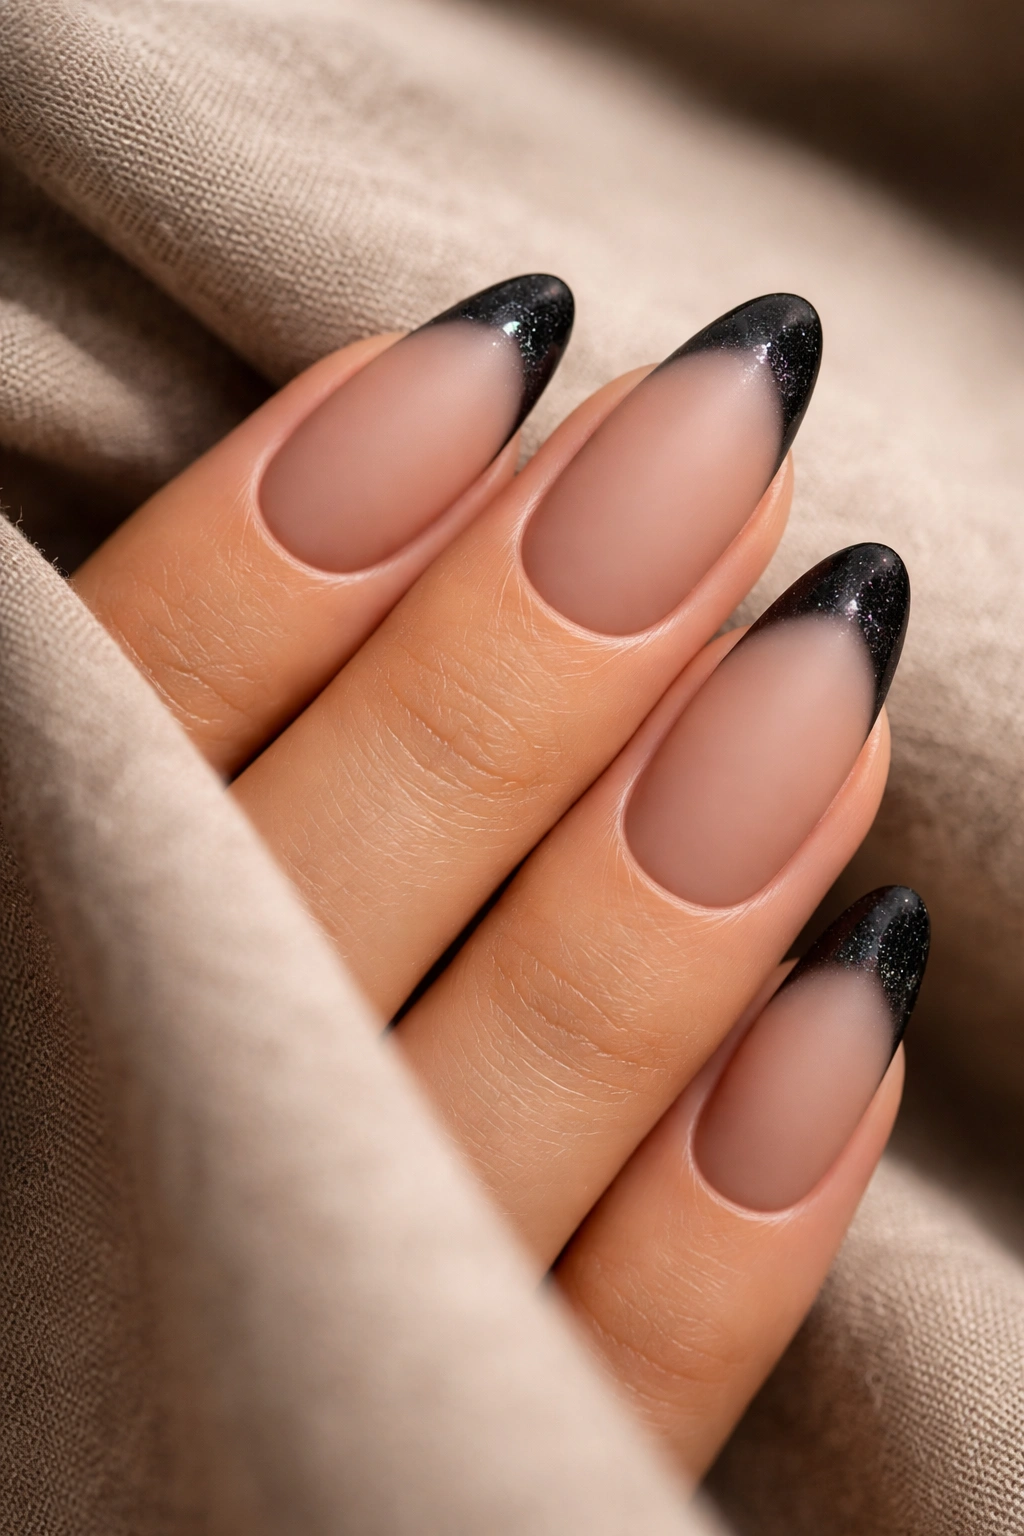
3. Matte Black Tips Over Glossy Nude
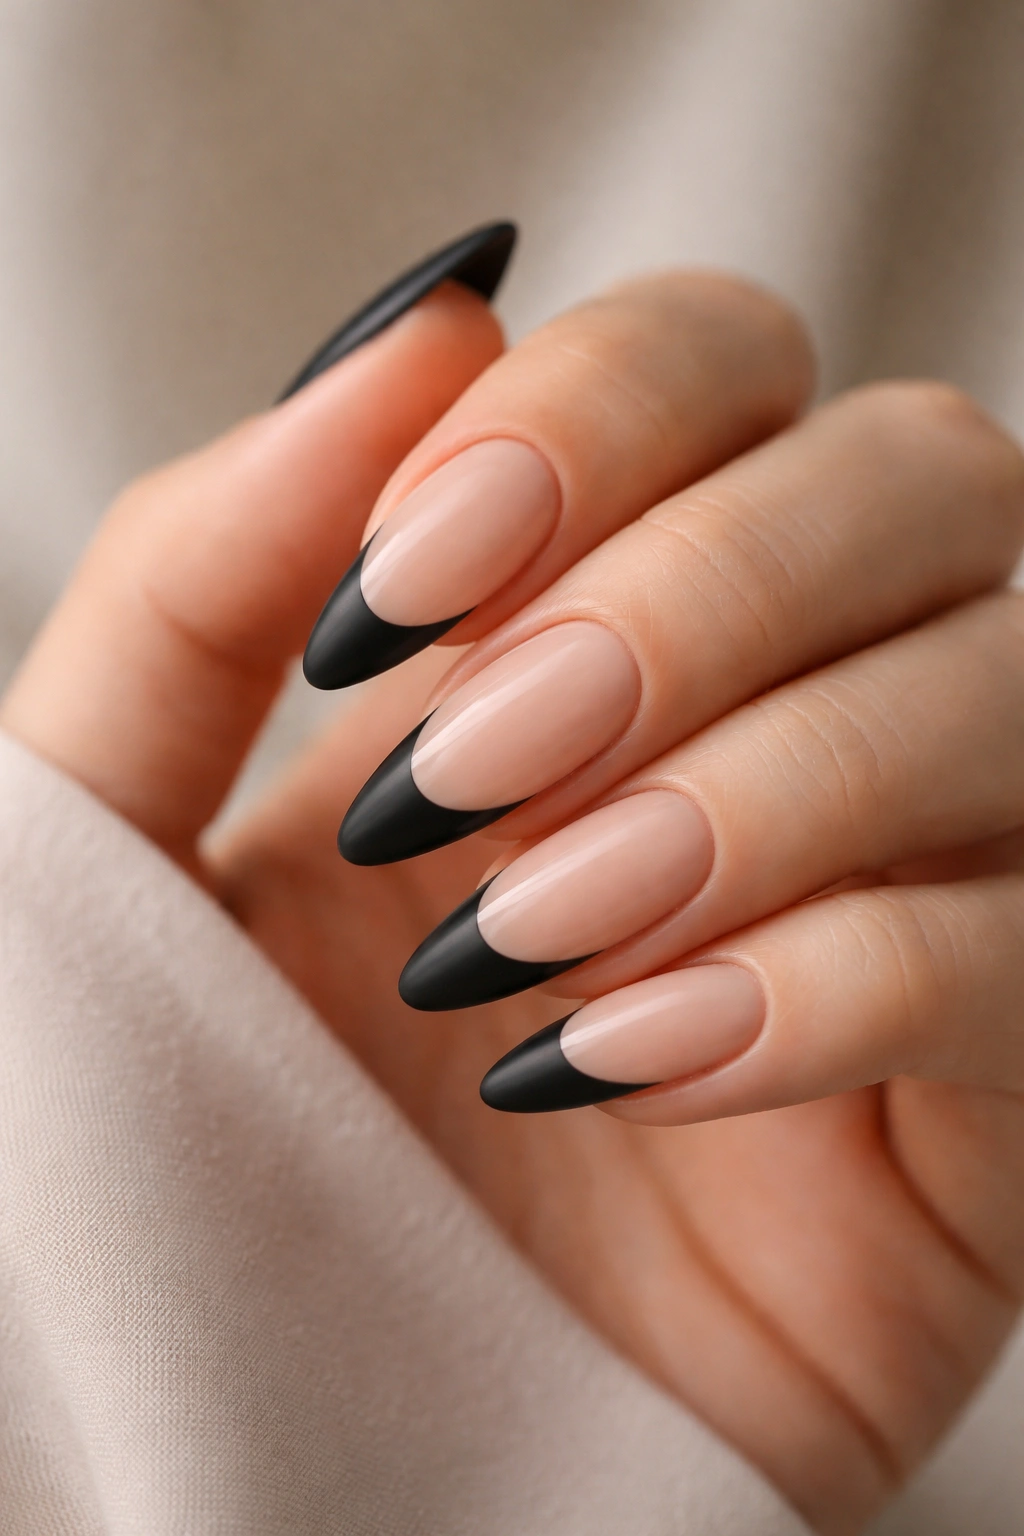
Matte and glossy together can be a little bit addictive. A matte black French tip on a shiny nude base gives you contrast without needing glitter, chrome, or extras. The finish difference alone makes the manicure feel deliberate.
What I like about this version is that it looks textured even though it isn’t complicated. Matte polish tends to soften the harshness of black, which can be useful if you want the design to feel chic instead of severe. On almond nails, that softer finish works especially well because the shape already brings enough elegance on its own.
If you try this at home, make sure the black polish is fully dry before you apply the matte top coat. If it isn’t, the finish can get patchy or streaky. That’s one of those annoying little mistakes that shows up instantly under normal light. One more thing: matte top coats can wear down faster at the free edge, so cap the tips carefully.
4. Reverse Black French Tips at the Cuticle
A reverse French tip flips the usual idea around. Instead of placing the black at the edge of the nail, you put it near the cuticle and let the rest of the nail stay nude or sheer. On almond nails, this looks sleek and a little unexpected, especially if you like nail art that reads more fashion-forward than traditional.
The cuticle line is the part that needs the most care. If the arc is too thick, the nail can look crowded. If it’s too thin, the design can disappear once you add top coat. I usually think of this style as a minimalist’s version of drama. Quiet, but not shy.
It also grows out more gracefully than a full black tip in some cases. Because the accent starts near the base, the line can still look intentional even after a little regrowth. That makes it a decent choice if you don’t want to redo your manicure every time the first millimeter of nail starts showing.
5. Black Outline French Nails
An outlined French tip is one of those designs that looks more complicated than it is. You create the French tip shape, then trace the edge with a thin black line, often leaving the center either nude, sheer, or a different tone. It’s a small change, but it adds a lot of definition.
The outline style works beautifully on almond nails because the shape already gives you a natural frame. The line sharpens that shape even more. If you want your manicure to look architectural, this is a smart choice. If you want something soft and dreamy, probably not. This one has edges.
What Makes It Different
The outline gives the eye a place to land. Instead of one solid block of color, you get contrast, shape, and a little breathing room in the middle.
- Works well with sheer pink, milky beige, or a faint blush base.
- Looks best when the outline is thin and even all the way around.
- Can be done with a striping brush or gel liner.
- Feels modern without relying on extra decoration.
Tip: keep the outline narrow. Thick borders can make the nail look boxy, and almond nails are much prettier when they stay tapered.
6. Black Tips With Gold Foil
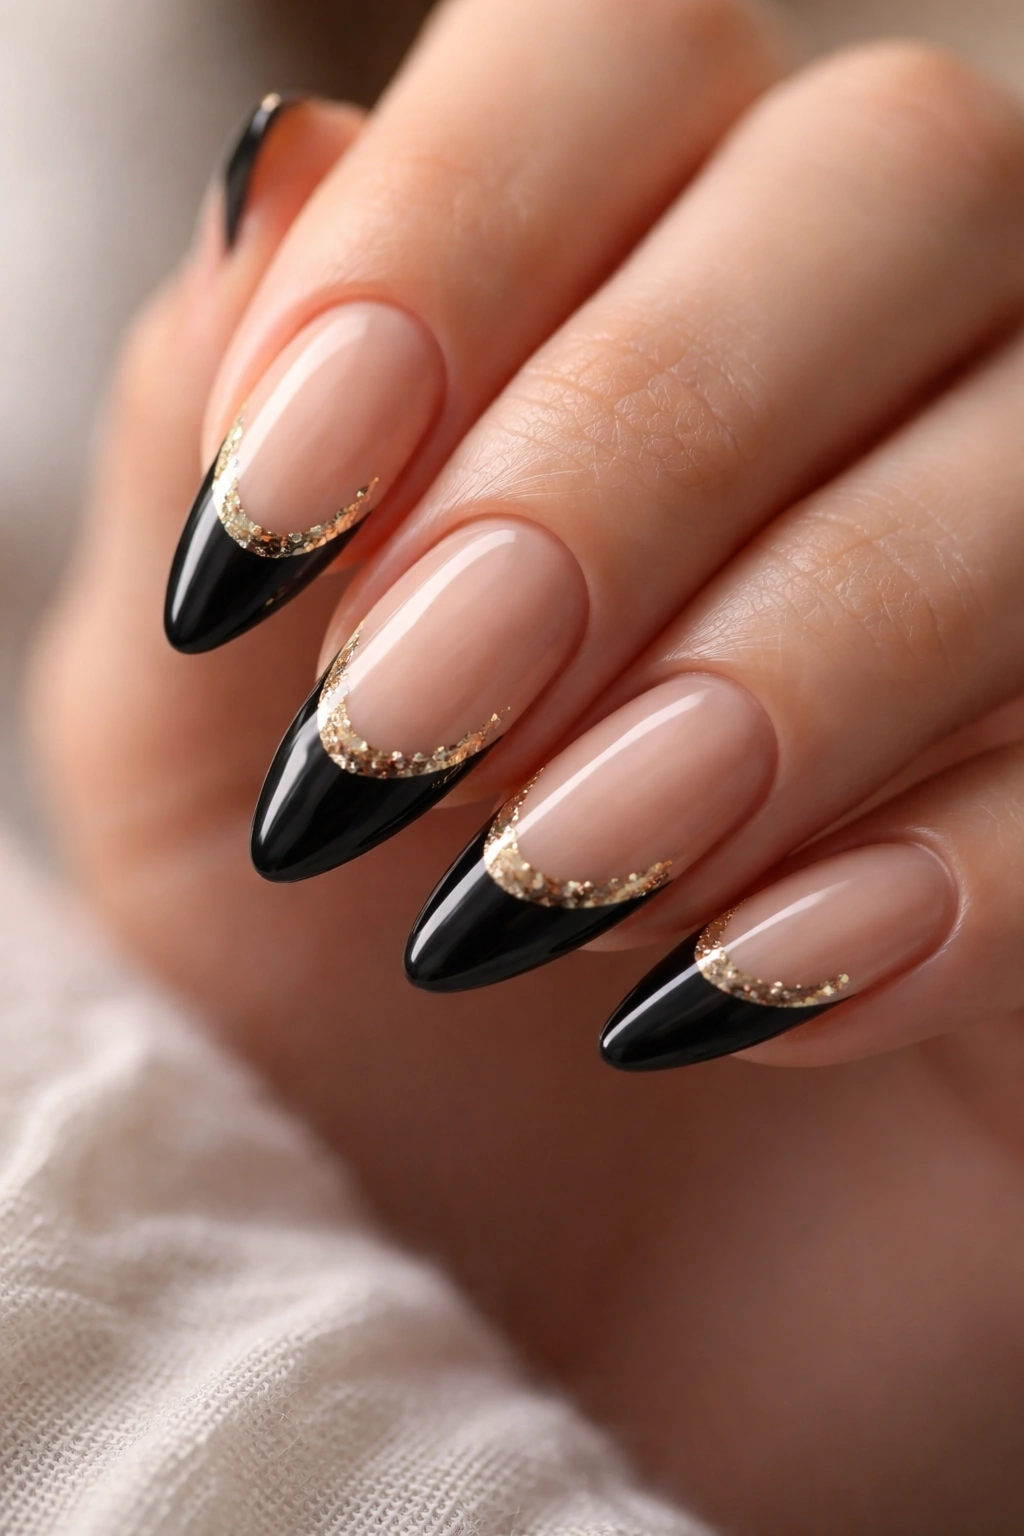
Black and gold is a classic pairing for a reason. On almond nails, a black French tip with a little gold foil tucked near the smile line can feel glamorous without crossing into costume territory. You only need tiny bits of foil — not chunks — or the design starts to look busy fast.
A lot of nail designs go wrong because people add too much ornament. This one is better when it stays restrained. A few torn pieces of foil along one side, or a whisper of gold at the center of the tip, is usually enough. The black gives the structure, the gold gives the shine, and the almond shape keeps the whole thing from feeling too hard.
If you’re doing this yourself, press the foil into slightly tacky gel or use foil glue. Don’t bury it under too many coats, or you lose the metallic effect. Also, gold foil on black tip nails chips visually faster than plain black, so seal the free edge carefully.
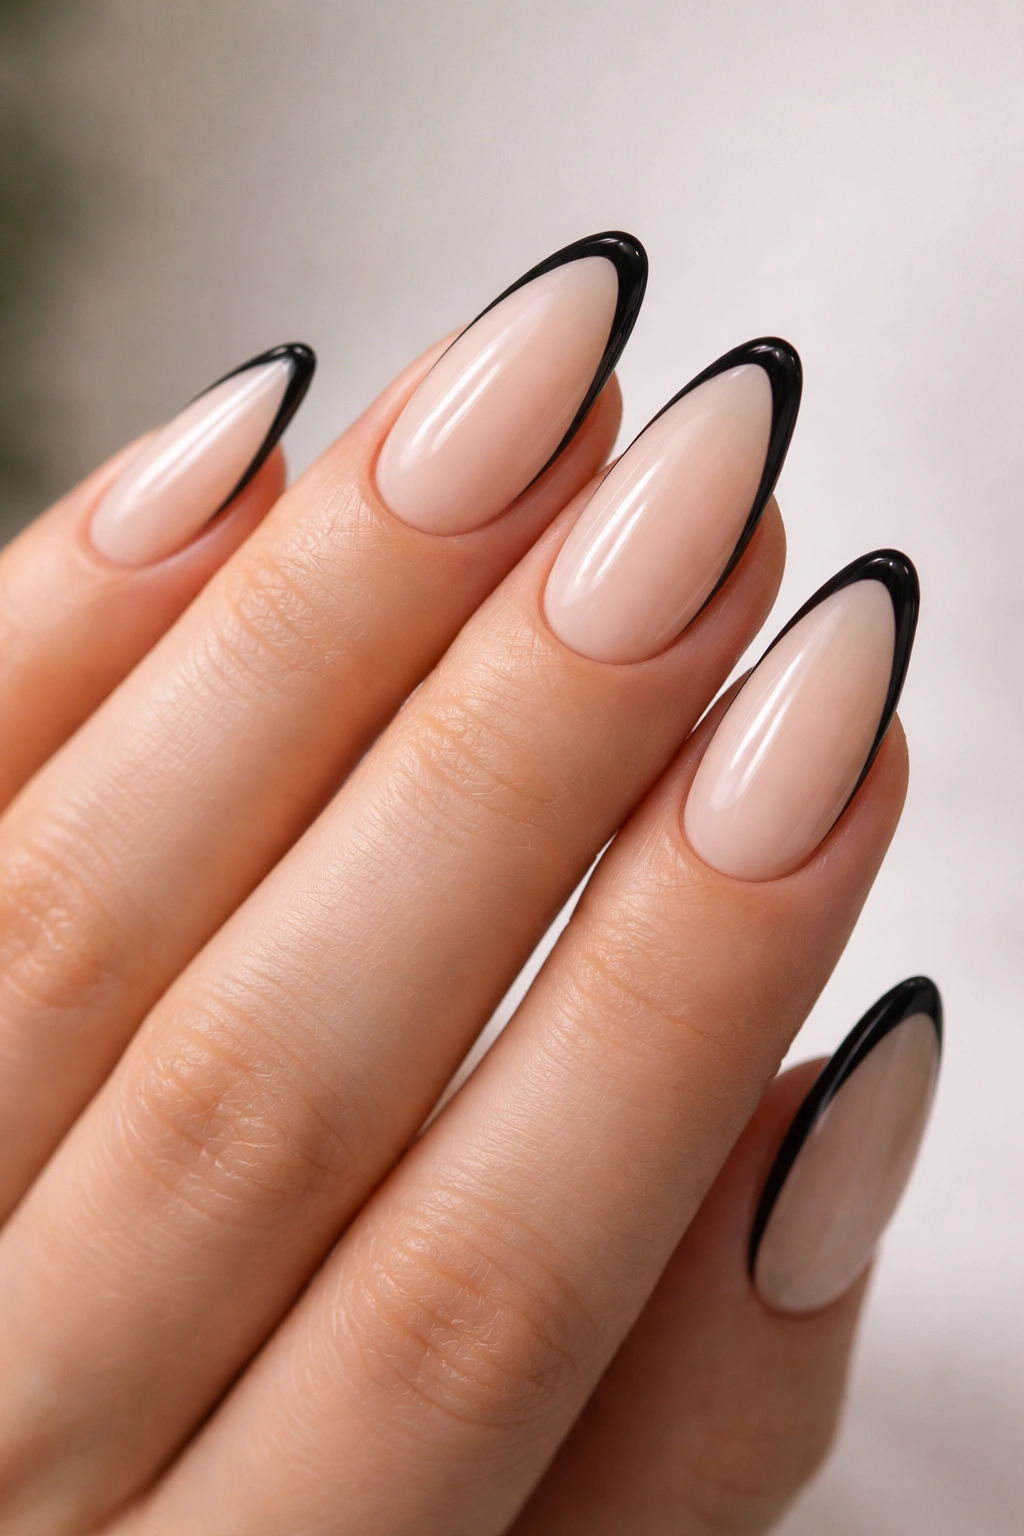
7. Micro Black French Tips
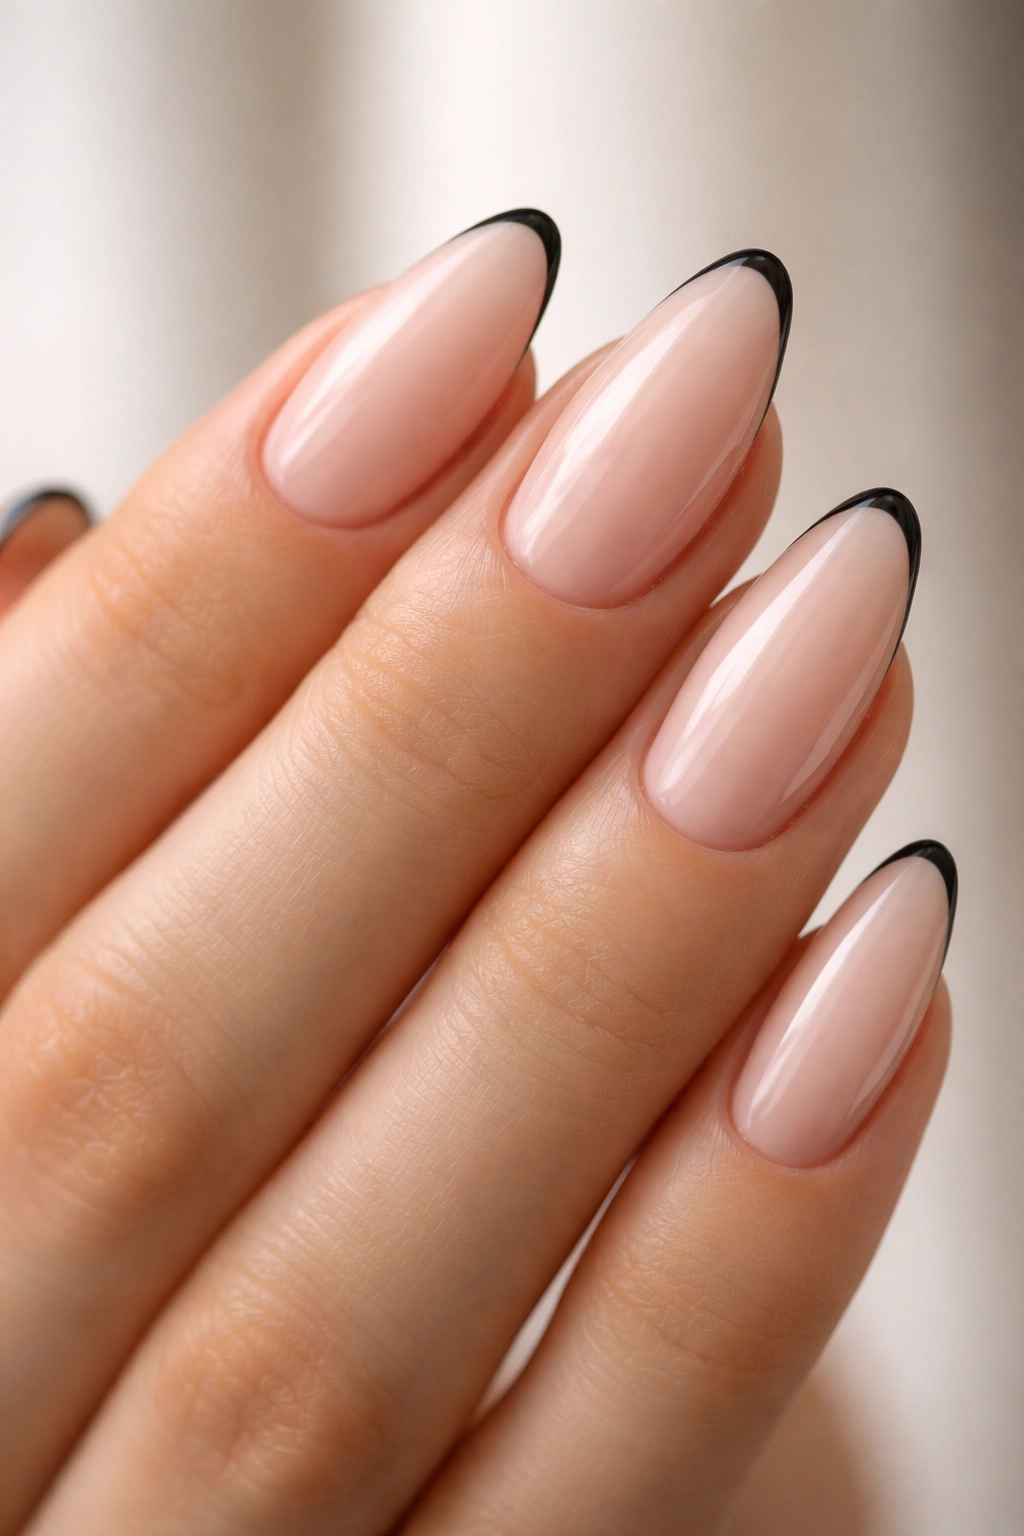
Micro tips are tiny, neat, and a little bit smug in the best way. The black line is so fine that it barely announces itself from a distance, but up close it sharpens the entire nail. On almond nails, micro tips keep the shape light and delicate.
This is one of the easiest ways to wear black French tip almond nails if you work in a conservative setting or just don’t want your manicure to do all the talking. It’s also a smart choice for shorter almond nails, where a thick tip can overpower the rest of the nail.
The trick is precision. A micro French line looks best when the arc is even and the polish is opaque in one pass. If you have to keep repainting the same spot, the line gets chunky. Use very little product on the brush, and wipe off the excess before touching the nail. A little restraint goes a long way here.
8. Black Tips With Nude Negative Space
Negative space designs rely on what you leave out, and that’s part of why they feel fresh. With this version, the black French tip doesn’t start at the sidewalls in a fully solid way. Instead, the nude base shows through in sections, creating a cutout effect that feels airy and graphic.
This style works especially well when you want black nails but don’t want a solid dark manicure. It keeps the look lighter, which matters on almond nails because the shape is already visually strong. Too much opaque black can flatten the curve. Negative space keeps the line moving.
A good version of this design needs clean edges. Sloppy cutouts look accidental instead of designed. If you’re doing it at home, sketch the shape lightly with a thin detail brush before filling in the black. And if the negative space ends up a little uneven? Fine. The whole point is that it shouldn’t look heavy-handed.
9. Black French Tips With Tiny Rhinestones
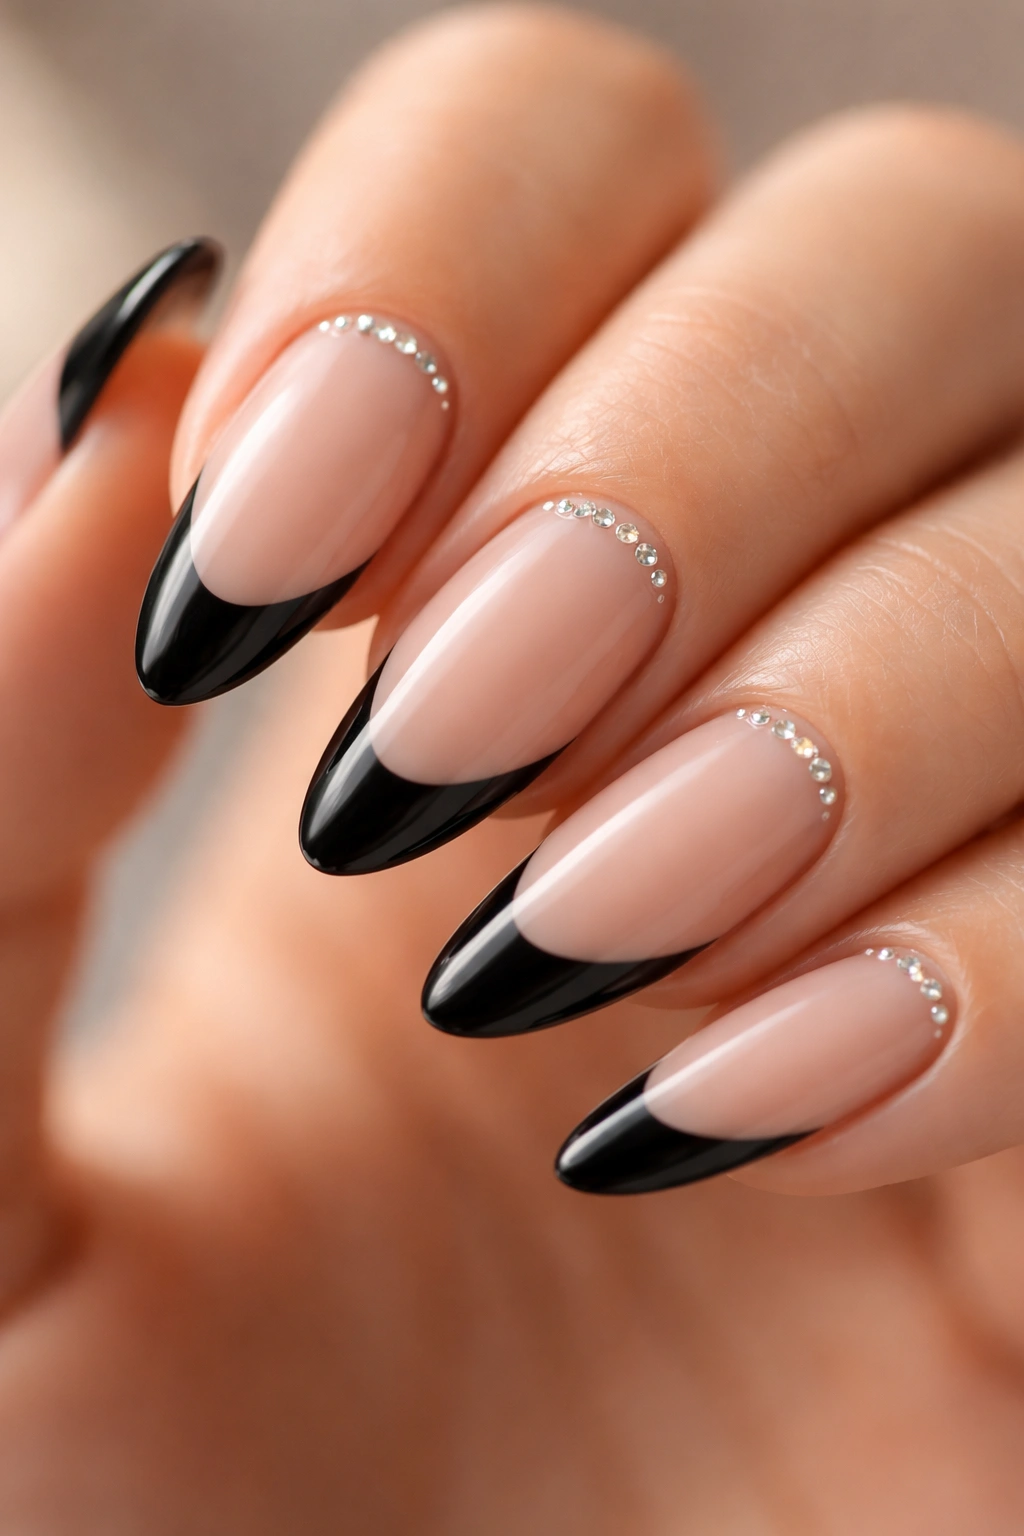
A few rhinestones can change the whole mood of black French tip almond nails. The design goes from sharp to dressed up, but only if you keep the stones small. Tiny crystal accents near the smile line or at one side of the cuticle work better than a full sparkle bar, which can make the nail feel crowded.
This is the manicure I’d choose for a dinner, a wedding, or any event where you want your hands to look polished in photos without turning into a full-on statement piece. The black tip keeps it grounded. The stones catch light. The almond shape does the rest.
One practical note: place the stones in gel or nail glue, not thick polish. Then seal around them, not over them, so they stay raised and reflective. If you cover the top of the stone too heavily, the sparkle gets dull fast. Tiny details matter here. More than people think.
10. V-Tip Black French Almond Nails
A V-tip changes the whole geometry of the manicure. Instead of the tip following a rounded smile line, the black meets in a pointed center, which echoes the almond shape underneath and makes the nail look longer. It’s sleek, sharp, and a little more dramatic than the usual French.
This version is excellent if you like lines that feel tailored. The angle at the center adds length, while the black edge keeps the design grounded. On medium or long almond nails, the V shape can look especially clean because there’s enough room for the point to breathe.
How to Get the Most From It
The two sides of the V need to be symmetrical, or the whole nail looks off. That means starting with the center point, then drawing each side outward in matching angles.
- Use a detail brush with a long, thin tip.
- Place the center point first.
- Keep both sides the same thickness.
- Finish with a high-gloss top coat for crisp edges.
Best for: elongated almond nails, people who like graphic designs, and anyone who wants black French nails with a little more attitude.
11. Black Tips With White Line Accents
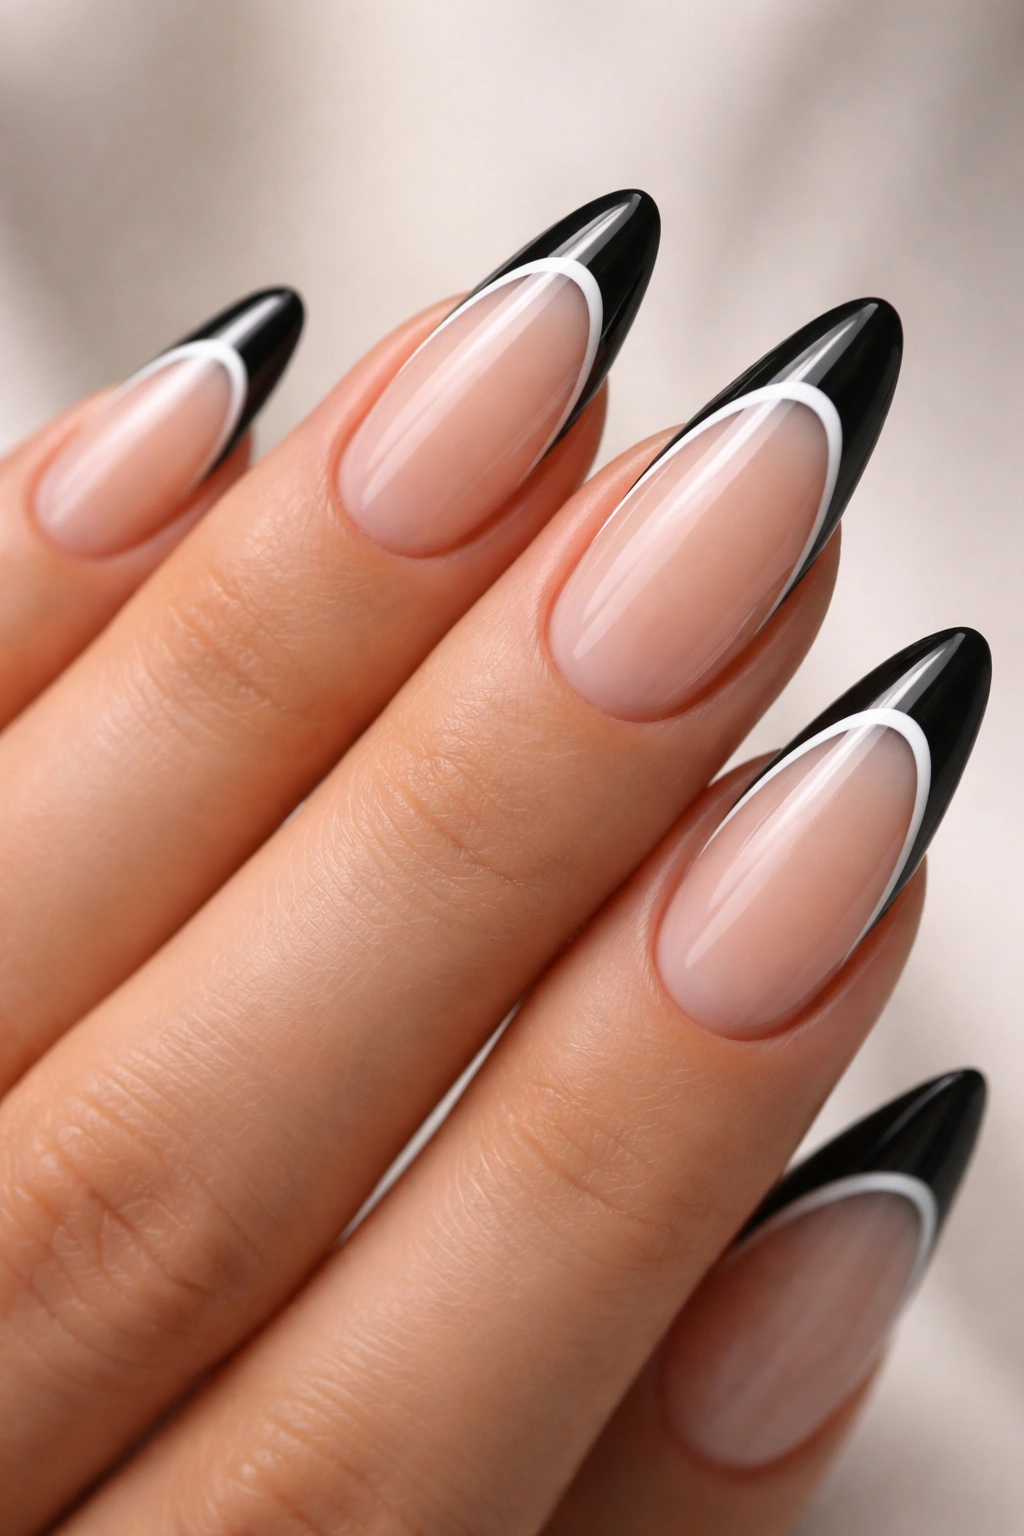
Black and white together can be surprisingly sharp. A black French tip with a thin white line tracing the edge, or running just beneath it, gives the manicure a graphic, almost editorial feel. It’s a simple palette, but it doesn’t look plain.
The contrast works because white lifts the black. You get the drama of the dark tip and the crispness of the light line, which makes the shape easier to see from a distance. On almond nails, that extra definition can look especially neat around the tapered point.
This one is best kept thin. If the white line is too thick, the design starts feeling like a striped nail rather than a French tip. A fine striping brush is your friend. So is patience, which is annoyingly boring advice, but true. Let each line dry before adding the next one, or the colors can bleed together.
12. Glossy Black Tips on Milky White Base
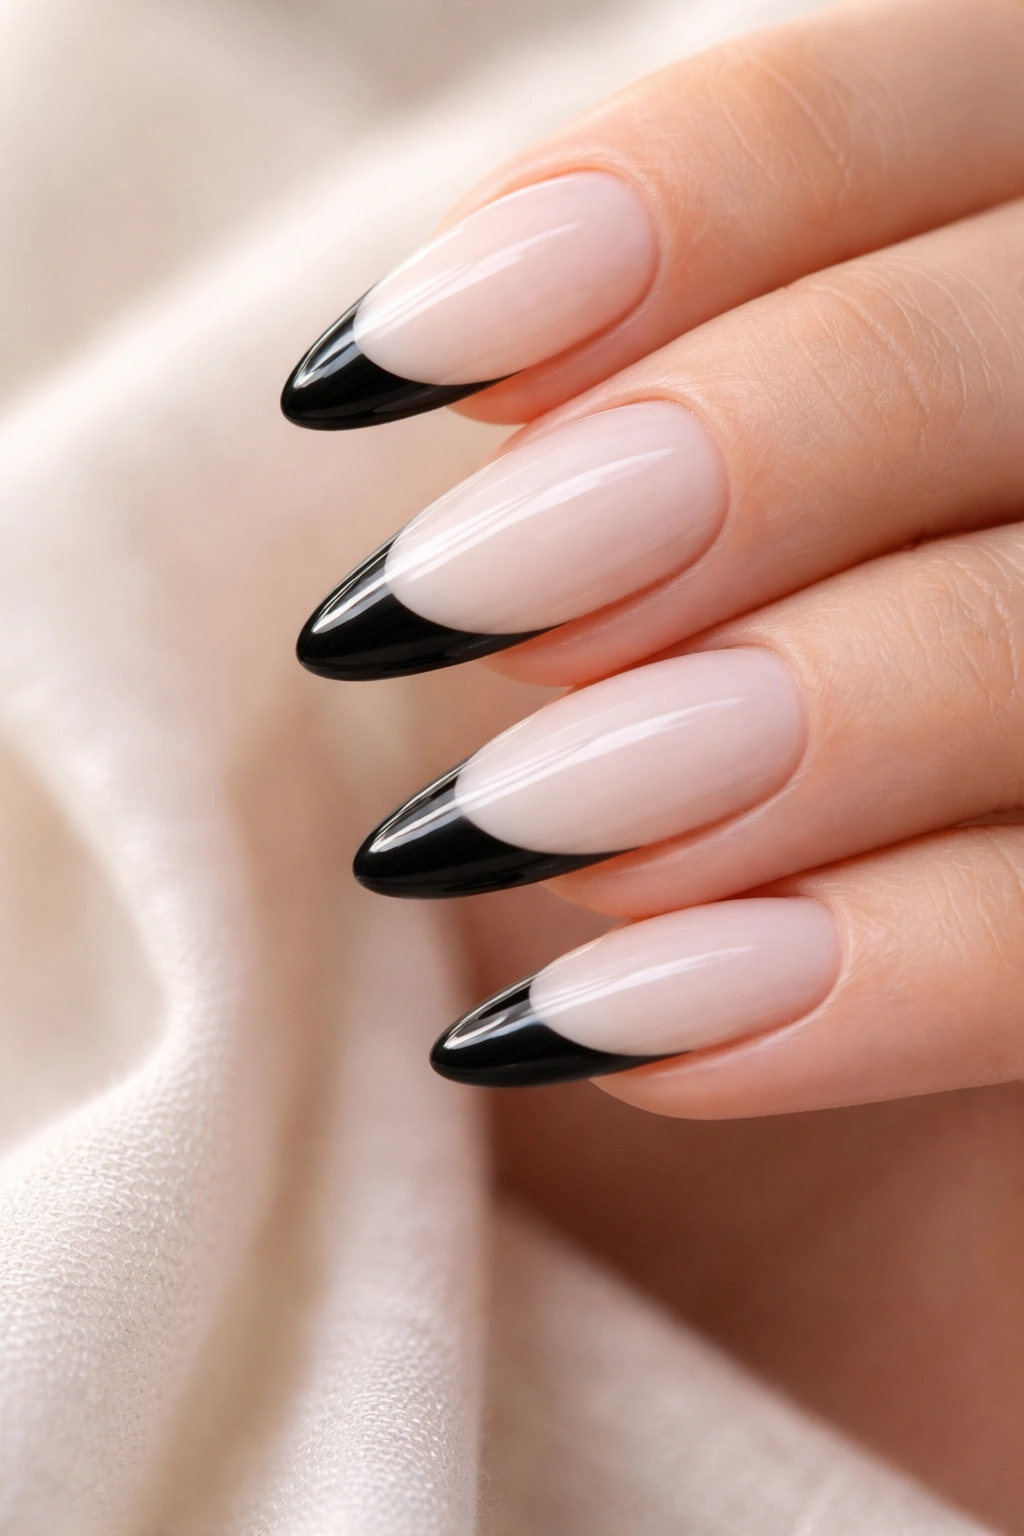
A milky white base gives black French tip almond nails a cleaner, almost porcelain look. The black edge stands out harder here than it does on pink or beige, which makes the design pop without needing glitter or chrome. It’s crisp. Very crisp.
I like this version when I want something that feels fresh but not soft. The milky white keeps the manicure light, while the black tip gives it shape and contrast. On almond nails, the result is neat and modern without being severe.
This combination does best with a sheer-but-not-transparent base. If the white is too opaque, the manicure can start to look chalky. If it’s too sheer, the black tip can muddy the finish. A soft, cloudy white is the sweet spot. It makes the black look even cleaner than it actually is.
13. Black Tips With Chrome Accent Lines
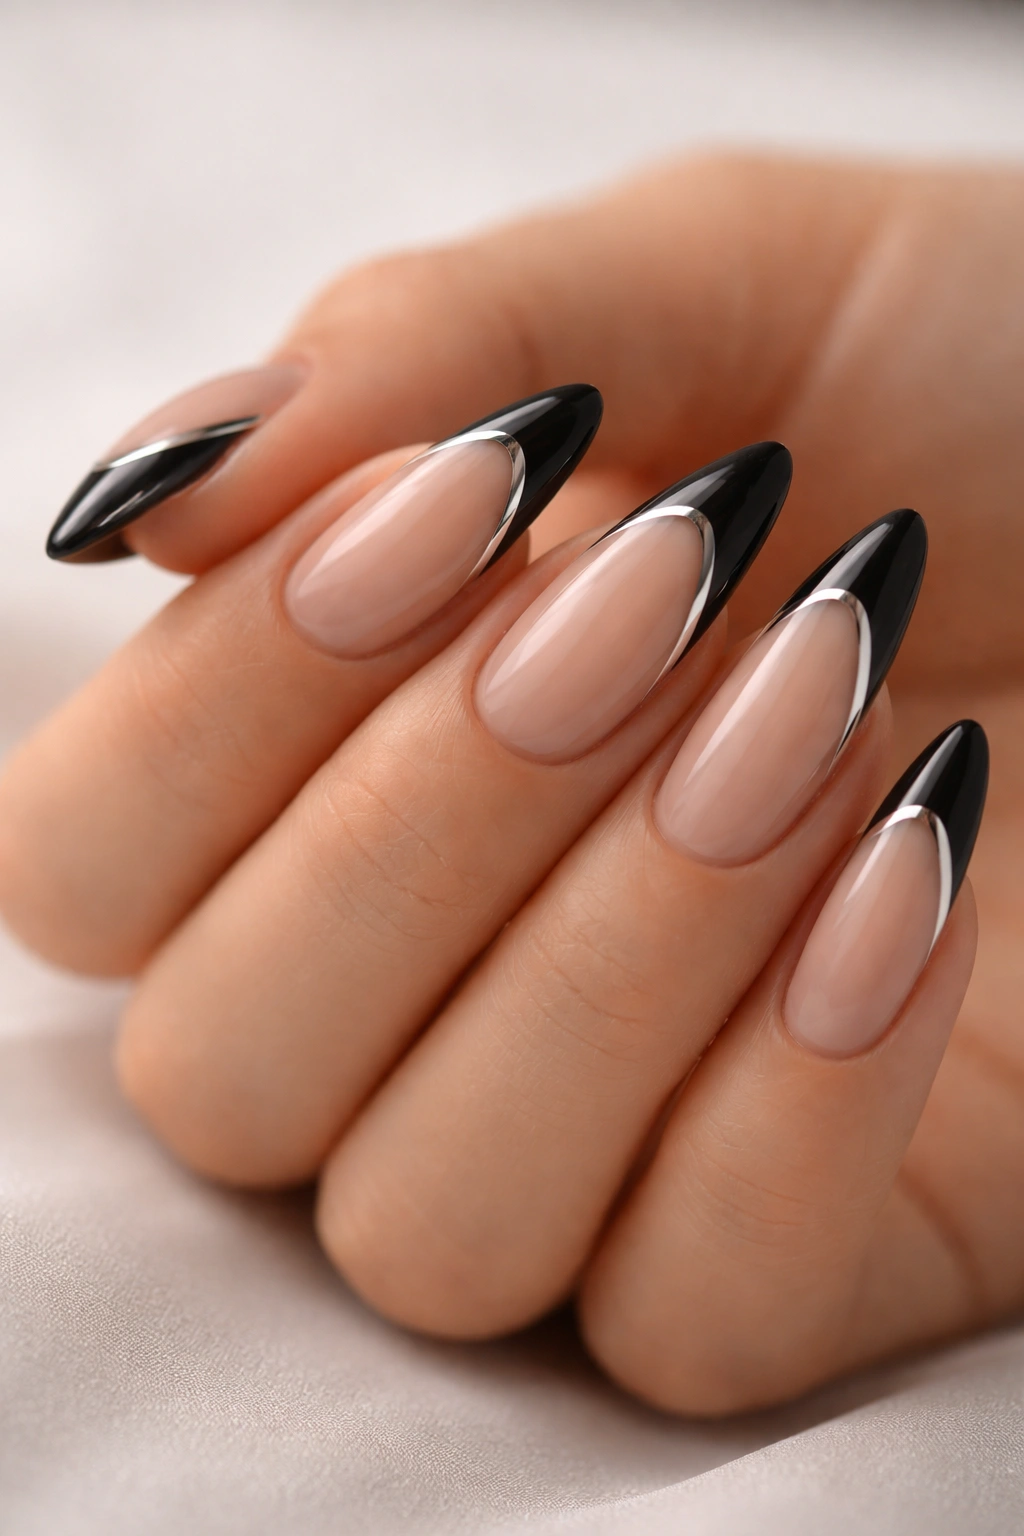
Chrome accents are for people who want just a little shine, not a full metallic takeover. A black French tip with a thin silver or gunmetal chrome line can make almond nails look futuristic without getting loud. The black anchors the design, and the chrome gives it movement.
The line can sit right on the edge of the black tip or just beneath it. Either way, the shimmer catches light in a way that changes as your hands move, which is part of the fun. This is not the manicure for someone who likes things subtle-subtle. It has edge.
At home, chrome powder works best over a no-wipe top coat or a sticky gel layer. If you try to rub it onto a fully dry glossy surface, you’ll usually get patchy results. And keep the line thin. Chrome is strongest when it’s used sparingly.
14. Matte Nude Nails With Black Velvet Tips
Velvet finishes can look a little over-the-top if they’re used everywhere, but as a tip accent they’re gorgeous. A black velvet or cat-eye style French tip on an almond nail adds depth and a soft reflective sheen that changes in the light. It’s more interesting than standard matte, less shiny than gloss, and a little moody.
The best part is the texture contrast. A matte nude base makes the velvet tip stand out even more. Because almond nails already have that elongated curve, the finish can look especially rich without needing extra decoration. The manicure does a lot with very little.
If you’re using magnetic polish, keep the magnet close to the tip and hold it steady for a few seconds before curing. That’s what creates the soft banding effect. Move too fast, and the shimmer spreads out instead of pooling where you want it. Tiny timing details matter more with magnetic polish than people expect.
15. Black French Tips With One Barely-There Accent Nail
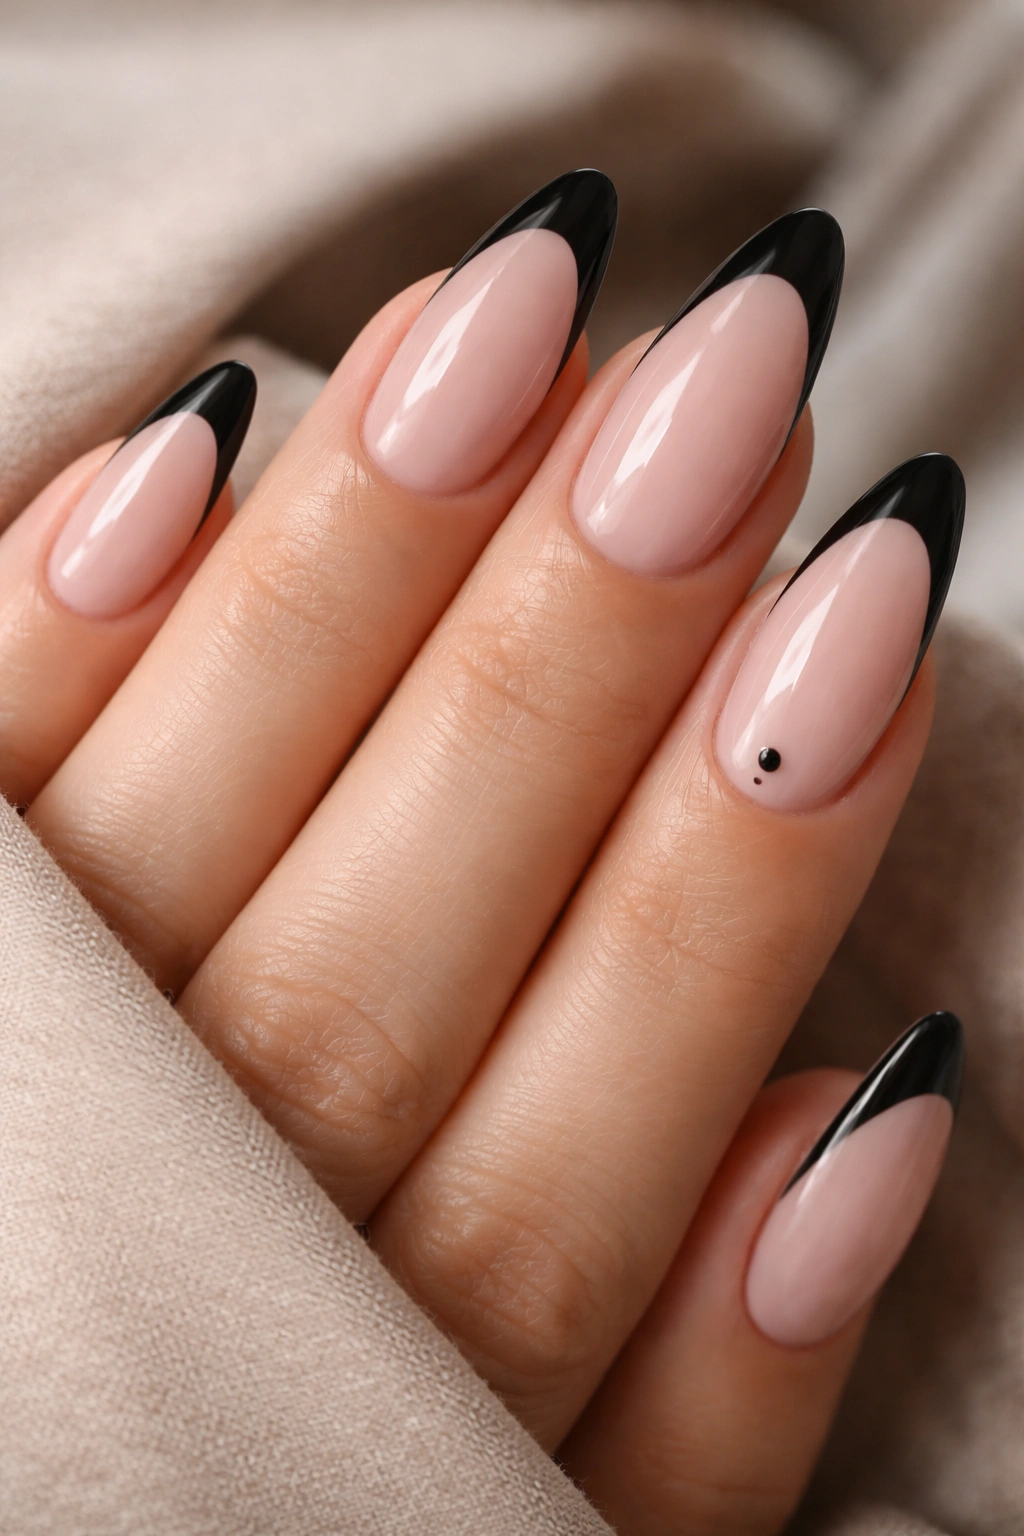
Not every nail has to work equally hard. Sometimes the prettiest design is the one that lets four nails stay clean and gives one nail a small accent — a fine line, a dot, a tiny heart, or even a single crystal. With black French tip almond nails, that kind of restraint keeps the set from feeling too busy.
This is a smart move if you like polish but get bored easily. The main design stays consistent, and one accent nail gives your set a small twist. I’ve seen too many people pile on extra art until the manicure loses its shape. One accent is enough. More can wait.
The accent nail should echo the French tip, not fight it. A tiny black dot near the cuticle or a slim curved line near one side edge is enough to make the whole set feel intentional. No need to turn every finger into a separate project.
How to Shape Almond Nails for the Cleanest Black Tip
The shape matters as much as the design. A black French tip can look elegant on almond nails, but only if the free edge is filed with a smooth taper and not turned into a narrow point that snaps the first time you open a can. Almond should feel soft at the sides and gently tapered at the tip. Not dagger-like. Not round.
A good almond shape usually starts wider near the cuticle and narrows gradually toward the center point. If the sides are filed too straight, the tip starts reading oval instead of almond. If they’re too steep, the nail can look sharp in a bad way. The balance sits in the middle, and once you see it, you’ll know.
For black tips especially, evenness matters because dark polish magnifies bad filing. A crooked almond shape makes a French line look off no matter how carefully you paint it. File both hands with the same angle, then check them from the front, not just from above. That front view tells the truth.
Best Base Colors for Black French Tip Almond Nails
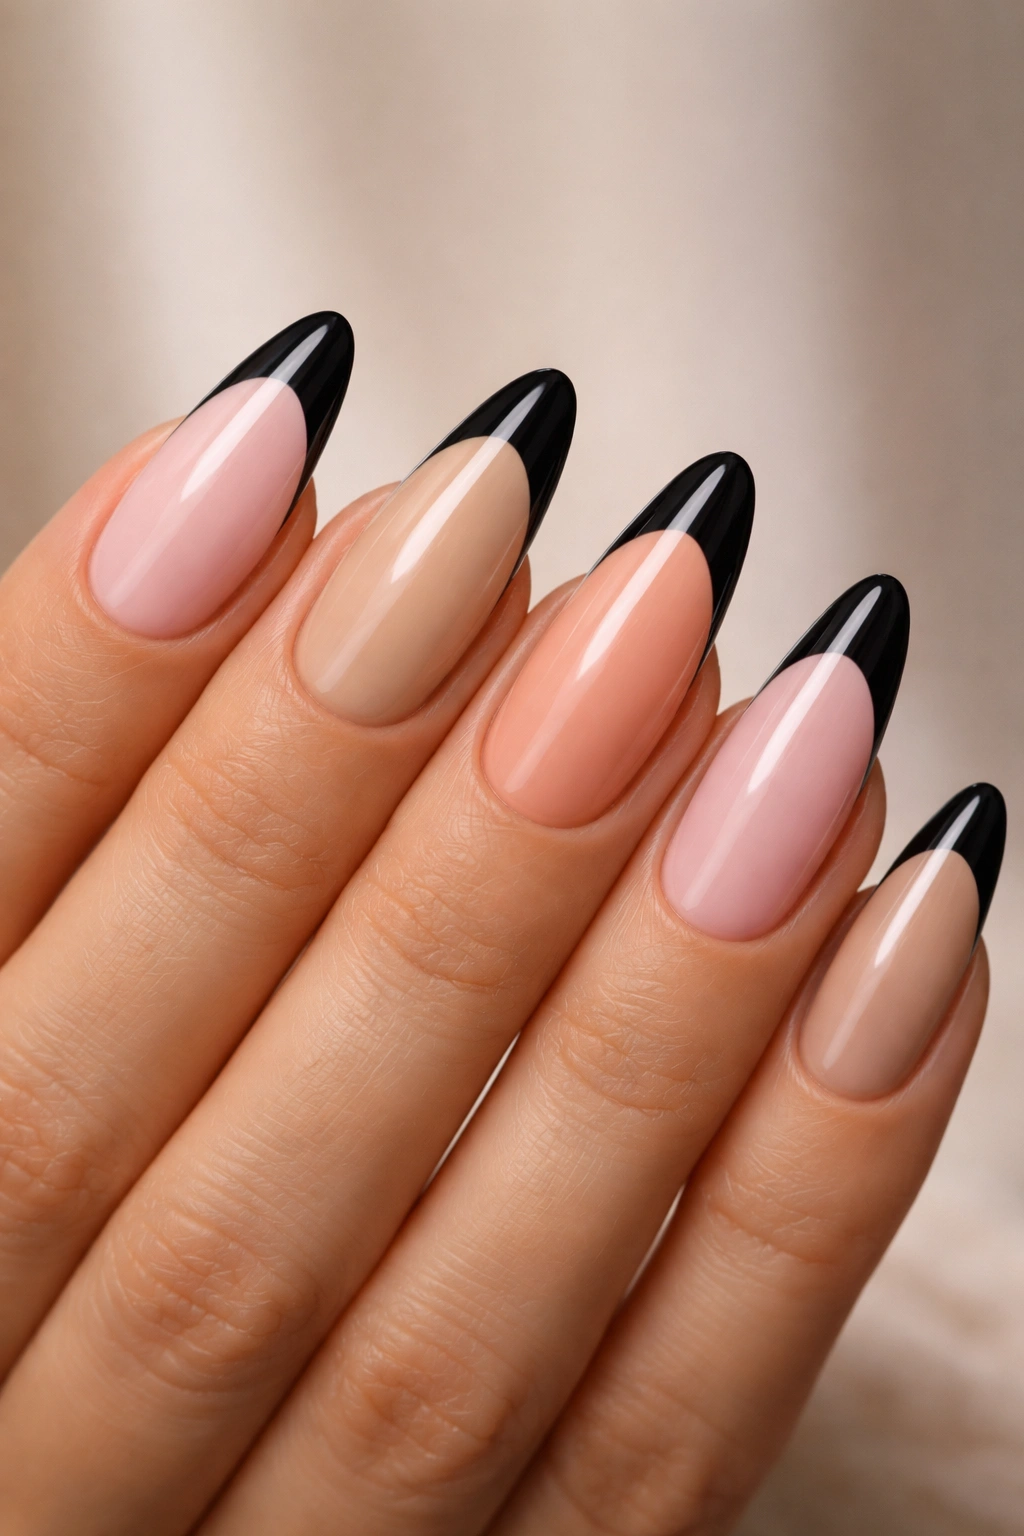
Black tip nails are more forgiving than people think, but the base color still changes the whole mood. A sheer pink base gives you that soft salon look. Milky beige feels a little warmer and more natural. Nude with peach undertones can flatter deeper skin tones especially well, while a cool pink base sharpens the contrast.
If you want the black to stand out hard, go for a pale base. If you want the manicure to blend a little more, choose something closer to your skin tone. That’s not a rule carved in stone, just a useful starting point. The same black tip can read edgy or gentle depending on what sits underneath it.
I’m partial to semi-sheer bases because they hide minor growth better than opaque ones. That matters if you wear your manicure for more than a few days. And if your nail beds are very short, a nude base closer to your natural tone can make the almond shape seem longer.
How to Keep Black French Tips From Smudging or Chipping
Black polish shows everything. Smears, chips, uneven edges, and a rushed top coat all look more obvious against a dark tip than they do with pale art. The fix is mostly boring, which is to say it works.
Let each layer dry enough before the next one. Don’t flood the free edge with polish. Cap the tip with top coat so the edge gets sealed, but don’t leave a thick blob hanging there, because that chips faster than a thinner layer. And if you’re using regular polish, give it extra drying time before you start typing, washing dishes, or digging in your bag.
A lot of people blame the polish when the real issue is the prep. Oil on the nail plate, dusty filing residue, or uneven shaping will make black tips lift faster. Wipe the nail with alcohol or nail cleanser before painting. Dry nails last longer. Not glamorous, but there it is.
Final Thoughts
Black French tip almond nails work because they keep the clean shape of a French manicure and give it a darker, sharper edge. That alone is enough for most people. You do not need ten extra layers of design to make them interesting.
Pick the version that matches your patience. Thin tips, micro tips, and classic curves are easiest to wear every day. V-tips, chrome lines, and matte finishes push the look further without losing the almond shape that makes it so flattering.
If you’re doing these at home, start with one simple set and get the line work right before chasing fancier details. A neat black French tip will always look better than a messy “creative” one. Always.
