

A good abstract manicure doesn’t need rhinestones, airbrushing, or a steady hand that belongs in a museum. Short almond nails already do half the work for you: the shape softens the hand, elongates the fingers a bit, and gives even simple designs a cleaner finish than the same art would on a square tip. That is why short abstract almond nails are such a smart choice. They look polished, but they also leave room for mistakes that don’t feel like mistakes.
Abstract nail art has a reputation for being fussy, but the best versions are usually loose, slightly imperfect, and fast to do with tools you probably already own. A dotting tool helps, sure. So does a toothpick. So does the corner of a makeup sponge. The point is not precision in the architectural sense. The point is balance, contrast, and a little visual rhythm across a small surface.
Short almond nails make that even easier. The shape gives you a tapered canvas without forcing you into the long, dramatic look that some nail art depends on. You can wear a tiny swirl, a half-moon shape, a broken line, or a blotchy color block and it will still read as intentional. That’s the charm here. It looks creative, but not precious.
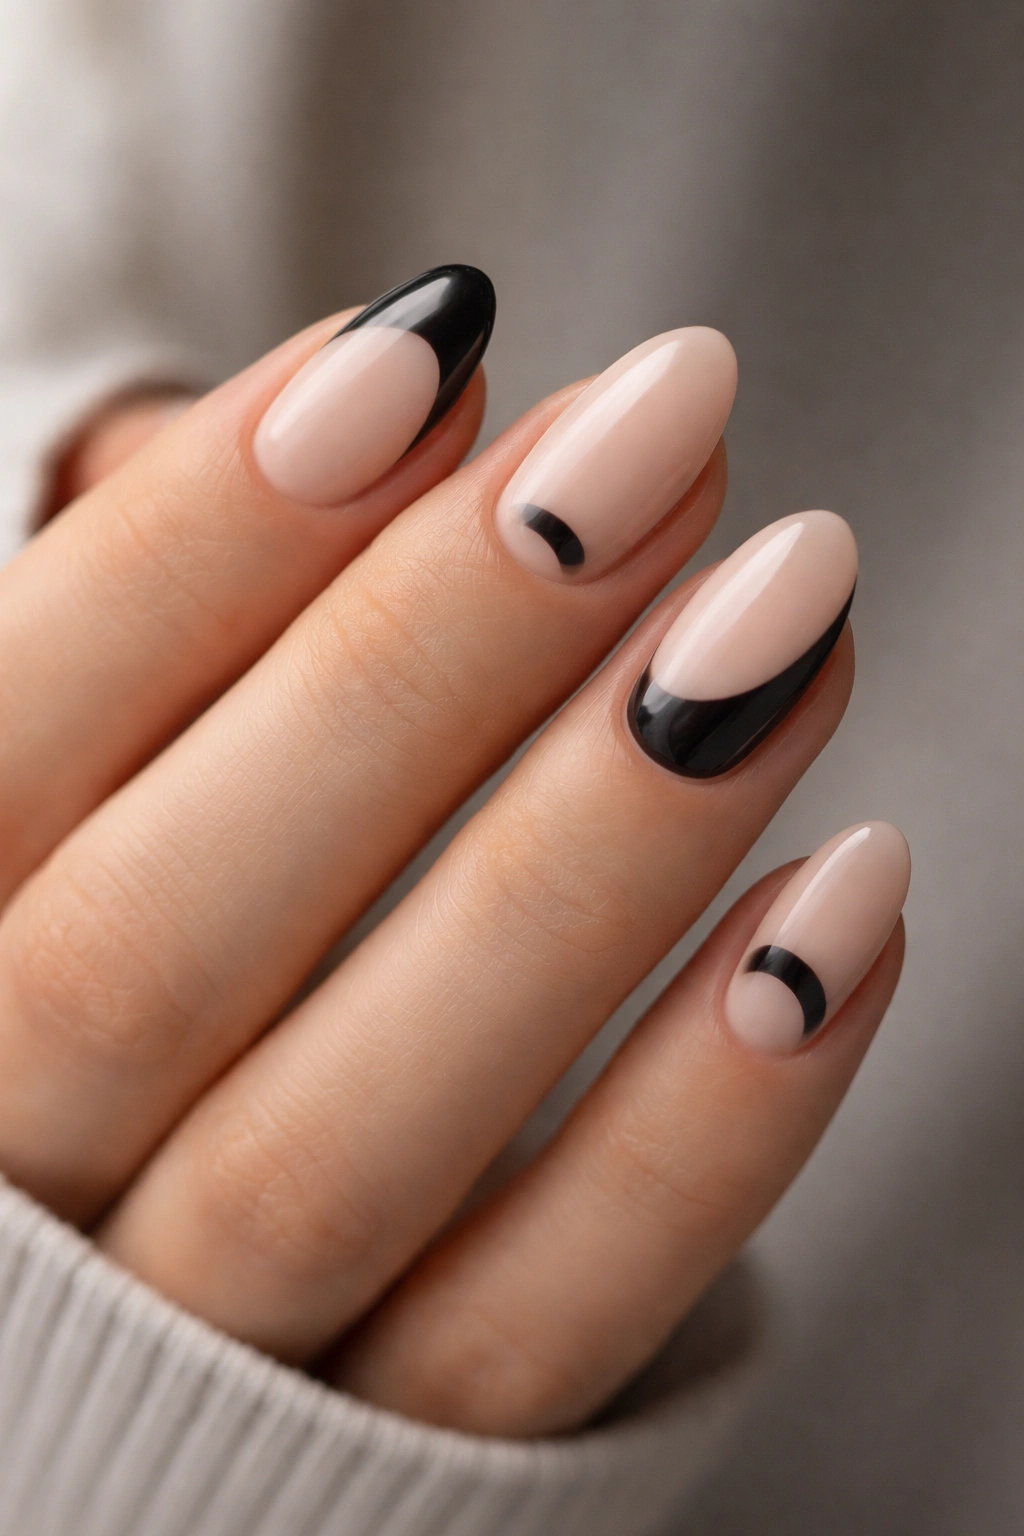
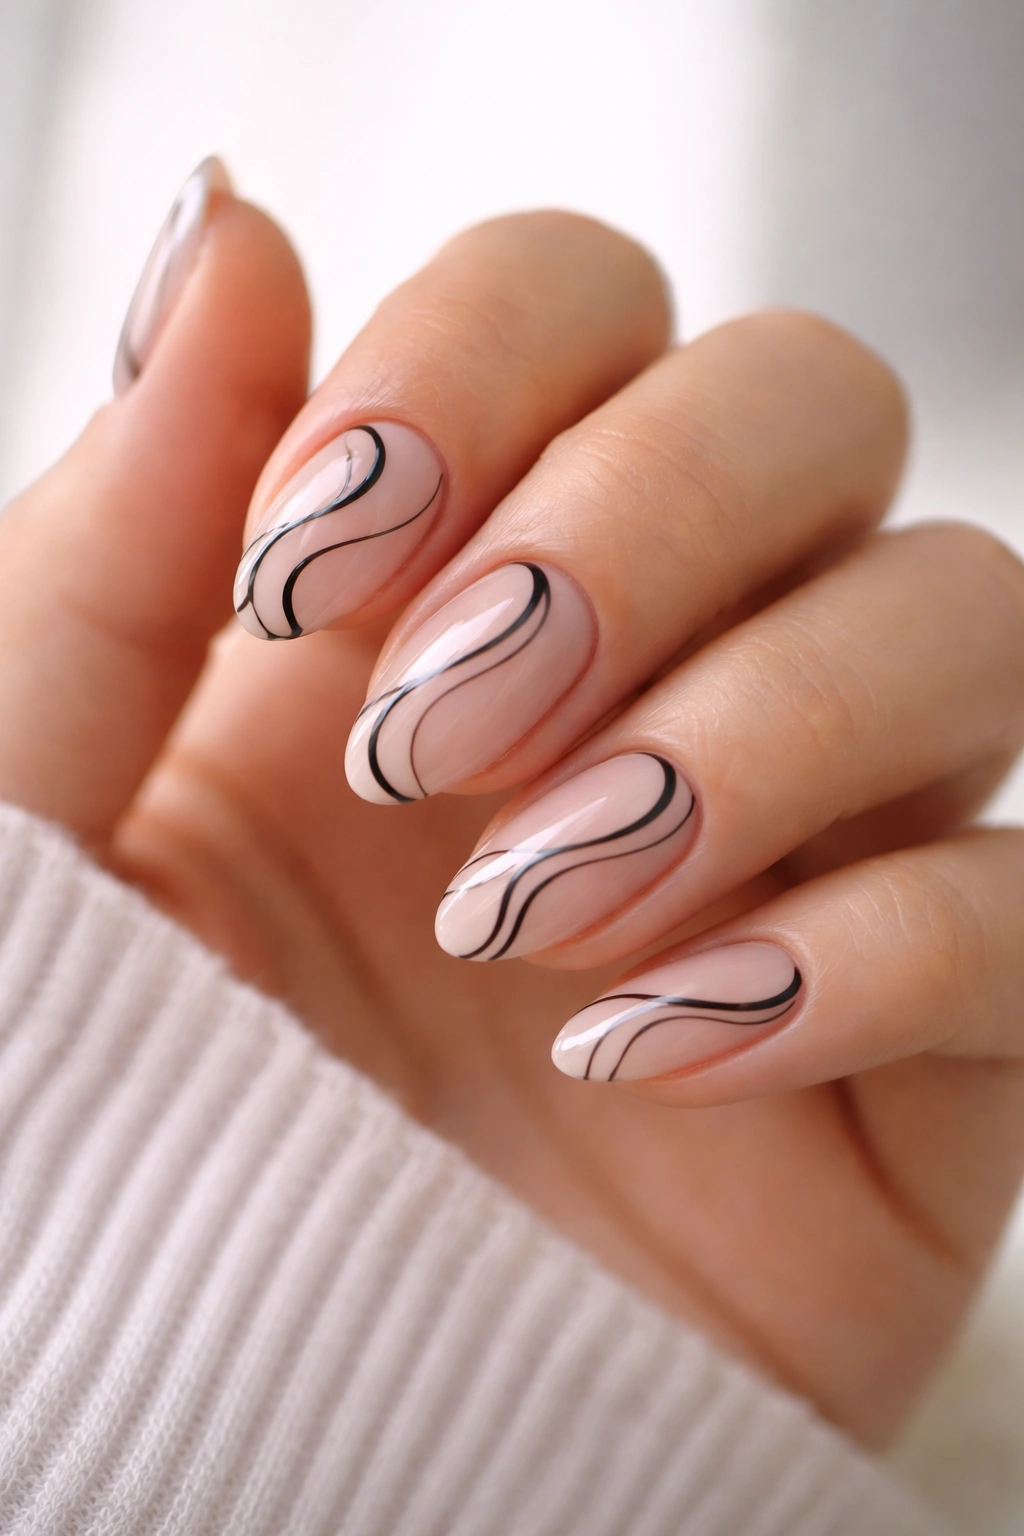
1. Soft Black Swirls on a Sheer Base
Black swirls are the easiest way to make short almond nails look finished without looking busy. A sheer nude, milky pink, or barely-there beige base keeps the nail light, while thin curved black lines give you that abstract feel with almost no effort. The trick is to keep the swirls loose. Perfect symmetry makes them feel stiff. A little wobble makes them better.
Why It Works
The contrast does most of the heavy lifting. On a short almond shape, black against a translucent base creates enough definition that your nails still read from a distance, even though the design itself is minimal. The curve of the almond tip also supports the swirl shape naturally, so the whole manicure feels connected.
If you want this to stay wearable, keep the black lines thin and let some nails have one swirl while others have two. That unevenness is doing real work. It keeps the set from looking stamped out.
How to Use It
- Use a sheer nude base coat or a soft pink jelly polish.
- Paint the swirls with a thin liner brush or a toothpick.
- Keep the lines slightly uneven in width.
- Leave at least half the nail bare so the design can breathe.
Best tip: put the boldest swirl on the accent nail and keep the others lighter.
2. Crooked French Tips with a Twist
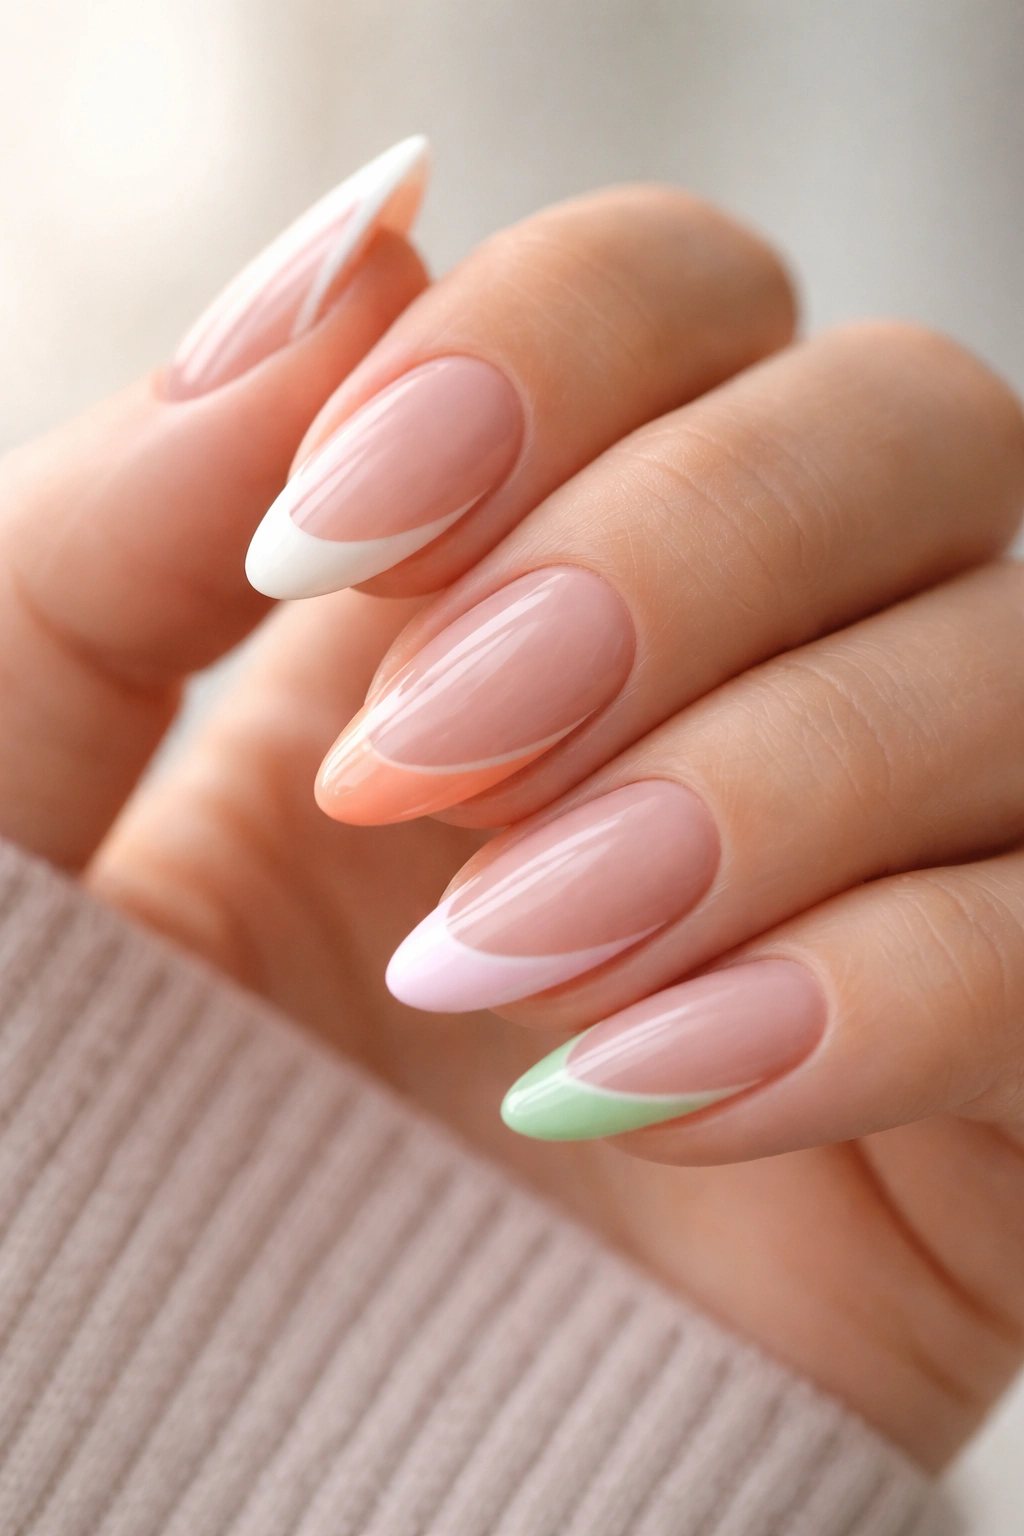
A crooked French tip sounds wrong until you try it. Then it makes sense fast. Instead of drawing a neat smile line, sweep the tip a little higher on one side or let the color dip unevenly across the almond edge. That small shift turns a standard French manicure into something abstract without making the nail look messy.
The best part is that short almond nails make this style forgiving. A clean French line on a short nail can sometimes feel too formal or too tiny. A slanted edge adds movement. It also lets you use brighter colors, because the imperfect shape keeps them from feeling stiff.
If you like polish but hate fuss, this is one of the easiest options on the list. Use white, chocolate brown, red, cobalt, or even a muted green. The shape carries the design.
3. Floating Dots and Tiny Orbits
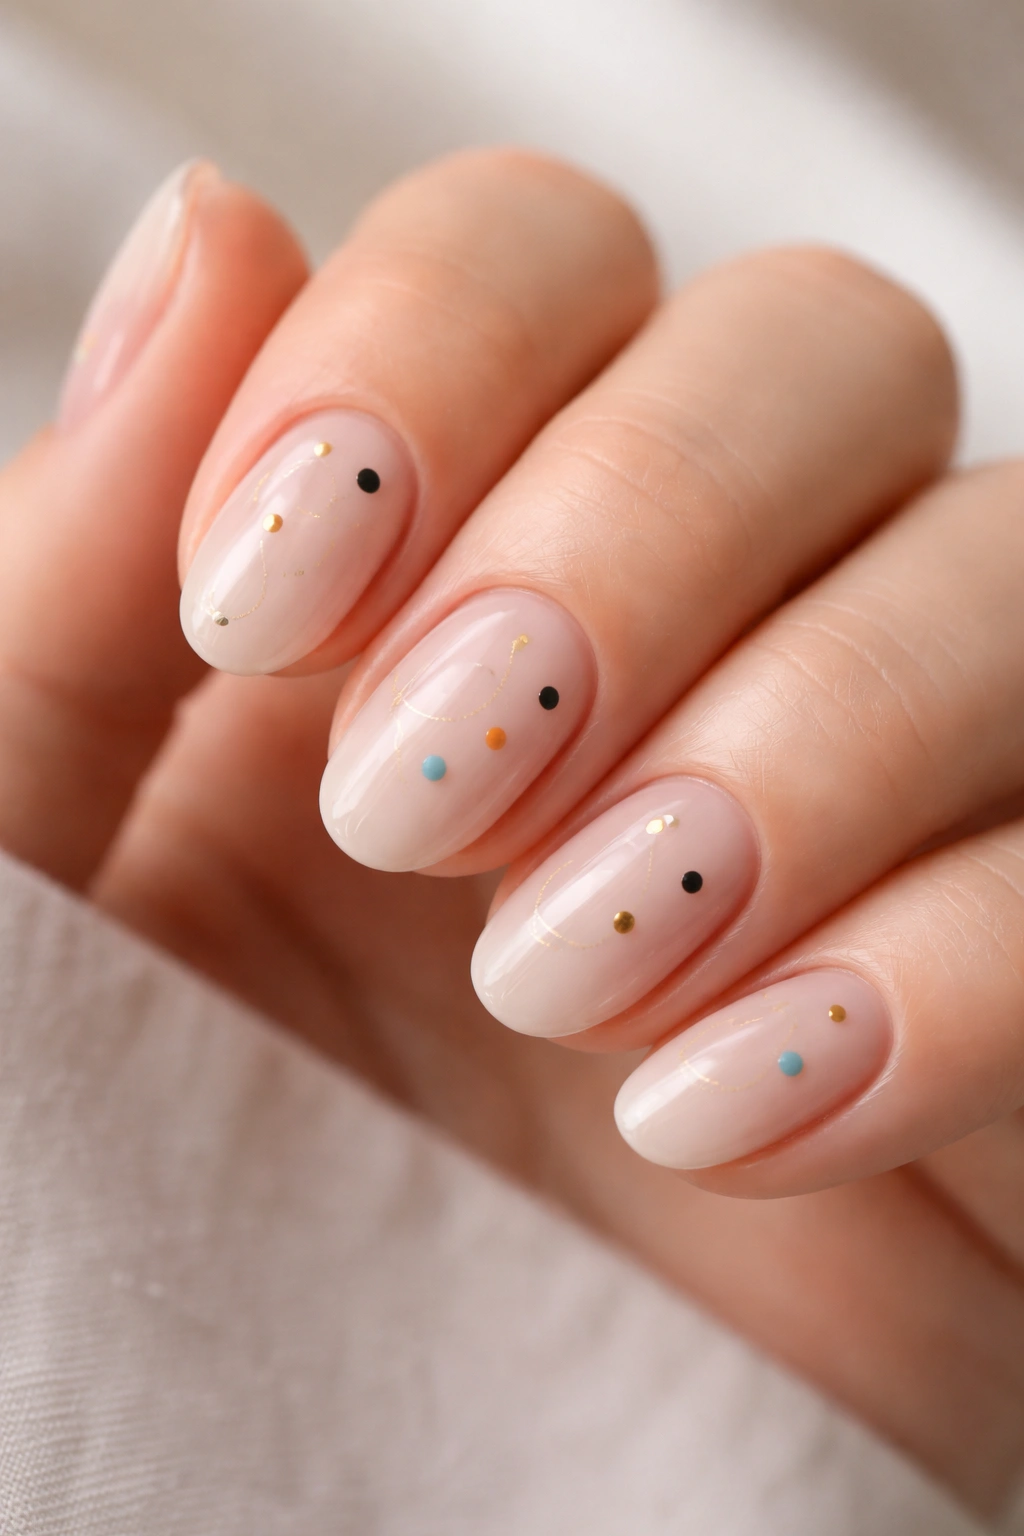
Dots are underrated. A few circles placed off-center can make short almond nails look considered, modern, and a little playful without requiring any drawing skill at all. Think one dot near the cuticle, one drifting toward the sidewall, maybe two tiny dots stacked diagonally on another nail. That’s enough.
What Makes It Different
Unlike line work, dots don’t need to connect to anything. They can sit there on the nail like little planets. That gives you room to build a design that feels airy instead of crowded. On almond nails, especially short ones, the negative space matters just as much as the polish.
The trick is scale. Large dots on a short nail can look clumsy. Use a dotting tool, the end of a bobby pin, or the tip of a nail brush for clean circles around 1 to 2 millimeters wide. A few larger ones are fine, but keep most of the set small.
How to Get the Most From It
- Pick one neutral base and one accent color.
- Place dots in odd numbers: 1, 3, or 5.
- Keep at least one nail nearly bare.
- Use matte top coat if you want the dots to feel softer and more graphic.
4. Blurred Color Blocks

Blurred color blocks are for people who like abstract art that looks a little painterly. You lay down one color, then tap a second shade into it while the polish is still tacky, so the edge softens instead of forming a sharp line. On short almond nails, that smudge between colors feels deliberate and modern.
This style works best with two or three shades that sit close together: peach and rust, mauve and plum, beige and coffee, sage and olive. Too many colors, and the hand starts to look cluttered. Keep the palette tight. That restraint is what makes the design look expensive, even though it’s dead simple.
A sponge helps, but a fingertip in a pinch works too. Not elegant. Still works.
5. Mismatched Neutral Shapes
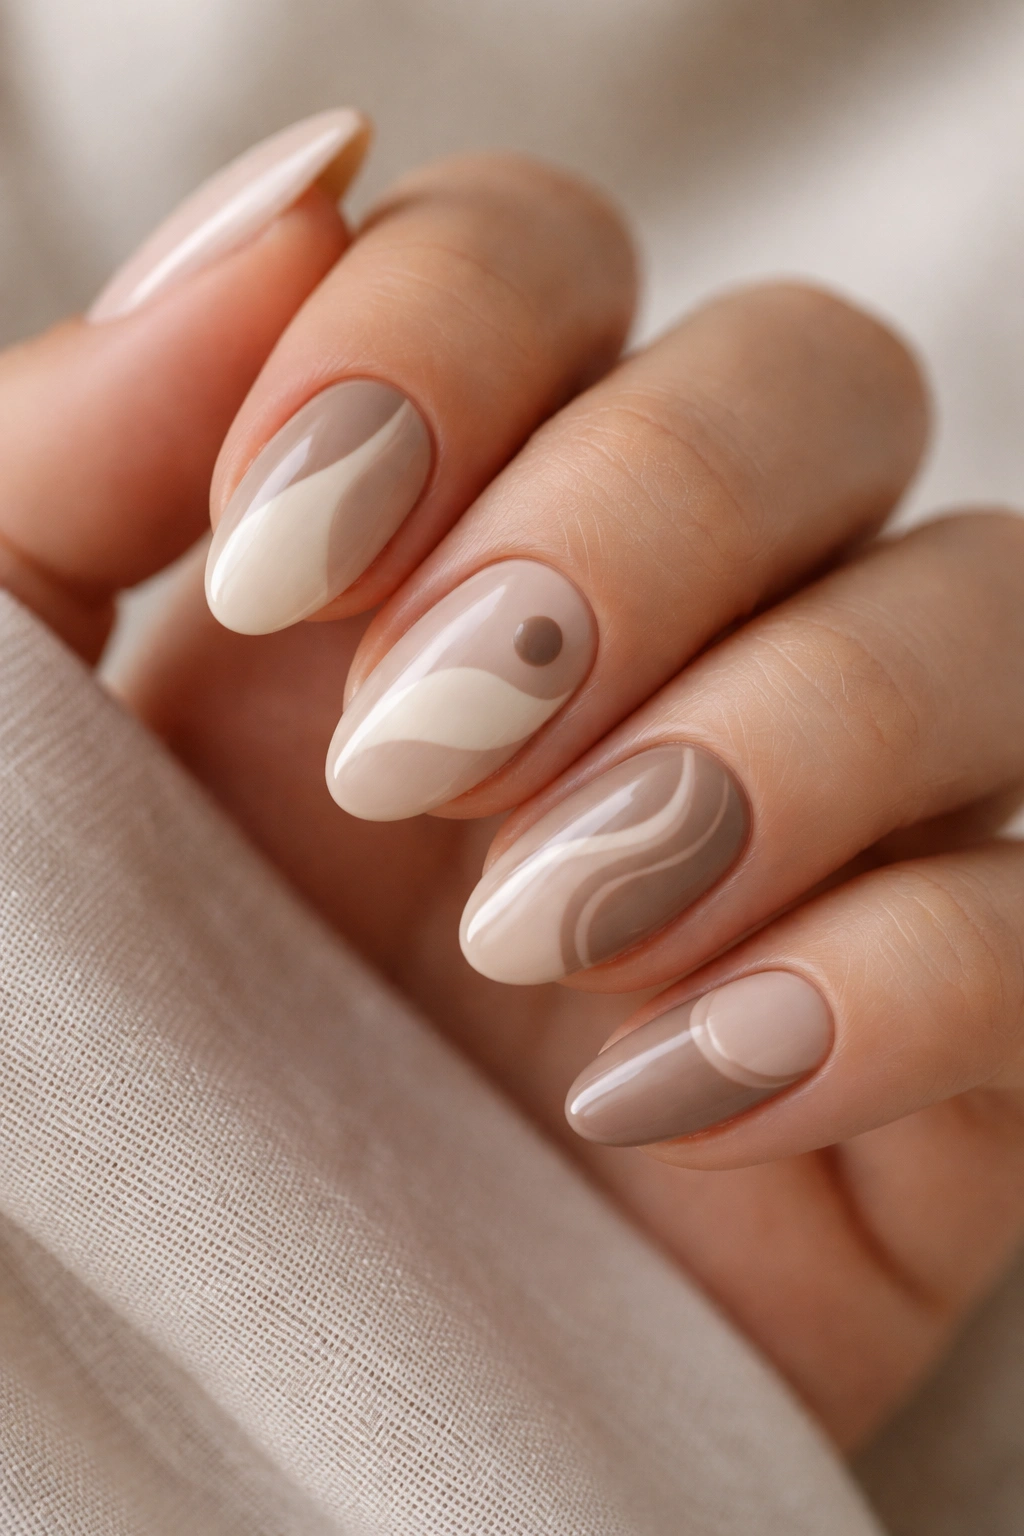
Mismatched neutral shapes are one of those manicures that look more complicated than they are. Paint each nail with a different abstract form in the same color family: a crescent, a slanted block, a thin stripe, a half circle, a soft blob, a triangle pulled to one corner. If all the shades stay in the same family, the whole set feels calm rather than chaotic.
That sameness is the point. You are not trying to make every nail match exactly. You are building a set that shares a language. Beige, taupe, cream, camel, and soft brown do this beautifully on short almond nails because the shape keeps the designs graceful while the variation keeps them from feeling flat.
I like this approach when I want art that reads as creative but not loud. It’s also useful if your polish application is a little uneven. The design tolerates that. Sometimes that is half the battle.
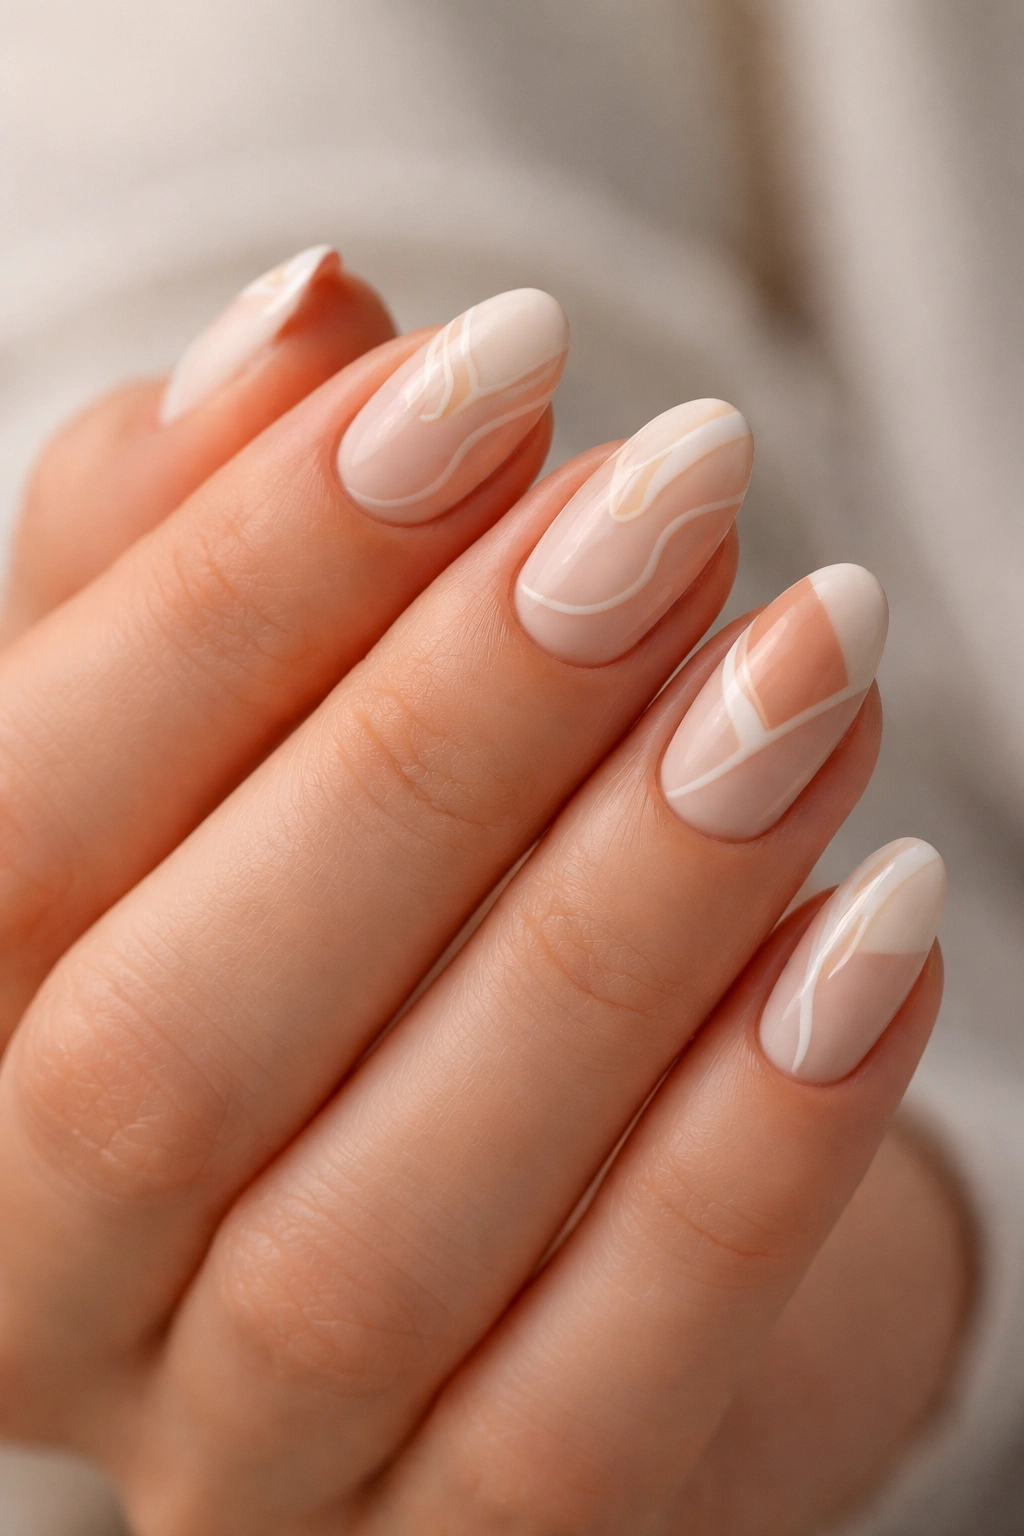
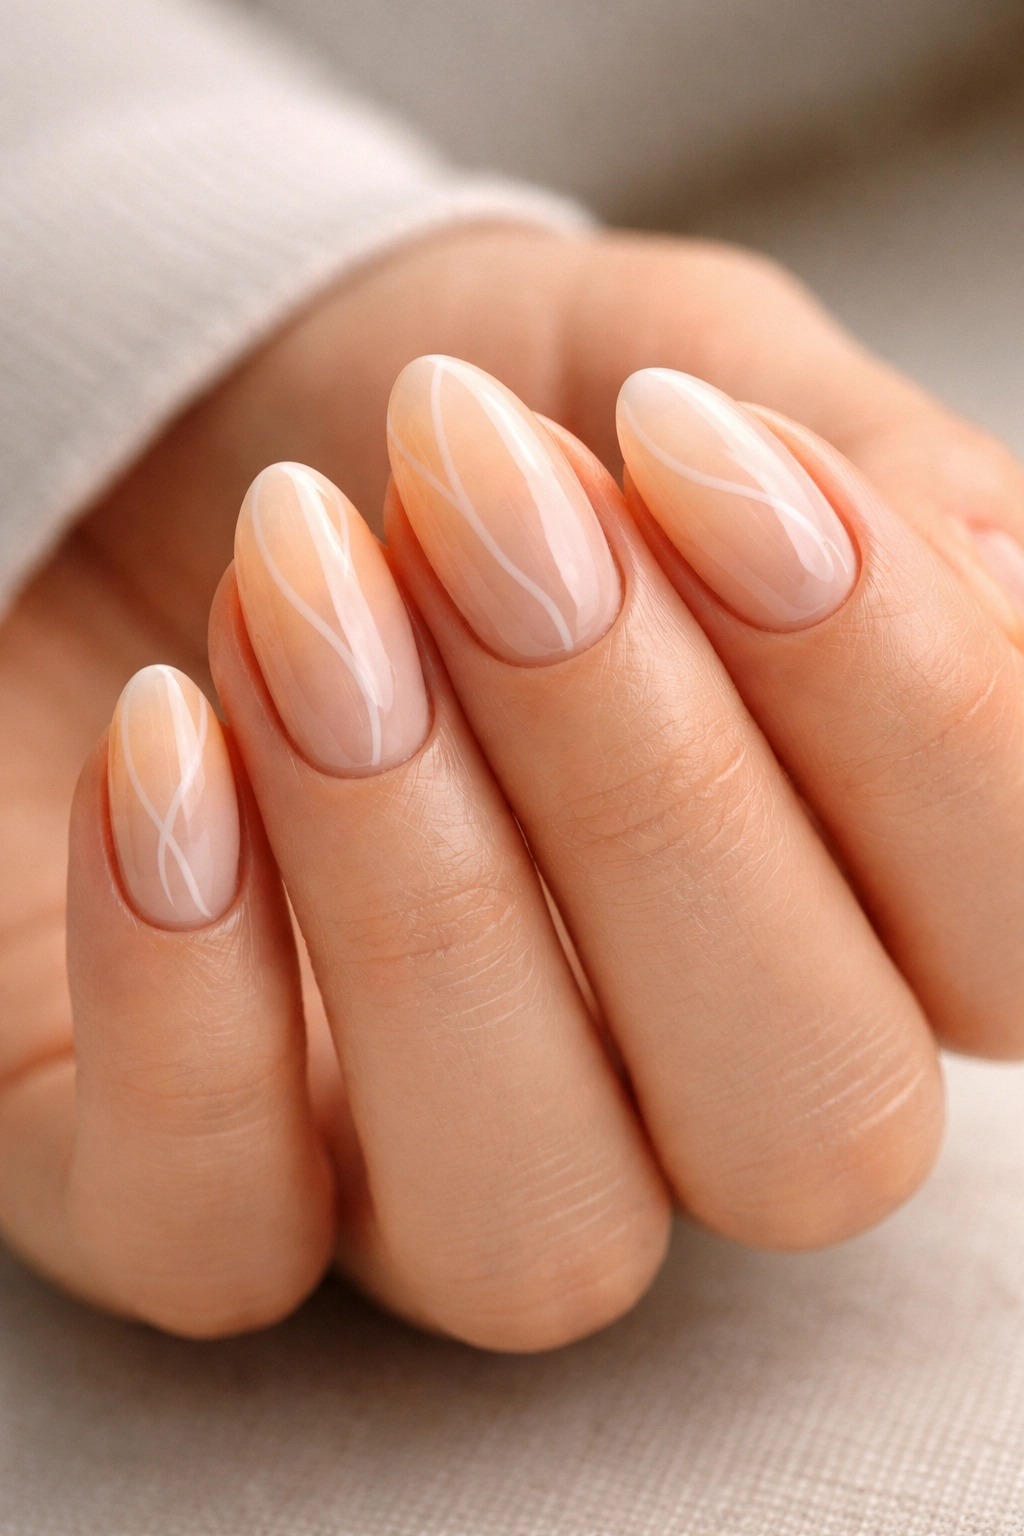
6. Wavy Lines in Two Tones
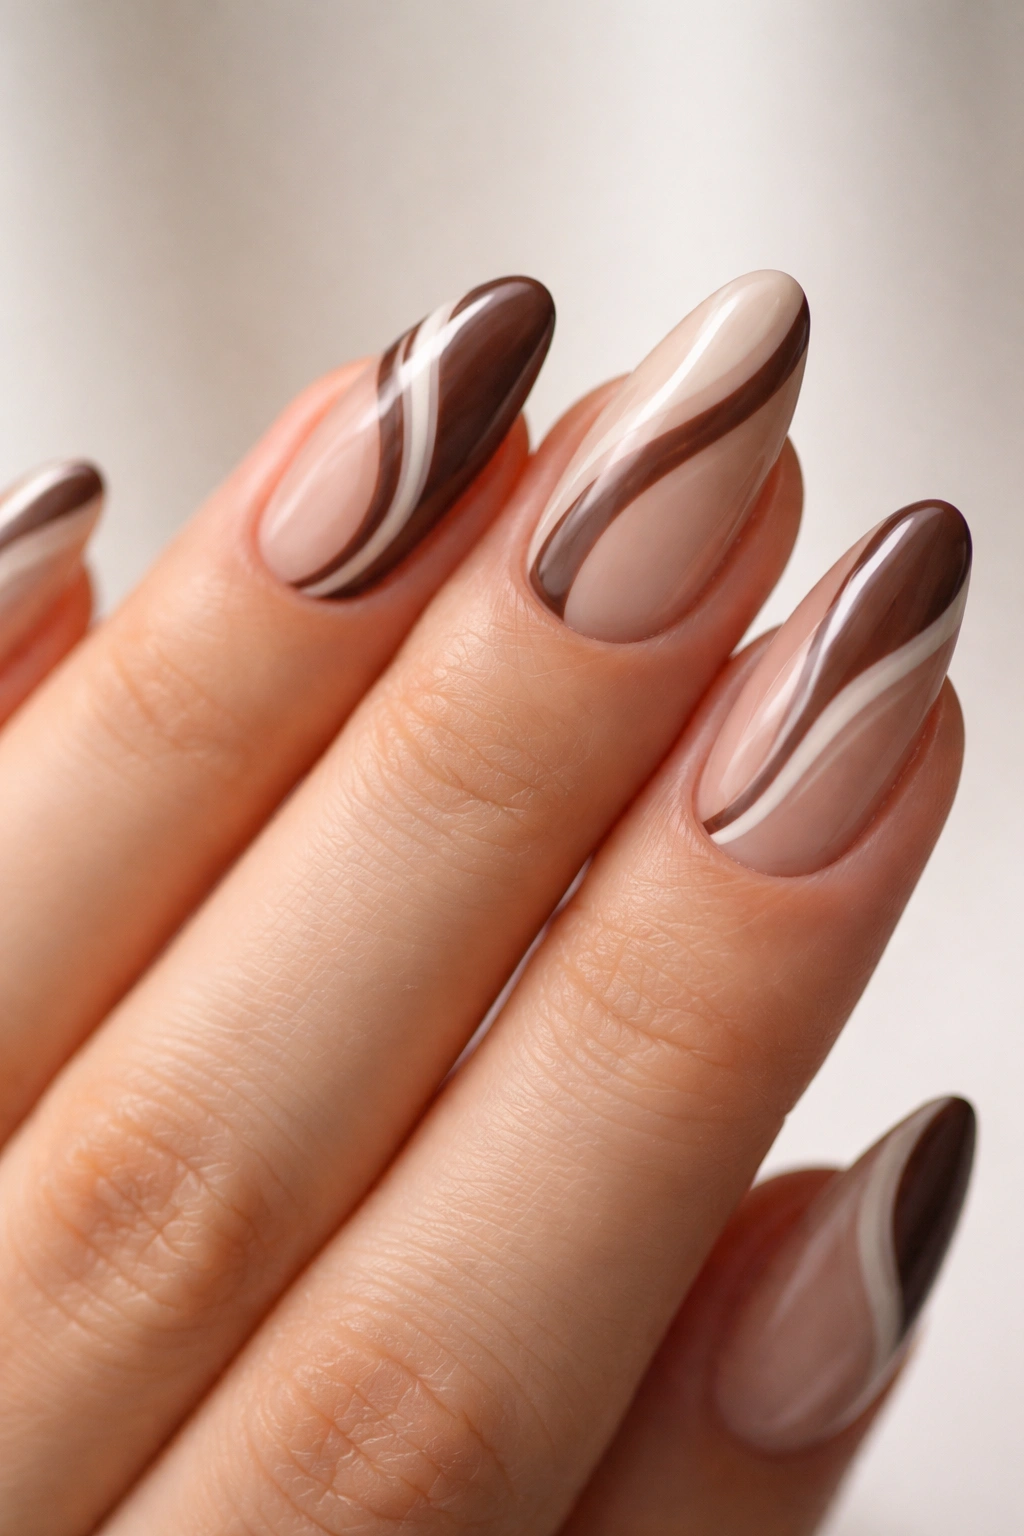
Wavy lines can go wrong fast if you overthink them. The best ones look as if you drew them in one smooth pass and then stopped before you got precious. Use two colors only, usually one dark and one light, and run the waves diagonally across the nail so they follow the almond shape instead of fighting it.
The Science Behind It
The diagonal direction makes the nail look longer. That matters on short nails, where a design can easily make the plate look wider than it is. A wave that starts near one sidewall and falls toward the tip creates motion, which the eye reads as length.
Try white and black, sand and chocolate, or dusty rose and burgundy. If you want the design to feel softer, use one opaque color and one sheer jelly shade. That gives the line a faint layered look without any extra effort.
Quick Notes
- Use a thin brush for the wave.
- Keep the curve broad, not tight.
- Let one nail have a double wave.
- Seal with glossy top coat to keep the lines crisp.
7. Cutout Negative Space
Negative space designs are basically the manicure version of leaving a sentence unfinished on purpose. On short almond nails, they work because the shape already feels refined, so you can carve out tiny open areas without the look falling apart. Think crescent cutouts, side slivers, open rectangles near the tip, or a little bare half-moon at the base.
The key here is clean edges. A wobbly negative space design looks accidental. Use striping tape or a fine brush if you want the gaps to stay tidy. Black and nude is the obvious pairing, but deep green, navy, terracotta, and white all hold up well too.
This style is especially good if you like abstract nails but do not want a lot of color on your hands. It gives you design without density. Nice trade.
8. Soft Marble Smears
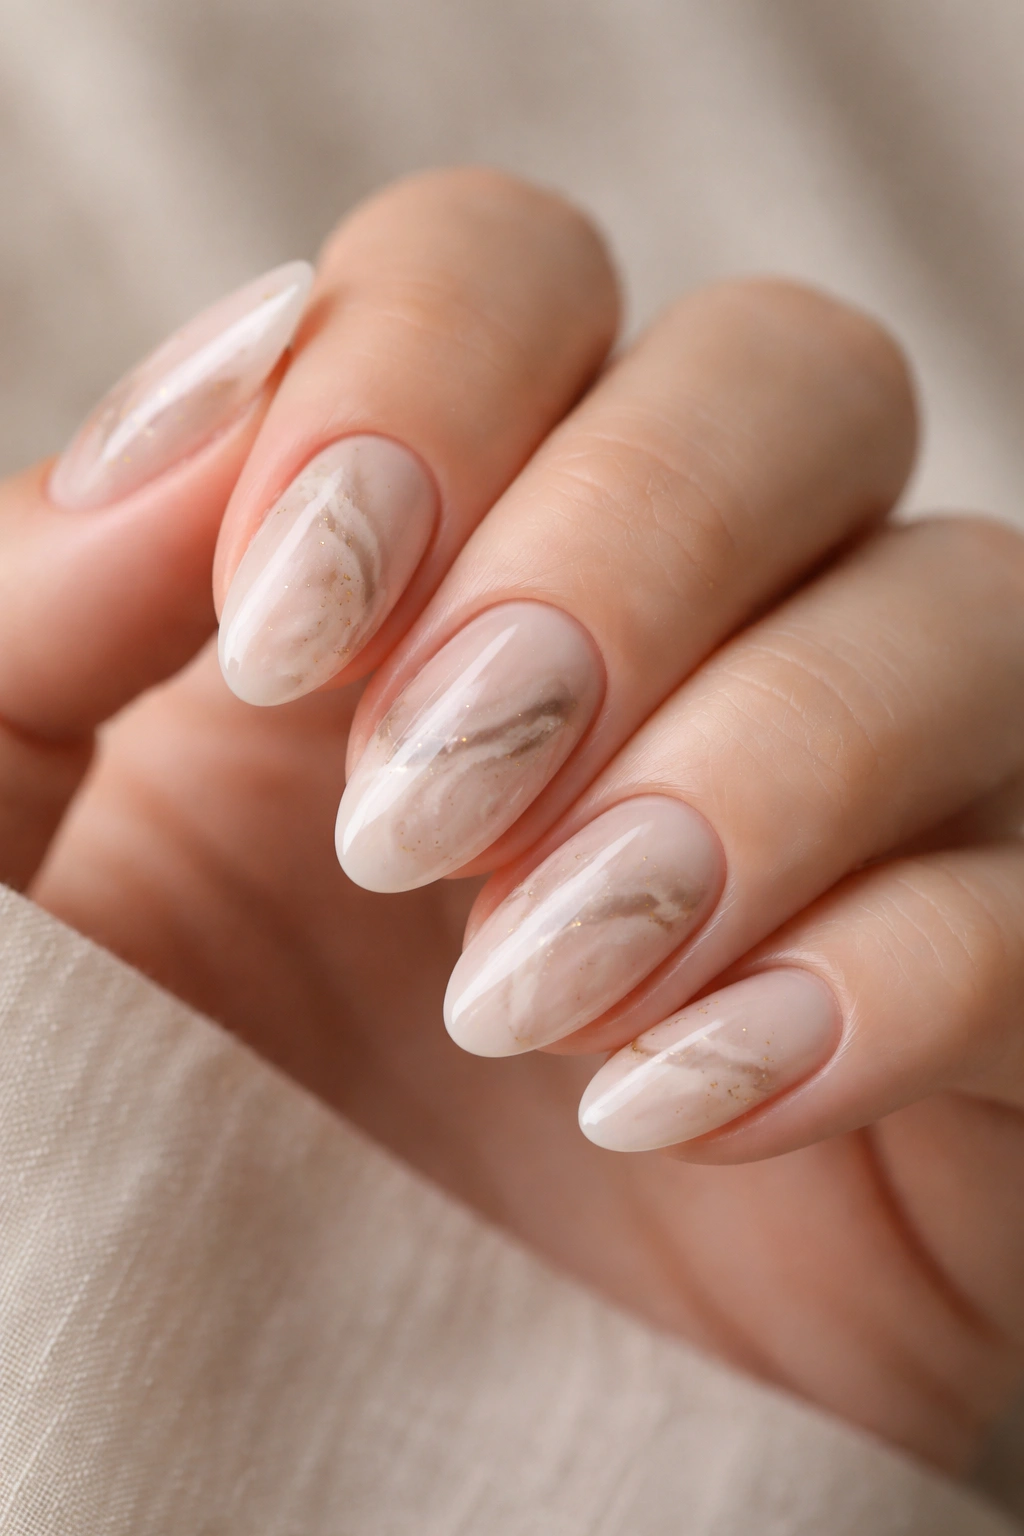
Marble doesn’t need to be fancy. In fact, the prettiest short abstract almond nails with marble are usually the least complicated ones. Use two or three diluted shades and swirl them just enough that the borders blur. You want the nail to look like stone, smoke, or wet ink — not a bathroom counter.
Why It’s So Wearable
Short almond nails can make marble look smaller and less dramatic than long extensions do, which is a blessing. That means you can play with the effect without turning your manicure into a full statement piece. Use white with grey, beige with brown, or lilac with soft taupe for a quieter version.
If you want more texture, dot in a little metallic foil or a tiny streak of shimmer. Do not overdo it. Marble falls apart when every nail tries to be the center of attention.
What to Watch For
- Blend while the polish is still wet.
- Stop before the colors fully mix.
- Use a thin detail brush for vein lines.
- Keep at least one nail simpler than the others.
9. Tiny Abstract Flames
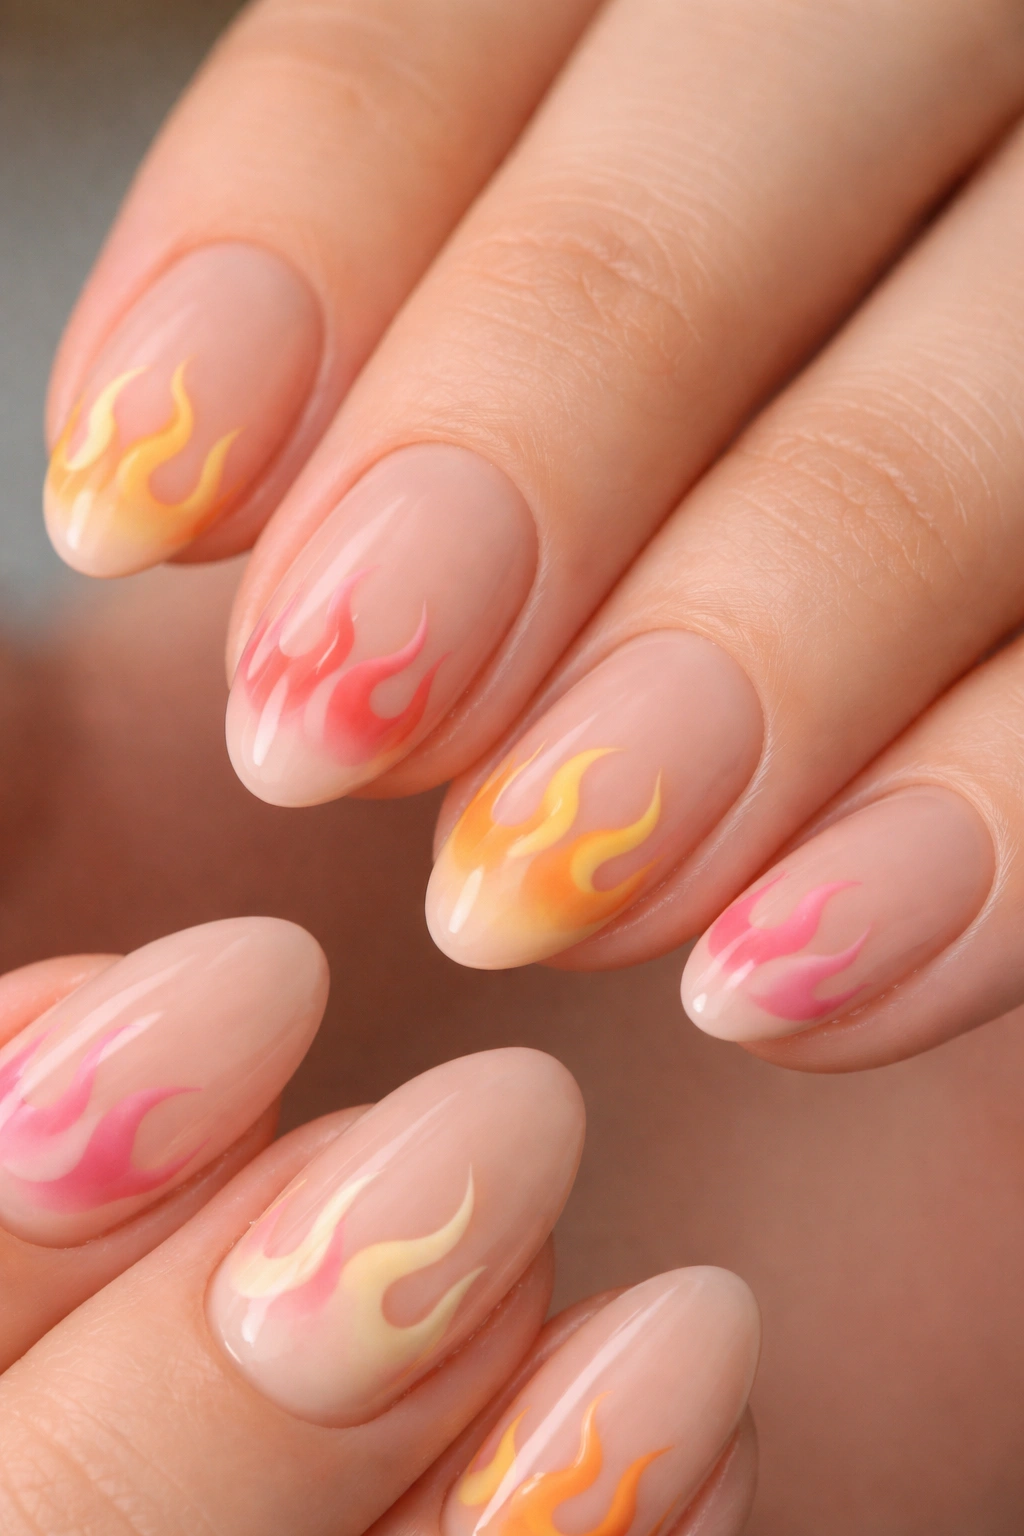
Flames on short almond nails can look sharp or silly, depending on how you handle them. The version I like uses soft, curved flame shapes in one or two colors, drawn low on the nail so they rise toward the tip. Because the nail is short, the flame should be compact and rounded, not long and aggressive.
This design gives you drama without needing a lot of length. Red and black is classic. Orange and cream feels warmer. Even dusty pink and brown can work if you want the idea of flame without the obvious color story.
A lot of people draw the flame too narrow. Wider bases usually look better on short nails because they leave more room for the almond taper. Keep the points soft. Harsh spikes can make the nail look cramped.
10. Half-Moon Patchwork
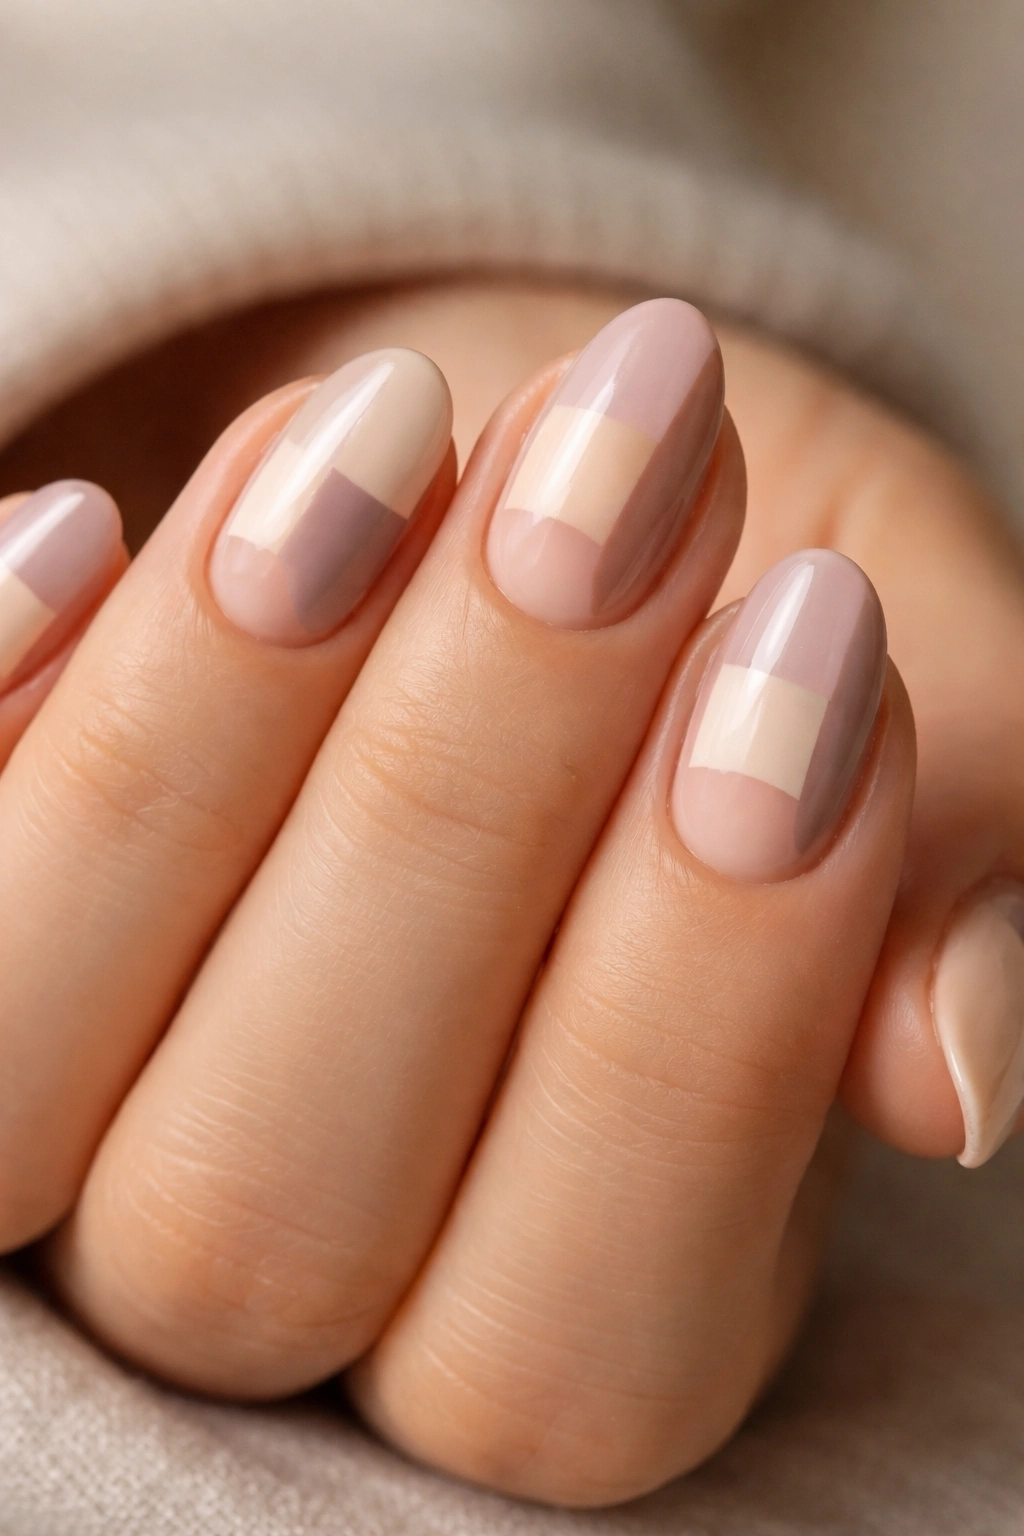
Half-moon patchwork is what happens when you stop trying to make each nail perfect and let the shapes do the talking. Paint a moon at the cuticle, a block on the side, a stripe across the middle, and leave the rest bare or neutral. The design becomes interesting because it feels assembled, not planned to death.
Why It Works on Short Almond Nails
The curved nail bed gives you a natural anchor point for the moon shape, and the taper at the tip keeps the rest from looking too heavy. That means you can split the nail into sections without making it feel busy. It’s a smart way to use abstract shapes on a small canvas.
Stick to two or three shades per set. If you bring in more than that, the design starts to lose its rhythm. And rhythm matters here more than color theory does.
How to Use It
- Place the moon slightly off-center for a looser look.
- Use one matte shade and one glossy shade if you want texture contrast.
- Keep the side blocks thin on the pinky and ring finger.
- Repeat one shape across the whole set so it feels connected.
11. Painterly Brush Strokes
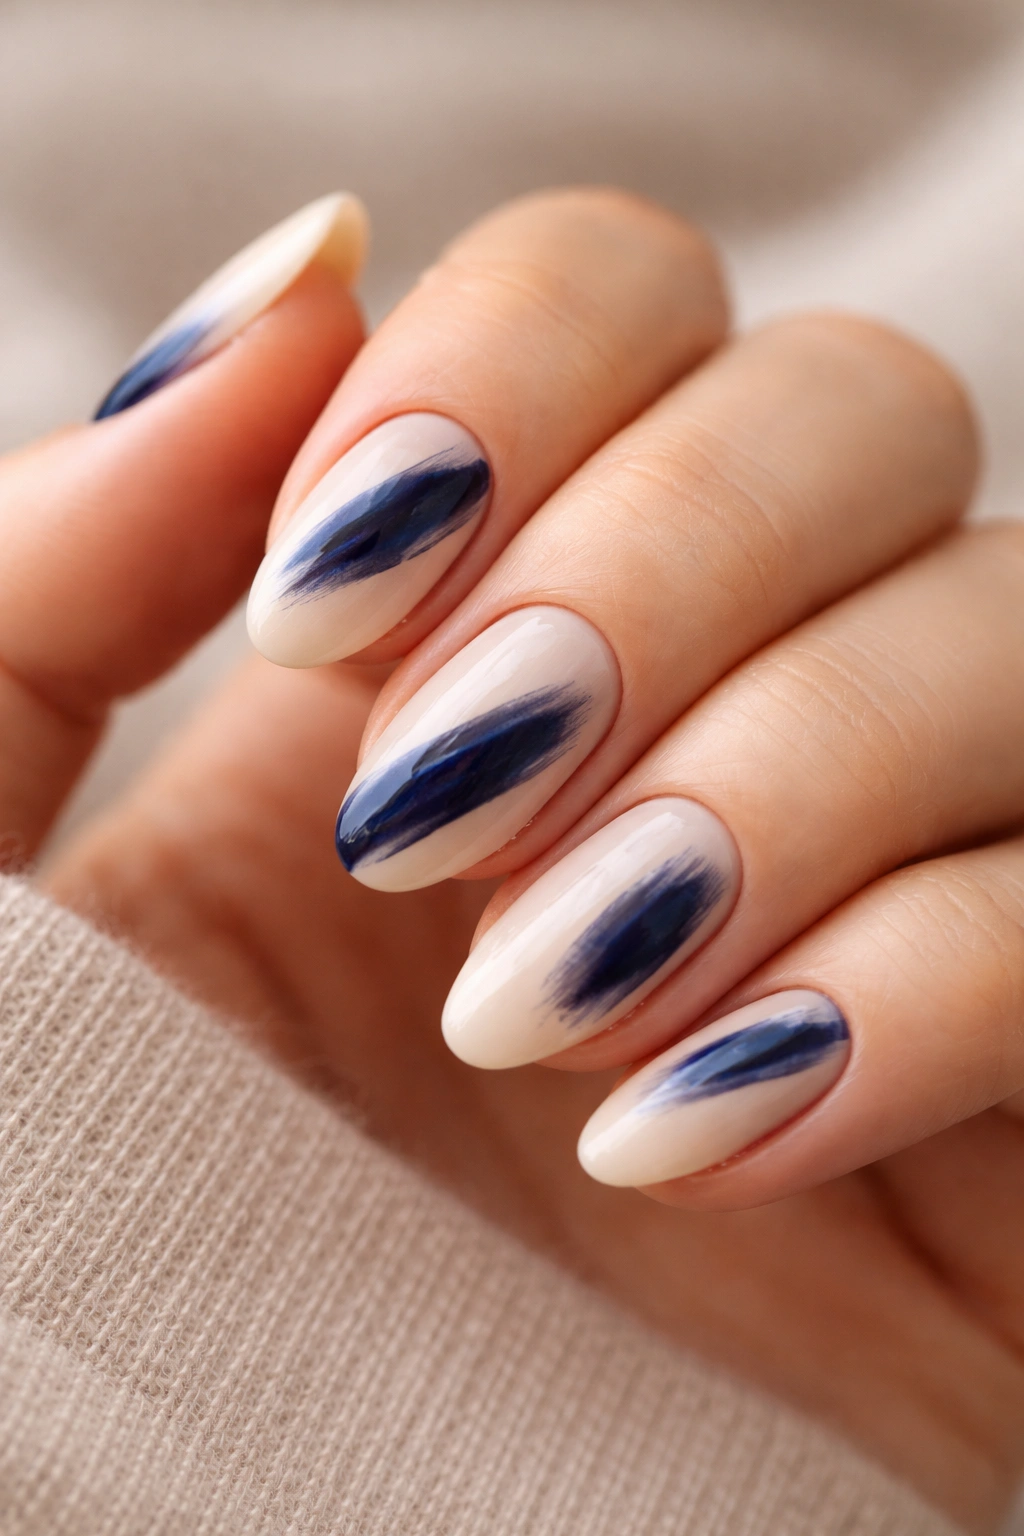
Brush-stroke nails are messy in the best way. A single thick swipe of color, dragged across a nude base, can look like a miniature painting if you keep the edges soft and the placement casual. Short almond nails are ideal for this because they leave enough room for the stroke to show, but not so much room that the design becomes theatrical.
I prefer this with one bold color and one calmer background. Navy on cream. Wine on blush. Forest green on beige. Those combinations give the brush mark room to stand out without screaming for attention. You can also layer two strokes so one peeks through the other, which creates a slightly worn-in look that I find more interesting than a perfect stripe.
Don’t aim for consistency across every nail. That’s how this design gets stiff. A brush stroke should look like a gesture. Quick. Done. Still pretty.
12. Offset Stripes
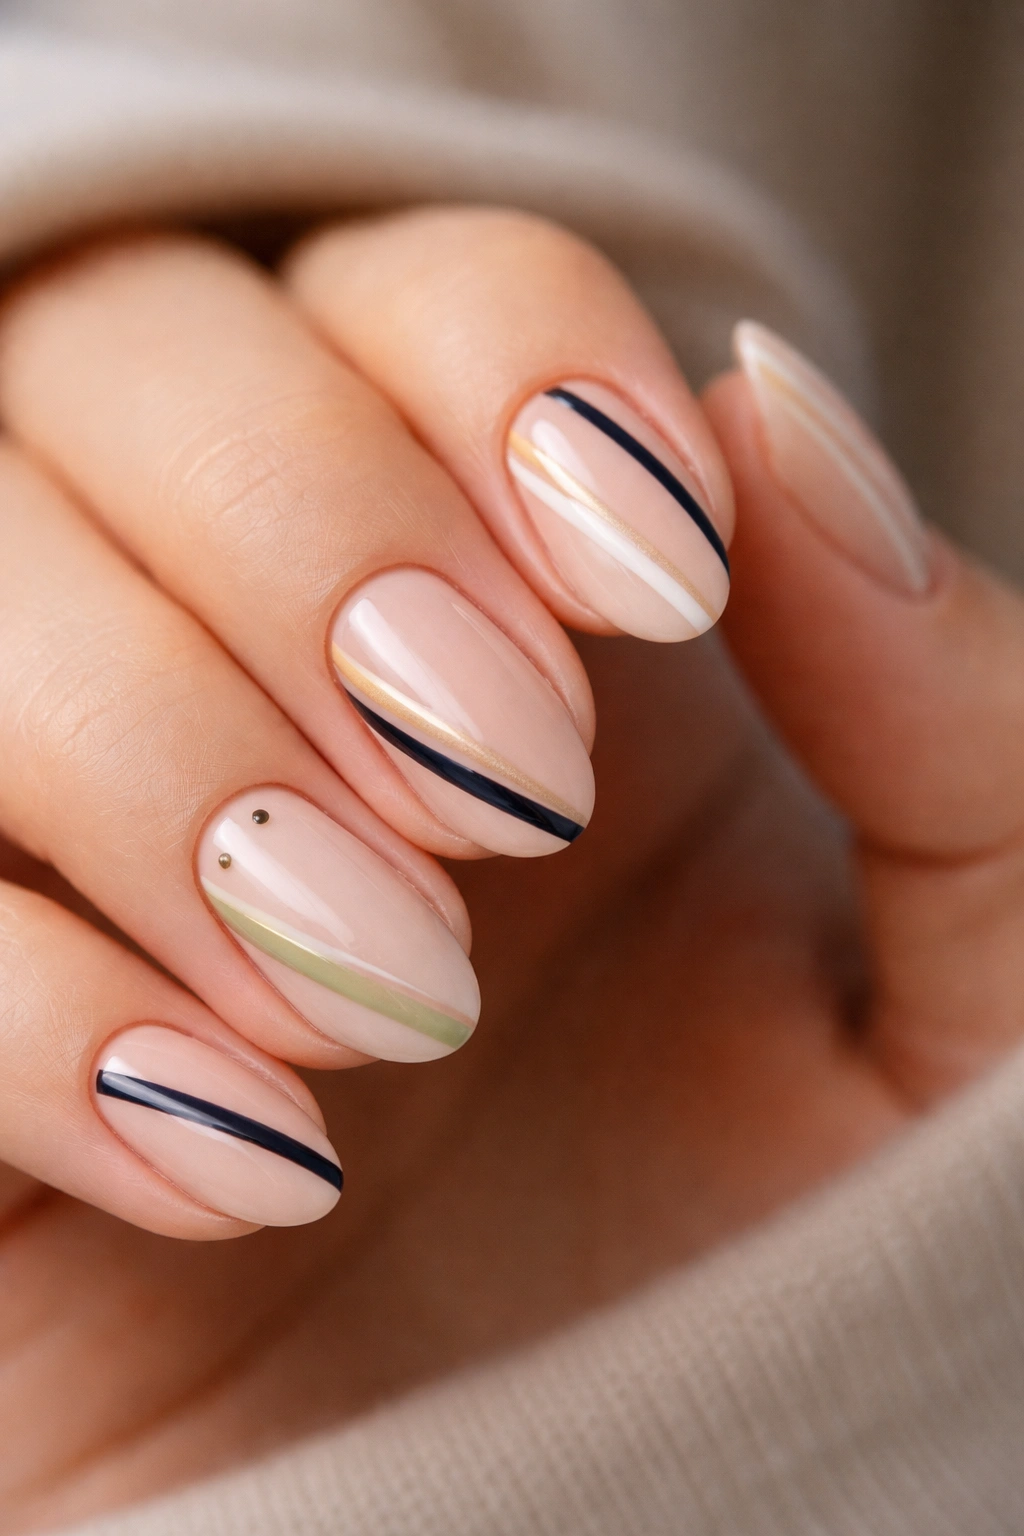
Straight stripes are fine. Offset stripes are better. Place one stripe near the sidewall, another a few millimeters away, and let them run at different angles so the design feels intentionally off balance. On short almond nails, that imbalance is where the charm lives.
The good thing about stripes is that they’re easy to adapt. Horizontal stripes make the nail feel wider, so use them sparingly. Vertical or diagonal stripes help lengthen the look of the hand. A single stripe plus one tiny dot is often enough. You do not need to fill the nail.
If you are using bright polish, keep the base sheer or nude. If you are using darker polish, a matte top coat can make the whole set feel more graphic. Clean line work matters here, but the lines do not have to be perfect. A slight hand-drawn edge looks better than a ruler-straight one.
13. Abstract Hearts That Barely Read as Hearts
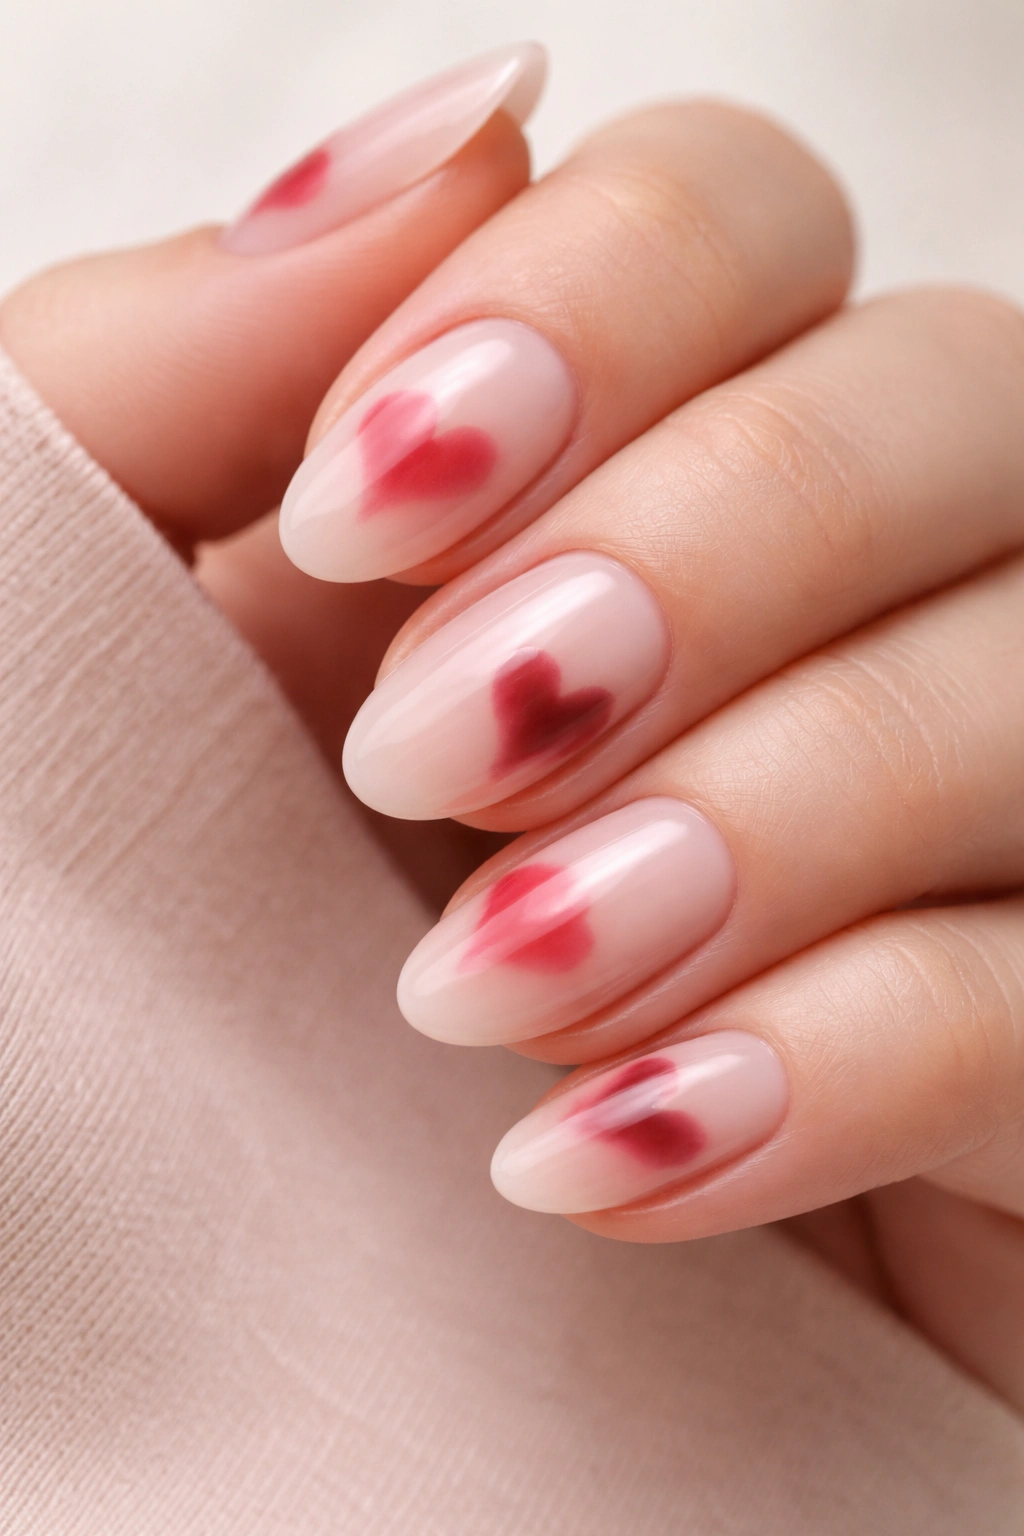
Abstract hearts are a nice choice when you want something soft but not sugary. Instead of a full heart shape, paint two rounded blobs that meet in the middle, or use a broken outline so the form only hints at a heart. On short almond nails, that subtlety keeps the design from getting cloying.
The shape works because the almond tip already has a romantic line to it. A tiny heart near the cuticle or off to one side can sit quietly on the nail without taking over. Red is the obvious choice, but burgundy, chocolate, dusty rose, and black all feel more grown-up.
This is one of those designs where restraint wins. If every nail has a heart, the effect gets loud fast. One or two accent nails are usually enough. Maybe three if the rest are bare.
14. Smudged Metallic Accents
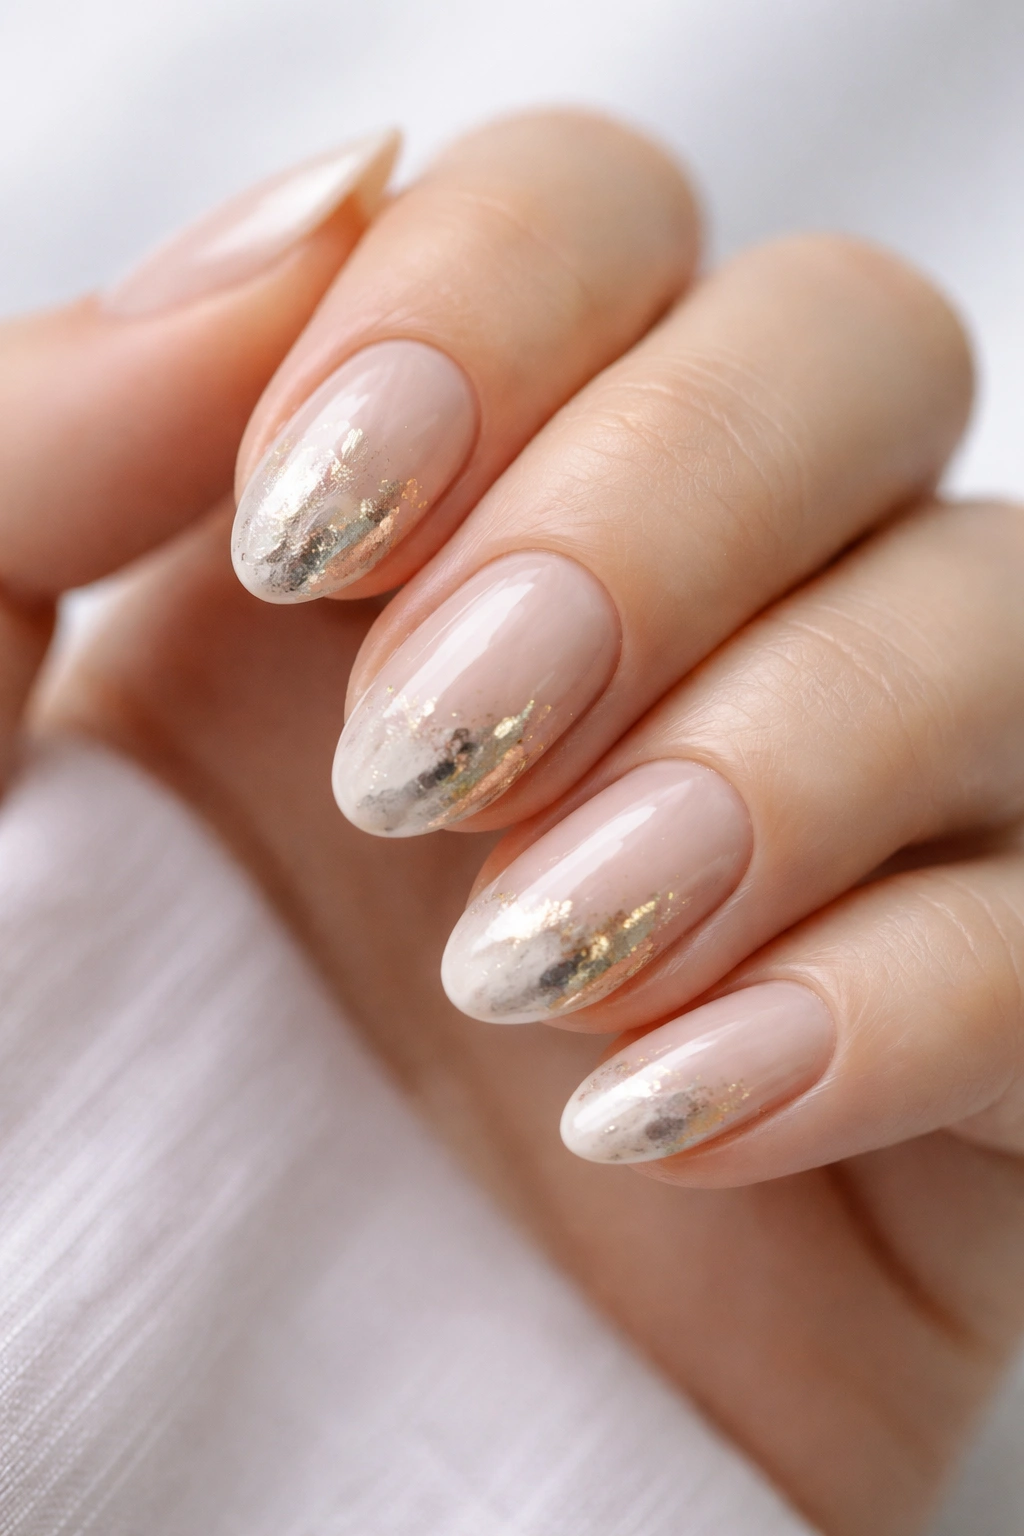
Metallic accents are where abstract nails start to feel a little more dressed up, but you still do not need much. Smudge gold, silver, bronze, or chrome into a corner of the nail, then blur the edge with a sponge or brush so it looks like a flash of foil rather than a hard block.
What Makes It Different
Metallic polish can be unforgiving if you paint it evenly across the whole nail. Smudged and partial, it feels more modern and less costume-y. On short almond nails, that small flash of shine catches the eye without making the manicure look overloaded.
Gold works best against milk white, blush, and tan. Silver looks cleaner with grey, black, or navy. Bronze sits somewhere in the middle and tends to flatter warmer skin tones, though that rule is not sacred. Try what you like. Your eyes will tell you fast enough.
A Practical Shortcut
- Use a sponge to tap metallic polish lightly.
- Leave one edge rough.
- Pair the shine with matte polish on another nail.
- Keep the metallic area under one-third of the nail.
15. Color-Blocked Tips with Bare Bases
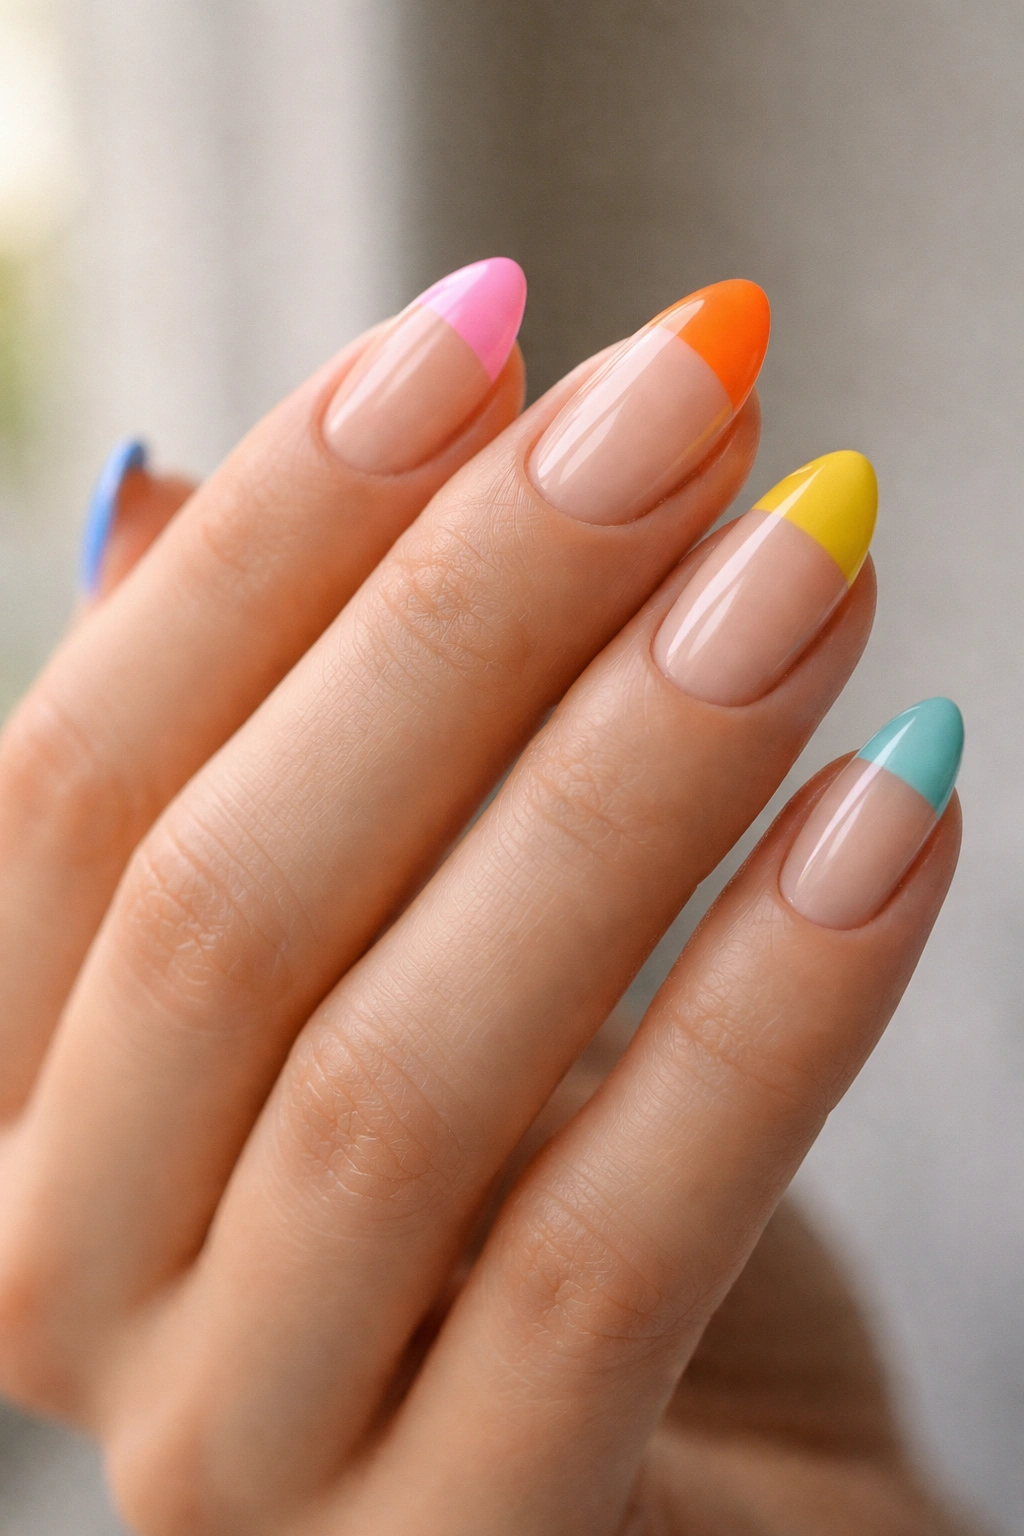
Color-blocked tips are the cleanest way to do abstract nails when you want order and freedom at the same time. Leave most of the nail bare, then paint the tip in a solid block of color that doesn’t quite follow the usual French curve. Angle it. Cut it into a wedge. Let it sit lower on one side than the other. That oddness is what makes it abstract.
This style is especially nice on short almond nails because the bare base keeps the manicure light. You get color without heaviness. You also get a design that grows out gracefully, which is a practical bonus people often ignore until they’re staring at chipped polish ten days later.
Try cream with espresso, blush with navy, or clear base with green. If you want the easiest version possible, use tape to mark the block, then remove it before the polish fully dries. Clean lines are easier than they look once you stop trying to make them perfect.
How to Make Short Almond Abstract Nails Look Intentional
A lot of abstract nails fail for one boring reason: they look random instead of arranged. That is fixable. The best short almond designs usually share at least one element across the set — the same color family, the same line thickness, the same kind of curve, or the same amount of bare space. You do not need all four. One is enough.
Shape matters too. The almond tip already gives the manicure a soft point, so designs that echo that curve tend to look better than rigid geometric blocks everywhere. Even when you do a square-ish accent, let some part of it tilt or soften. That tiny adjustment changes the whole read of the nail.
A glossy top coat makes most abstract sets feel cleaner, while matte top coat turns the same art into something calmer and a bit artsier. I prefer glossy when the design uses thin lines or dots. Matte works better when you are leaning into blocks, marbling, or muted tones. Both are good. Pick the finish that supports the design instead of fighting it.
Tools That Make the Design Easier
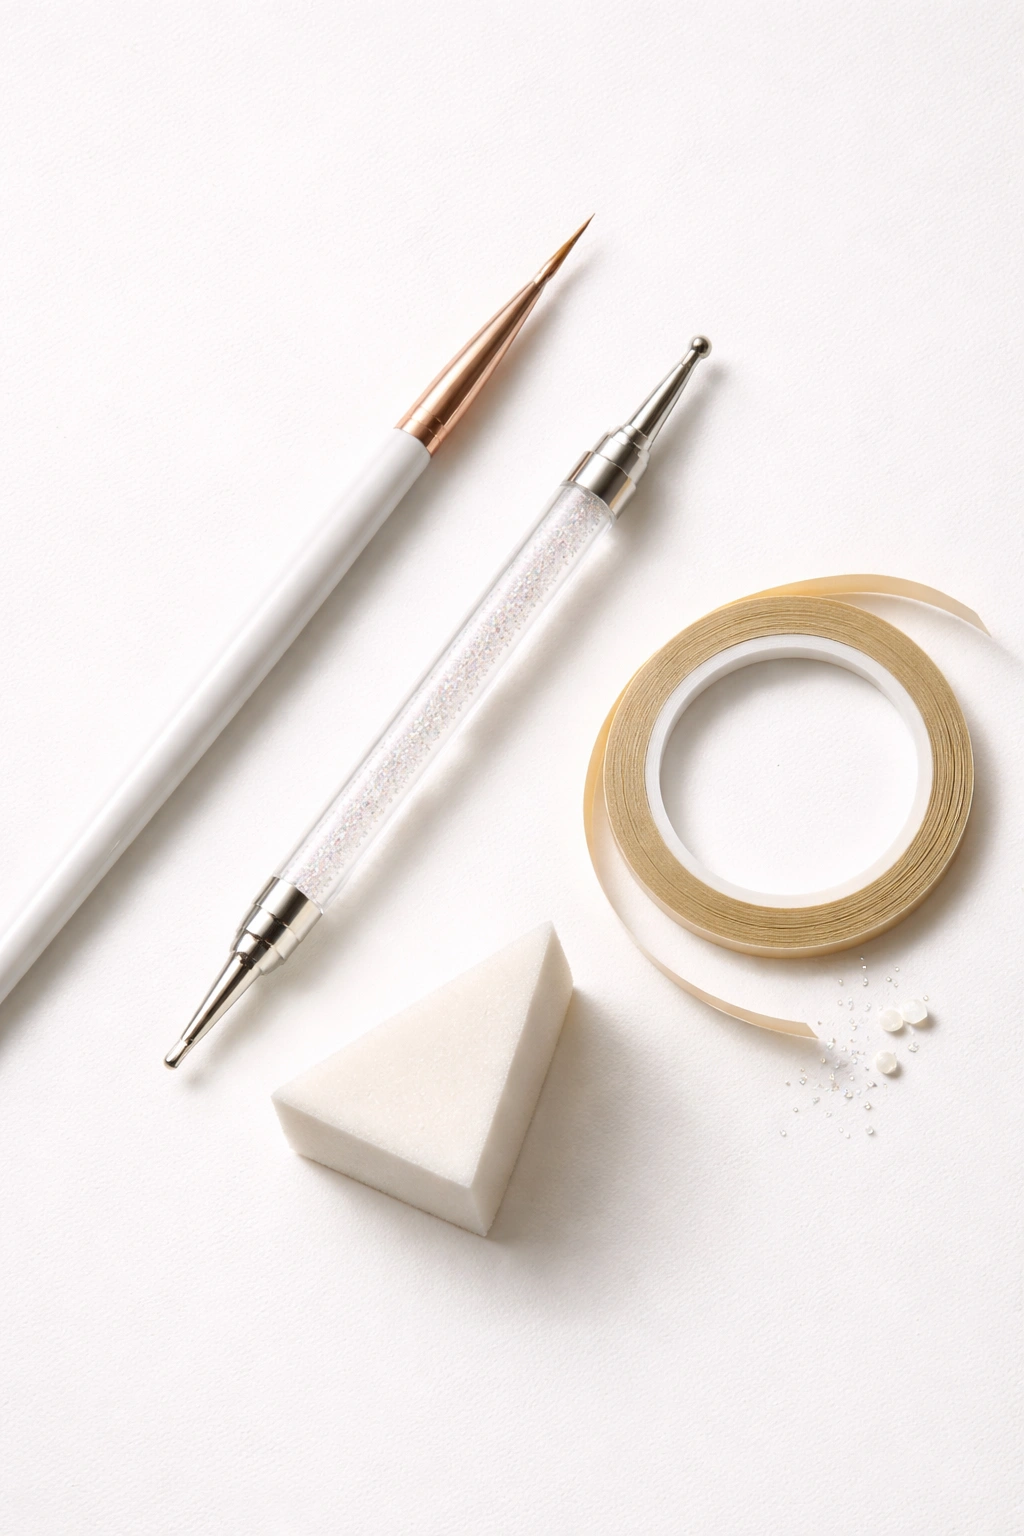
You do not need a drawer full of nail gear, but a few small tools help a lot. A thin liner brush gives you more control than a regular polish brush, especially for swirls and stripes. A dotting tool is useful, though a bobby pin works in a pinch. A sponge helps soften color blocks and metallic accents. Tape is worth keeping around if you want cleaner lines without spending half the afternoon correcting them.
Clean-up matters more than people admit. A small brush dipped in acetone lets you sharpen edges quickly, and that usually makes the difference between “cute abstract nails” and “I did this in bad light and hoped for the best.” Tiny fixes count.
If you only buy one thing, buy the liner brush. It earns its place fast.
Keeping the Manicure Neat for Longer
Short nails are forgiving, but the free edge still takes abuse from typing, washing dishes, and the usual daily nonsense. A good base coat helps the polish cling better, and wrapping the tip with top coat slows down chipping at the edge. Not glamorous. Useful.
Oil your cuticles. That sounds unrelated, but dry skin makes even a good manicure look tired faster. A drop of cuticle oil massaged in once or twice a day keeps the whole hand looking softer, which matters more than most people think when the nail art itself is minimal.
If your design uses thin lines, skip hand soap with heavy scrubbing grit and avoid long soaks right after painting. Water is not the enemy, but repeated wet-dry cycles are rough on polish. Let the manicure set fully before you start living your life again. Boring advice. Still true.
Final Thoughts
Short abstract almond nails work because they do not ask for perfection. They ask for shape, contrast, and a little nerve. That is a much friendlier deal, and honestly, a more interesting one.
The strongest designs here all share the same quiet trick: they leave space. A naked patch, a soft edge, a line that does not quite meet the end. That emptiness is part of the look, not a mistake you need to fix.
Pick one idea, keep the palette tight, and stop before you overwork it. Abstract nails look best when they still feel a little alive.
