

Valentine’s Day isn’t just about romantic love—it’s the perfect time to celebrate your ride-or-die friendship too. What better way to show the world you’re besties than with matching nail designs that scream “we’re a package deal”? Think coordinating hearts, complementary colors, and designs that fit together like puzzle pieces.
Matching Valentine nails with your best friend is more than just a cute photo op (though you’ll definitely want to snap those hand pics). It’s a fun bonding experience that turns a regular mani appointment into a memorable hangout. Whether you’re planning a Galentine’s celebration, need something festive for a friend group outing, or just want to twin with your bestie, there’s a coordinating nail design that’ll fit your vibe.
The beauty of matching nails is that you don’t have to be exactly the same. You can swap colors, mirror designs, or create complementary looks that work together. One of you might rock pink nails while the other goes for red. Or you could split a design down the middle—literally.
Why Matching Nails Are Perfect for Valentine’s Day
Valentine’s nails have always been about hearts, pinks, and reds. But when you coordinate with your best friend, you’re adding another layer of meaning to the holiday. You’re saying that friendship matters just as much as any other kind of love.
There’s something special about looking down at your nails and knowing your best friend has a coordinating set. It’s like wearing matching friendship bracelets, but way more grown-up. Plus, matching nails make for incredible Instagram content—your followers will eat up those side-by-side hand shots.
The timing couldn’t be better either. February gives you the perfect excuse to play with romantic colors and sweet designs without it feeling over-the-top. Pink chrome, red glitter, tiny hearts—it’s all fair game. Your matching manicure becomes a conversation starter wherever you go.
How to Choose Your Perfect Matching Design
Before you book that nail appointment, you’ll want to pick a design that works for both of you. Consider your nail preferences first. Does one of you prefer short nails while the other loves length? No problem—most matching designs work across different nail shapes and sizes.
Think about your color preferences too. If one of you gravitates toward cool tones and the other loves warm shades, find a middle ground. Baby pink and burgundy can create a gorgeous contrast. Or try a neutral base with colored accents that you can customize.
Your lifestyle matters when choosing a design. If one of you types all day at a computer, maybe skip the super long stiletto nails. Shorter almond or square shapes can look just as cute and won’t get in the way of daily tasks. The goal is to find something you’ll both actually want to wear for the full two weeks.
Don’t forget to discuss your budget beforehand. Some designs require builder gel, chrome powder, or tons of hand-painted details that’ll cost extra at the salon. Other looks are simple enough to DIY at home with press-ons or regular polish. Being on the same page about spending keeps things stress-free.
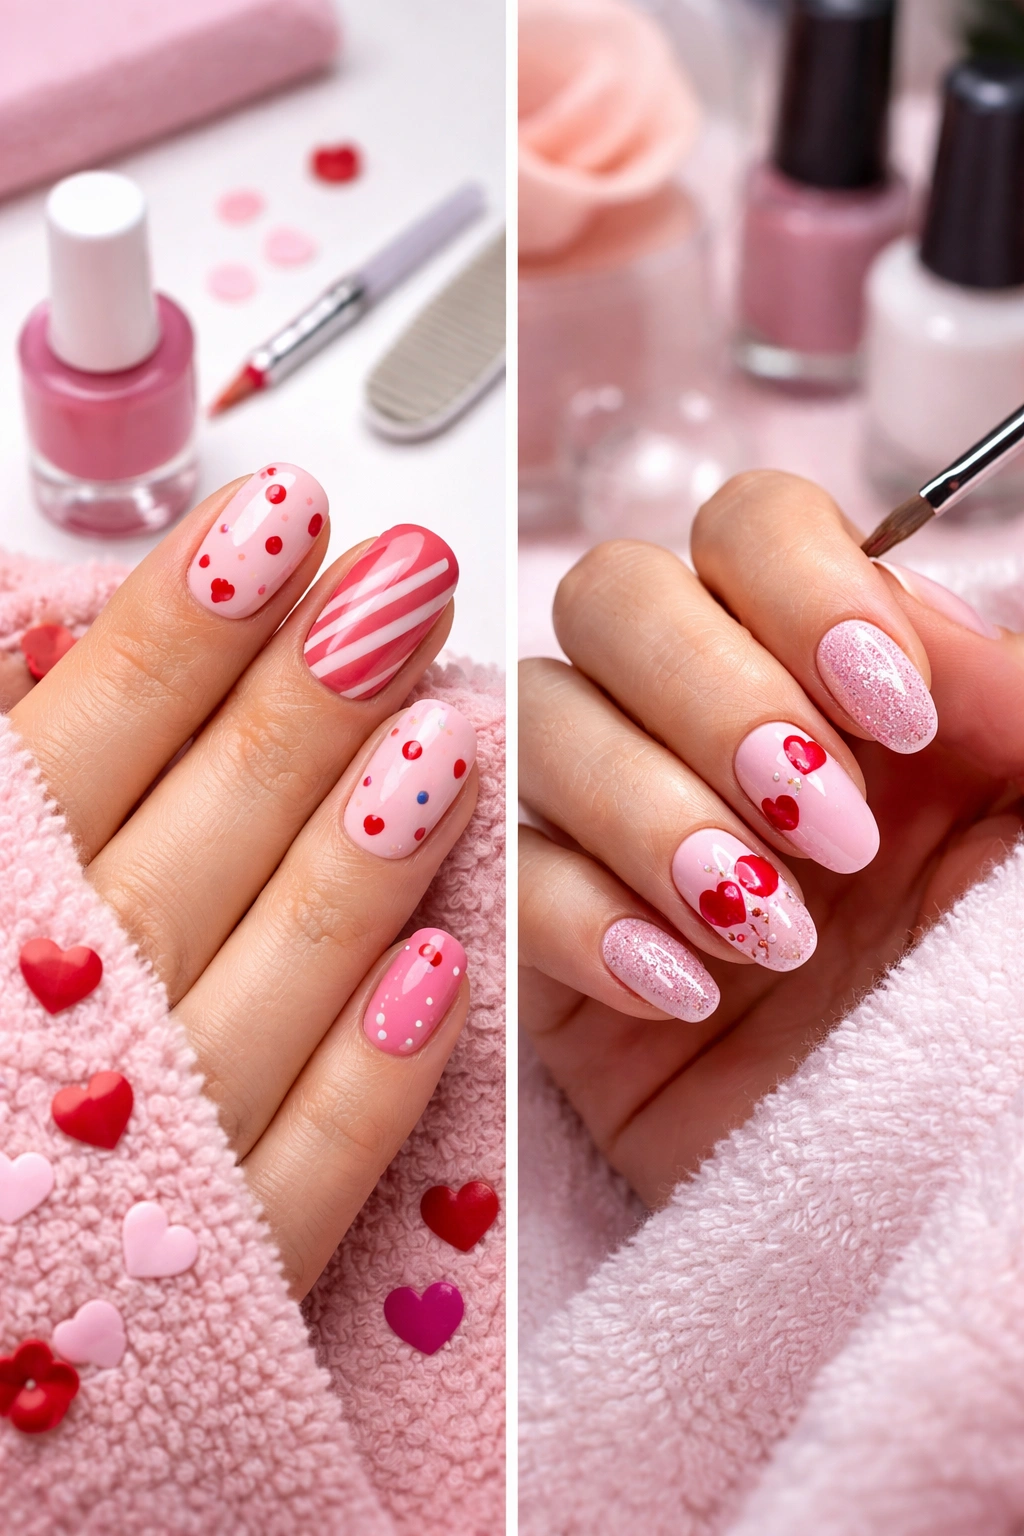
1. Pink and Red Polka Dots
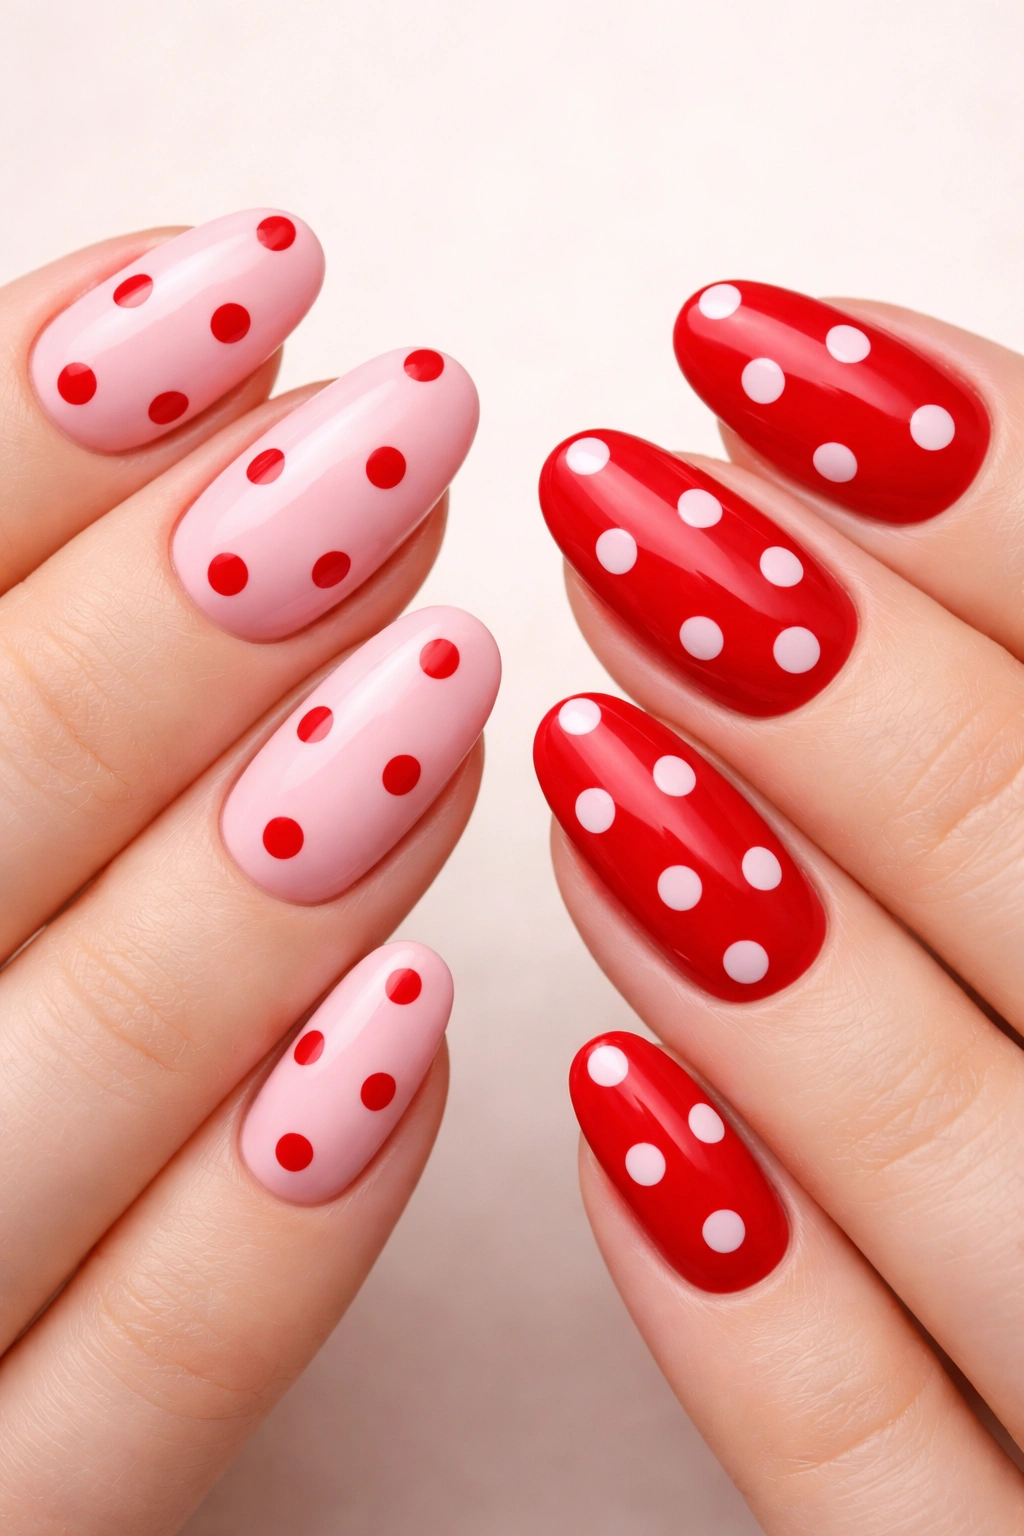
This playful design is perfect if you want something fun without being too literal about Valentine’s Day. The concept is simple: one of you paints your nails pink with red dots, while your bestie goes red with pink dots. It’s like you’re mirror images of each other.
The polka dot pattern is surprisingly easy to recreate at home. After applying your base color and letting it dry completely, grab a dotting tool (or the end of a bobby pin works too). Dip it in your contrasting polish and create evenly spaced dots across each nail. You don’t need perfect placement—a slightly random pattern actually looks more organic and fun.
What makes this design work so well is the color swap. When you hold your hands together, the inverse colors create this really cool coordinated effect. It’s obvious you planned it together without being matchy-matchy in an awkward way.
Finish with a glossy top coat to seal everything in. The shine makes the colors pop even more and helps your manicure last longer. This design typically stays chip-free for about a week, which is pretty good for a DIY job.
2. Heart French Tips
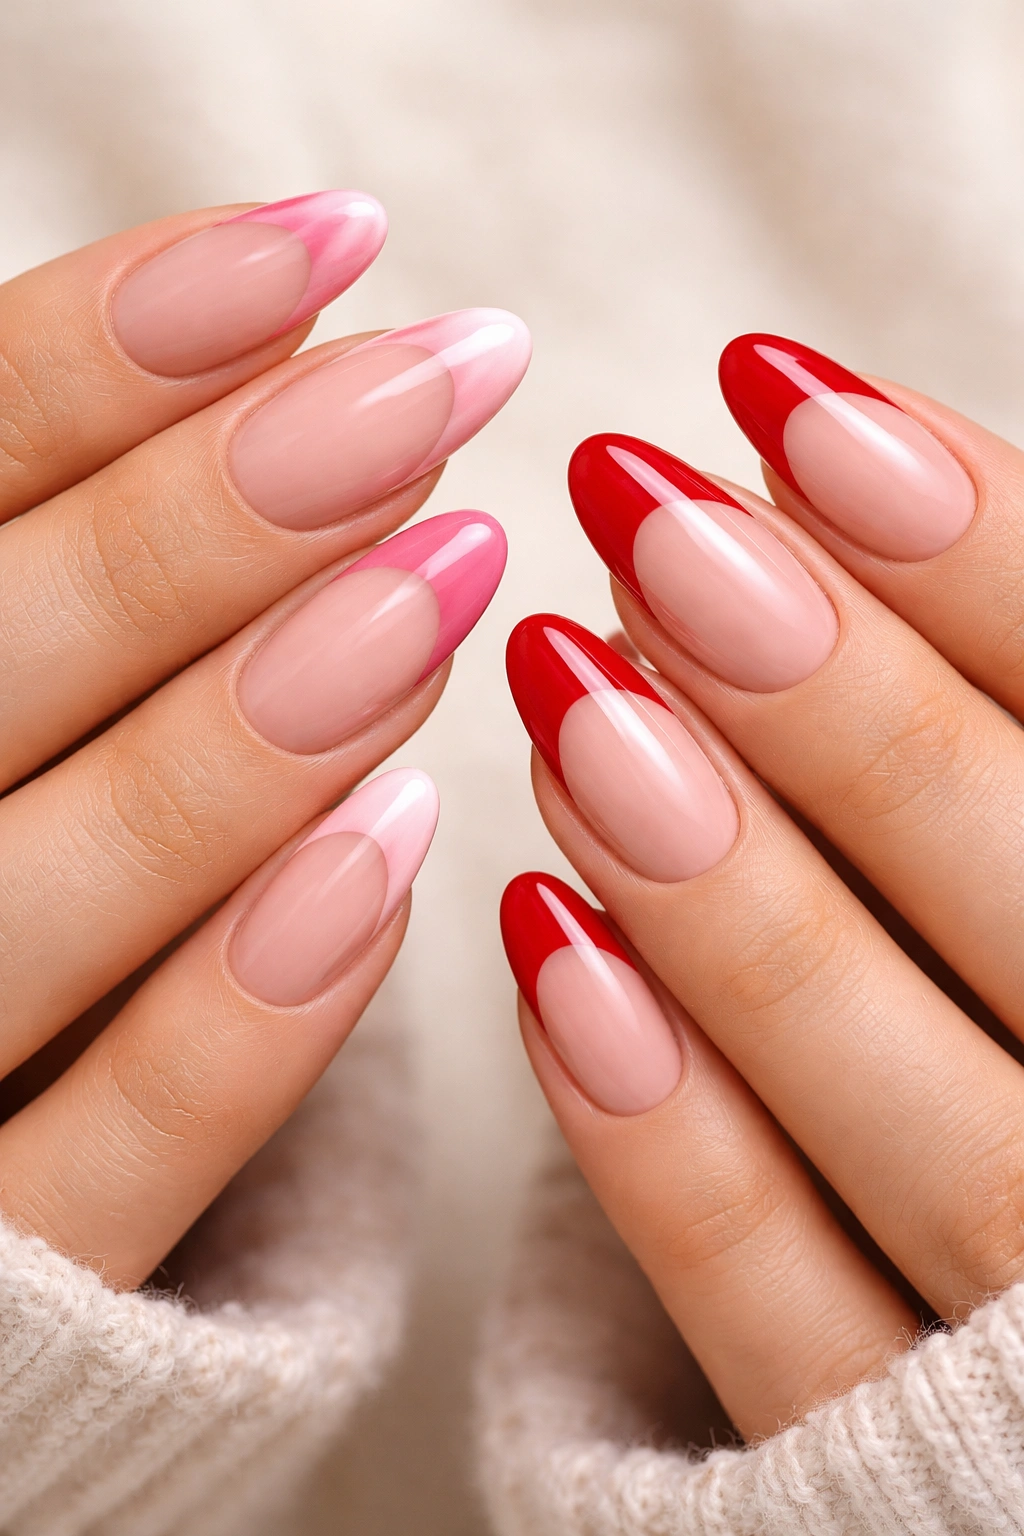
French manicures get a Valentine’s upgrade with this classic design. Instead of the traditional curved tip, you’ll create heart-shaped tips using red or pink polish. One friend can go with pink hearts on a nude base, while the other rocks red hearts—or you can both do the same color if you prefer total matching.
The trick to getting clean heart shapes is patience. Use a thin nail art brush and work slowly. Start by creating two small dots side by side at the tip of your nail, then drag the polish down and inward to form the bottom point of the heart. If you mess up, a cotton swab dipped in nail polish remover becomes your best friend.
This design works beautifully on longer nail shapes like almond or coffin. The extra length gives you more canvas to work with, making the hearts more visible and impactful. That said, it can definitely work on shorter nails too—you’ll just have smaller, more delicate hearts.
For extra coordination, consider adding tiny hearts to your ring fingers while keeping the other nails as classic French tips. This creates visual interest without overwhelming the overall look. It’s that perfect balance between festive and wearable.
3. Inverse Color Blocking
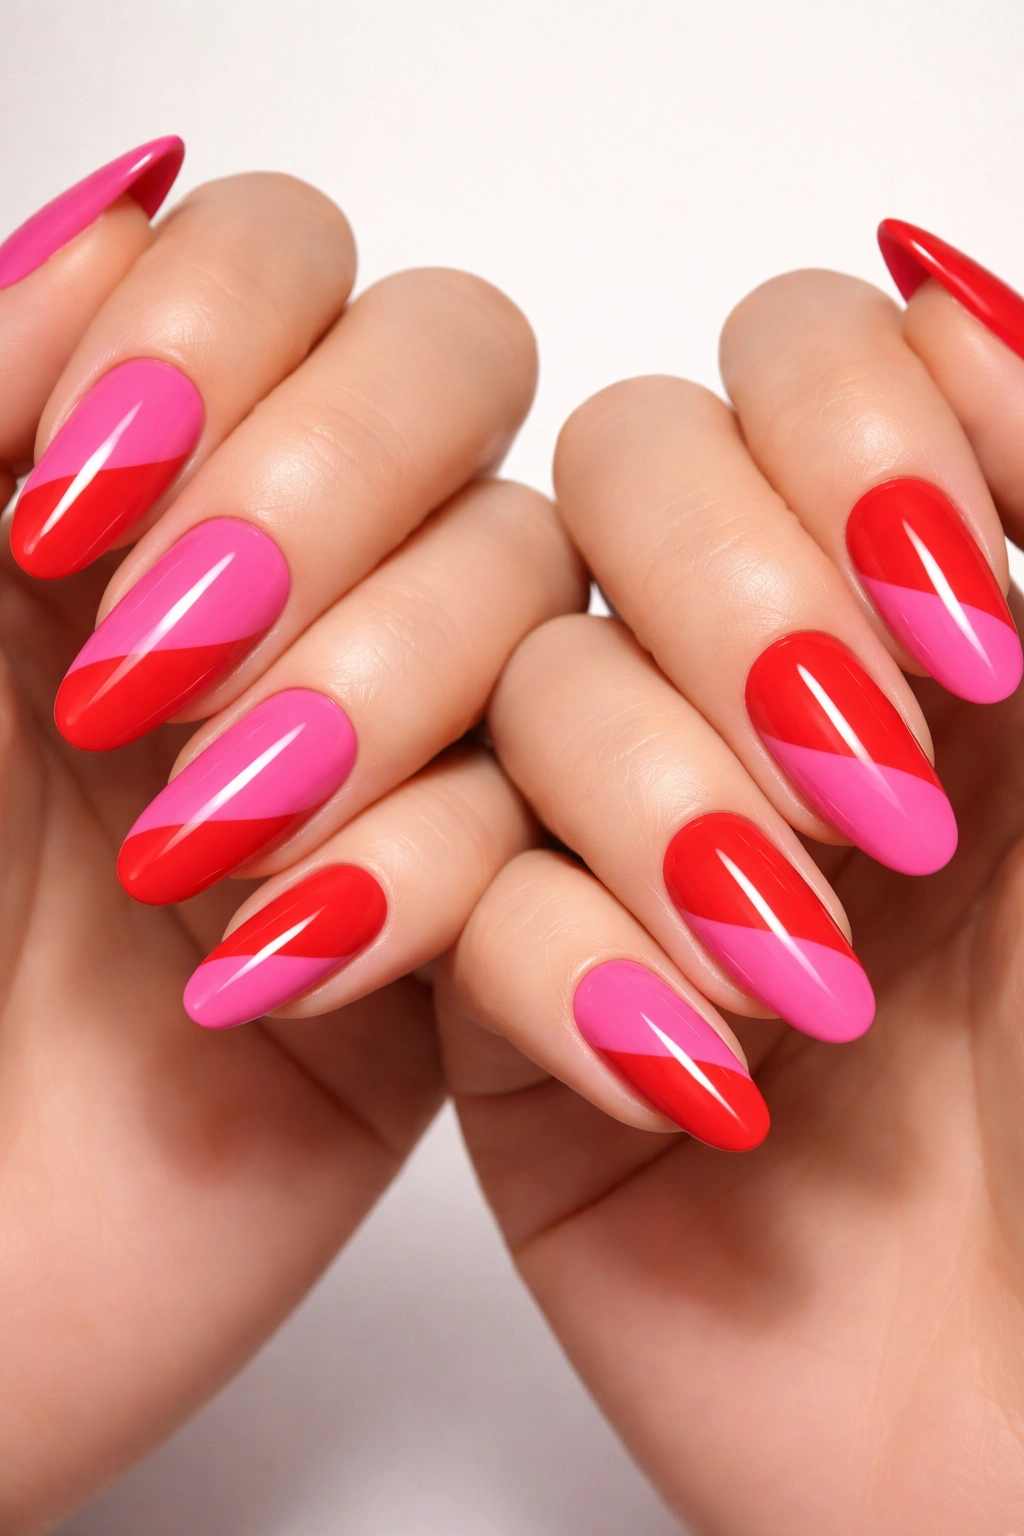
Color blocking creates a bold, modern look that’s perfect for besties who like to make a statement. Here’s how it works: you both choose the same two colors (let’s say hot pink and electric red), but you flip which color goes where. If your pointer and ring fingers are pink, your bestie’s are red, and vice versa.
This design has serious visual impact when you put your hands side by side. The coordinating colors make it clear you planned this together, but you’re each rocking your own unique pattern. It’s like wearing opposite jerseys for the same team.
The beauty of color blocking is that you can make it as simple or complex as you want. Start with just two colors if you’re new to nail art. Feeling more ambitious? Add a third accent color on your ring fingers or incorporate a small heart design on one nail per hand.
Application is straightforward since you’re working with solid colors. Just make sure each coat is completely dry before moving to the next nail to avoid smudging. Two thin coats of each color will give you better coverage and a smoother finish than one thick coat.
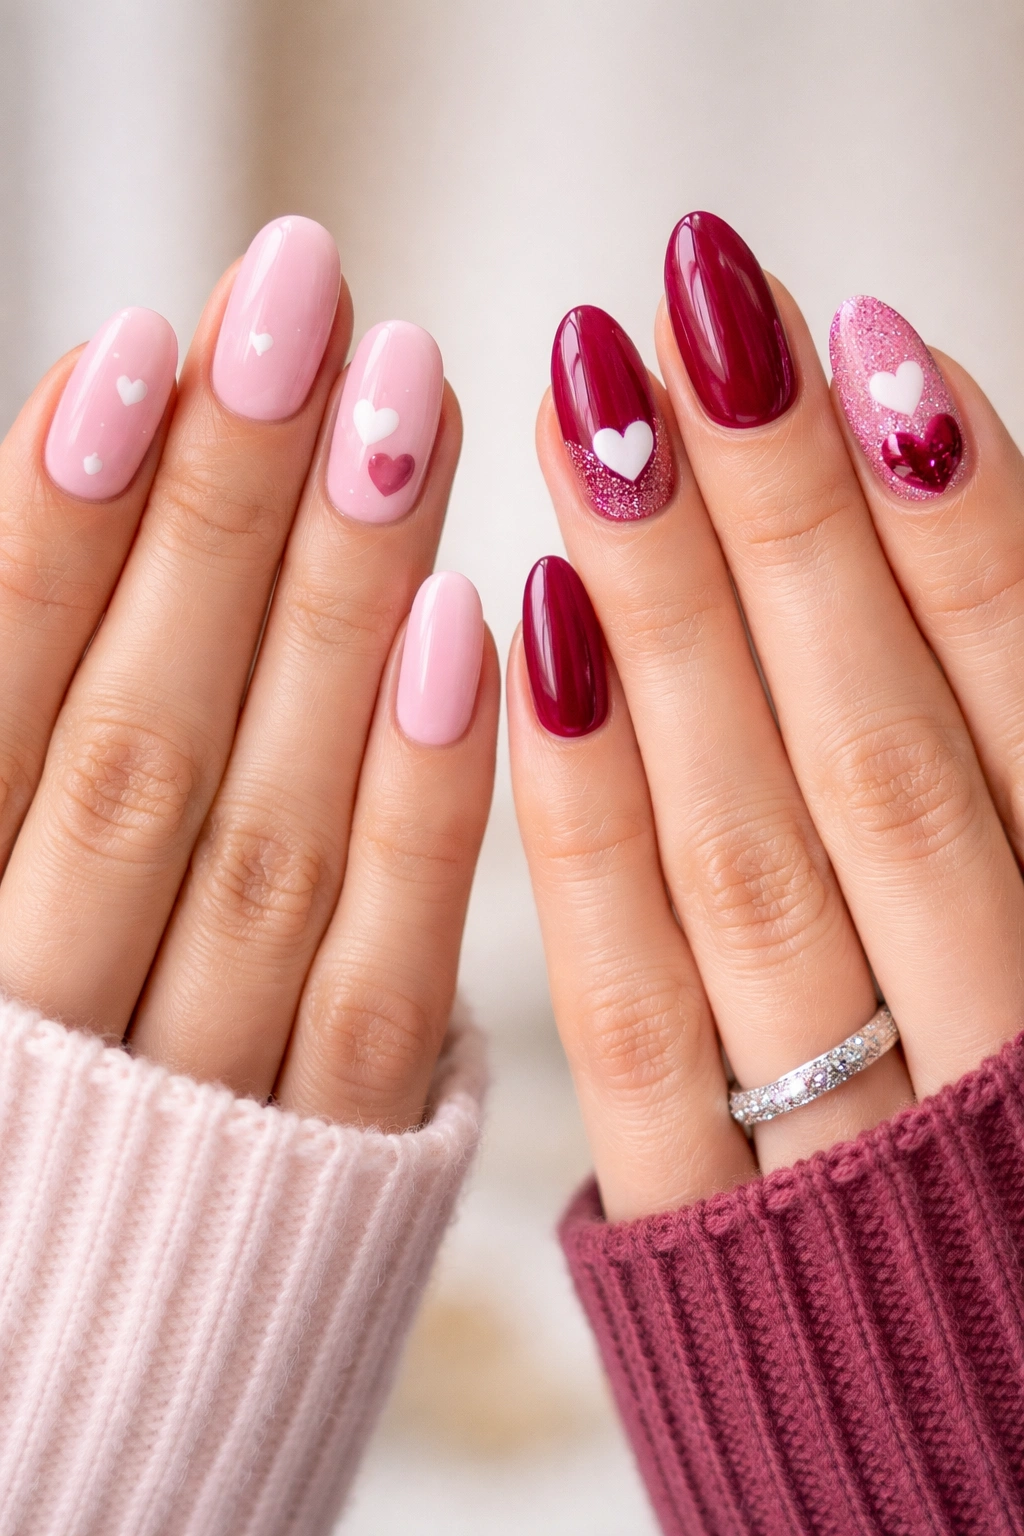
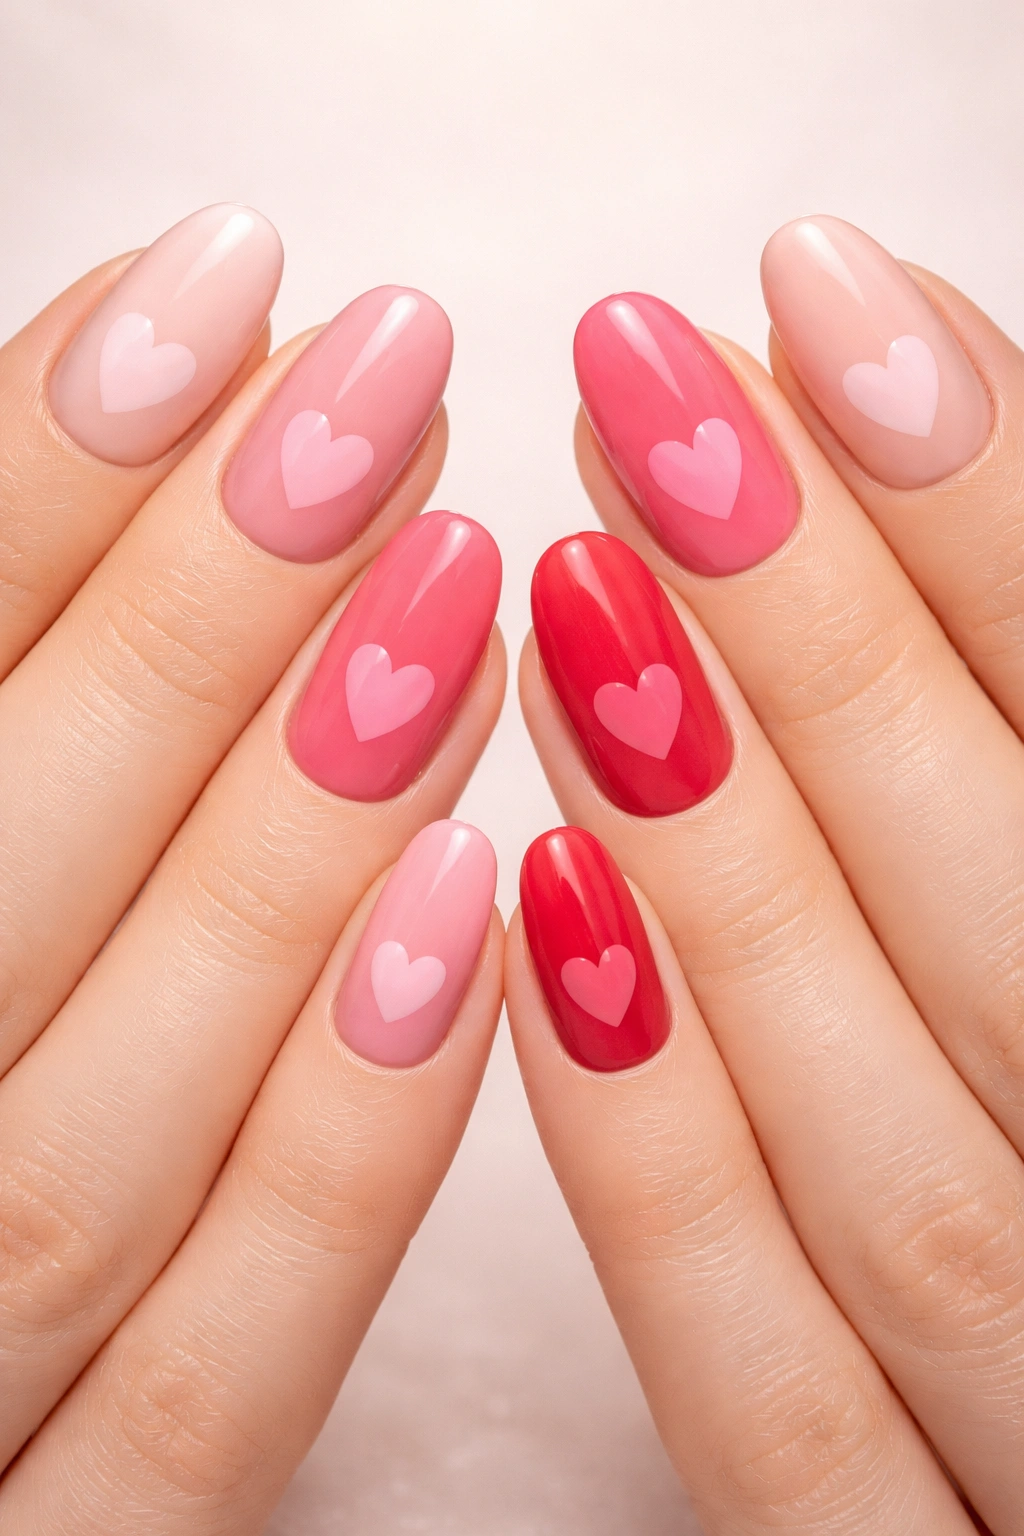
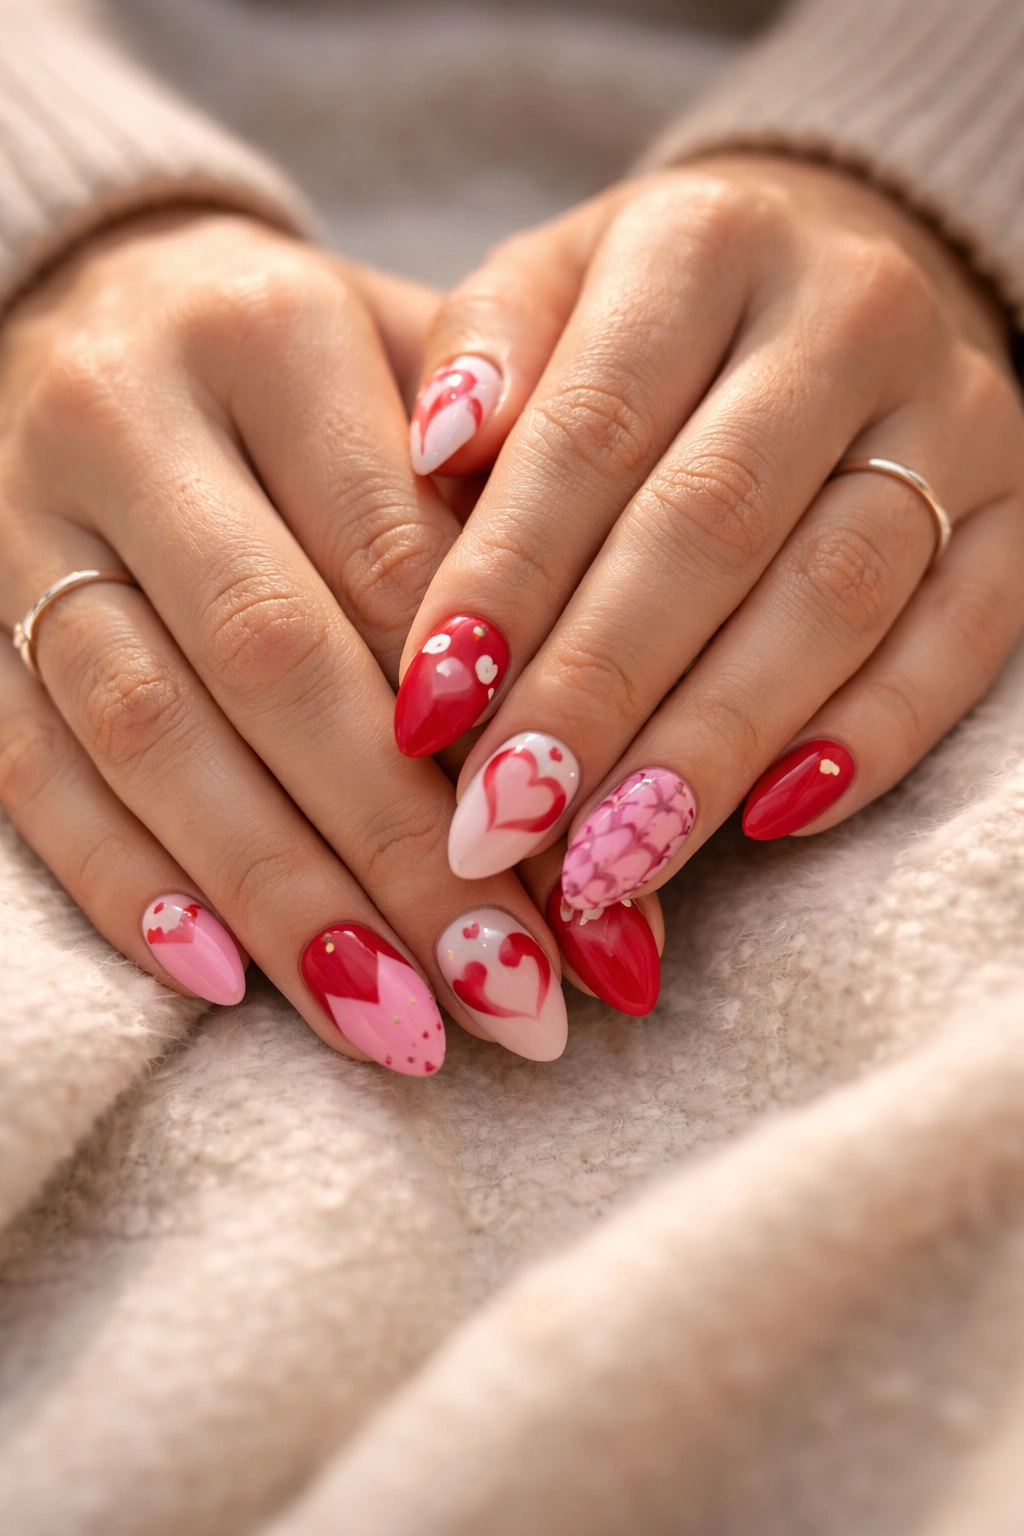
4. Classic Red with Heart Accents
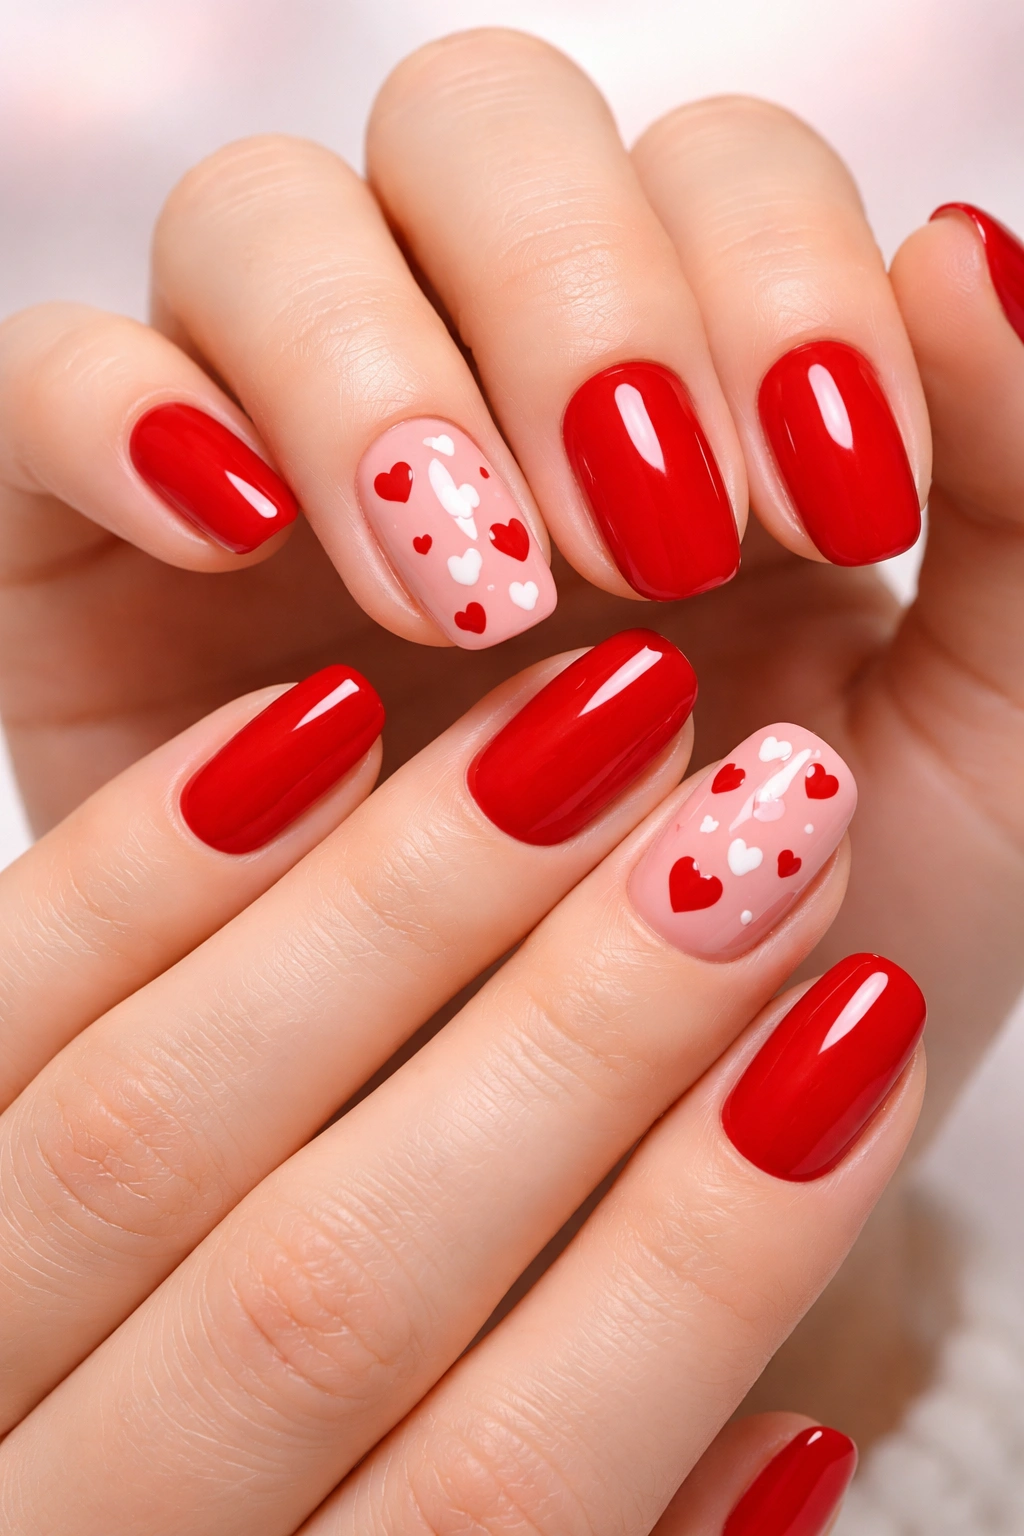
You can’t go wrong with a timeless red manicure, especially for Valentine’s Day. To make it a matching moment with your best friend, add small heart details in different placements or colors. One of you might have white hearts on red nails, while the other does pink hearts.
The red base gives this design a sophisticated, grown-up vibe. It’s not cutesy or juvenile—it’s elegant with just a hint of Valentine’s whimsy. This makes it perfect if you’re heading to a nice dinner or event where you want to look polished.
For the heart accents, you have options. Use a dotting tool to create two small dots and drag them into a heart shape. Or grab some heart-shaped nail stickers from any beauty supply store—they’re foolproof and save tons of time. Nail stickers are honestly underrated for how professional they can look.
Consider putting hearts on just your ring fingers as accent nails. This keeps the overall look balanced and prevents it from feeling too busy. The rest of your nails stay that gorgeous, glossy red that photographs beautifully.
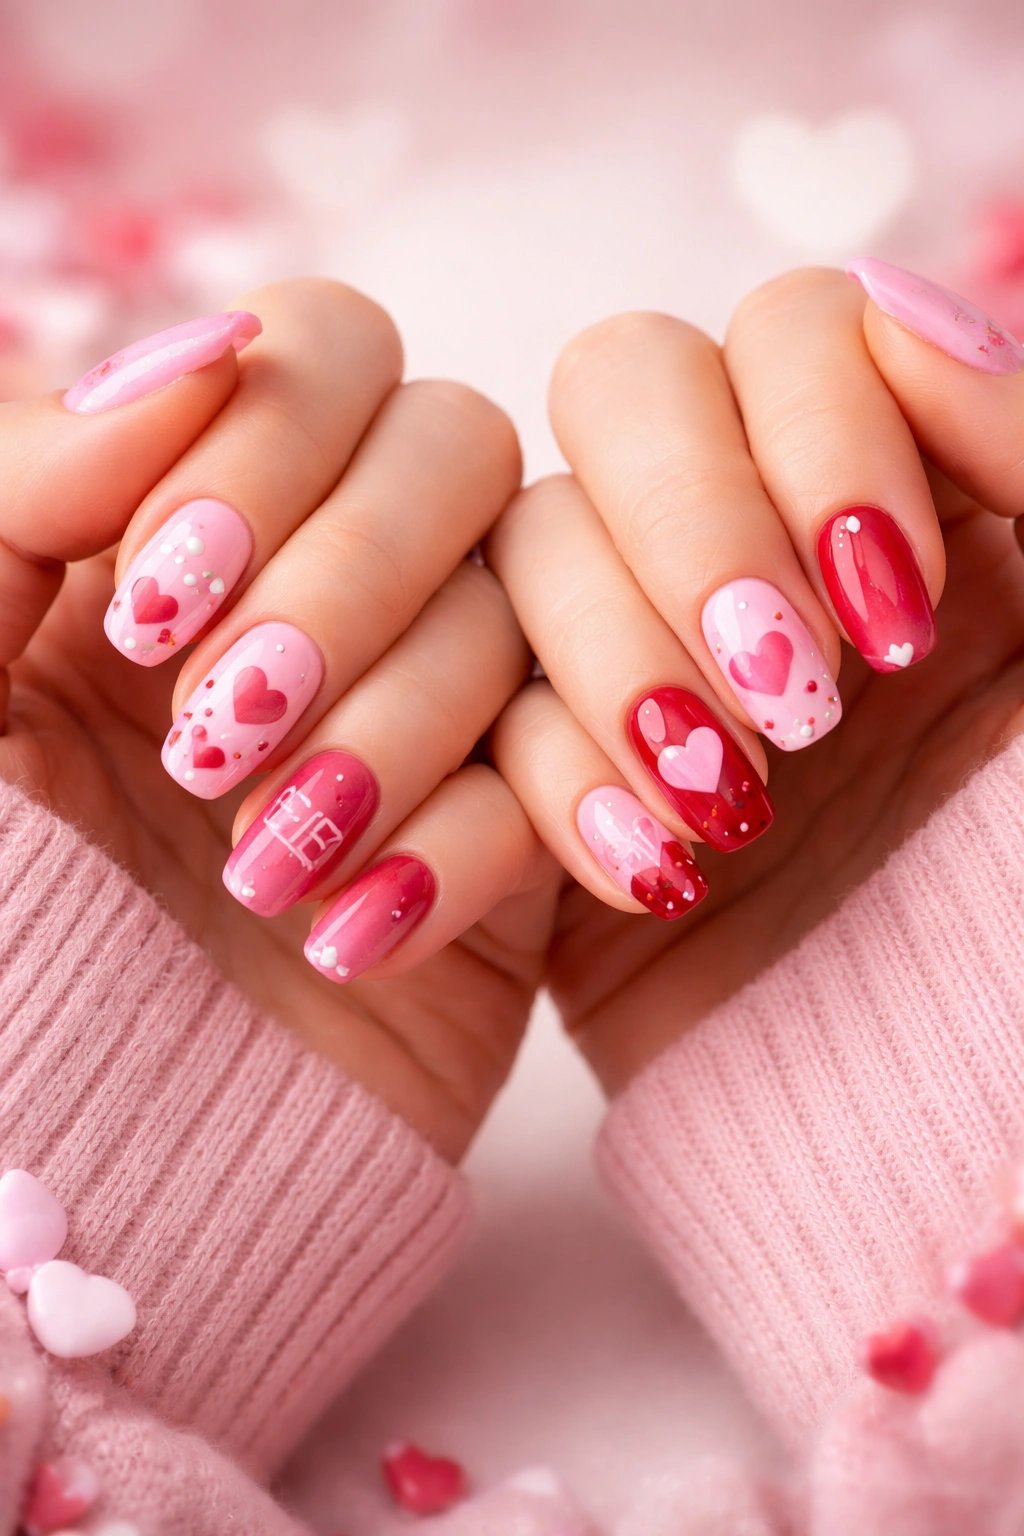
5. Jelly Polish with Hearts

Jelly nails have that gorgeous translucent quality that looks like lip gloss on your fingertips. For a matching bestie look, you can both use the same pink jelly base but add different colored hearts underneath. The jelly layer creates this cool dimensional effect where the hearts look suspended in the polish.
To create this look, start with a white or nude base coat. While it’s still tacky, paint your hearts using regular polish in red, pink, or white. Let those dry completely—we’re talking at least 10 minutes. Then apply your jelly polish over the top. The translucent layer will give the hearts that soft, dreamy appearance.
If you don’t have jelly polish, you can make your own by mixing a tiny bit of regular polish with clear top coat. It won’t be quite as perfect as real jelly polish, but it’ll give you a similar effect. The key is getting that sheer, buildable coverage.
This design works especially well on shorter to medium length nails. The jelly effect can sometimes make very long nails look less polished, but on shorter nails? Chef’s kiss. It’s that perfect balance of fun and sophisticated.
6. Yin and Yang Coordination

This design is all about balance—literally. One friend wears black nails with white details (like hearts or dots), while the other rocks white nails with black accents. It’s a fresh take on Valentine’s nails that ditches the traditional pink-and-red palette entirely.
The contrast between black and white creates such a striking visual effect. When you hold your hands together, it’s like you’re literally showing the world that you complete each other. It’s the perfect design for best friends who appreciate a slightly edgier, more alternative aesthetic.
You can customize the details to fit your style. Add small white hearts to the black nails and black hearts to the white nails. Or go with polka dots, stripes, or even tiny star designs. The monochrome palette means almost any pattern will work beautifully.
This design also has serious staying power beyond Valentine’s Day. Unlike super themed looks with candy hearts or Cupid motifs, this black and white coordination works year-round. You’ll actually want to keep wearing it long after February 14th.
7. Candy Heart Messages
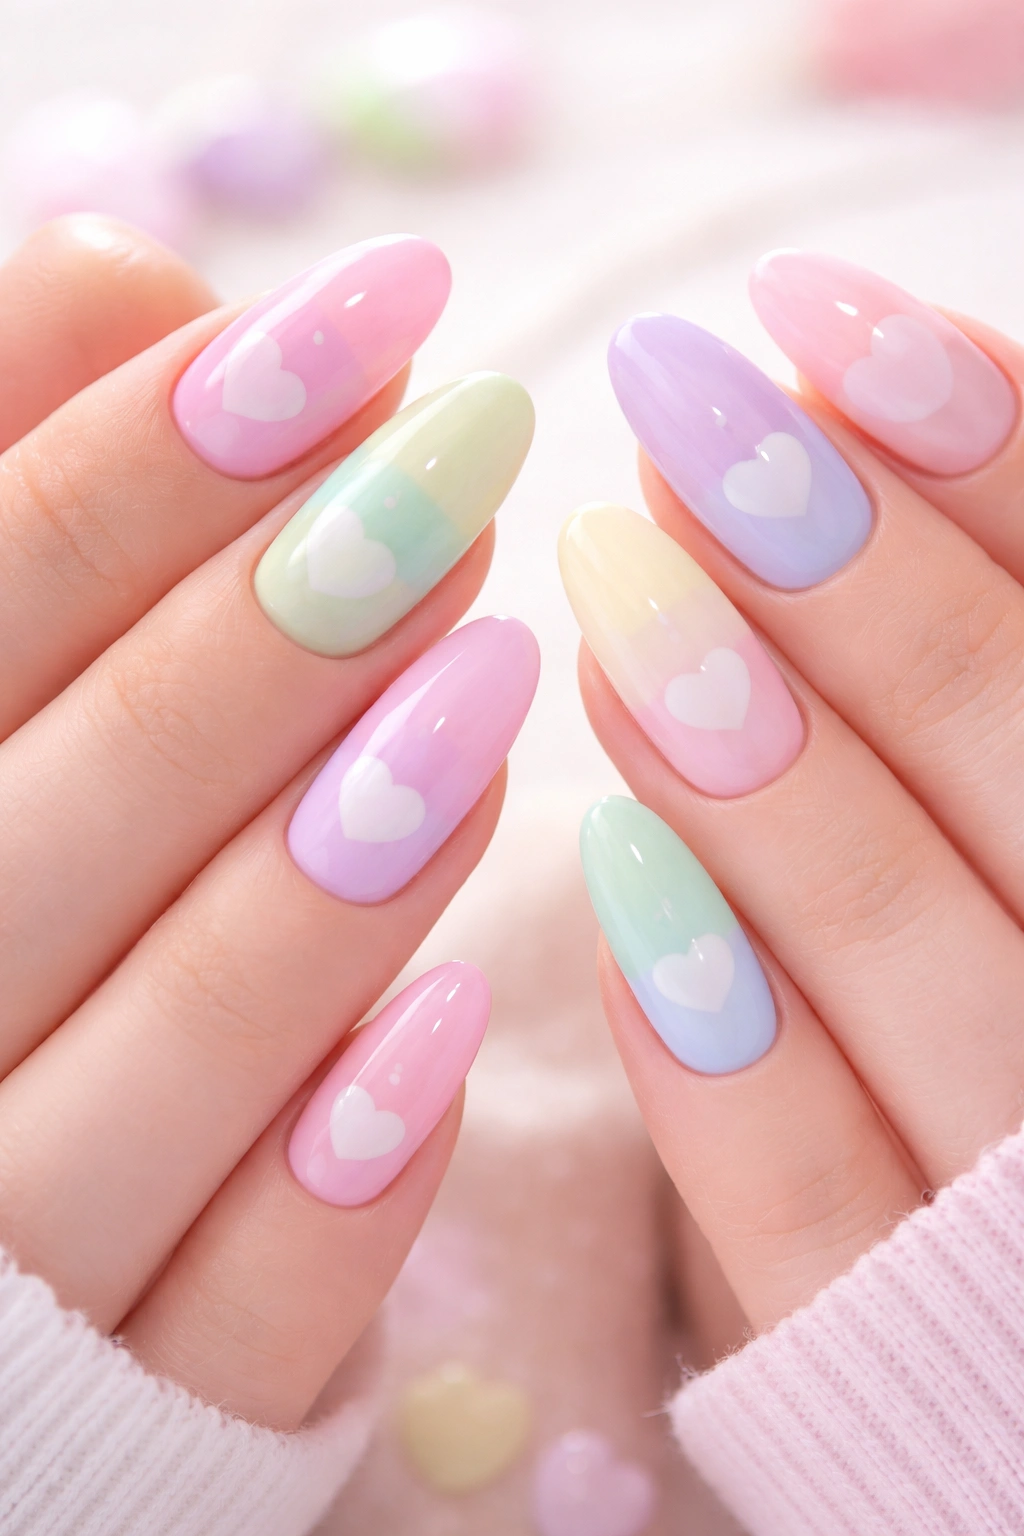
Remember those chalky conversation hearts with little sayings on them? Bring that nostalgic energy to your nails. Choose pastel shades like baby pink, lavender, mint, or peach as your base colors. Then use a fine detail brush to write messages like “BFF,” “BESTIE,” “LOVE U,” or inside jokes that only you two understand.
The hand-lettering is what makes this design so personal and special. Your nail tech can do this, or you can attempt it yourself if you’ve got steady hands. Use a white or black polish for the lettering so it stands out clearly against the pastel background.
You don’t have to write words on every nail—that can look overwhelming. Try putting messages on just your ring and middle fingers while keeping the other nails solid pastels. This creates focal points without making your nails look too busy or hard to read.
Coordinate your messages so they complement each other. If one of you has “BEST” on your nail, the other can have “FRIEND.” Or both of you can rep your friendship with phrases like “SOUL” and “MATE” or “PARTNER” and “CRIME.” Get creative with it.
8. Checkered Valentine Design
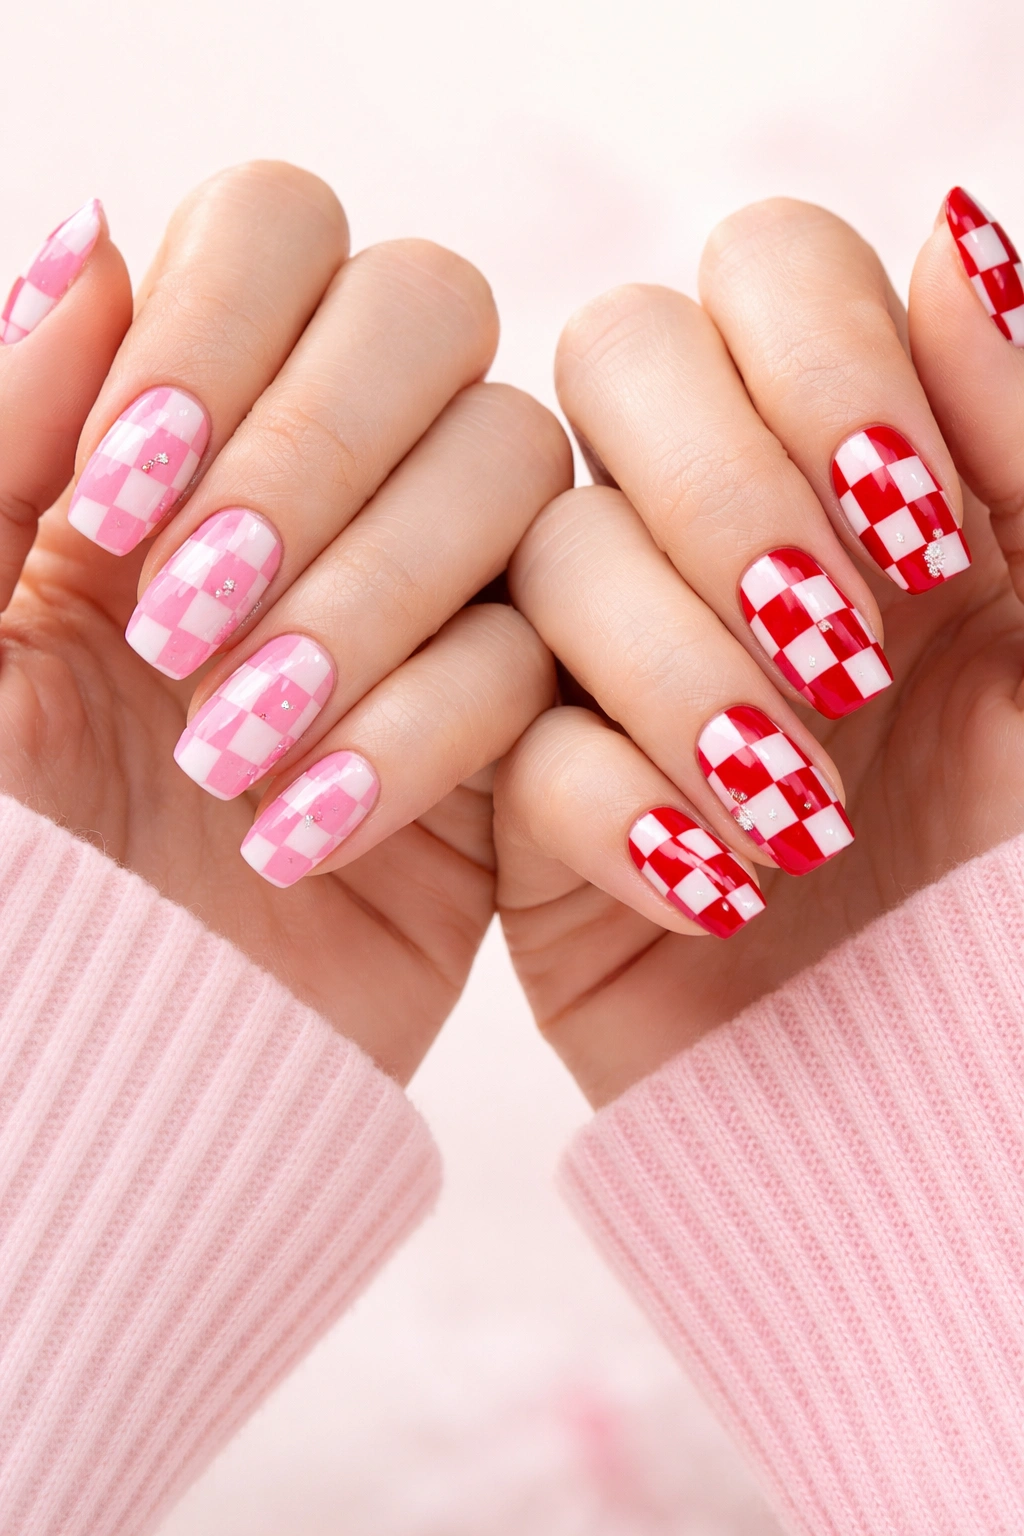
Checkered nails have that retro, Y2K vibe that’s super trendy right now. For a Valentine’s twist, use pink and red squares instead of the traditional black and white. One friend can do a pink-and-white checkered pattern while the other goes red-and-white, creating a coordinated but not identical look.
Creating clean checkers takes precision, but it’s worth the effort. Start by outlining your squares with a thin nail brush before filling them in. This technique helps keep your lines straight and your squares even. You can also use striping tape to mark off sections if you want extra-crisp edges.
The checkered pattern looks especially cool on square or squoval nail shapes. The geometric nail shape echoes the geometric pattern, creating this really cohesive, intentional aesthetic. It’s giving chess board meets Valentine’s Day, and honestly? It works.
Mix solid nails with checkered accent nails to prevent visual overload. Paint your pointer and pinky fingers solid pink or red, then do the checkered pattern on your middle and ring fingers. This gives your eyes somewhere to rest while still showing off that intricate design.
9. Aura Heart Nails
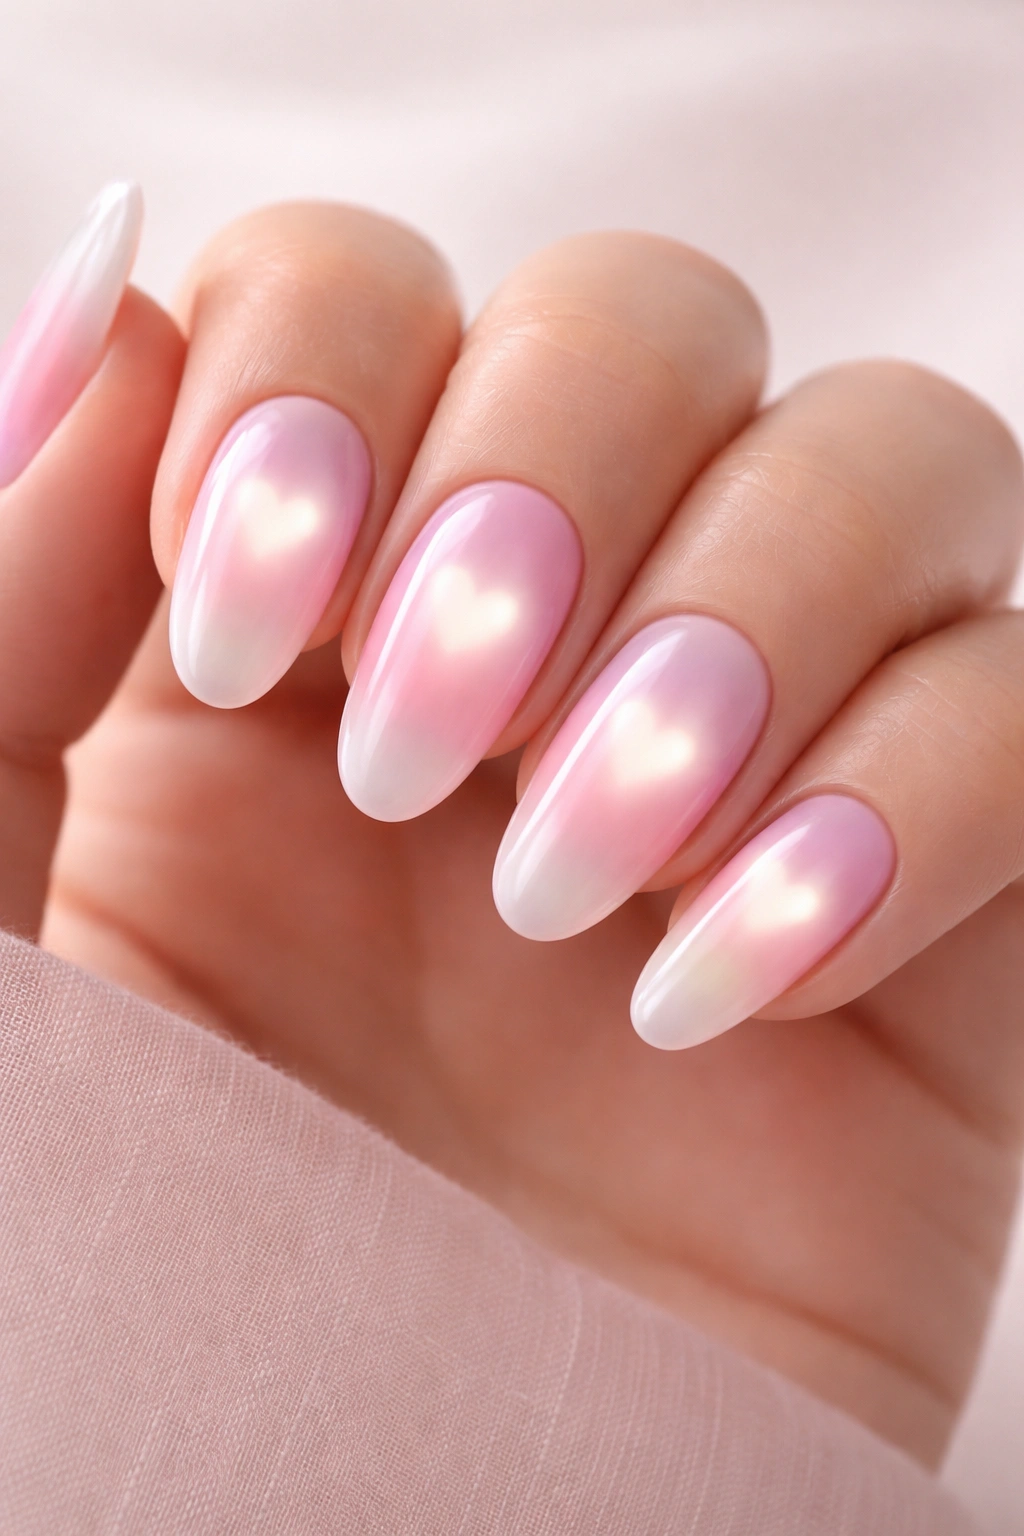
Aura nails are having a moment right now, and the technique looks way more complicated than it actually is. For matching bestie nails, you’ll create that soft, airbrushed gradient effect with your base colors, then add matching heart designs in the center.
Here’s how the aura effect works: Paint your nail with a lighter shade as the base. Take a makeup sponge and dab your darker color onto it. Gently bounce the sponge in the center of your nail, building up color gradually. The result is that gorgeous fade from dark to light that looks super dreamy and romantic.
Once you’ve created your aura base, add a heart to the center of each nail using a dotting tool or thin brush. You can use a metallic shade, white, or even a contrasting color. The heart becomes the focal point of the design, drawing the eye right to the center where the aura is darkest.
Coordinate with your best friend by using different color combinations. One of you might do a deep red aura fading to pink, while the other does burgundy fading to nude. The technique stays the same, but the color variation makes it clear you’re coordinating without being matchy-matchy.
10. Pearl and Bow Details
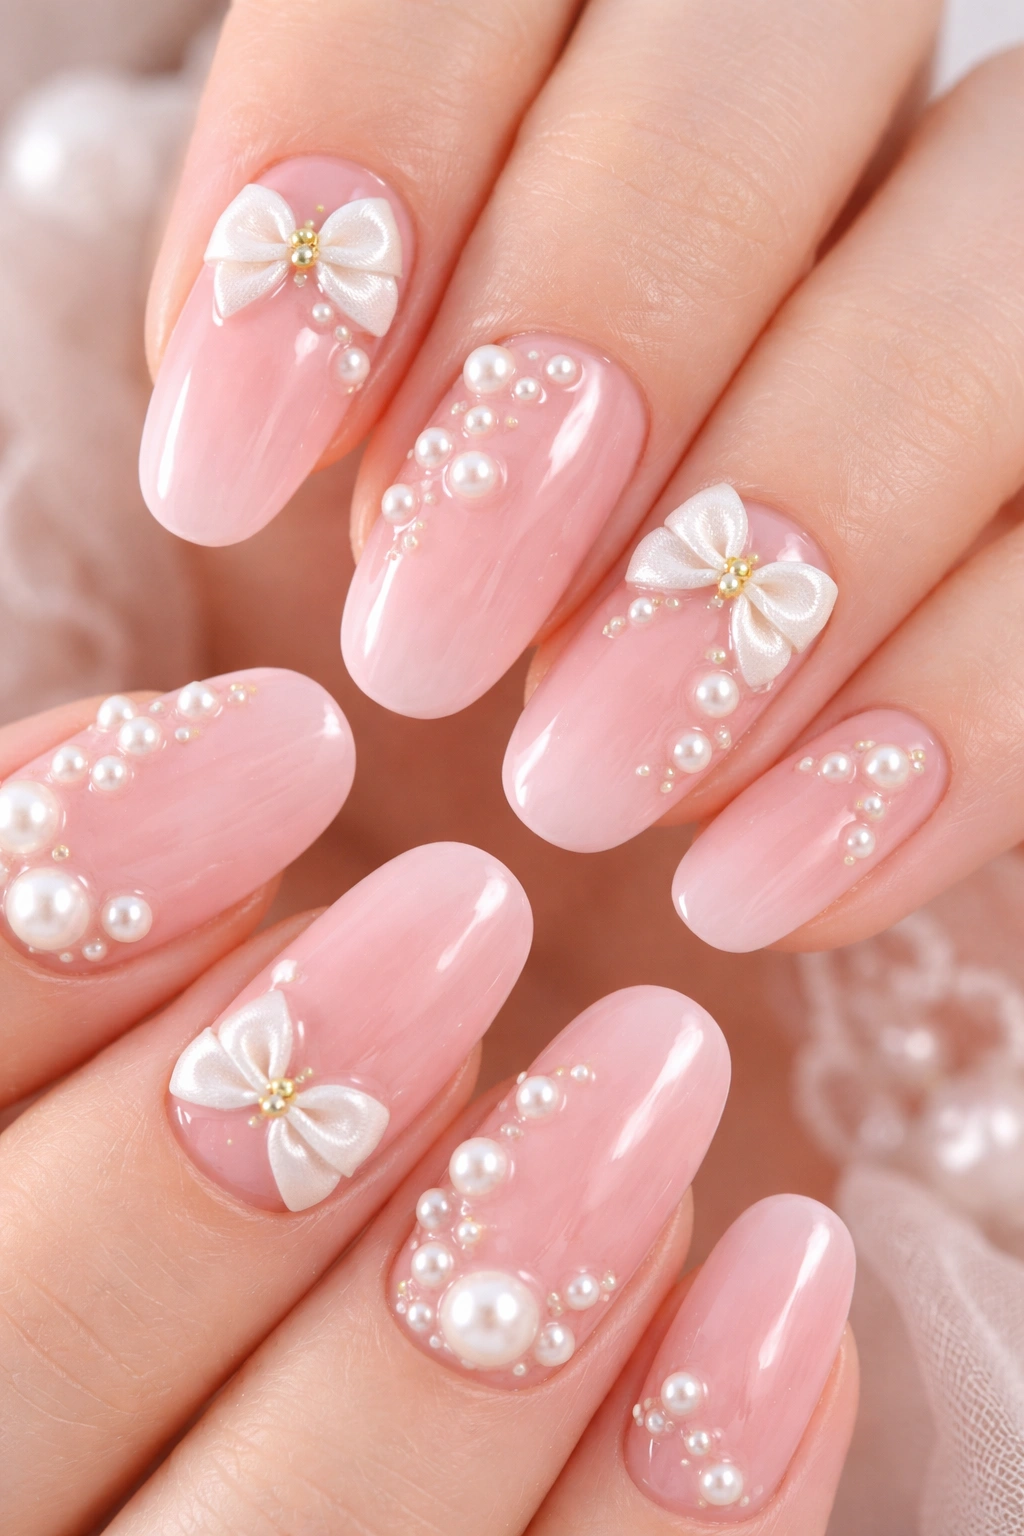
For besties who love that coquette, ultra-feminine aesthetic, pearl and bow embellishments are your answer. Start with a soft pink or nude base, then add 3D pearl appliqués and tiny bow designs using builder gel or nail stickers. This design is giving Bridgerton meets Valentine’s Day in the best way.
The dimensional elements make this manicure feel special and high-end. Those little pearls catch the light beautifully, adding subtle sparkle without being over-the-top glittery. It’s elegant enough for a fancy date or event but still clearly Valentine’s themed.
You can coordinate by placing your embellishments on different fingers. If one friend has bows on her ring fingers, the other might have pearls there instead. Or you could both do the same placement but swap the pearl and bow positions. It’s like a sophisticated matching game.
Fair warning: this design works best when done at a salon. Those 3D elements require specific products and techniques that are tricky to nail at home (pun intended). Budget a bit extra for the appliqués and builder gel work, but trust me—the result is worth every penny.
11. Cartoon Heart Style
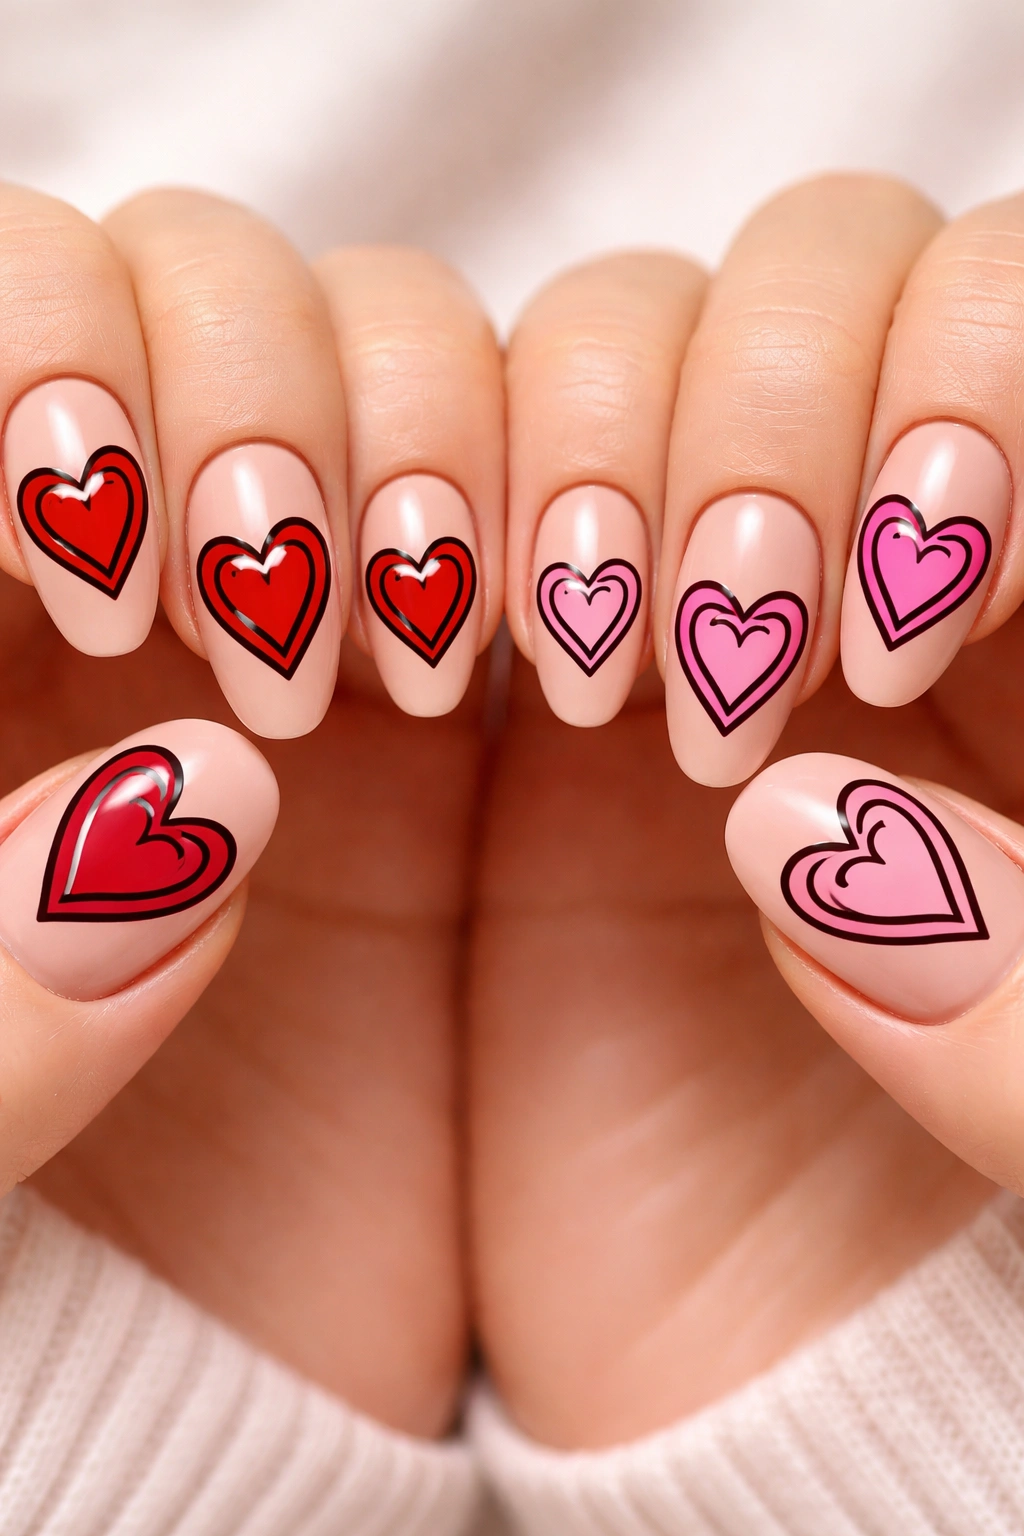
Channel your inner anime character with outlined, cartoon-style hearts. These aren’t your standard filled-in hearts—they’ve got that sketched, graphic novel quality that looks super cool and artistic. The outlines create a playful, youthful energy that’s perfect for best friends who don’t take themselves too seriously.
To create the cartoon effect, paint your hearts in a solid color first. Once they’re dry, use a black nail polish and a very thin brush to outline each heart. Then add a smaller heart outline inside the first one, leaving some space between the lines. This double-outline technique is what gives it that authentic cartoon look.
You can coordinate colors while keeping the same cartoon style. One friend might do red outlined hearts on a nude base, while the other does pink. The consistent outlining technique ties your manicures together even though you’re using different shades.
This design looks amazing on medium to long nails where you have enough space for the details to really shine. On shorter nails, you might want to do just one large heart per nail rather than multiple smaller ones. The key is making sure those outlines stay visible and don’t get lost.
12. Gradient Heart Ombré
Create a literal representation of your friendship spectrum with gradient heart nails. Here’s the concept: line up five shades of pink (or red) from lightest to darkest. Paint each nail a different shade, starting with the lightest on your pinky and ending with the darkest on your thumb. Then add a heart to each nail using the shade from the previous finger.
The ombré effect across all five fingers creates this stunning color story. When you hold up your hand, it’s like watching a sunset of pinks transition seamlessly. It’s artsy, intentional, and makes for incredible photos.
Coordinate with your bestie by having them do the same gradient in reverse order. If you go light to dark from pinky to thumb, they go dark to light. When you put your hands together, you create this beautiful mirrored effect that’s so satisfying to look at.
Choosing your shades is the most important step. You want colors that are clearly different from each other but still in the same family. Head to the nail polish section and hold bottles next to each other to test out combinations before committing. Most beauty stores will let you see the polish through the bottle or have testers available.
13. Abstract Swirl Designs
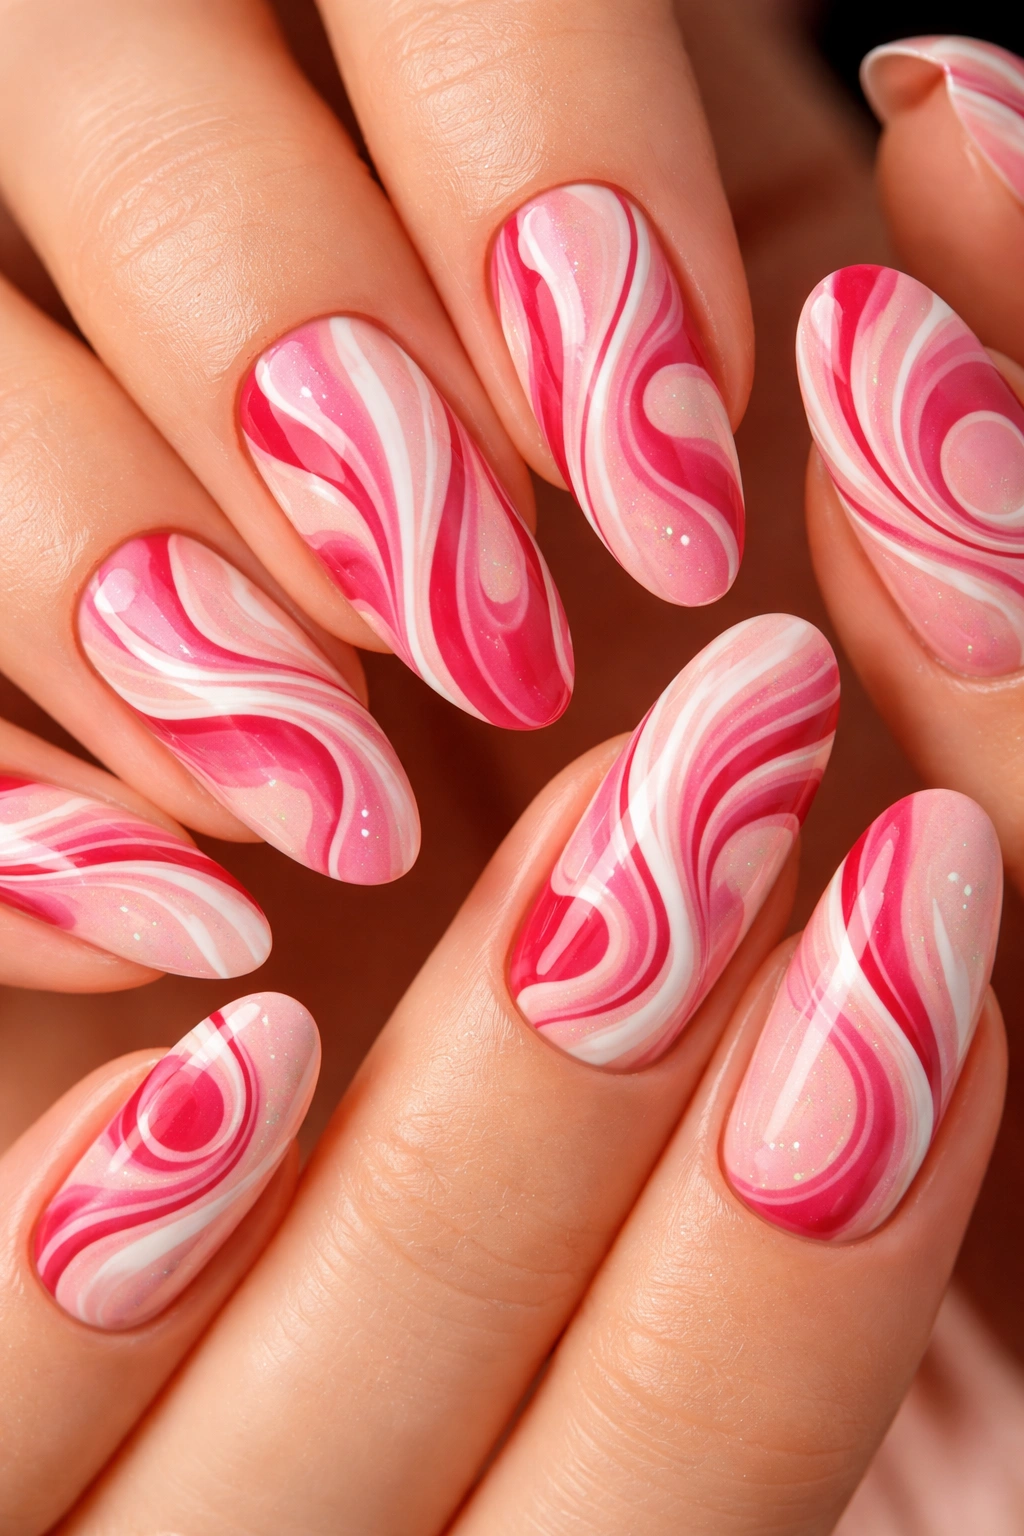
If you’re both into that artsy, modern aesthetic, abstract swirls are where it’s at. These designs use curved lines and organic shapes rather than literal hearts and bows. The result feels more sophisticated and gallery-worthy while still fitting the Valentine’s color scheme.
You can create swirls using a thin striping brush or even a toothpick if you’re DIYing. The key is to keep your movements fluid and curved—no straight lines here. Let the polish flow across the nail in wavy, interconnecting patterns. Don’t stress about making them perfect or symmetrical. The beauty of abstract art is that “mistakes” often look intentional.
Coordinate by using the same color palette but different swirl patterns. You might create more tightly wound spirals while your best friend does looser, broader curves. Or one of you could do swirls on a pink base while the other uses red. The variation keeps things interesting while clearly being part of the same design family.
This design works on any nail length or shape, which makes it super versatile. Short nails? The compact canvas actually looks really chic with minimal swirls. Long nails? You’ve got room to create elaborate, intricate patterns. There’s no wrong way to do it.
14. Chrome Heart Details

Chrome nails are everywhere right now, and for good reason—that metallic, mirror-like finish is absolutely stunning. For a Valentine’s bestie manicure, use chrome powder or polish as an accent rather than covering the entire nail. Add chrome heart outlines or flame designs that catch the light.
The reflective quality of chrome makes even small details really pop. A thin chrome outline around a regular polish heart creates dimension and visual interest without requiring tons of skill. The contrast between matte or glossy polish and shiny chrome is what makes this design special.
Coordinate by choosing different base colors with the same chrome accents. One friend might do rose gold chrome hearts on a nude base, while the other does silver chrome hearts on pink. The consistent use of chrome ties your looks together even though the colors differ.
Creating chrome details at home can be tricky without the right tools. Chrome powder needs to be rubbed onto uncured gel polish to get that mirror finish, which means you’ll need UV/LED lamp and gel products. If you’re working with regular polish, look for chrome nail pens or chrome polishes that give a similar (though not quite as intense) effect.
15. Simple Stripe Coordination

Sometimes the best designs are the simplest ones. Striped nails using Valentine’s colors create a clean, modern look that’s easy to DIY and still clearly coordinated. Paint your nails in a base color, then add vertical or horizontal stripes in contrasting shades.
The beauty of stripes is their versatility. You can do thick stripes for a bold look or thin lines for something more delicate. Mix stripe widths on different nails for added visual interest. There’s no single “right way” to do striped nails, which means you can customize them to match your personal style.
For coordination, swap your base and stripe colors with your bestie. If you’re wearing pink nails with red stripes, they wear red nails with pink stripes. It’s a simple flip that creates that matching effect without requiring identical manicures.
Use striping tape to get perfectly straight lines if you want that crisp, professional look. Apply your base color and let it dry completely. Place your striping tape where you want your lines, paint over the entire nail with your stripe color, then carefully peel the tape off before the polish dries. The negative space left behind creates your stripes.
16. Velvet Pink Finish
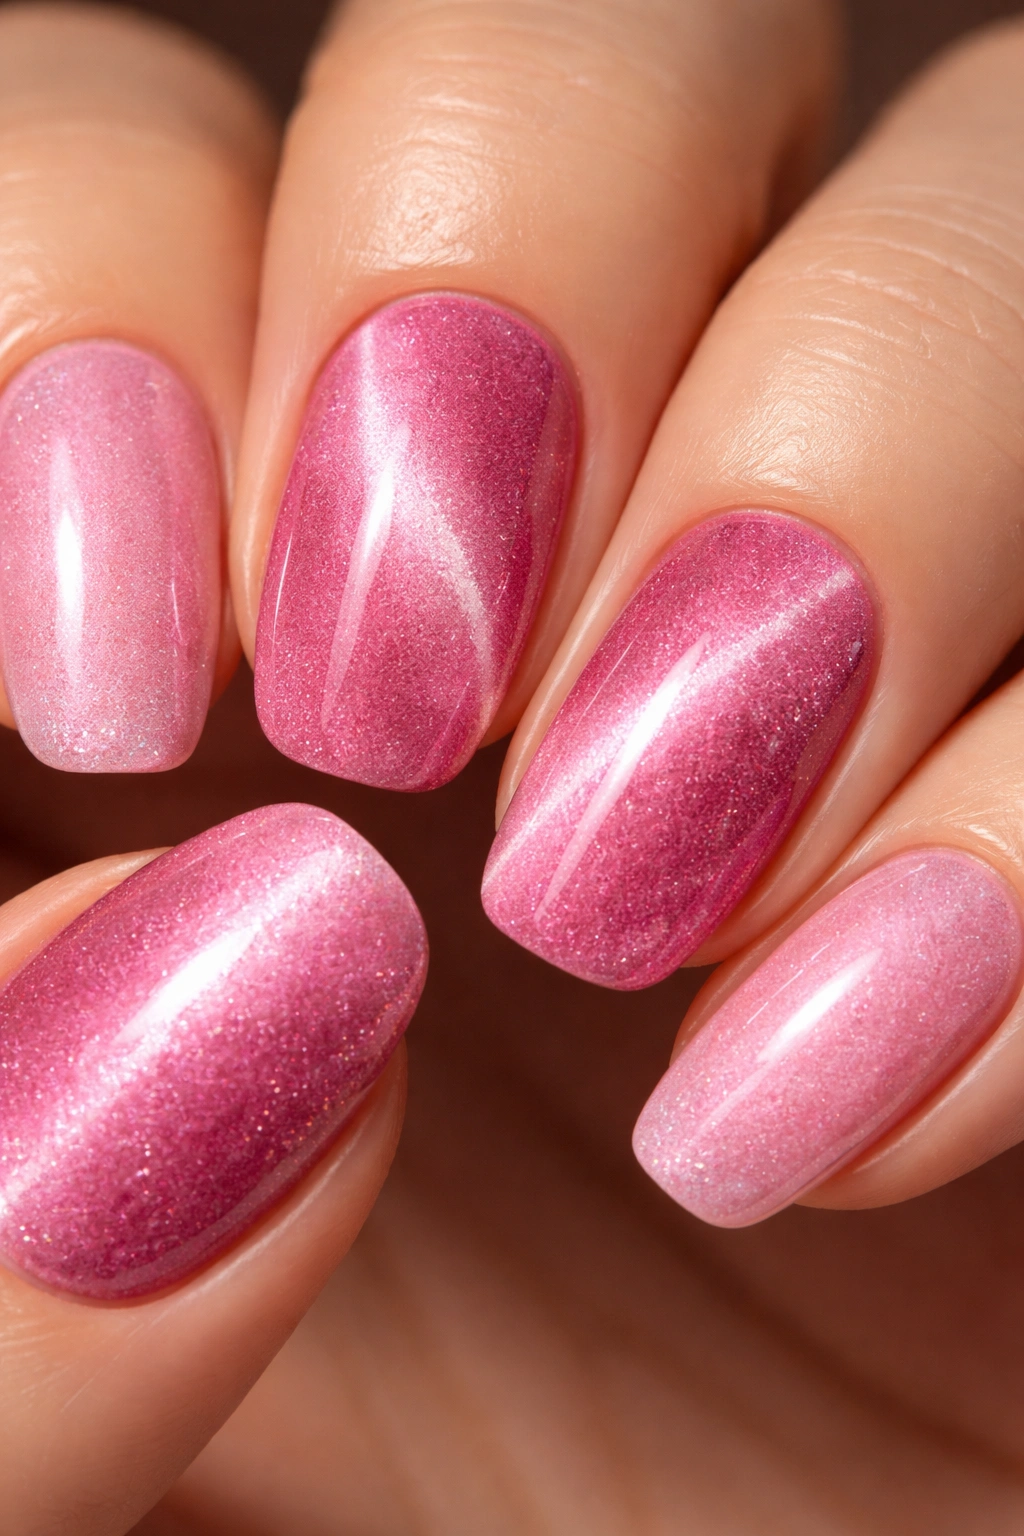
Velvet nails have this gorgeous, soft texture that looks almost fuzzy. It’s created using magnetic gel polish that you manipulate with a magnet wand to create depth and dimension. For matching Valentine’s nails, you can both do velvet finishes in different shades of pink or red.
The magnetic polish contains tiny metallic particles that respond to the magnet. When you hold the magnet over wet polish, it pulls those particles into patterns—creating the velvet, 3D effect. Different magnets create different patterns, from cat-eye looks to more uniform velvet textures.
Coordinate by using velvet finishes with the same magnet pattern but different base colors. Or you could both use the same color but create different magnetic patterns. One of you might do a traditional cat-eye while the other creates that uniform velvet look. The magnetic element ties you together.
This design definitely works best when done professionally or if you’ve invested in magnetic gels and magnets at home. Regular polish won’t give you this effect. That said, some brands make velvet-finish top coats that create a similar texture without the magnetic element—they’re not quite the same, but they’re a more accessible alternative.
More Coordinating Ideas to Try
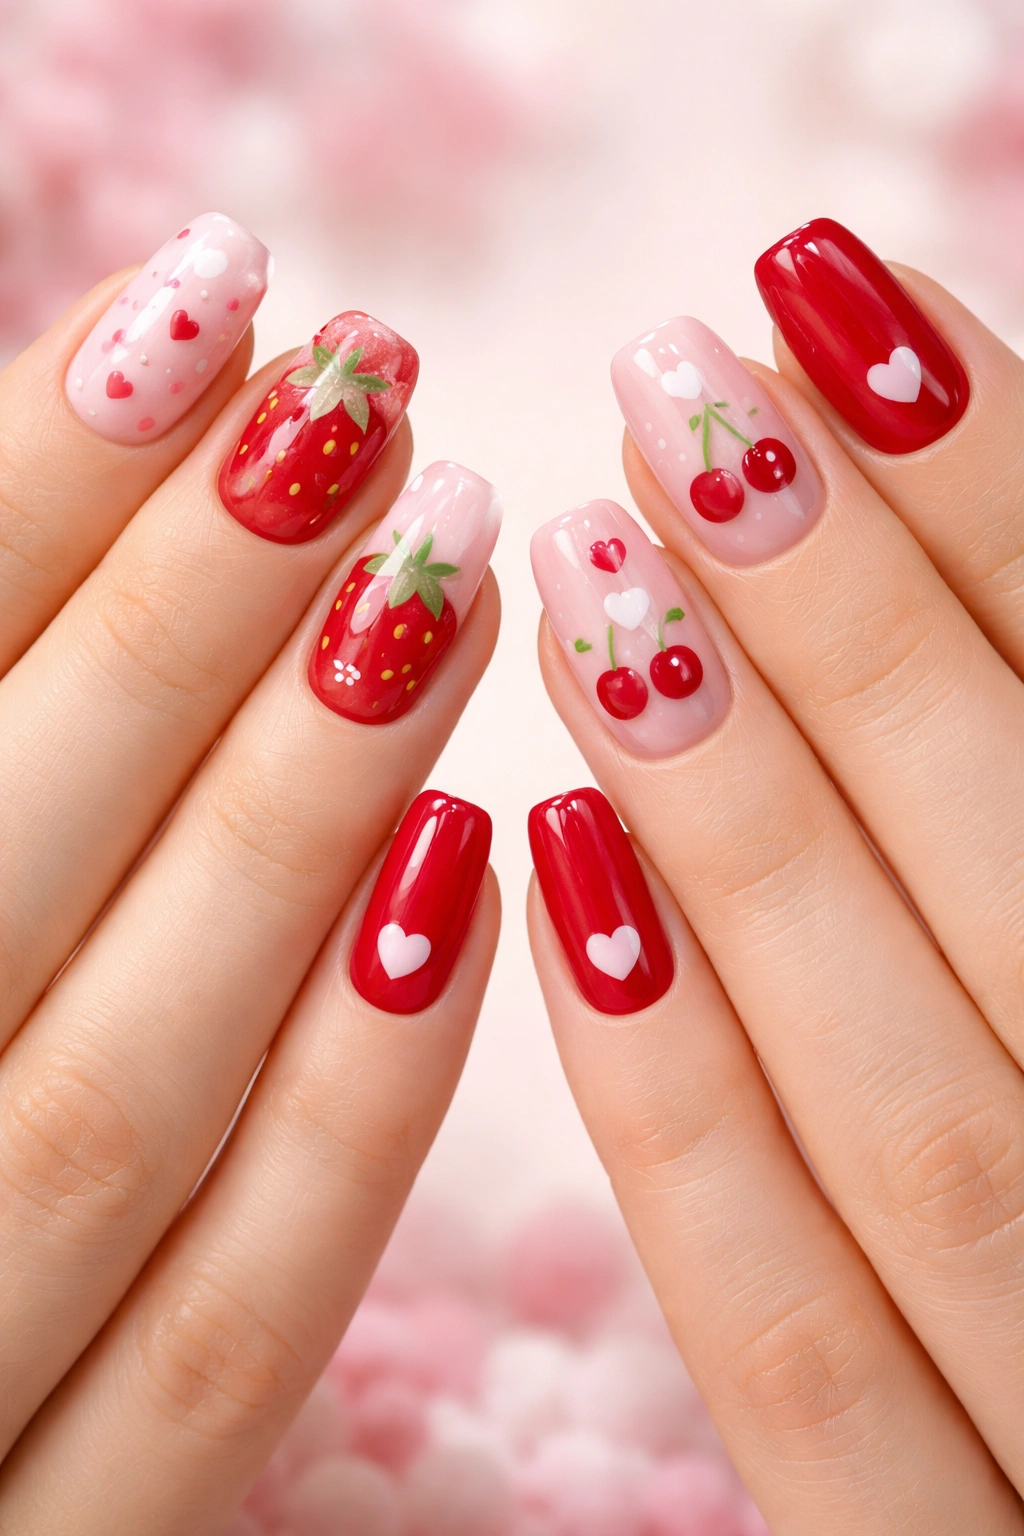
Beyond these main designs, there are endless ways to match with your bestie. Consider doing different variations of the same theme—like one of you does strawberry nail art while the other does cherries. Both are fruity and Valentine-themed, but you’re not wearing identical designs.
Another option is complementary nail shapes. If you both can’t agree on length, embrace the difference. One friend rocks short square nails while the other goes for long almond shapes, but you both use the same color palette and design elements. It shows that you don’t have to be identical to be coordinated.
Think about incorporating your initials or meaningful symbols into your designs. Maybe you both get tiny “B” hearts for “bestie” or include the date you met. These personal touches make your matching manicure even more special and meaningful than a generic Valentine’s design.
Tips for Coordinating Your Nail Appointment
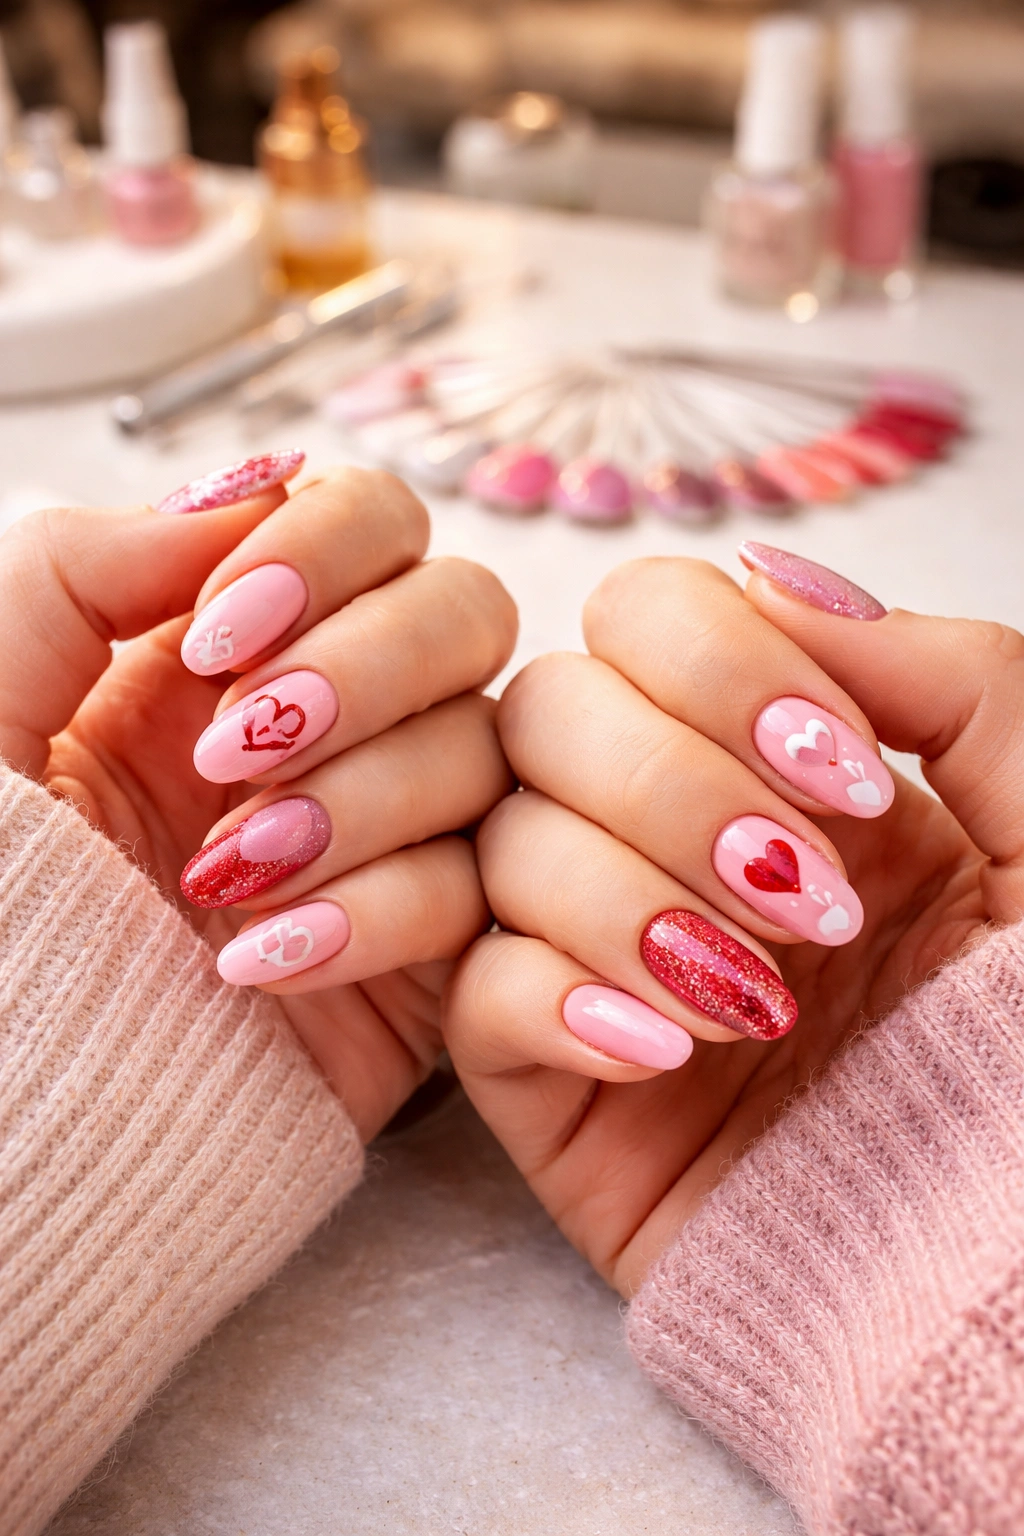
Book your appointments back-to-back or at the same time if your salon has multiple techs. This lets you see each other’s designs in progress and make adjustments if needed. Plus, it’s way more fun to get your nails done together than separately.
Bring reference photos to show your nail tech exactly what you’re going for. Screenshot images from this article or find similar designs on Pinterest. Having a visual reference prevents miscommunication and ensures you both end up with the look you wanted.
Discuss your design plans beforehand so you’re on the same page. Text each other your color preferences, design ideas, and any specific elements you want to include. This advance planning prevents last-minute stress or disagreement at the salon.
Consider your nail health when planning your design. If either of you has weak or damaged nails, maybe skip techniques that require lots of filing or harsh removal processes. Gel can be great for strengthening nails, but constant gel use can also damage them over time. Press-ons might be a healthier alternative if you change your manicure frequently.
Should You DIY or Hit the Salon?
Simpler designs like polka dots, stripes, or solid colors with one accent nail are totally manageable at home. Grab your favorite polishes, a dotting tool, and some striping tape, and you’re good to go. DIY matching manicures make for a fun bestie hangout activity—put on a rom-com, pour some wine, and paint away.
Complex designs with chrome details, builder gel, 3D elements, or intricate hand-painting are better left to professionals. Nail techs have the tools, products, and expertise to create looks that would be nearly impossible to replicate at home. Don’t torture yourself trying to DIY something that requires professional-level skill.
Press-on nails are the best of both worlds. Brands now make incredibly realistic, high-quality press-ons that last up to two weeks. Some even come in matching sets specifically designed for best friends. You get salon-quality results without the time commitment or expense of a full appointment.
Think about your budget and time constraints. A full set with intricate Valentine’s details could run you $60-100+ at a salon, while a DIY job might cost $20-30 in supplies. Press-ons typically fall somewhere in the middle at $15-40 per set. Choose the option that makes sense for your situation—there’s no shame in any approach.
Wrapping Up
Matching Valentine’s nails with your best friend is such a sweet way to celebrate your friendship. Whether you go for classic hearts, edgy inverse colors, or trendy chrome details, the important thing is that you’re doing it together. These coordinating manicures become little wearable reminders that you’ve got someone who always has your back.
Don’t overthink the design process. Pick something that speaks to both of your styles, fits your budget, and makes you smile when you look down at your hands. The “perfect” matching manicure is whatever feels right for your friendship.
Remember that these designs aren’t just for February 14th. Many of these looks work beautifully year-round—especially the ones using techniques like ombré, stripes, or color blocking. You can totally rock matching best friend nails in July if you want to.
Snap tons of photos of your coordinating manicures. Those hand-holding shots, coffee cup pics, and friendship poses are going to make incredible memories. Plus, your matching nails will definitely rake in the likes on social media. But more importantly, you’ll have physical proof of your friendship that you can see every single day for the next two weeks.
