

Soft square nails have quietly become the goldilocks of nail shapes — they’re sophisticated without being stuffy, trendy without feeling temporary, and genuinely flattering on most hand shapes. Now throw blueberry milk aesthetics into the mix, and you’ve got one of the most sought-after nail looks of the moment. The blueberry milk trend isn’t just one design; it’s an entire color palette and vibe that translates beautifully across multiple styles, finishes, and artistic directions.
What makes blueberry milk nails so compelling is their inherent sophistication. Unlike bold, saturated colors that demand attention or stark minimalist designs that feel clinical, blueberry milk nails strike a perfect balance between soft and moody. The color palette draws from soft, milky whites and creams combined with dusty blueberry purples and muted blue-tones — think the color of fresh blueberry skin with a faint white bloom, or the subtle purple haze you see in overcast skies. It’s understated luxury that photographs beautifully and works whether you’re heading to the office or out for something more glamorous.
The soft square shape amplifies this appeal. Square nails with slightly rounded corners give you that clean, polished aesthetic without the sharpness that can read too edgy or dramatic. The shape is modern and intentional without being polarizing — it works with both minimalist and maximalist designs, elongates the fingers subtly, and provides enough canvas space for intricate details without looking overwhelming.
What’s particularly exciting about blueberry milk nails right now is just how adaptable the concept is. You can keep it perfectly minimal with a single soft, creamy blueberry shade, or you can lean into complexity with ombre effects, delicate florals, geometric patterns, or three-dimensional embellishments. Whether you’re a “less is more” person or someone who loves nail art as wearable sculpture, there’s a blueberry milk soft square approach that’ll speak to you.
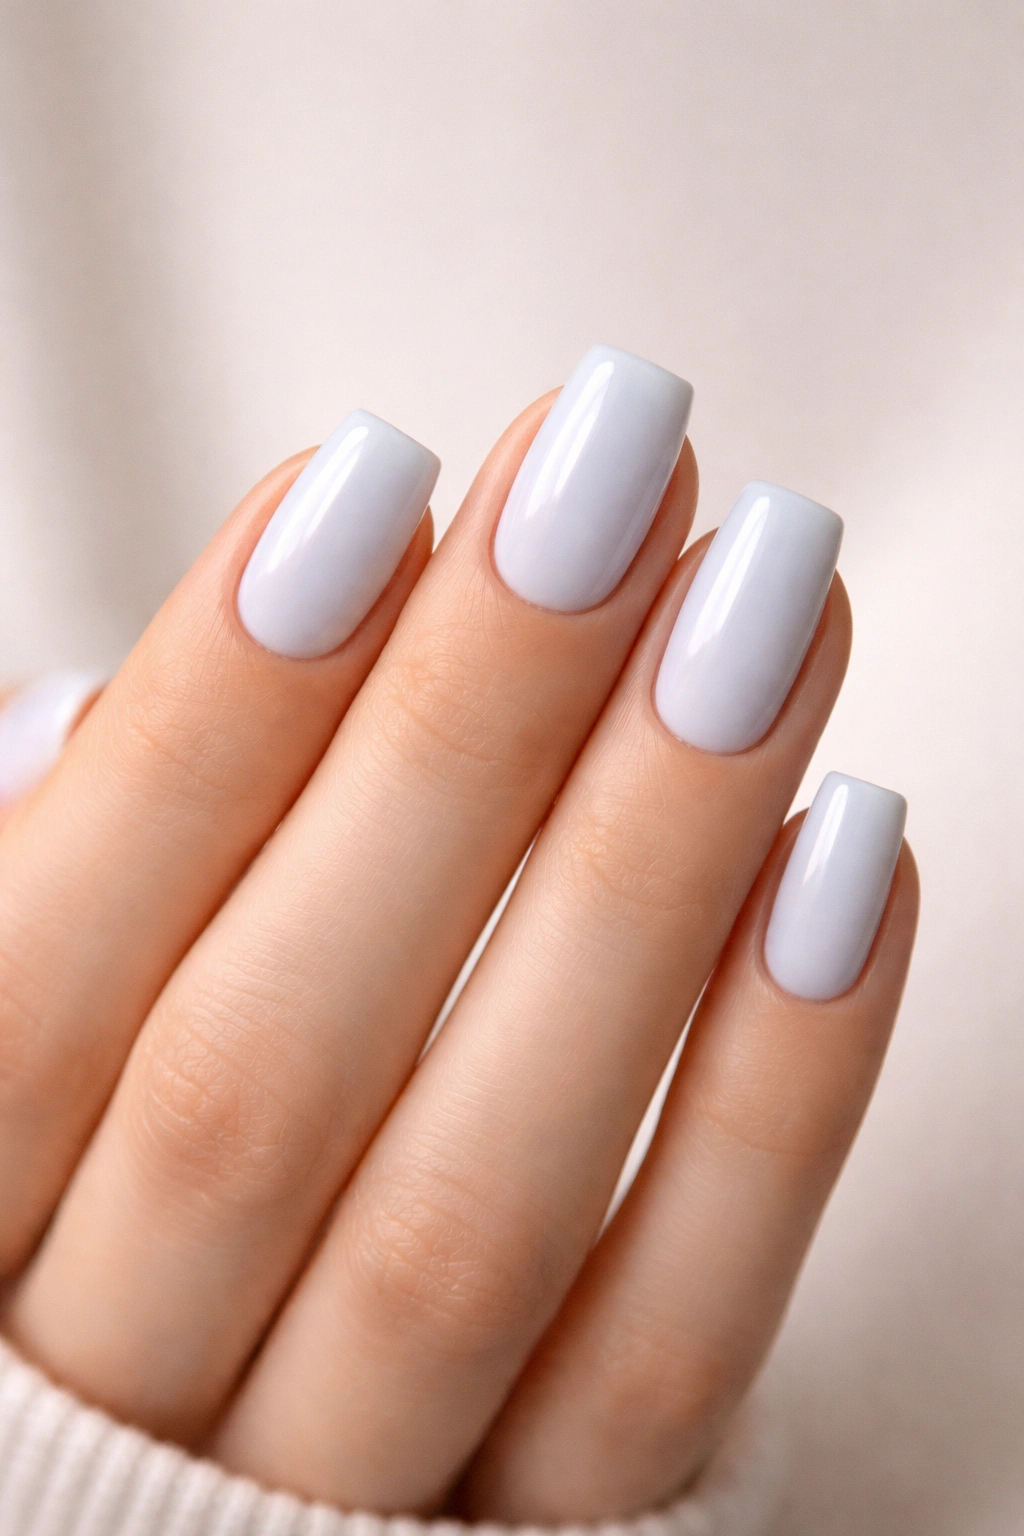
1. Classic Creamy Blueberry with Micro Shine
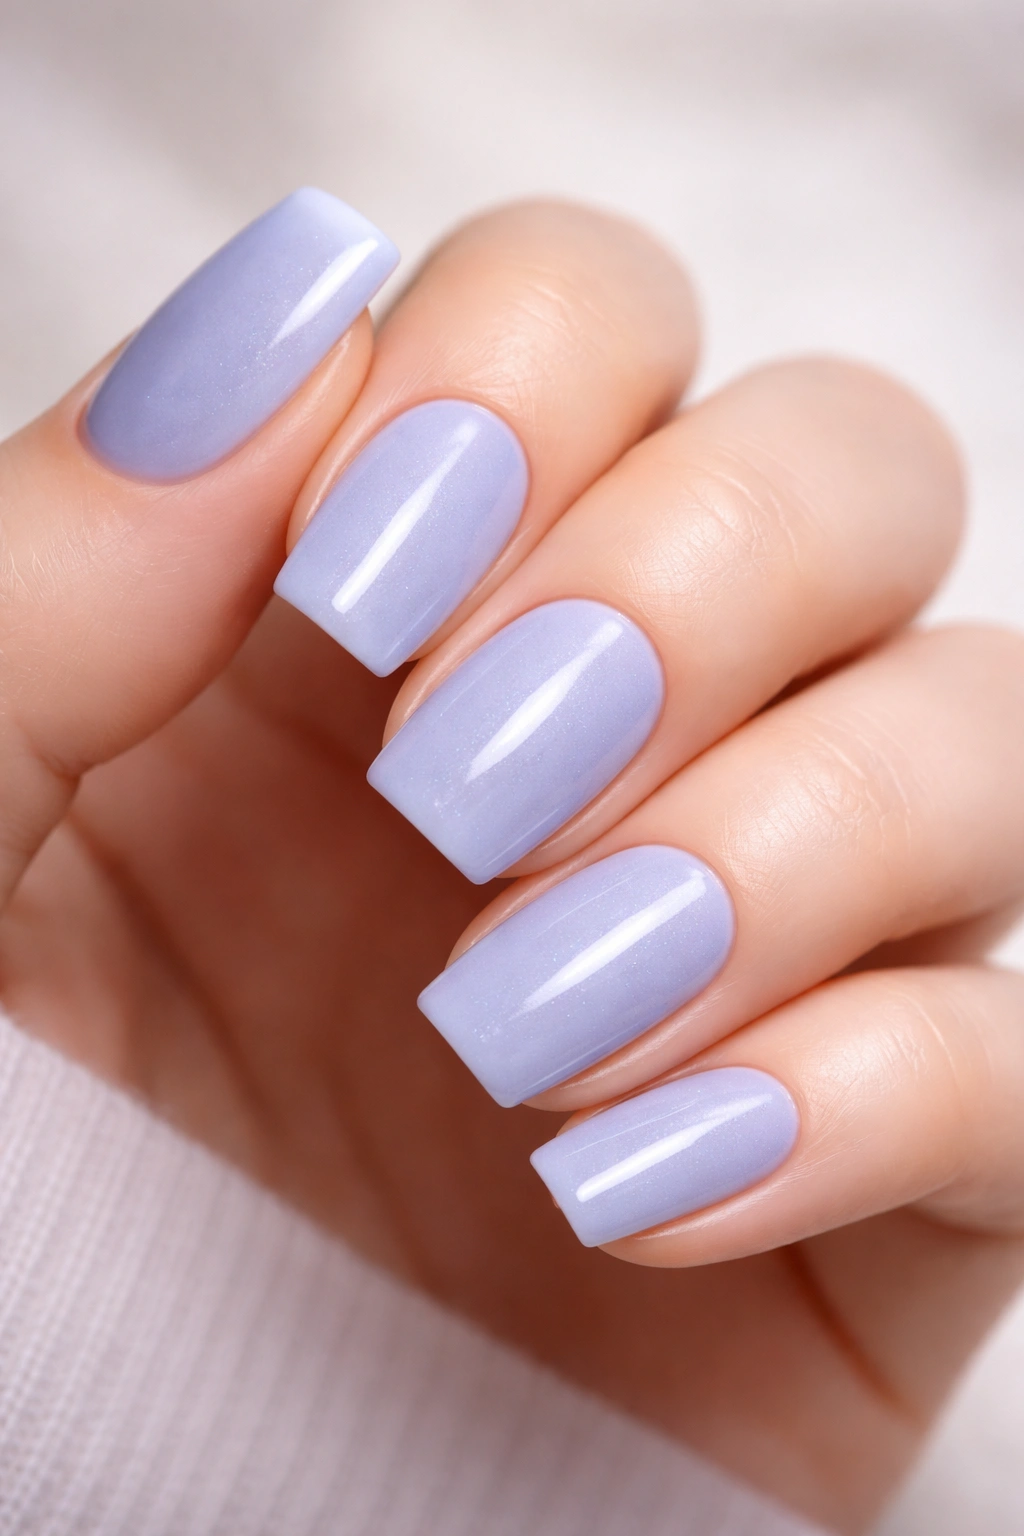
This is the foundation look that started the whole blueberry milk movement, and it’s become a cult classic for good reason. You’re looking at a base coat of creamy blueberry polish — think the color of a blueberry muffin with the slightly dusty undertones — applied in two thin coats to build opacity and depth without that thick, plastic appearance that comes from one heavy coat.
The Formula That Makes It Work
The key to nailing this look lies in the finish. You don’t want cream-textured polish (which sits flat and matte), and you definitely don’t want high-gloss glossy (which makes blueberry look too dark and intense). What you want is something in between — a soft, subtle shimmer that catches light without being glittery or sparkly. This micro-shine finish is what gives the look its signature “milk” quality; the polish has just enough light-reflective quality to look luminous and creamy rather than one-dimensional.
Application matters here. Paint thin, even coats rather than going for full coverage in one pass. After the base color dries completely, seal with a glossy top coat to enhance that creamy luminosity and protect your color from chipping. The contrast between the soft matte-ish blueberry and the glossy seal creates depth that makes the nails look expensive and intentional.
How to Wear It
- Office perfect: Pair with a structured blazer and let your nails do the subtle talking
- Everyday wear: This shade never looks out of place, making it endlessly versatile
- Longevity: This finish typically holds strong for 2-3 weeks before you notice significant wear
- Nail health tip: Use a base coat before application to prevent staining, especially if you have fair or light-colored nails that can absorb pigment
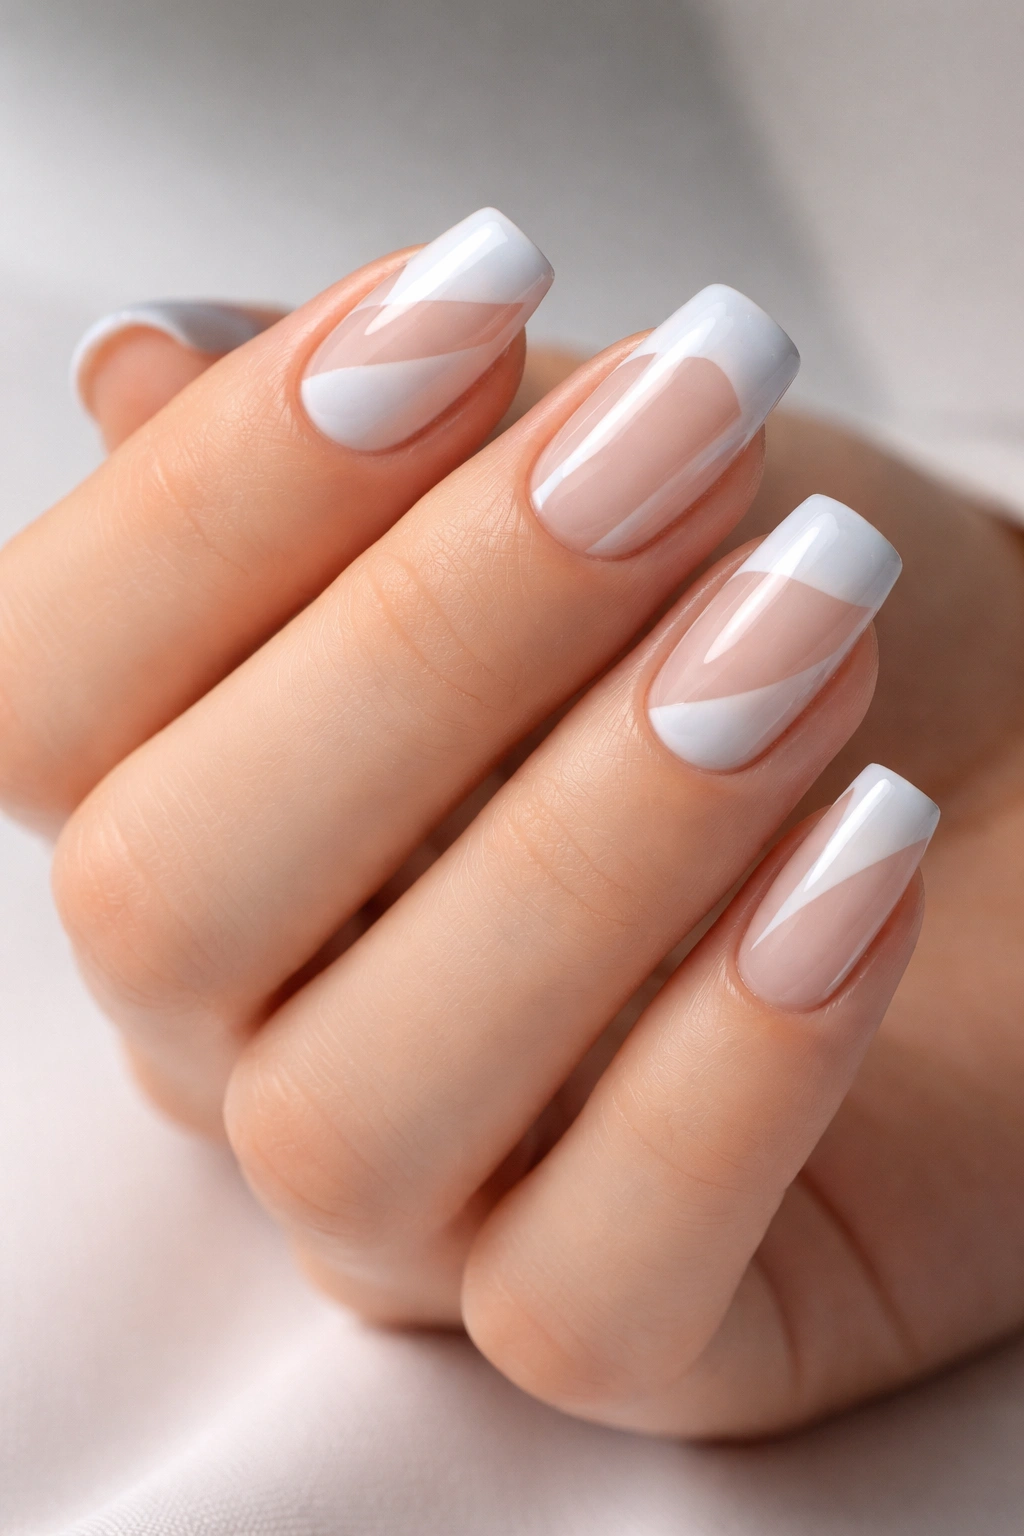
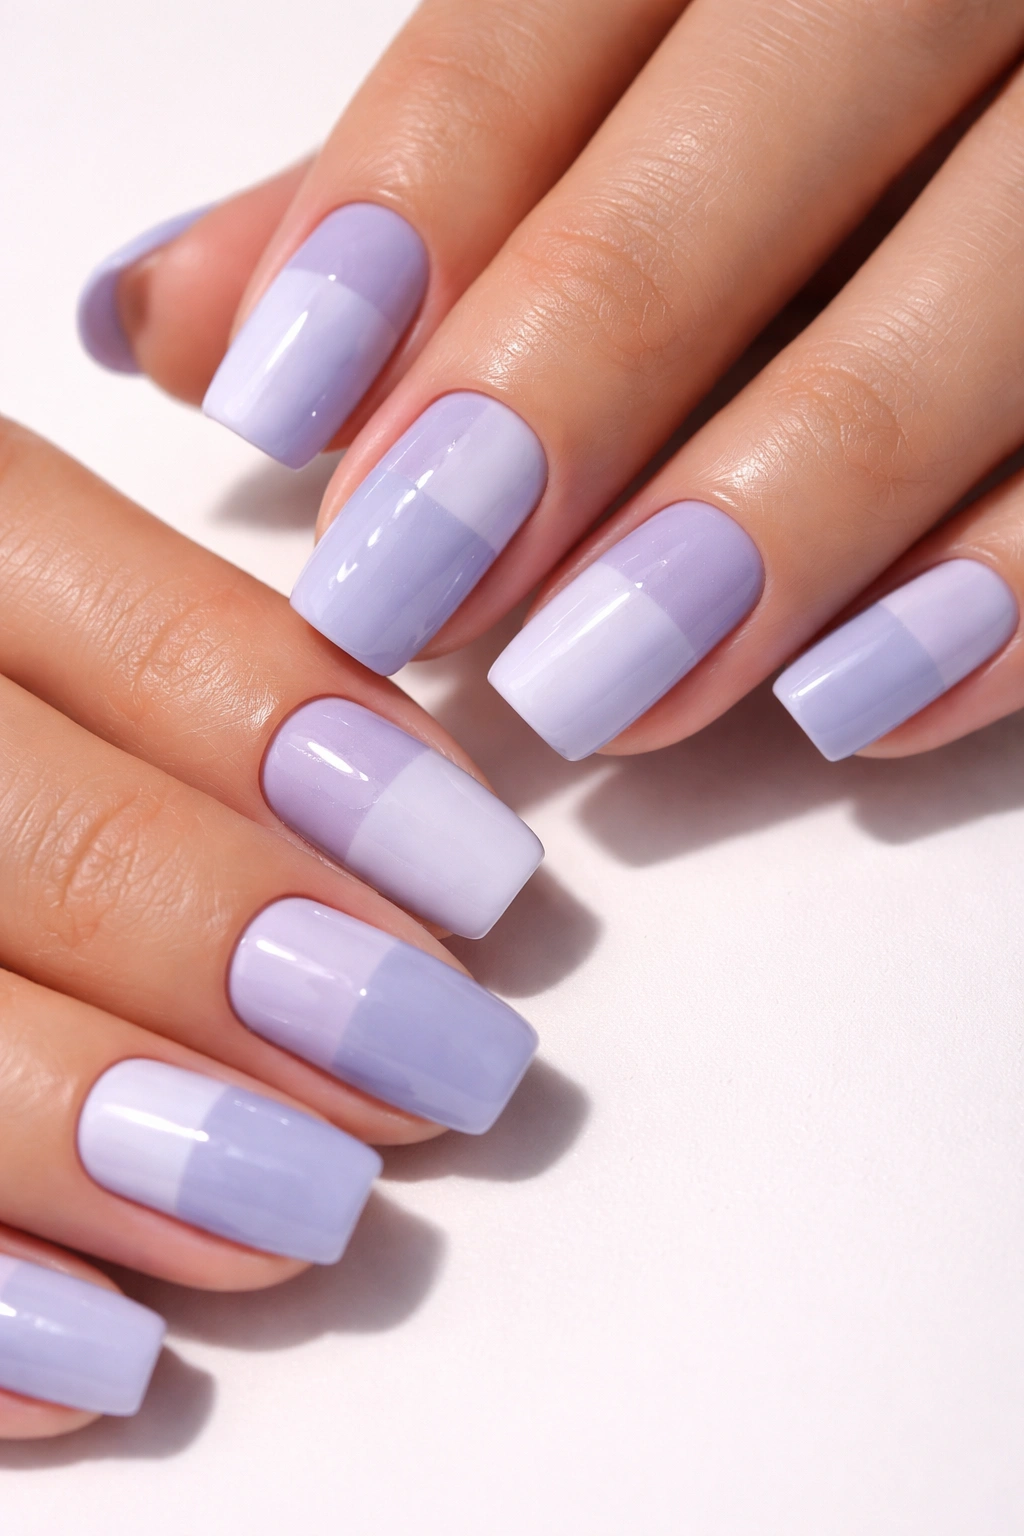
2. Half-Moon Blueberry and Milk
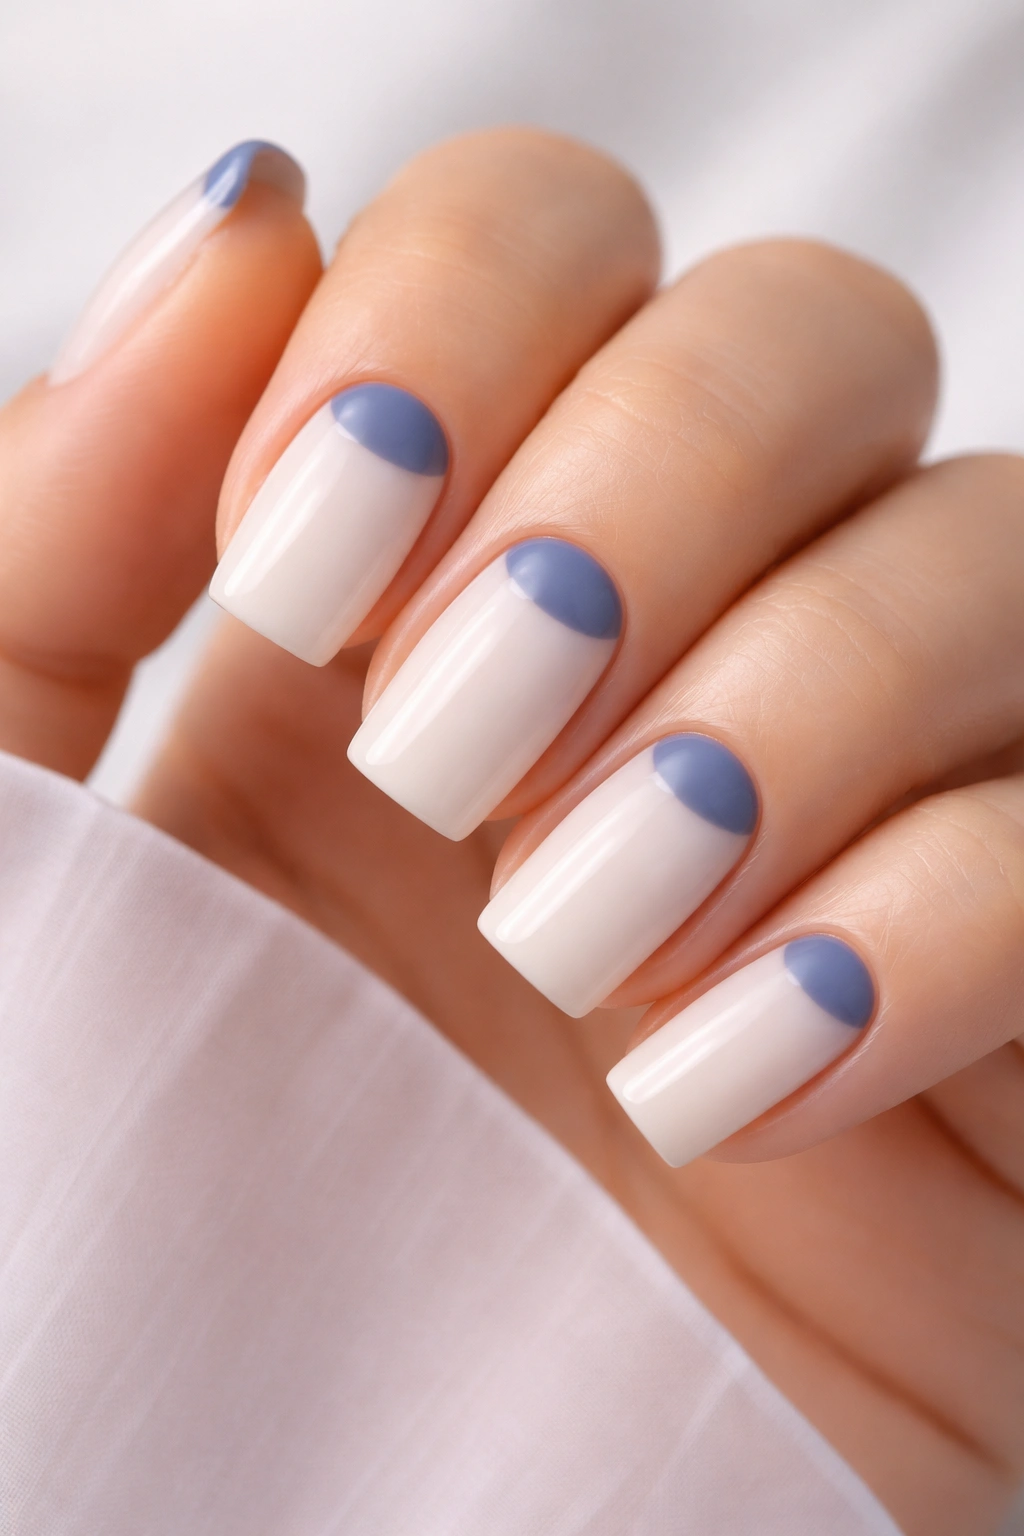
This layout puts a creamy off-white or soft milk color on the main nail bed with a delicate blueberry half-moon at the cuticle line. It’s an elegant update on the classic half-moon manicure that feels fresh and modern while nodding to vintage nail art.
Creating the Perfect Half-Moon Shape
The trick to a clean half-moon is using a curved stencil or, if you’re hand-painting, a steady hand and a fine brush. Map out your half-moon lightly with a pencil first if you’re nervous, then paint the blueberry color carefully along the cuticle area. The curve should be smooth and intentional, not wavy or jagged. Some people find it easier to use a specialized half-moon stencil (available at most beauty suppliers), which removes the guesswork and guarantees symmetrical results across all ten nails.
Let the blueberry layer dry completely before applying the milk base coat to the rest of the nail. The boundary between the two colors should feel distinct but not harsh. If the line feels too sharp once everything is dry, use a tiny brush and a drop of the milk color to slightly soften the edge where the two colors meet — you’re aiming for a seamless blend that looks intentional rather than accidental.
Design Variations
- Reverse half-moon: Try milk at the cuticle with blueberry on the tips for a reversed take
- Gradient blend: Instead of a hard line, create a soft gradient where the colors gently transition
- Metallic accent: Add a thin gold or silver line right where the two colors meet for subtle glamour
- Nail-by-nail variation: Alternate which color is the primary on different nails for visual interest
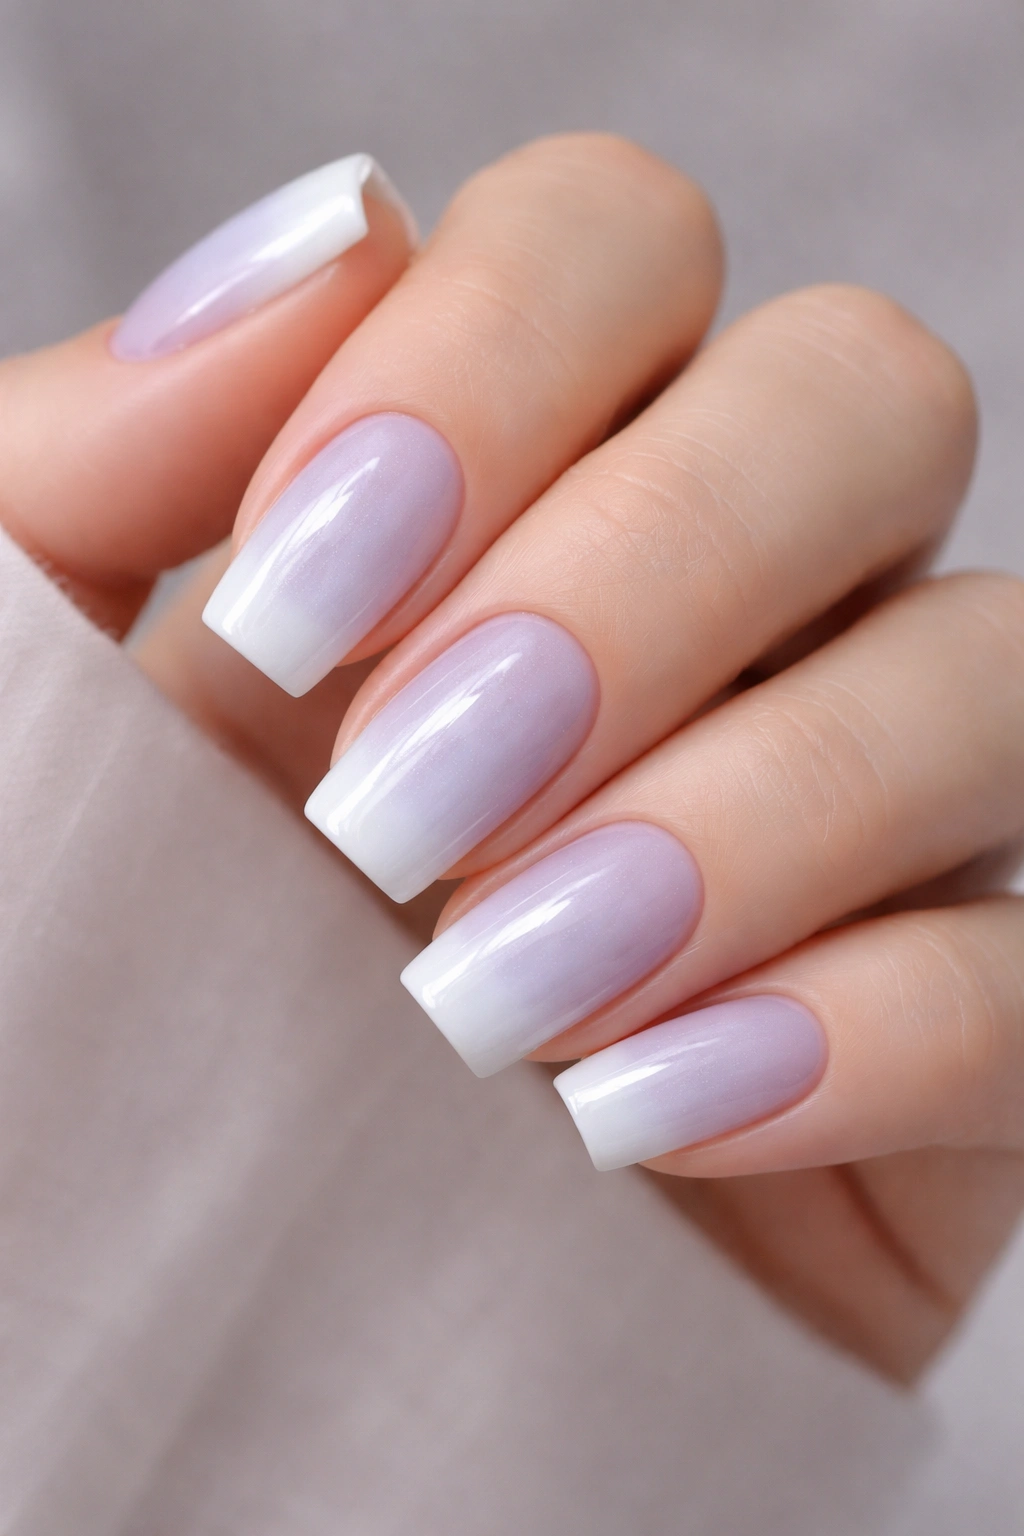
3. Ombre Mist Blueberry to White
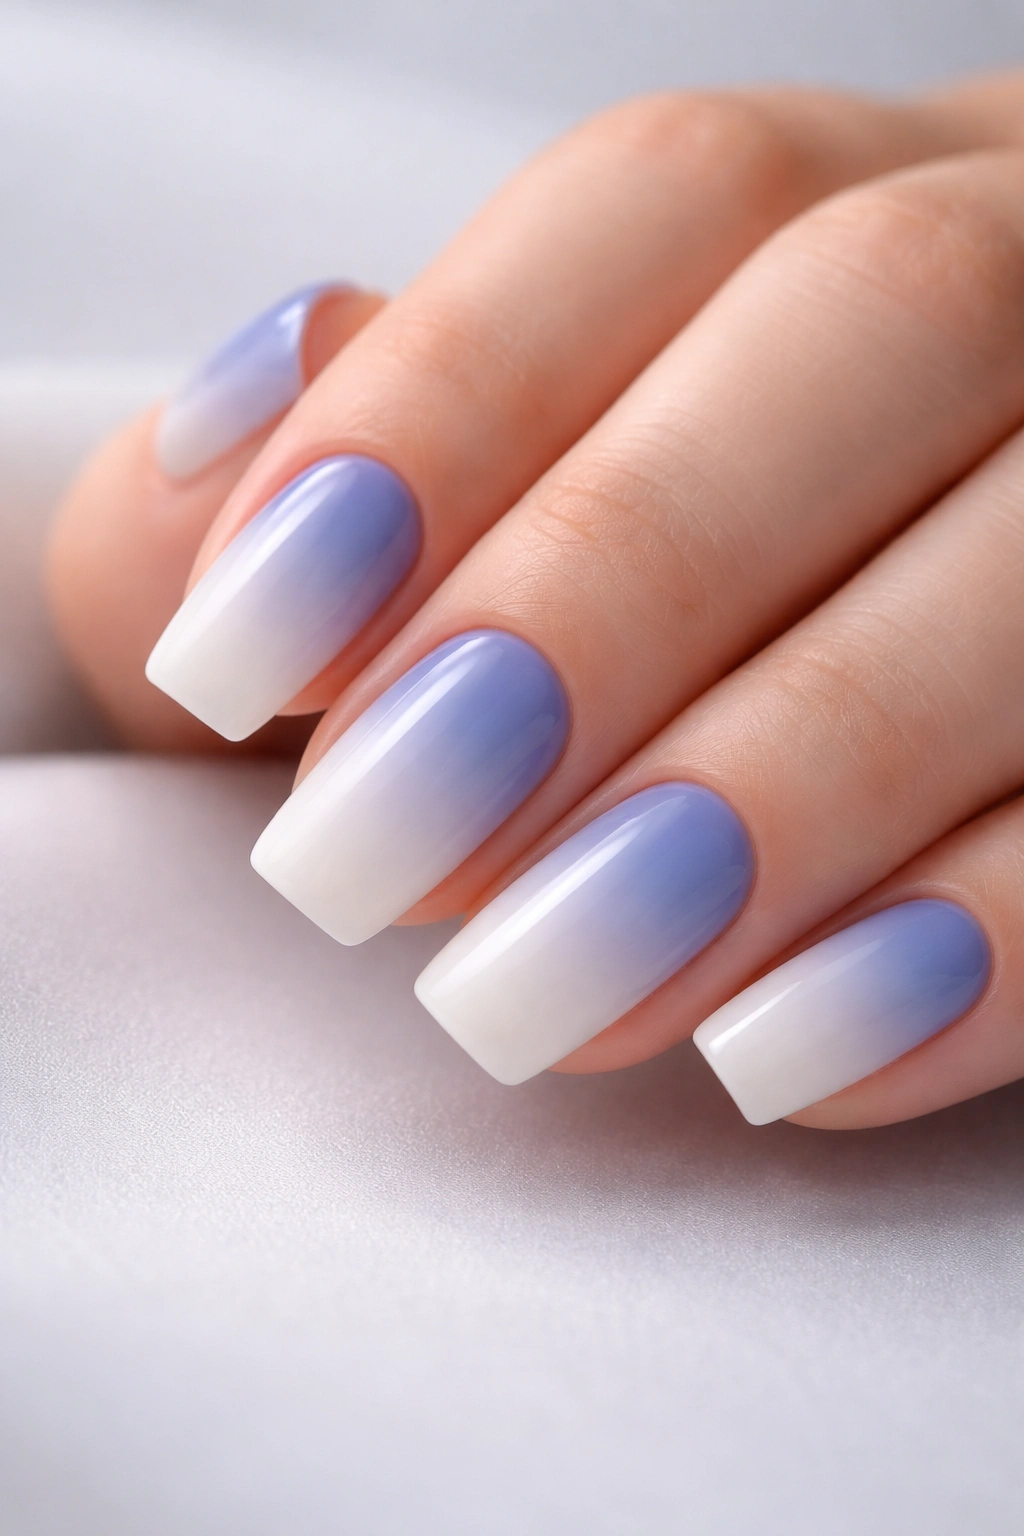
This is where you graduate from creamy blueberry at one end of the nail (usually near the cuticle) through increasingly milky whites until you reach almost pure white at the tip. The gradient is soft and blurred rather than striped or distinct, creating that ethereal “mist” effect that makes the design feel three-dimensional and ethereal.
The Ombre Technique Explained
You’ll need at least three shades: a true blueberry, a blueberry-leaning milk, and a near-white cream. The magic happens on a blending surface (a makeup sponge or blending brush works beautifully). Paint a small dab of each shade onto your sponge without fully blending them, then dab the sponge gently onto your nail in a vertical motion. The sponge naturally blends the colors where they meet, creating that soft, gradient effect.
This is definitely more involved than the first two looks, which is why it often takes practice to get the blending smooth without over-working it. One pro tip that game-changers for people learning ombre: apply a base coat to your nail first and let it dry completely. The slightly sticky surface of the base coat actually helps the ombre blend more smoothly than it would on bare nail. After you’ve sponged on your gradient, seal with a glossy top coat to blend the texture and enhance the depth.
Color Story Shifts
- Cool to warm ombre: Transition from cool blueberry through neutral milk to warm cream for a surprising warmth
- Monochromatic depth: Use different saturation levels of the same blue-purple tone for a more subtle ombre
- Reverse gradient: Start white at the cuticle and deepen to blueberry at the tips for an inverted effect
- Glitter fade: Add fine holographic glitter to the blueberry end that fades out as you move toward white
4. Soft Blueberry with Minimalist Floral Line Art
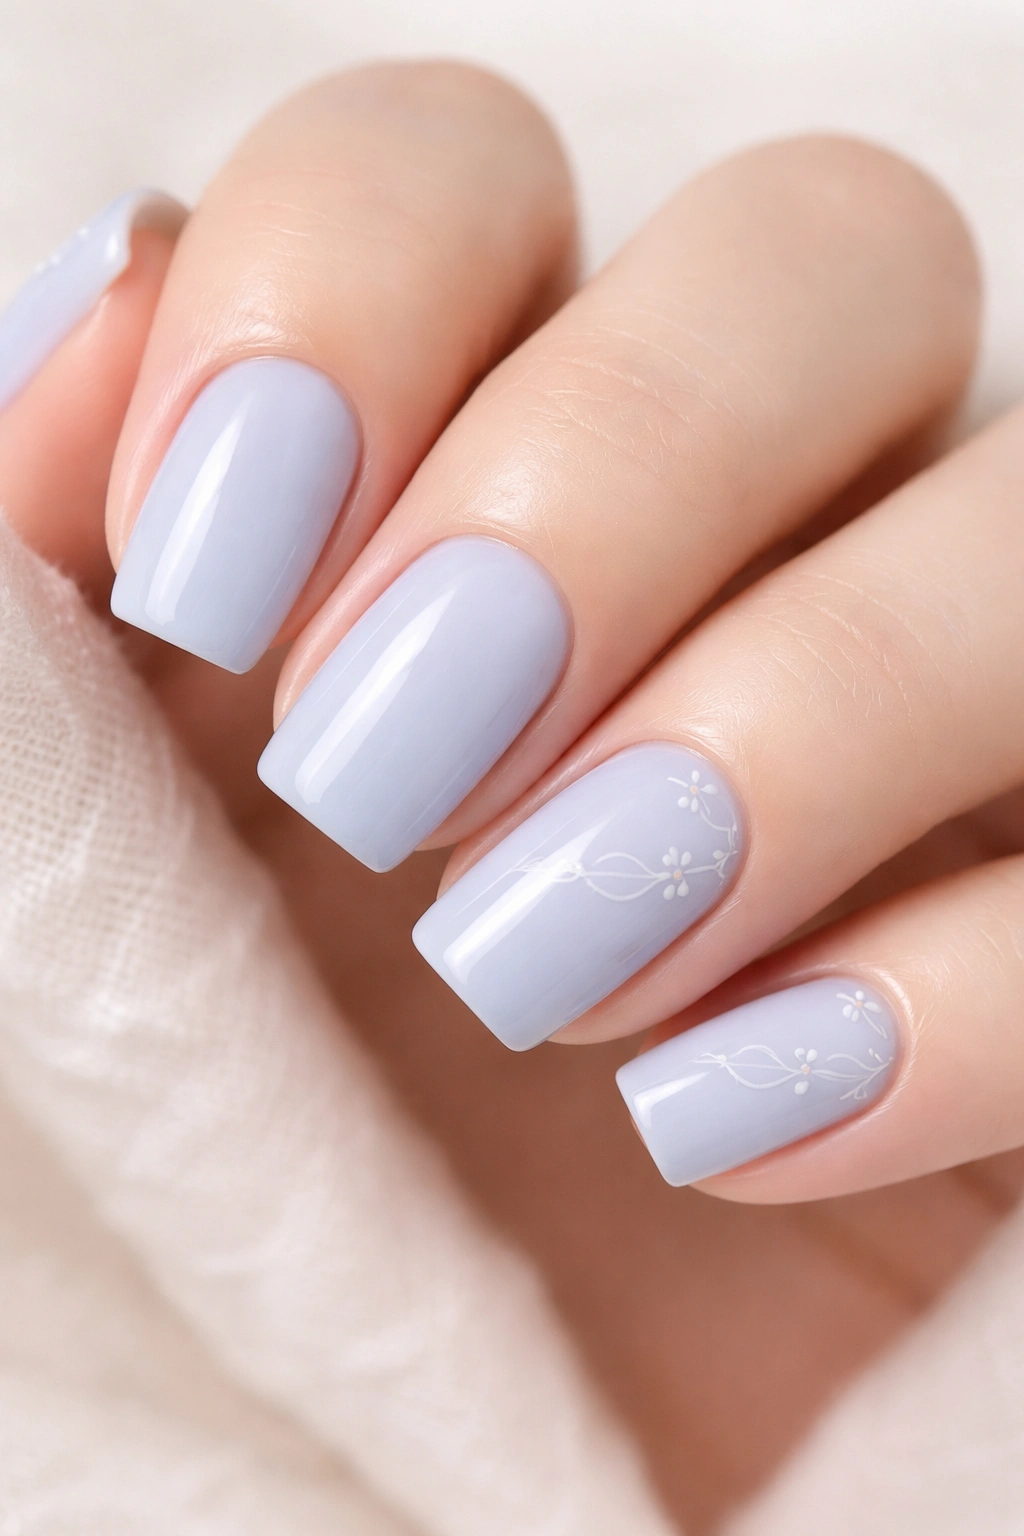
Here’s where we bring in just a whisper of artistic detail. You’re keeping the blueberry milk base solid and creamy, but adding one or two delicate line-work florals — maybe a tiny wildflower or minimalist rose outline near the cuticle or scattered across two or three nails.
Executing Fine Line Work
Line art on nails requires a very fine brush, steady hand, and thin, high-pigment polish or ink. A standard nail art brush is usually too thick; you’re looking for something with maybe 2-3 bristles that holds a fine point. Dip it into black, deep purple, or even a warm brown polish, and sketch your flower. Start with the stem, then the petal shapes, keeping lines thin and intentional.
If free-hand sketching feels intimidating, there’s absolutely nothing wrong with using a nail art stamp or a water-slide decal. You’d simply apply your solid blueberry base, let it cure completely, apply the decals according to package directions, and seal everything with top coat. The final result looks just as intentional and artistic, and there’s no shame in using tools that help you achieve the look you want.
The beauty of line art florals is how forgiving they are. A slightly wobbly line reads as hand-drawn and charming rather than sloppy. These designs work especially well on two or three accent nails while you keep the other nails solid blueberry milk.
Floral Motif Ideas
- Minimalist daisy: Three or four petals in the simplest shape, with a tiny dot center
- Botanical branch: A thin, branching stem with small leaves scattered along it
- Single-line rose: A rose drawn with one continuous, flowing line
- Grass and wildflowers: Multiple thin stems with varying height for a meadow feel
- Geometric + organic: Combine a minimalist flower with small geometric shapes for balance
5. Blueberry Milk Marble with Soft, Blurred Edges
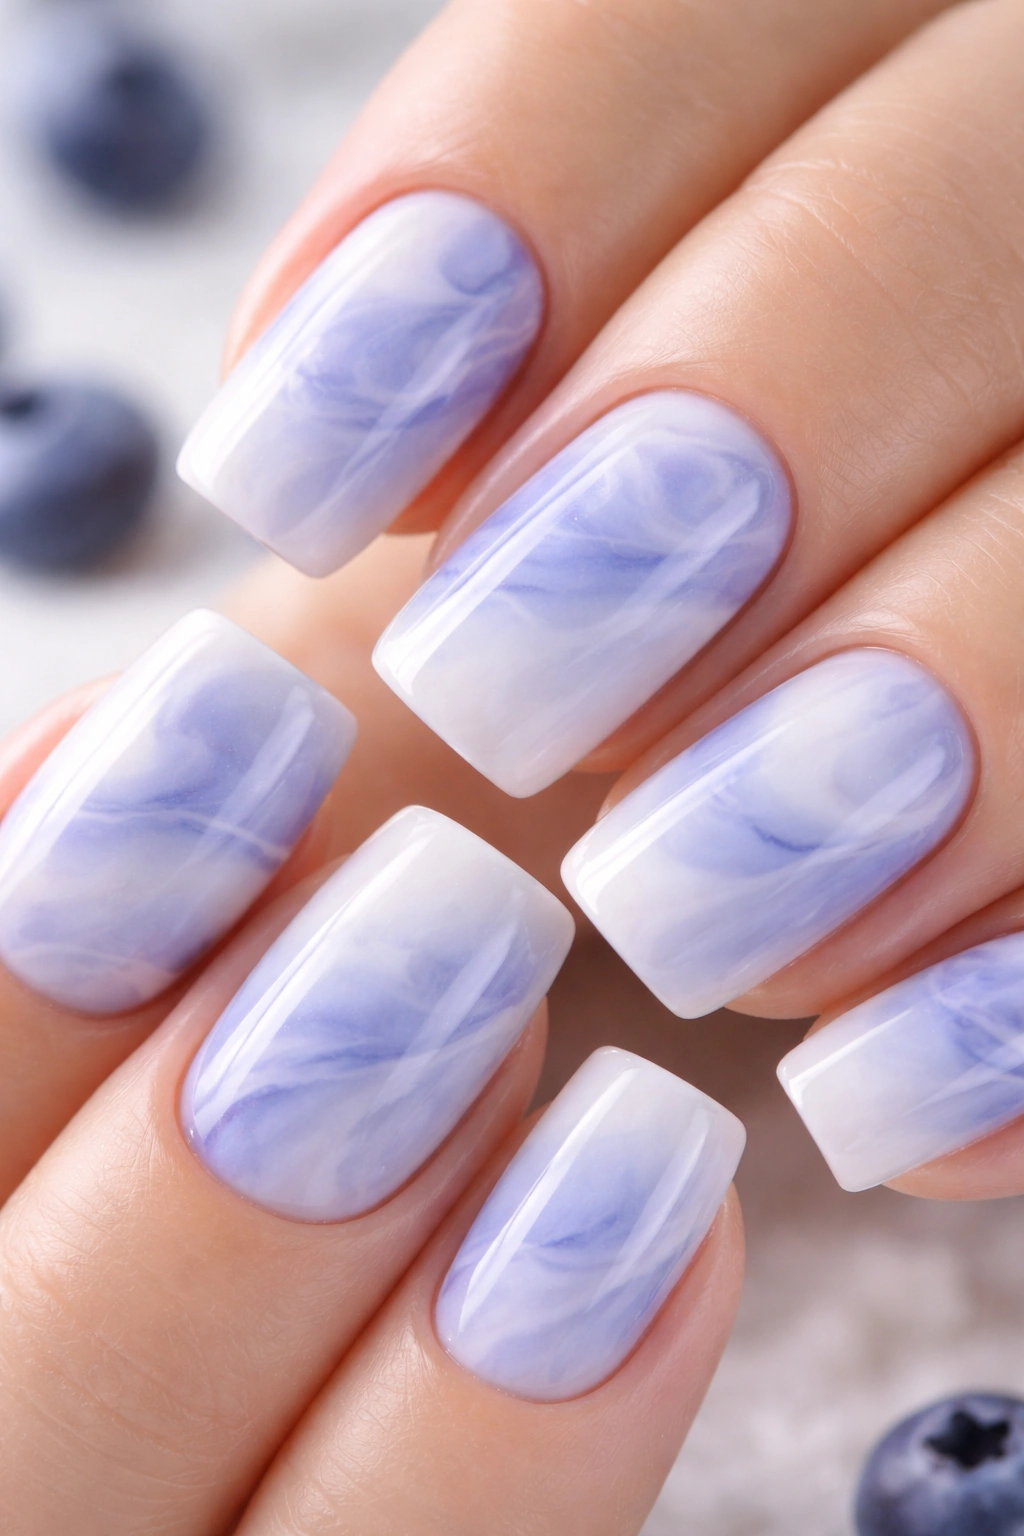
Marbling is that organic, naturally-occurring pattern that looks like swirled paint mixed in water. On nails, it’s created through a specific water-marble technique or simply by swirling two or three related colors together on the nail while they’re still wet and blending them with a brush or toothpick.
Achieving the Signature Marble Look
The traditional water marble technique involves filling a small glass or bowl with room-temperature water, dropping multiple colors of nail polish into the water (they sit on the surface), using a toothpick to swirl patterns into the polish, then dipping your nail into the pattern and letting the polish stick to your nail. The tricky part is timing — your polish needs to be exactly the right thickness and temperature to work properly.
A simpler alternative that yields gorgeous results: paint a base of cream or milk color, then while it’s still tacky, drop small amounts of blueberry and white polish directly onto the nail and gently swirl them together with a tiny brush. Don’t over-blend; let the colors remain somewhat distinct so you can see the individual shades. The swirling should look organic and natural, not perfectly uniform.
The “blurred edges” part is crucial for the soft aesthetic. Once your marble design is set, use a clean, damp blending brush or sponge to lightly feather the edges of the pattern where it meets the nail edge. This softens any harsh lines and makes the entire design feel more cohesive and intentional rather than chaotic.
Marble Variations
- Two-color marble: Just blueberry and white swirled together for maximum simplicity
- Three-color marble: Add a milky gray or taupe to the blueberry-and-white combination
- Negative space marble: Keep certain areas of the nail pure blueberry or pure white while marbling only sections
- Glitter marble: Incorporate tiny flecks of holographic or silver glitter into the swirl pattern
- Matte marble over glossy: Create the marble with matte polish over a glossy blueberry base for textural contrast
6. Gradient French Tips with Blueberry Undertones
The French tip is having a major moment, and this version puts a contemporary spin on the classic look. Instead of a stark white tip, you’re creating a gradient that transitions from blueberry at the nail bed through creamy tones to a soft white tip. The overall effect is sophisticated and modern while honoring the timeless French manicure structure.
The Gradient French Technique
Start with your base coat, then apply a rich blueberry or muted navy-blue color to the entire nail — this is your foundation. Let it dry completely. Next, map out where your “tip” area will be; this is usually the outer third or quarter of the nail. Using a sponge and your milk and white shades, create a gradient from the blueberry base toward the white tip, just like the ombre technique described earlier, but contained to the tip area.
The beauty of this approach is that it gives you all the elegance and visual elongation of a French manicure while keeping the color story cohesive with the blueberry milk palette. The gradient within the tip keeps it from feeling stark or dated — it’s a French manicure for people who love color and depth.
Seal everything with a glossy top coat to ensure the gradient blends smoothly and the whole design has a polished, professional appearance. The shine also makes the color transitions more visible and beautiful.
French Gradient Variations
- Reverse French: Blueberry color at the tip with white-to-cream gradient back to the cuticle
- Colored tip French: Keep the tip a solid, saturated blueberry instead of white for a bolder take
- Thin French line: Add a fine metallic line where the gradient meets the main color for definition
- Translucent tips: Use a translucent white polish for the tip gradient, allowing a hint of the blueberry base to show through
- Staggered tips: Vary the length of the “tip” area nail by nail — some short, some longer — for an artistic look
7. Blueberry Milk with Delicate Metallic Accents
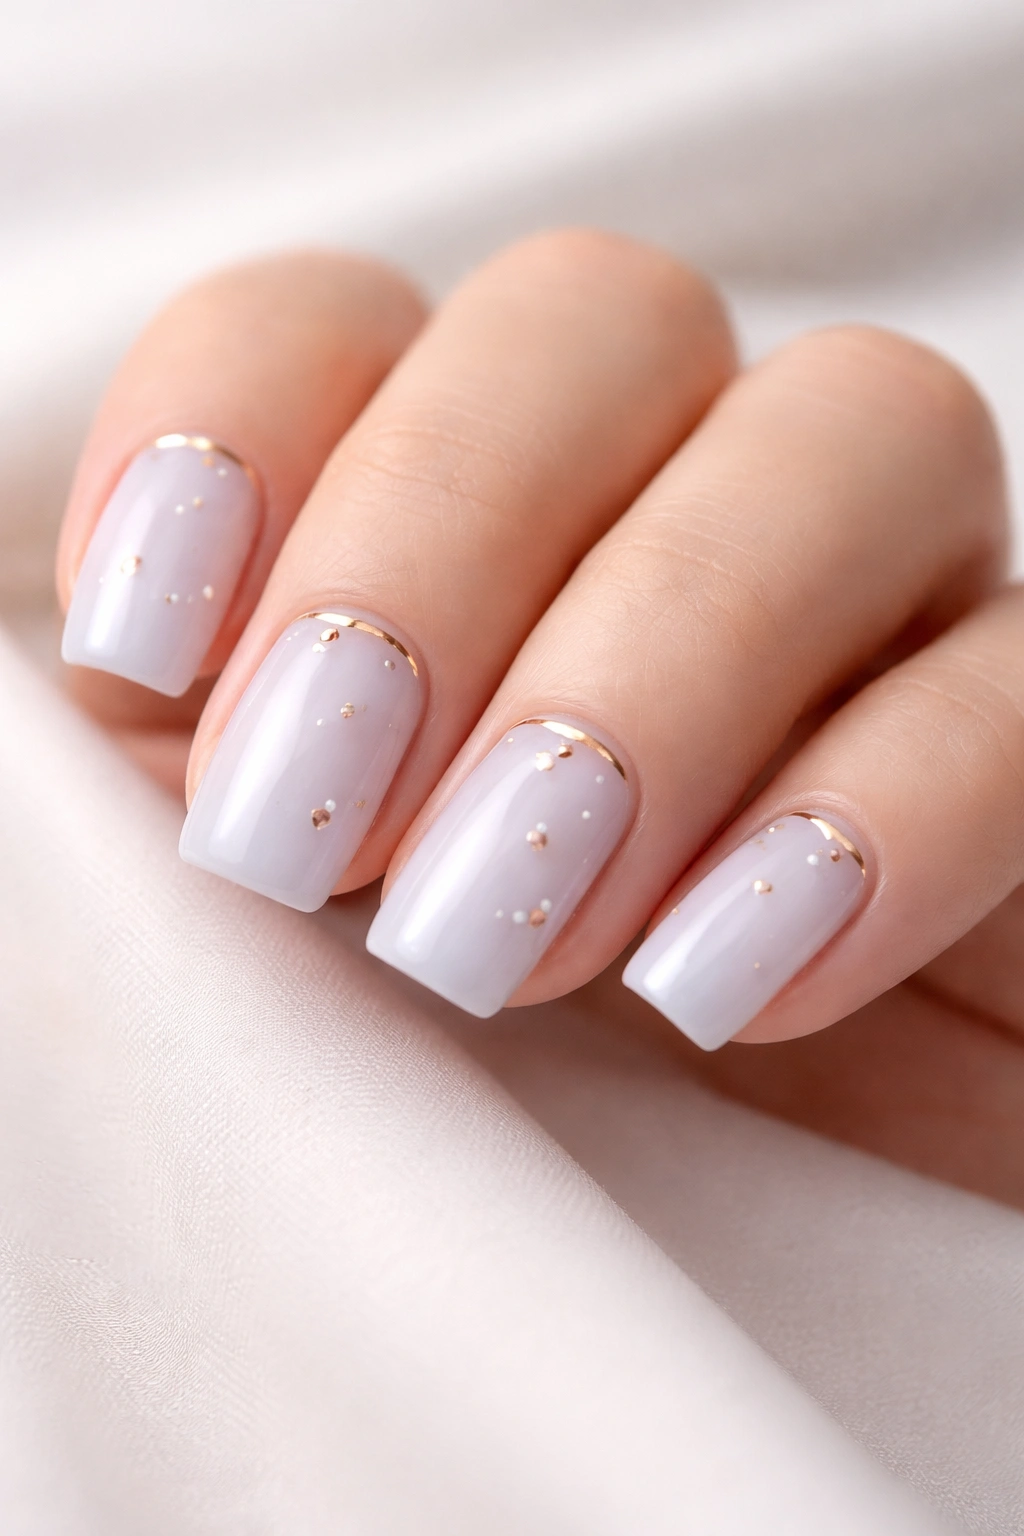
This design keeps the soft blueberry milk base solid while adding strategic metallic elements — maybe a thin gold or silver line near the cuticle, a metallic half-moon, or small geometric shapes in gold or rose gold scattered across the nail.
Choosing and Applying Metallics
Metallics work best when they’re used sparingly and intentionally. A thin metallic stripe or outline reads as elegant and intentional, while metallics covering large areas can start to feel costume-y or overwhelming. Think of them as jewelry for your nails — a statement, but not the whole look.
You can apply metallics using a fine brush and metallic polish, or you can use metallic nail pens (which are excellent for thin, precise lines), or thin metallic tapes. If you’re using tape, apply it after your base color is completely dry and sealed. Seal the tape down with a top coat immediately after placement to ensure it adheres and stays put for the duration of wear.
For a more ethereal approach, try using a metallic chrome powder over the blueberry milk base in certain areas only — maybe just the tips, or just along one side. Chrome powders have a ethereal, almost holographic quality that feels very current and sophisticated.
Metallic Accent Ideas
- Simple cuticle line: A thin gold or silver line right at the base of the nail, like minimalist jewelry
- Metallic half-moon: A shimmering half-moon accent in gold or rose gold at the cuticle
- Scattered geometric shapes: Tiny gold triangles, circles, or squares scattered naturally across the nail
- Metallic gradient tips: A chrome or holographic gradient concentrated just at the tips
- Metallic outline: A fine metallic border around the entire edge of the nail, defining the shape
- Three-dimensional metallic studs: Small metal nail studs placed strategically for dimension and catch-light
8. Blueberry Milk Base with Soft Pearl or Shimmer Finish
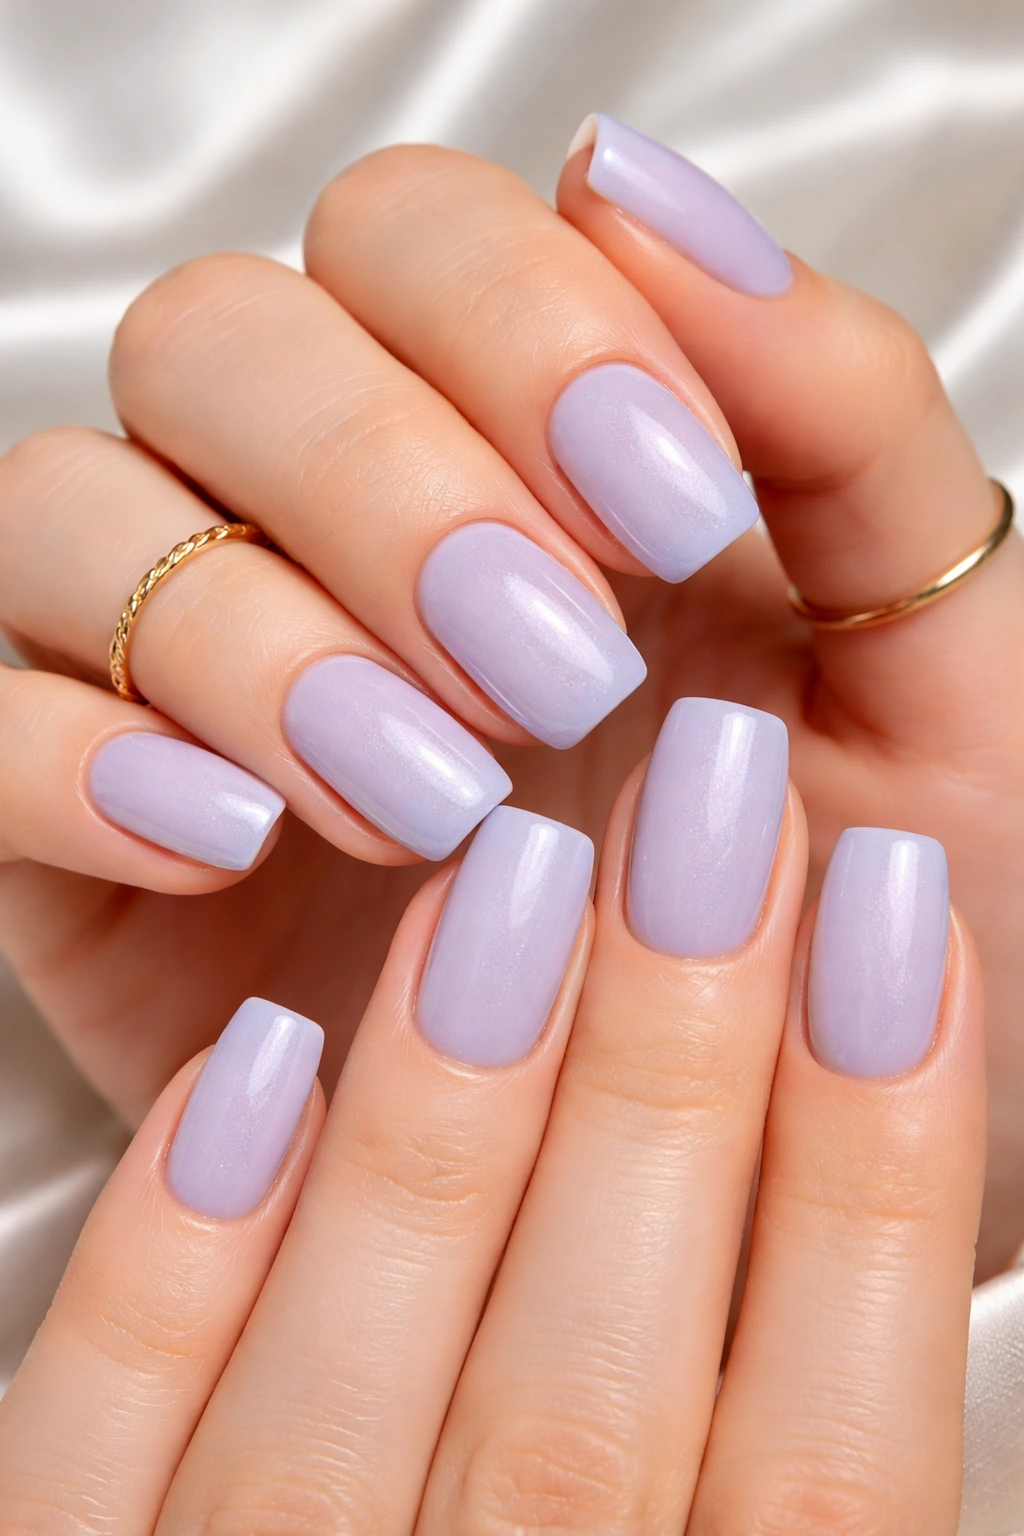
If you love the blueberry milk concept but want to add tactile dimension and light-catching beauty, a soft pearl or subtle shimmer finish is your answer. This isn’t glitter (which feels separate and grainy), but rather a pearl or shimmer suspension within the polish itself.
Understanding Pearl vs. Shimmer Finishes
Pearl finishes contain micro-sized pearl particles that reflect light in a way that makes the color appear to shift subtly and shimmer from different angles. A shimmer finish uses finely-milled metallic or iridescent particles that create a sparkling, reflective quality. Pearl tends to feel more sophisticated and subtle, while shimmer can range from barely-there to quite sparkly depending on the particle size.
For blueberry milk nails, you want the pearl or shimmer to enhance the creamy, luminous quality rather than dominate it. Look for polishes described as “soft shimmer” or “subtle pearl,” not “glitter-packed” or “holographic.” The goal is polish that catches light beautifully but doesn’t look textured or chunky.
Apply pearl or shimmer blueberry milk polish exactly like you would any cream polish — thin coats, proper base coat, careful curing if it’s gel. The shimmer will naturally build with each coat, so you’ll see the light-catching quality develop as you layer.
Pearl and Shimmer Variations
- Milky shimmer: Choose a shimmer formula in the creamy milk shade rather than dark blueberry
- Duochrome shimmer: Select a shimmer polish that shifts color depending on the angle — maybe blueberry shifting to purple or lavender
- Soft opal finish: An iridescent shimmer that reflects multiple colors subtly
- Two-shimmer design: Combine a soft shimmer blueberry with a softer shimmer milk for a multi-dimensional gradient
- Top coat shimmer: Keep the base solid blueberry milk, then add a shimmer top coat layer for adjustable sparkle
- Strategic shimmer: Apply shimmer only to the tips or accent nails while keeping other nails solid
9. Negative Space Blueberry Milk Design
Negative space nails intentionally leave portions of the nail bare (showing the nail bed or a sheer base), creating an artistic, minimalist look. Applied to blueberry milk, you might have creamy blueberry sections with geometric gaps of bare or pale nail bed, or clean negative space lines creating patterns across a milk-colored base.
Creating Clean Negative Space
The key to successful negative space nails is precision. If you’re creating this look at home, use nail stencils, thin metallic tape, or a steady hand with careful marking to ensure your bare areas are intentional and clean-edged, not accidental-looking.
One approach: apply your blueberry or milk base color to the entire nail, let it dry completely, then use painter’s tape or a specialized nail stencil to mask off the areas you want to keep bare. Paint the color of your choice in the non-masked areas, remove the tape carefully, and seal. The result is sharp, defined negative space.
Alternatively, keep most of the nail in solid blueberry milk but leave a thin border around the entire edge bare, showing just a sliver of the nail bed or a sheer pink base. This creates a clean, gallery-like frame around the color that feels very intentional and modern.
Negative Space Patterns
- Geometric frames: Clean lines creating rectangles, triangles, or abstract shapes within the blueberry milk base
- Half-and-half negative: One half of the nail in blueberry, the other half bare, with a clean vertical line dividing them
- Corner cut-outs: Small triangles or shapes cut out from the corners while the center remains blueberry milk
- Thin linear negative: Thin parallel lines running through the color, creating visual stripes of bare nail
- Cuticle-to-tip strip: A vertical bare strip running from cuticle to tip, creating a minimalist focal line
- Scattered dots: Multiple small negative space circles scattered across a solid blueberry milk base
10. Textured Blueberry Milk with Matte and Gloss Mix
This final design plays with finish and texture — keeping the blueberry milk color consistent while varying whether it’s matte, gloss, or somewhere in between. The result is a design that has visual movement and dimension purely from the interplay of light and matte surfaces.
Creating Texture Through Finish Variations
Apply your blueberry base in a glossy finish to the entire nail. Once dry, use painter’s tape or stencils to mask off certain sections, then apply the same blueberry color in a matte finish to those sections. Remove the tape, and you now have a nail with multiple finishes — the glossy sections catch light and look luminous while the matte sections appear more velvety and subdued. The color is identical, but the texture creates visual complexity and interest.
You can do the inverse — matte base with glossy accent sections — or create a gradient from glossy to matte across the nail. The matte-to-gloss transition especially works beautifully if you apply a very thin glossy top coat to just the glossy sections (not the matte ones), so the matte remains truly matte while the gloss becomes even more lustrous.
This technique requires a bit of patience and careful sealing, but the result is a sophisticated, designer-looking nail that absolutely photographs beautifully. The interplay of matte and gloss creates dimension and movement that a single-finish nail simply can’t achieve.
Texture and Finish Combinations
- Matte cuticle, glossy tip: Matte blueberry at the base transitioning to glossy creamy blueberry at the tip
- Alternating finish sections: Glossy and matte sections alternating in vertical or horizontal stripes
- Matte center, glossy frame: Matte blueberry in the center with a glossy border around the edges
- Glitter matte blend: Textured matte base with glitter suspended in a glossy top coat layer
- Soft satin finish: A middle-ground finish that’s neither fully matte nor fully glossy, using a satin top coat
- Metallic accents on matte: Matte blueberry milk base with glossy metallic lines or shapes for contrast
Final Thoughts
Blueberry milk nails represent something important in nail design right now — the move toward colors and finishes that feel personal, sophisticated, and wearable every single day. The beauty of the soft square shape combined with the blueberry milk palette is that whether you’re drawn to minimalist elegance or more artistic expression, there’s a version of this look that speaks to you.
The designs here range from dead-simple (that first creamy blueberry single-color look) to more involved (the textured finishes and marbling), so you can choose based on your comfort level, time availability, and how adventurous you’re feeling. If you’re getting these done professionally, show your nail artist a few of these photos so they understand the color story and mood you’re going for — the soft, milky quality is really the heart of what makes blueberry milk special.
What’s wonderful about committing to blueberry milk nails is that the color truly does work year-round. It’s cool enough for warmer months but moody enough not to feel summery, and it pairs beautifully with both neutrals and jewel tones in your wardrobe. Unlike trend colors that feel dated after a season, blueberry milk feels timeless and intentional — like you chose it because you genuinely love it, not because it was the trend of the moment. That’s exactly the kind of nail aesthetic that makes you feel confident and put-together every single time you look down at your hands.
