

Hot pink isn’t just a color—it’s a statement. Whether you’re channeling confidence for a night out, making waves at the office, or simply craving that dopamine hit that comes with a bold manicure, hot pink delivers exactly what its name promises: heat, energy, and undeniable attitude. Unlike softer pastels that whisper, hot pink practically shouts, and that’s precisely why it’s become the go-to shade for anyone ready to let their nails do the talking.
The beauty of hot pink lies in its remarkable range. It works across every skin tone when you choose the right undertone, suits short nails just as well as long ones, and pairs beautifully with virtually any design technique you can imagine. From pure, unapologetic solid color to intricate nail art featuring chrome finishes, 3D embellishments, and mixed textures, hot pink is the ultimate canvas for creative expression. A nail artist’s dream and a wearer’s confidence boost all rolled into one.
What makes hot pink so universally flattering is its balance of boldness and versatility. Warmer undertones lean toward magenta and fuchsia, while cooler undertones have a slight blue shift that makes them appear more electric. This spectrum means there’s genuinely a hot pink for everyone, regardless of whether your skin is fair, deep, olive, or anywhere in between. The key is understanding which direction speaks to you and then building from there.
If you’ve been considering taking the plunge into hot pink nails but aren’t sure which direction to go, this guide is for you. Below are ten stunning approaches to wearing this power color, each offering something different yet equally show-stopping.
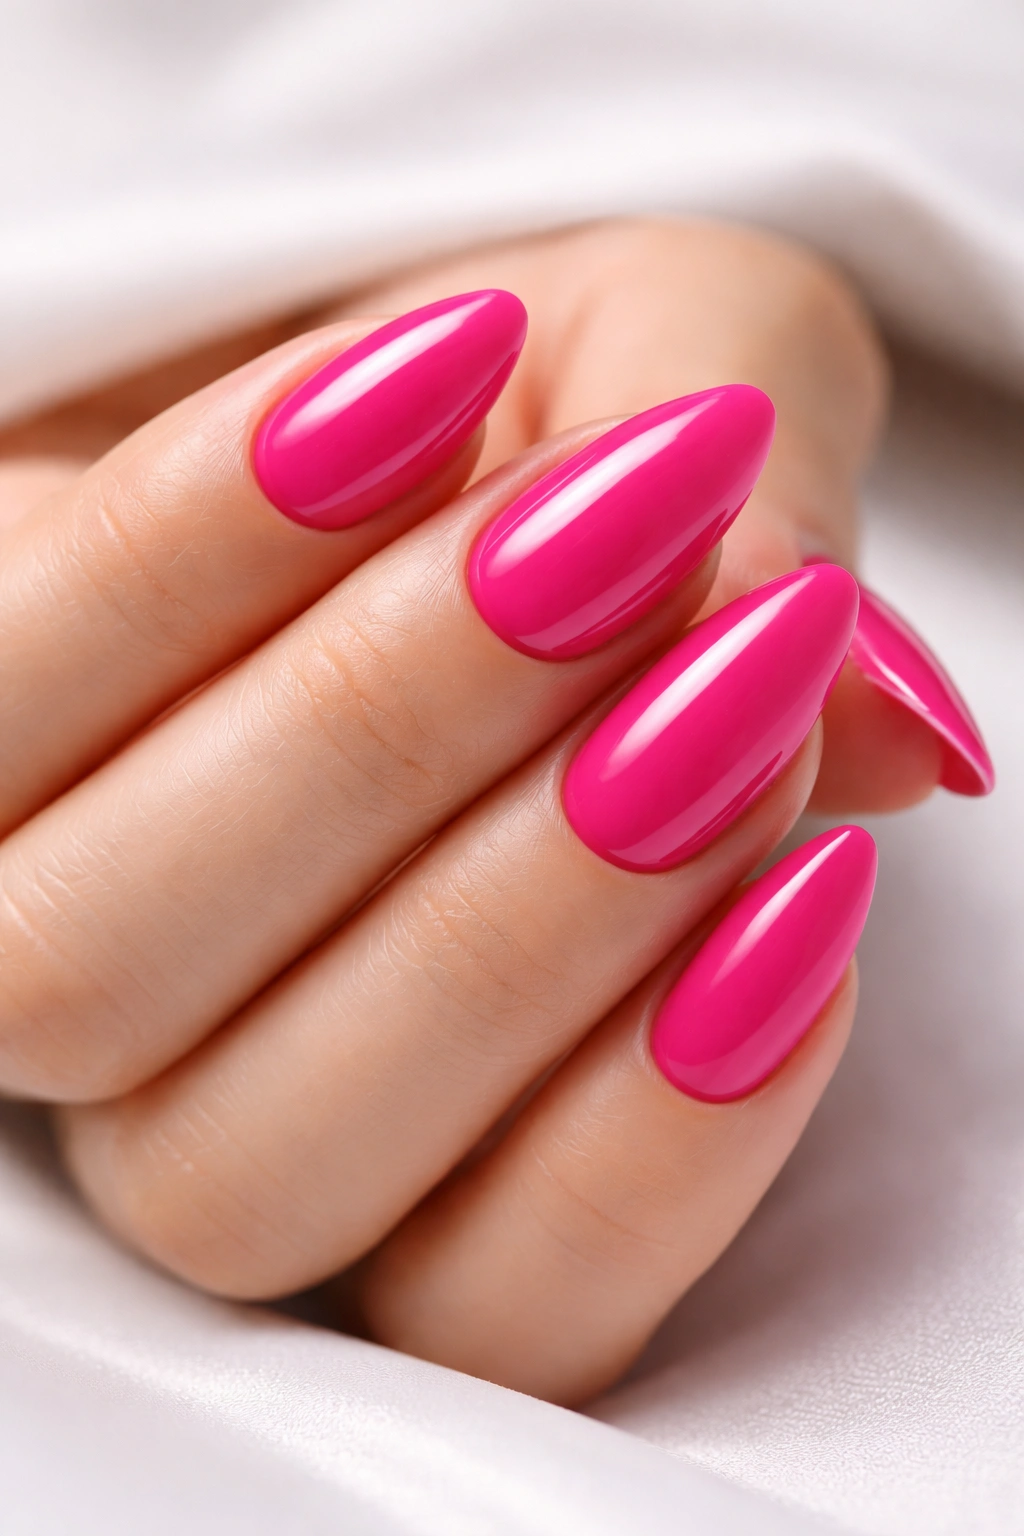
1. Solid Hot Pink Gloss for Maximum Impact
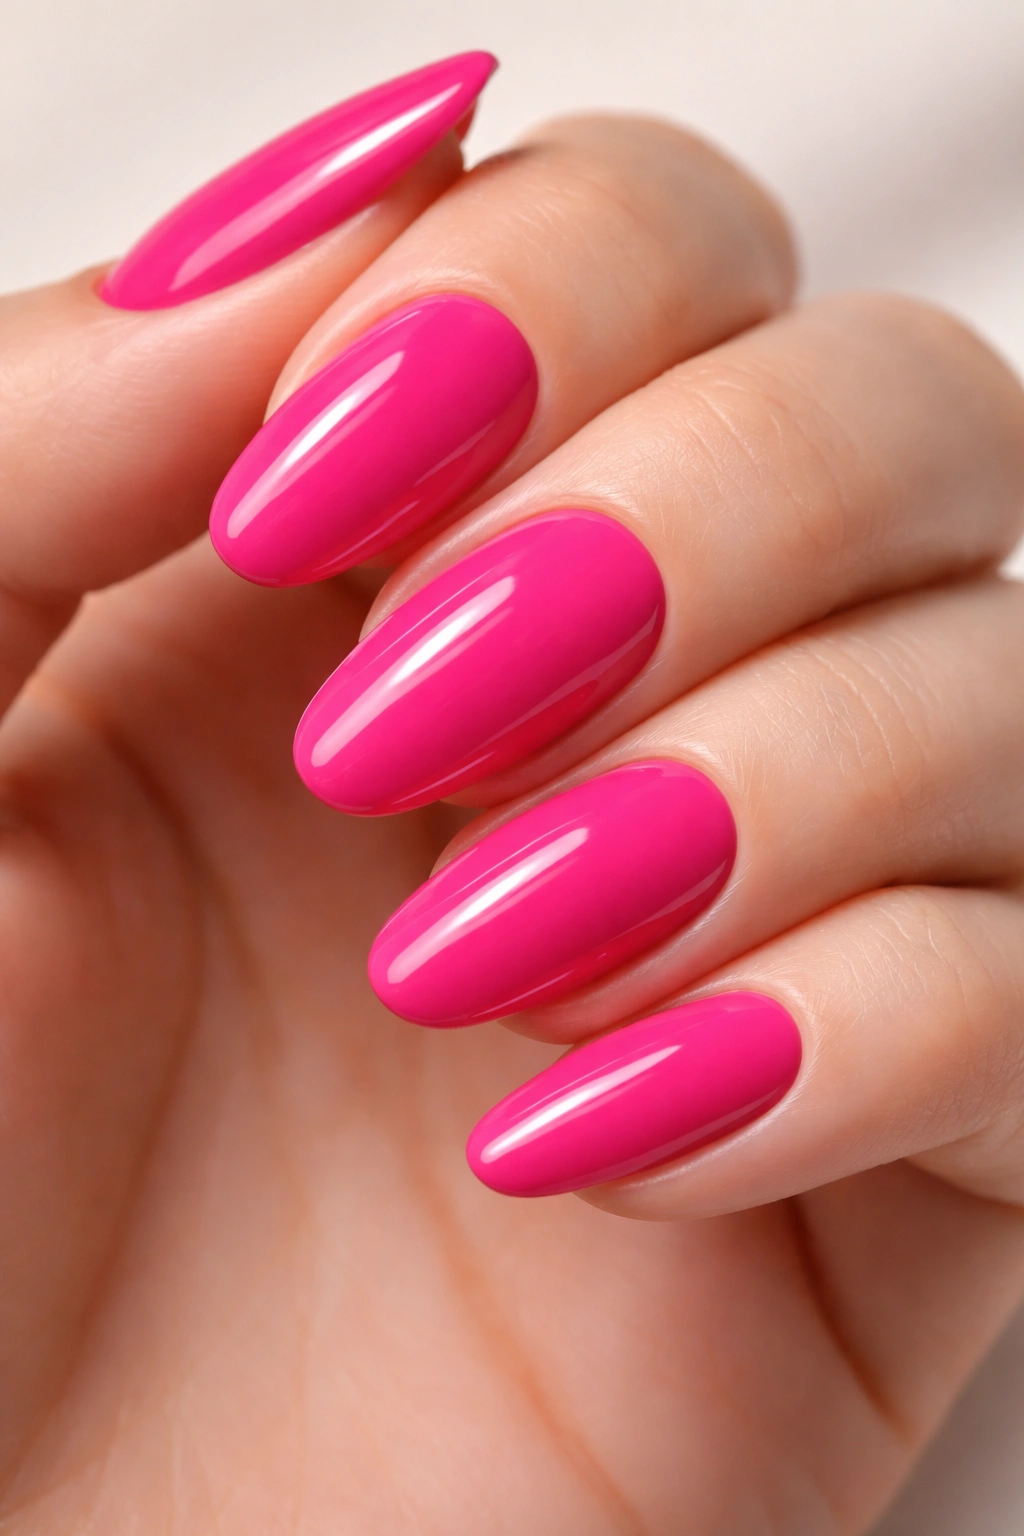
Sometimes the boldest choice is the simplest one. A single, saturated coat of hot pink polish with a glossy finish is all you need to make a statement that reads loud and clear. This approach celebrates the color itself without any competing designs or textures, letting the richness of the shade be the star.
Why This Look Commands Attention
A solid hot pink manicure works because of pure color psychology. Hot pink is inherently energetic and confident—it literally catches the light and the eye. When applied with a glossy topcoat, the reflection amplifies that effect even further, creating a near-luminous quality on your nails. You’re not asking for attention with this look; you’re demanding it. The beauty is that this simple approach never feels boring because hot pink itself is never boring. Whether you’re in a boardroom or a nightclub, it reads as intentional and powerful.
Application and Longevity Tips
- Use a quality base coat to prevent staining and to create a smooth surface for your color
- Apply hot pink polish in thin layers—usually two coats—rather than one thick coat that’s prone to streaking
- A high-quality glossy topcoat is non-negotiable; it protects the polish and adds that critical shine that makes hot pink pop
- Hot pink can be quite opaque, so with proper application and a good topcoat, you can expect 7-10 days of wear without chips
Pro tip: The glossier your topcoat, the more the pink seems to glow. Don’t skimp on this final step—it’s what transforms a good manicure into a truly stunning one.
2. Hot Pink Chrome with Mirror Shine
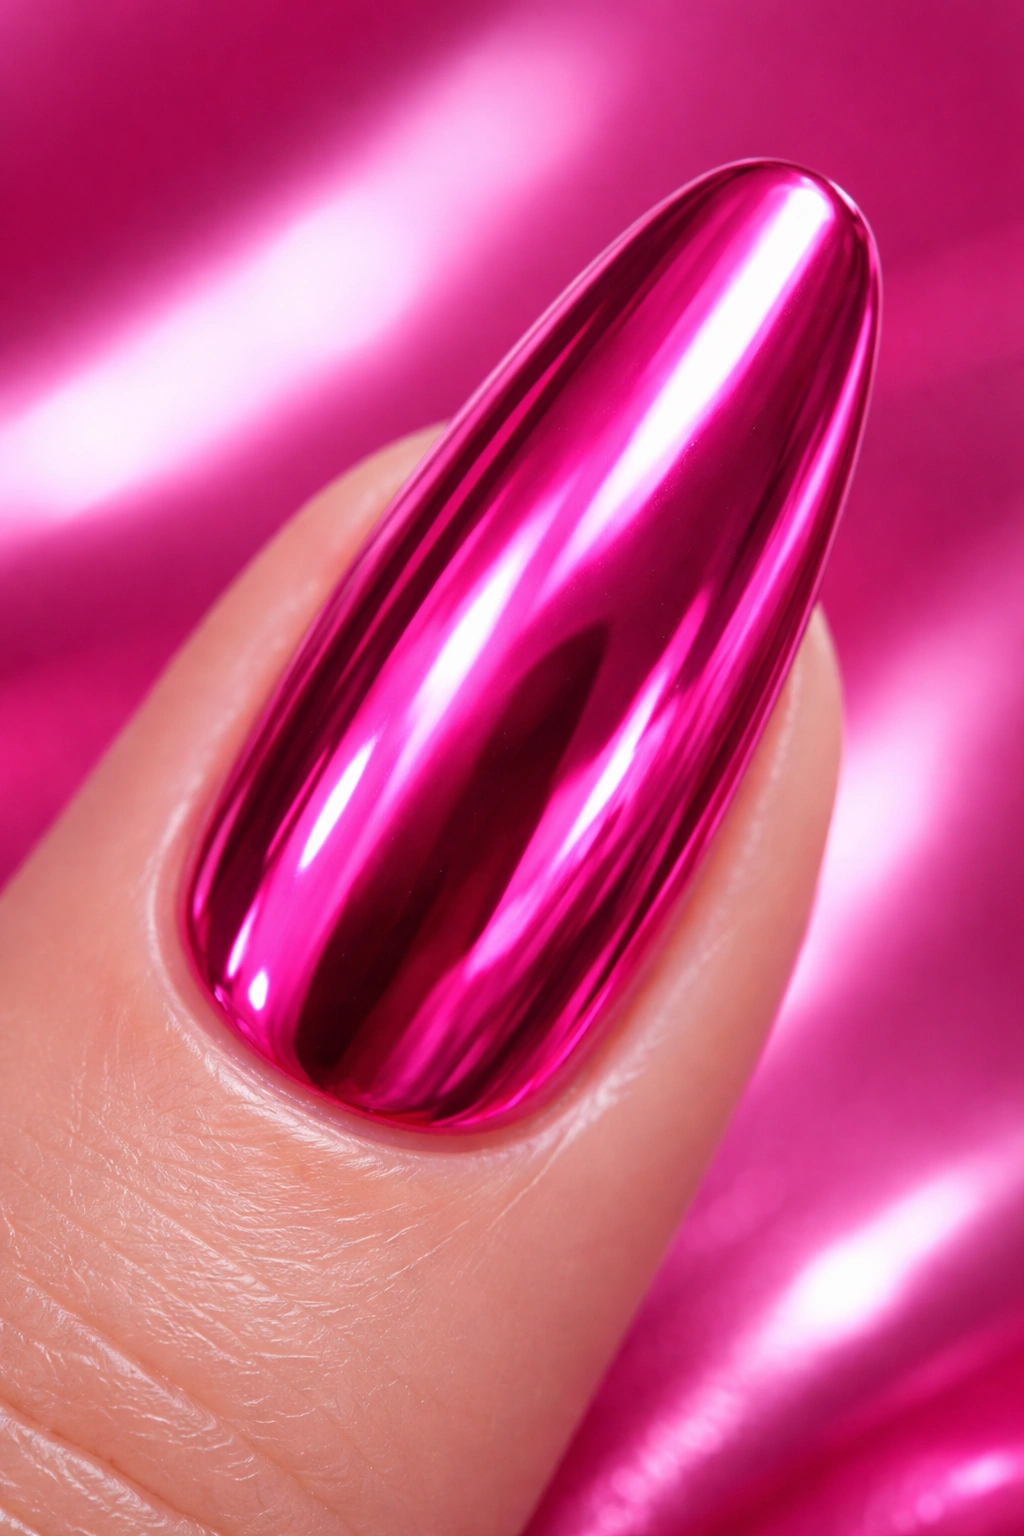
Chrome nails have fundamentally changed what’s possible in nail art, and hot pink is one of the colors that benefits most dramatically from this technique. Chrome creates an almost liquid-metal effect, turning your hot pink base into something that looks otherworldly and deeply luxurious.
How Chrome Transforms the Color
Chrome powder works by reflecting light in multiple directions simultaneously, creating a mirror-like finish that sits on top of your polish. When applied over hot pink, this creates depth that a regular polish can’t achieve. The pigment sits beneath the chrome layer, giving you both the saturated color and the reflective shimmer. The result is something that feels both bold and elegant—a rare combination. In bright light, the effect is nearly blinding. In softer indoor lighting, it reads as a sophisticated jewel tone.
Creating a Long-Lasting Chrome Mani
- Start with a smooth base coat and apply your hot pink gel or regular polish evenly
- Use a gel topcoat before applying chrome powder—this tackiness helps the powder adhere properly
- Brush or buff the chrome powder on in circular motions using a soft, fluffy brush
- Seal everything with another layer of gel topcoat to lock in the chrome and prevent it from flaking
- This technique typically lasts 2-3 weeks with gel polish, or around 7-10 days with regular polish
The chrome effect is so striking that you might feel tempted to add additional design elements, but resist the urge. Let the mirror shine do the work.
3. Hot Pink with Black Graphic Lines
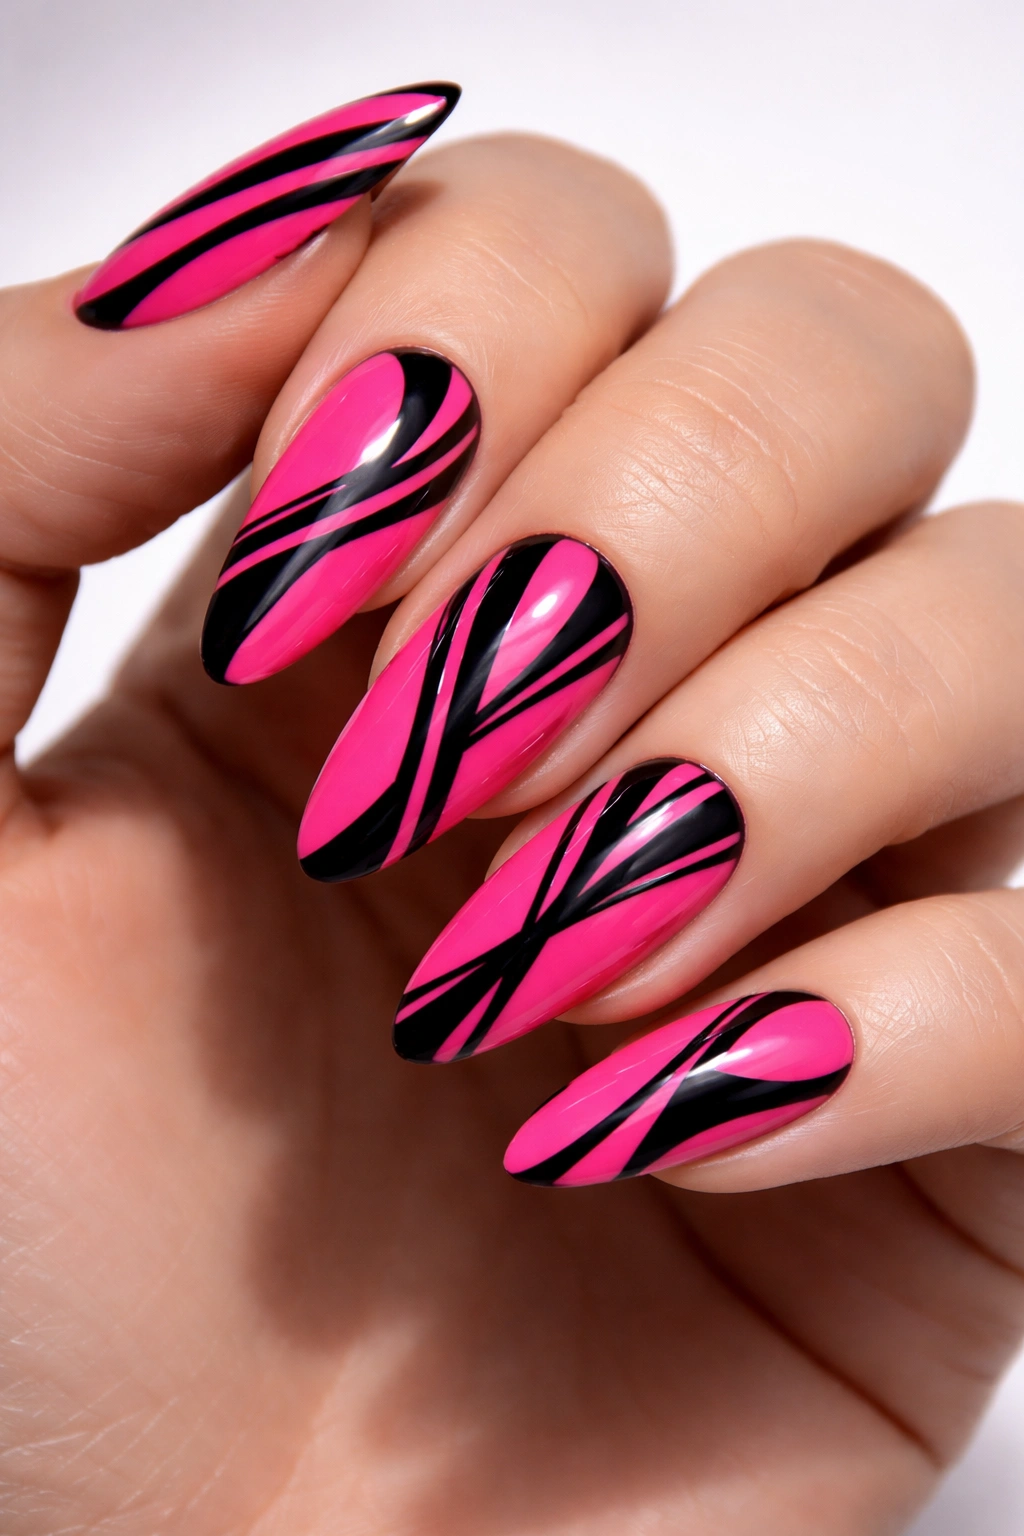
Pairing hot pink with bold black graphic lines creates a look that’s simultaneously playful and edgy. This design approach transforms hot pink from purely feminine into something with serious attitude and artistic credibility.
The Power of Contrast
Black and hot pink sit on opposite ends of the value spectrum, which means they create maximum contrast. This visual pop is what makes graphic designs feel so impactful. A simple black line—whether it’s a swirl, a stripe, or an abstract shape—becomes the focal point against the bright pink background. The boldness of both colors working together creates something that feels contemporary and intentional. This isn’t a dainty design; it’s a statement piece for your hands.
Nail Art Techniques for Graphic Lines
- Free-hand painting with a thin nail art brush requires steady hands; practice on one nail first
- Nail striping tape allows you to create perfectly straight lines; remove it before curing or topcoat application
- Stamping plates with graphic designs remove the guesswork; press the stamped image gently for crisp lines
- Gel pens designed for nail art work beautifully for creating fine details over cured polish
- Finish with a glossy or matte topcoat depending on the mood you’re going for—matte adds edge, glossy adds polish
Consider keeping the graphic elements to just one or two nails rather than all ten; this creates visual interest while maintaining wearability for everyday life.
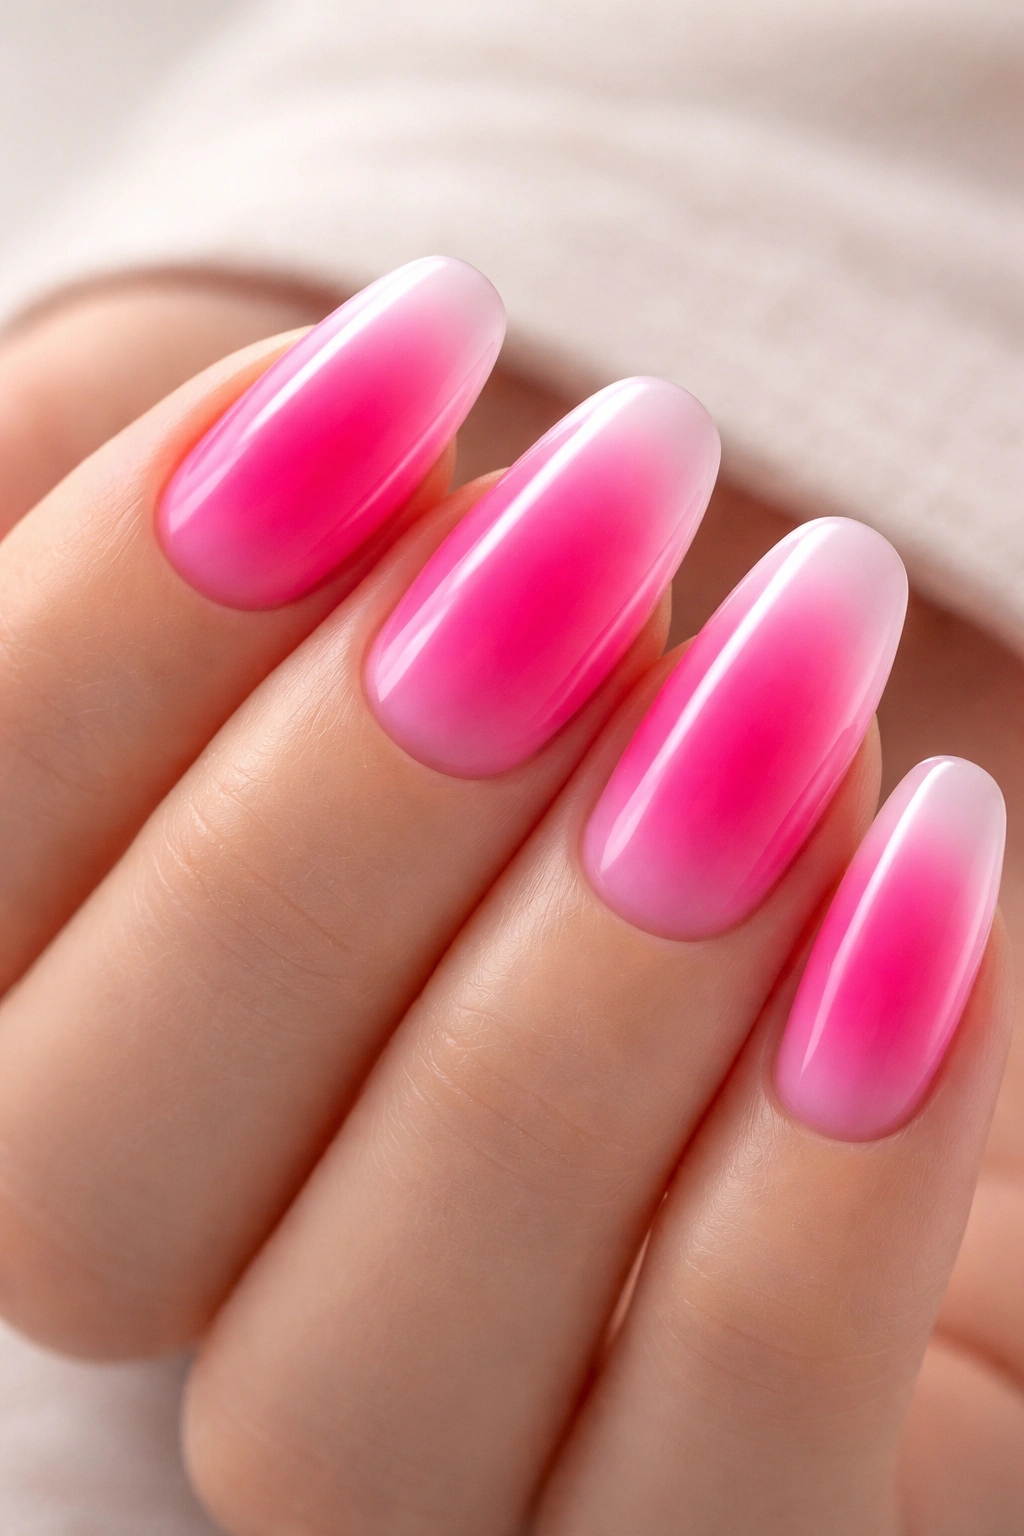
4. Hot Pink Ombré to Nude for Soft Transition
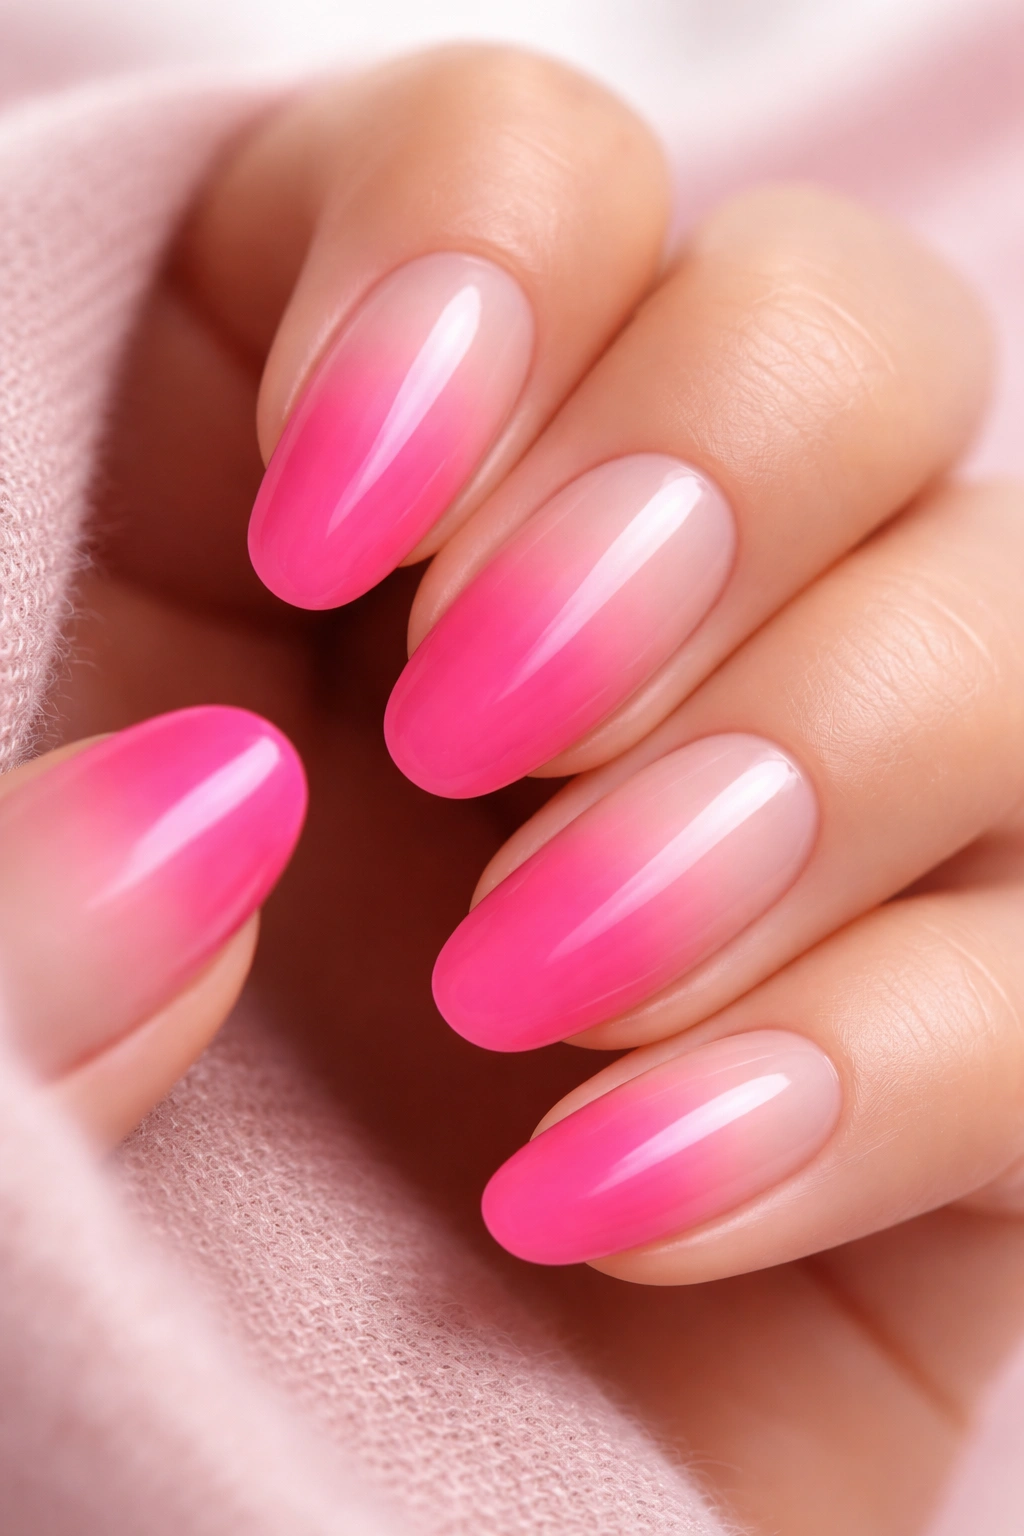
An ombré design that fades from hot pink at the tips to a nude or milky white base creates a gradient effect that’s both bold and refined. This look proves that hot pink doesn’t have to be all-consuming; it can be integrated in a way that feels sophisticated.
The Psychology Behind Ombré
Ombré works because it creates visual depth and movement. Your eye follows the color transition from one shade to another, which feels dynamic and modern. With hot pink transitioning to nude, you’re bridging bold and neutral—giving yourself a manicure that’s statement-making without being completely over-the-top. This approach works beautifully if you love hot pink but worry about it being too intense for certain situations. The nude base tones things down while the hot pink tips keep the energy alive.
Achieving a Flawless Gradient
- Sponge technique: Mix your hot pink and nude shades on a makeup sponge and dab onto the nail tip area, blending upward
- Airbrush method: Professional airbrushes create seamless transitions that are nearly impossible to achieve by hand
- Gradient nail polish: Some brands specifically formulate two-tone polishes designed to create this effect automatically
- Brush blending: Use a clean, slightly damp brush to soften the line where colors meet
- Multiple thin layers work better than one thick application—patience is essential
A matte topcoat over an ombré design creates a velvety effect that photographs beautifully, while a glossy topcoat emphasizes the gradient’s depth.
5. Hot Pink with Rhinestone Accents for Glamour

Adding rhinestones, crystals, or gems to hot pink nails instantly elevates the look into high-glamour territory. This approach is perfect for special occasions, nights out, or whenever you want your hands to literally sparkle.
Making Rhinestones Work with Hot Pink
Hot pink is bright enough that it can support significant sparkle without becoming visually chaotic. In fact, rhinestones on hot pink nails create an almost celebratory effect. The gems catch light independently from the polish, creating multiple focal points and depth. Whether you scatter stones across all nails or concentrate them on accent nails, the effect is undeniably luxe. The key is choosing rhinestone sizes and placements that feel intentional rather than random.
Rhinestone Application and Maintenance
- Use a rhinestone-specific adhesive or nail glue designed for gems; regular topcoat won’t hold them securely
- Apply stones with a dotting tool or tweezers to ensure precise placement
- Press each stone firmly for at least 10 seconds to ensure a secure bond
- Seal everything with clear topcoat once the adhesive is completely set
- Be gentle during hand washing; avoid harsh rubbing directly on the stones
- Expect stones to remain secure for around 1-2 weeks before potentially loosening
Consider using gradient sizes of rhinestones—larger ones as focal points, smaller ones to fill space. Or keep it minimal with just a few larger stones on your accent nails for an understated luxe vibe.
6. Hot Pink French Tips with Modern Twist
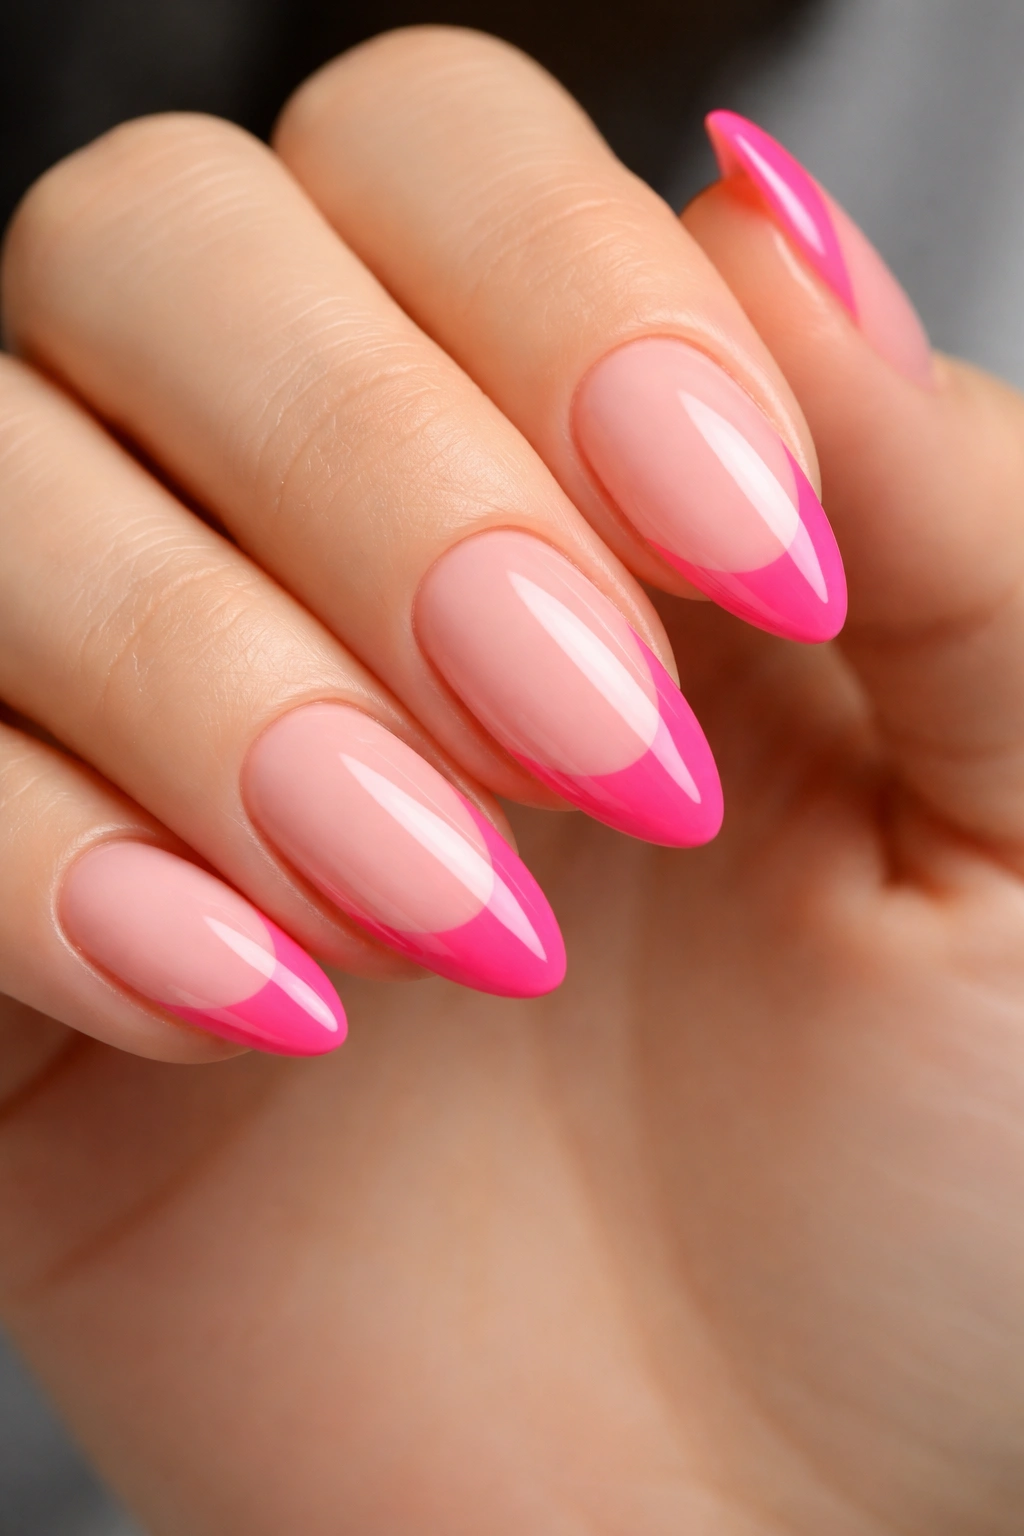
The French manicure is a classic, but when you swap white tips for hot pink, you create something that feels both timeless and thoroughly contemporary. This approach gives you the elegance of a French mani with the attitude of hot pink.
Reinventing the Classic
A traditional French manicure features a pale base and white tips, but when you reverse or modify this formula with hot pink tips, you’re playing with expectation. Hot pink tips on a nude or milky white base maintain the refined proportions of a French manicure while introducing serious color. Alternatively, you could do the reverse—a hot pink base with white tips—for a look that feels even bolder. The key is maintaining the clean lines and geometric precision that make a French manicure feel elegant in the first place.
Creating Perfect Hot Pink Tips
- Nail guide stickers ensure a straight line; apply them in the tip area and paint over
- Freehand painting with a thin brush works if you have a steady hand; brace your hand against the table for stability
- Curved guides are available for those who prefer the traditional curved French tip shape
- Practice on one nail before committing to all ten if you’re doing this at home
- A matte topcoat on hot pink tips creates a sophisticated, almost suede-like finish
- Glossy topcoat makes the pink appear more vibrant and candy-like
The width of the tip matters—thicker tips feel bolder and more graphic, while thin tips maintain classical elegance. Experiment to find what speaks to you.
7. Hot Pink Aura Nails with Soft Halo Effect
Aura nails feature a soft, diffused glow around the edges of the nail, creating a halo effect that feels almost ethereal. When executed in hot pink, this creates a look that’s simultaneously bold and dreamy—a stunning contradiction.
The Aura Technique Explained
An aura effect is created by applying color in a concentrated center area and then blending or diffusing it outward to the edges. With hot pink as your center color, you’re creating a manicure that reads from hot pink in the middle to increasingly pale or neutral toward the tips and sides. This creates visual softness that contrasts beautifully with hot pink’s inherent boldness. The result feels modern, slightly magical, and unexpectedly wearable for everyday life.
Building Your Aura Manicure
- Base color: Start with a pale pink, nude, or white base across the entire nail
- Sponge application: Dab concentrated hot pink in the nail’s center using a makeup sponge
- Blending: Use a clean, slightly damp sponge to diffuse the hot pink outward, creating a gradient
- Layering: Apply multiple thin layers rather than one thick layer for better control
- Sealing: Finish with a glossy topcoat that enhances the ethereal quality
- Optional accent: A tiny rhinestone or chrome accent in the aura’s center adds extra magic
The beauty of aura nails is that slight imperfections actually enhance the effect—the soft, uneven blending is exactly what makes them feel dreamy rather than geometric.
8. Hot Pink with 3D Blooming Gel Flowers
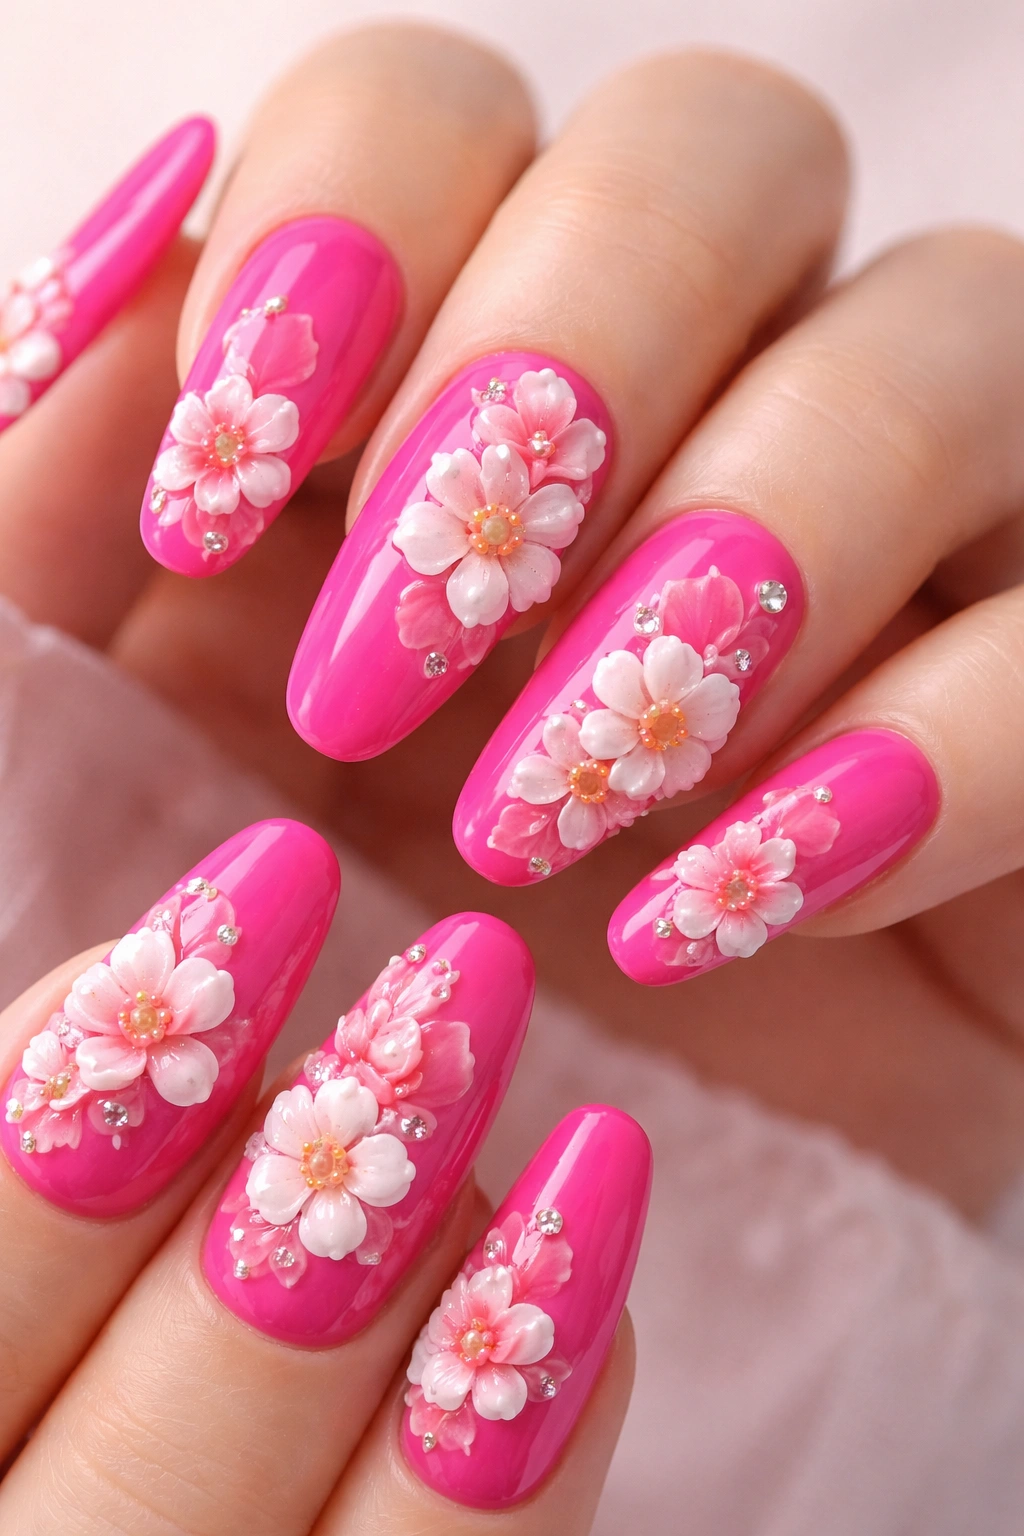
Three-dimensional floral designs take hot pink from a flat color to a textured, sculptural statement. Blooming gel—a special gel formula that feathers and creates organic, watercolor-like effects—allows flowers to virtually erupt from your nails.
What Makes 3D Florals Stand Out
Hot pink provides the perfect backdrop for 3D flowers because the brightness makes raised elements feel even more dimensional. When you add white, coral, or even purple flowers in 3D texture on top of hot pink, the contrast creates depth that photographs and photographs. These nails feel artistic and takes manicure into the realm of wearable art. The dimensional quality makes them conversation-starters.
Executing 3D Blooming Gel Designs
- Base layer: Apply a smooth hot pink gel base and cure completely
- Gel dots: Create dots of blooming gel in various colors (white, blush pink, coral) on the nail
- Feathering: Use a dotting tool or fine brush to gently drag the blooming gel outward, creating feathered edges
- Texture building: Layer additional blooming gel to create height and dimension
- Curing: Cure between layers to set each element before adding the next
- Sealing: Finish with a clear or milky topcoat to protect the design
- Longevity: Expect gel 3D designs to last 3-4 weeks with proper care
Professional application is often worth the investment here—creating balanced, dimensional florals requires significant skill and practice. However, simpler 3D dots are achievable at home with practice.
9. Hot Pink and Orange Ombre for Sunset Vibes
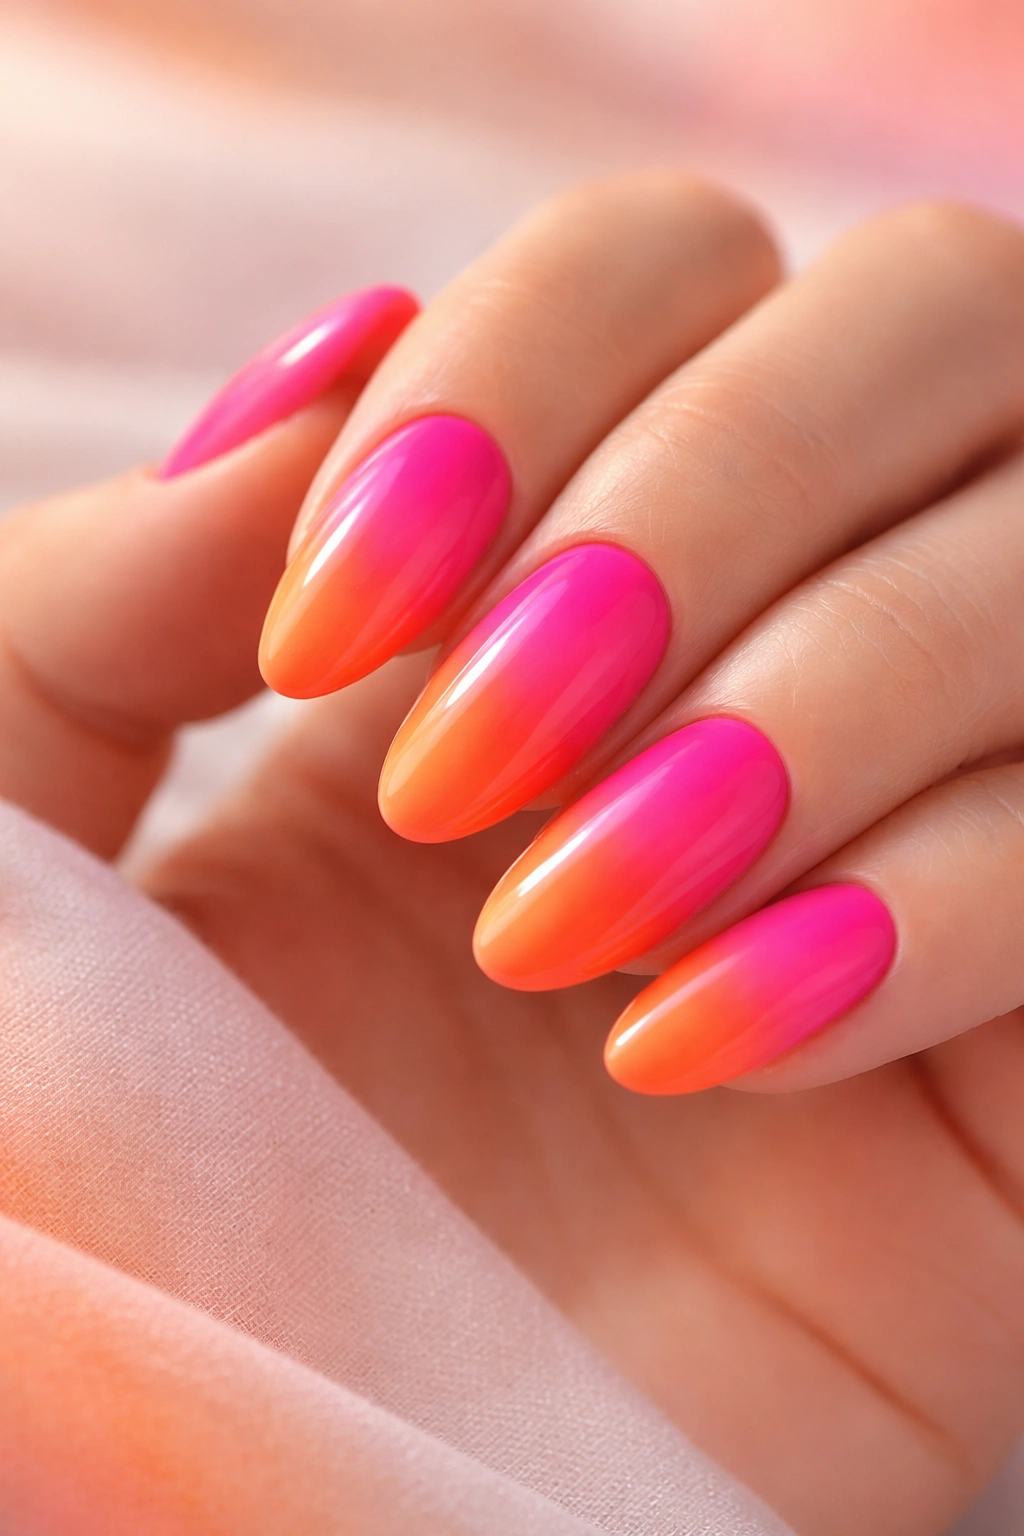
A gradient that flows from hot pink through coral and orange creates a sunset effect that feels warm, energetic, and seasonally appropriate. This color progression celebrates hot pink while expanding into the broader spectrum of warm tones.
Why This Color Progression Works
Hot pink, coral, and orange are all neighbors on the color wheel, which means they blend naturally without creating harsh transitions. This gradient feels organic rather than jarring. The progression from pink to orange creates visual interest and movement. It’s bold but not chaotic—energetic but not overwhelming. This approach appeals to anyone who loves hot pink but might appreciate slightly more color variation.
Creating a Multi-Color Ombre
- Color selection: Choose three polishes—hot pink, coral, and orange—in compatible finishes
- Sponge gradient: Apply each color to a makeup sponge in bands and press onto the nail, overlapping slightly
- Blending: Use a clean sponge to soften transitions between colors
- Layering: Build the ombre gradually with multiple thin applications rather than one thick layer
- Cleanup: Use rubbing alcohol and a thin brush to clean edges before topcoat
- Sealing: A glossy topcoat makes the gradient appear luminous and cohesive
This approach works beautifully on longer nails where you have more surface area to blend. On shorter nails, a simpler two-color pink-to-orange gradient might feel less crowded.
10. Hot Pink Stamping with Intricate Designs
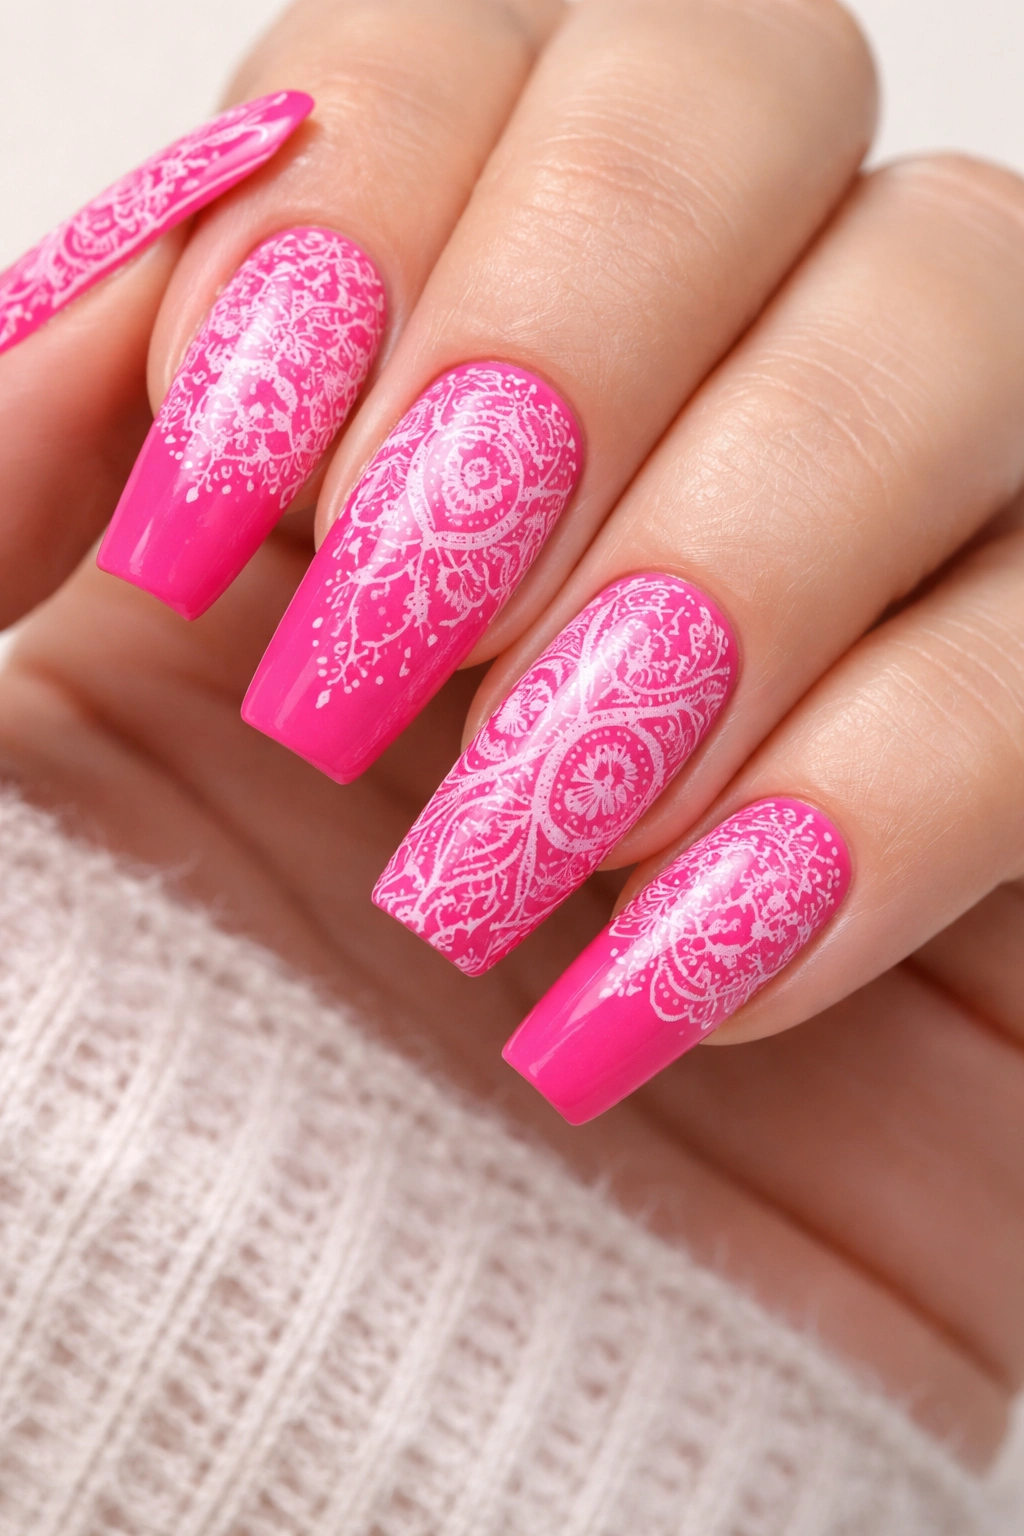
Nail stamping plates allow you to transfer intricate patterns—from florals to geometric designs to abstract art—onto your hot pink base. This technique makes complex nail art accessible even without advanced artistic skills.
The Advantages of Stamping
Stamping is a game-changer for anyone who loves detailed designs but lacks the confidence or ability to hand-paint them. Stamping plates come in thousands of designs, from delicate florals to bold graphics. When you stamp over a hot pink base, the stamped pattern creates visual contrast and complexity that would be nearly impossible to achieve freehand. The best part? You don’t need artistic talent—you need a steady hand and good technique.
Perfecting Your Stamping Technique
- Choose a stamping polish: Regular nail polish often works, but dedicated stamping polishes have the right consistency
- Select your plate and design: Experiment with different plates to find designs that complement hot pink
- Scrape at an angle: Use a scraper card at a 45-degree angle to remove excess polish from the plate
- Press firmly: Press the stamper onto the plate with even pressure to pick up the full design
- Transfer smoothly: Transfer the image to your nail in one smooth motion without twisting
- Seal immediately: Apply topcoat right away to prevent smudging
- Practice: Your first attempts might not be perfect—this is completely normal and improves quickly
Experiment with stamping on single accent nails rather than all ten at once. This creates visual interest while keeping the look wearable. Alternatively, double-stamping—using multiple stamping plates to layer designs—creates stunning complexity.
Final Thoughts
Hot pink nails aren’t just a fashion choice; they’re a declaration of confidence and personality. Whether you choose a simple, glossy solid color or an elaborate design with chrome, rhinestones, and textured elements, hot pink delivers impact that’s impossible to ignore.
The versatility of hot pink is what makes it so compelling. It works for professional settings when paired with clean lines and minimalist designs. It shines at celebrations and special occasions when loaded with embellishments and detail. It suits everyday wear when kept simple and glossy. Most importantly, it works across skin tones, nail lengths, and personal styles—there’s genuinely a hot pink approach for everyone.
If you’ve been hesitant about trying hot pink, remember that nails are temporary. Your polish will grow out and be replaced, allowing you to experiment with a new look. Start with whichever approach calls to you most—whether that’s a simple solid mani or an elaborate design—and enjoy the confidence boost that comes from having something so unapologetically bold literally at your fingertips.
