

Sage green almond nails sit in a sweet spot that a lot of manicures miss. The color is calm, but not boring. The almond shape is soft, but not plain. Put the two together and you get something that feels polished without looking overworked, which is harder to do than people think.
I usually prefer a sage that leans a little gray rather than a minty pastel. Gray-green shades tend to look richer on the hand, and they’re easier to wear with gold jewelry, silver jewelry, denim, black clothes, cream sweaters, or the random mix of things most of us actually wear.
The shape matters, too. A true almond should taper gently and keep the tip rounded, not sharp. If the point gets too narrow, sage can start to feel fussy; keep the curve soft and the whole manicure stays elegant. That little balance is the whole trick.
And then there’s the fun part. The same sage base can go glossy, matte, French, marbled, foiled, or barely decorated at all, and each version gives off a different mood. Some are clean and quiet. Some have a little edge. Some look far more complicated than they are.
1. Glossy Sage Green Almond Nails
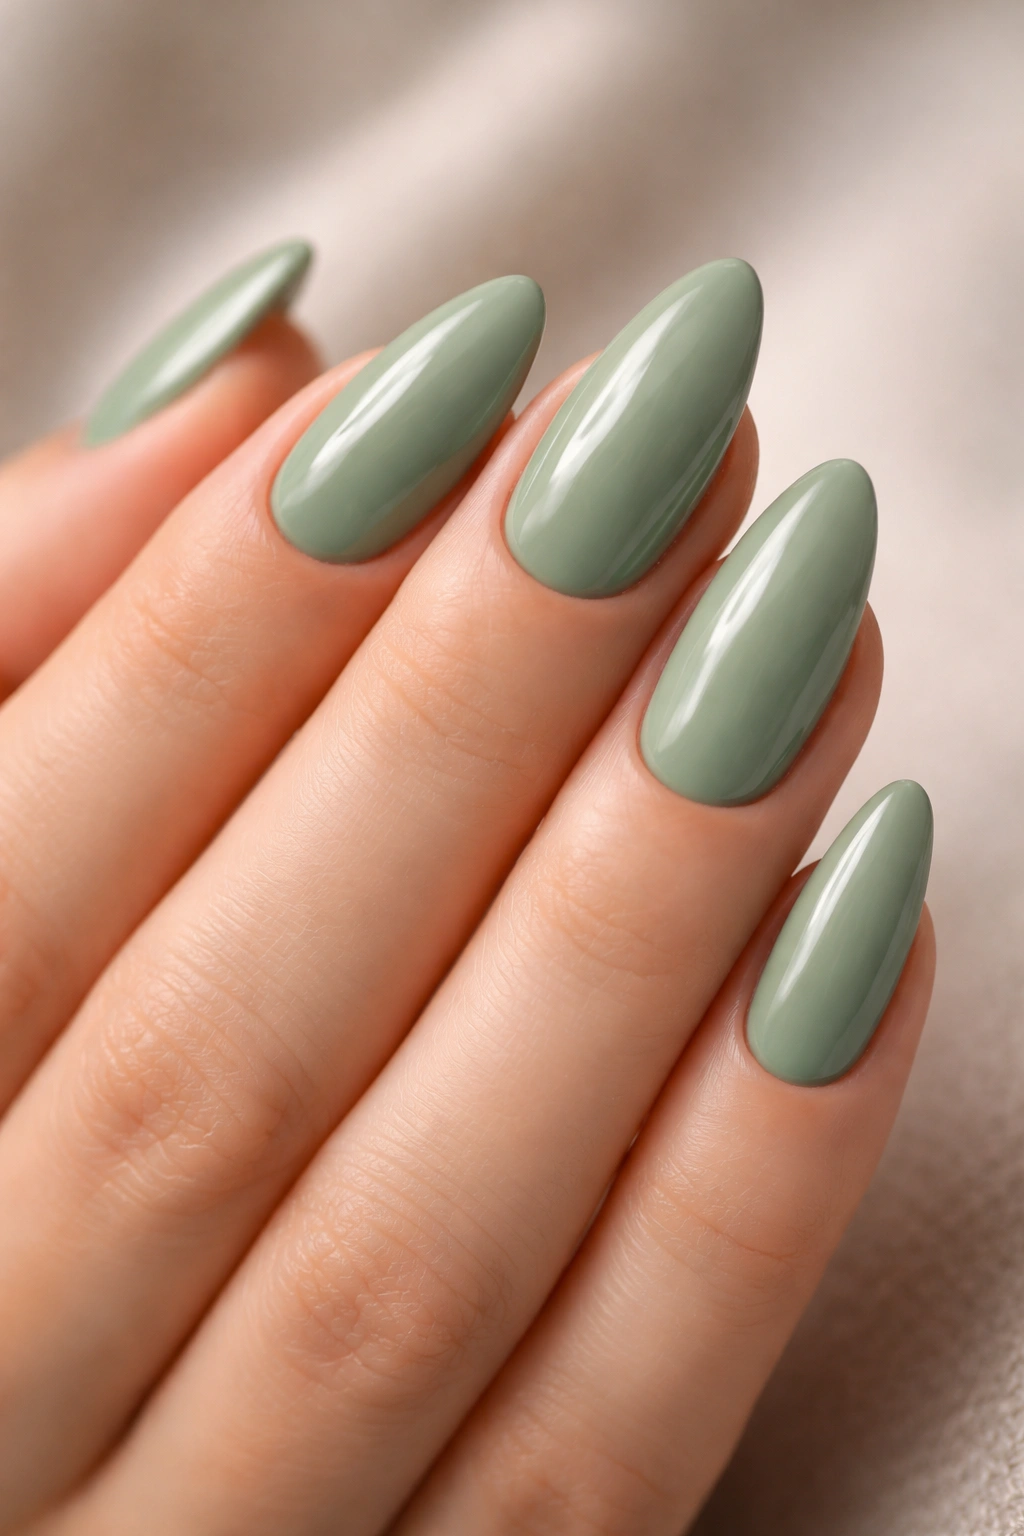
A solid glossy sage is the easiest version to get right, and honestly the one I come back to most. There’s no extra art fighting for attention, so the color itself gets to do the talking. On almond nails, that muted green feels smooth and controlled, not loud.
The best version leans muted, almost dusty, with a gray undertone instead of a yellow one. Two opaque coats usually do the job, though a sheerer polish may need a third pass to stop the nail bed from showing through. Finish it with a high-shine topcoat, and the whole manicure suddenly looks more expensive than the polish bottle has any right to suggest.
Keep the tip rounded, not pinched.
If you’re wearing this on your natural nails, ask for a medium almond rather than a dramatic taper. The shape should follow the sidewall of your nail and then gently close in at the tip. That gives the green enough surface area to look rich instead of thin and skimpy. It’s a simple manicure, but it only looks simple when the shape is neat.
2. Matte Sage Green Almond Nails with a Soft Suede Finish
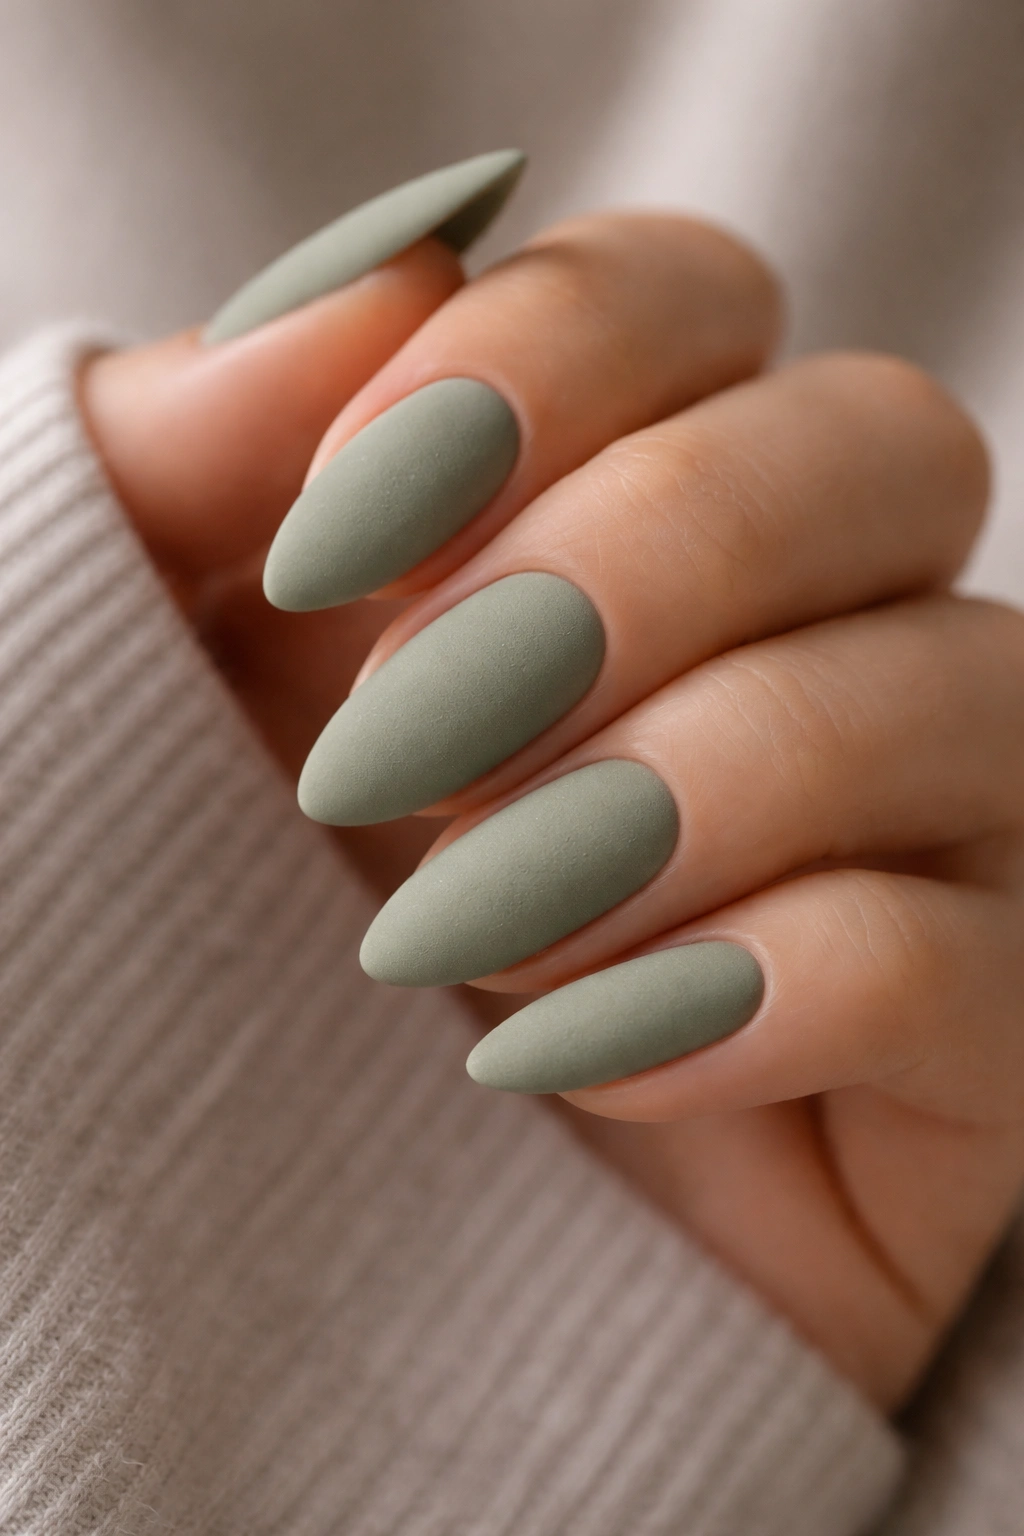
Why does matte sage look so good? Because the finish strips away shine and leaves the color feeling dense, almost velvety. On almond nails, that texture makes the shape seem a little longer and a little more sculpted without changing the actual length.
What matte changes
Matte topcoat mutes the reflection, so tiny brush marks and color shifts show more easily. That means prep matters more than people expect. A ridge-filling base coat helps a lot here, especially if your nails have a few grooves or if your polish tends to streak on the first pass.
What to ask for
- Pick a midtone sage, not a washed-out one.
- Ask for an even base layer before the matte topcoat goes on.
- Keep the cuticle line crisp, because matte shows sloppy edges fast.
- Skip chunky texture or glitter; it fights the suede effect.
I like matte sage most when the rest of the look is plain. No foil. No gems. Just that soft, almost chalky finish and a clean almond curve. It’s quieter than glossy sage, but it has more mood.
3. Sage Green French Tips on a Sheer Nude Base
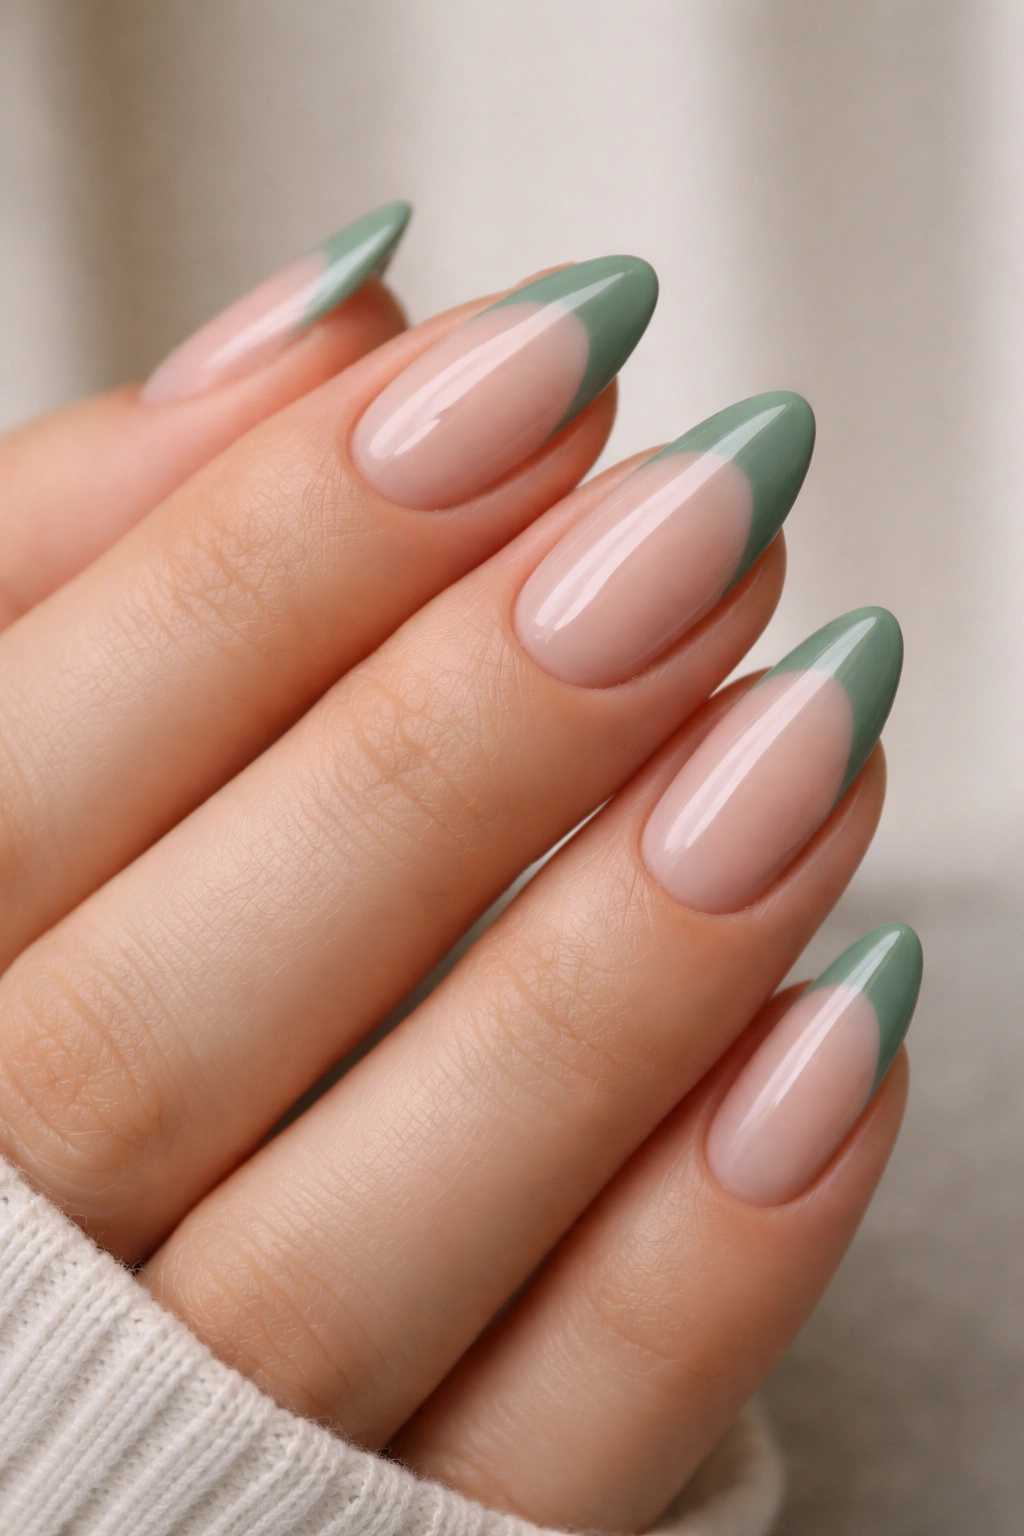
If classic French tips feel too stiff, sage on the tip softens the whole manicure. The sheer nude base keeps the nail airy, while the green tip adds enough color to look intentional. It’s one of those designs that works on short almond nails and longer ones alike.
Keep the smile line slim
The sweetest version uses a tip that’s about 2 to 4 mm wide, with a rounded smile line that follows the almond shape. A straight line can make the nail look boxy, and that defeats the whole point. The tip should sit lightly on the edge, not take over the whole nail.
A soft pink-beige base works better than a tan one. The goal is to let the green stand out without the manicure looking harsh. If you want a cleaner finish, ask for the green only on the outer edge of each nail, with the curve slightly deeper on the middle finger and a touch shallower on the pinky.
This is the version I’d pick if you want something office-safe but still a little more interesting than a plain nude set.
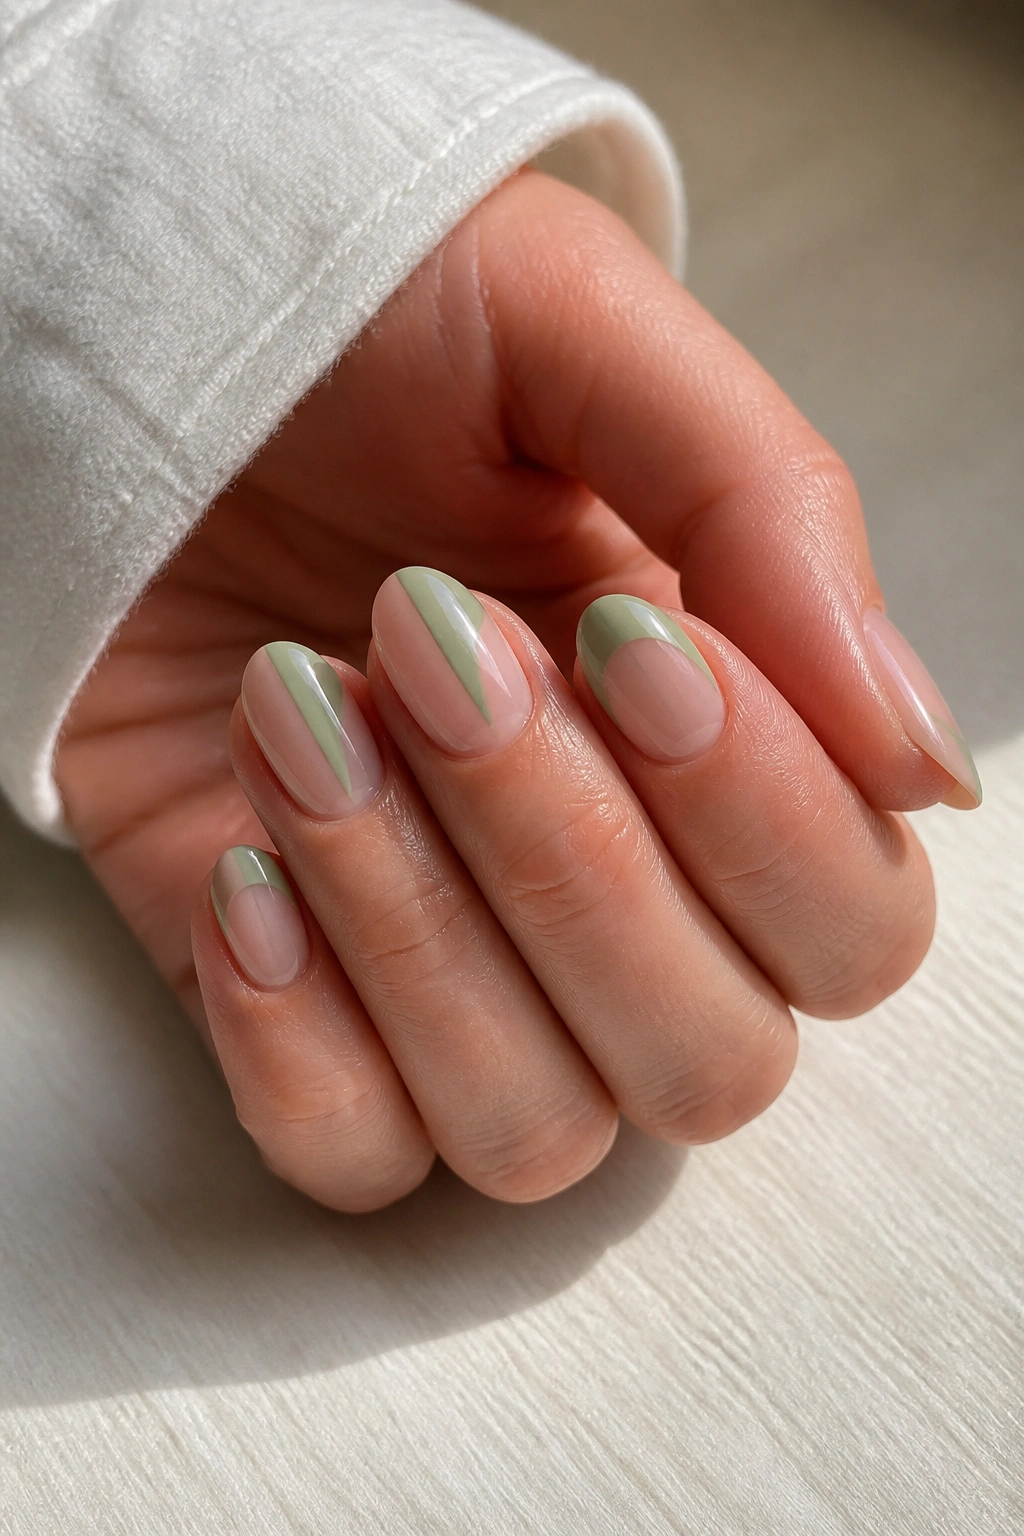
4. Two-Tone Sage and Cream Color Block Nails
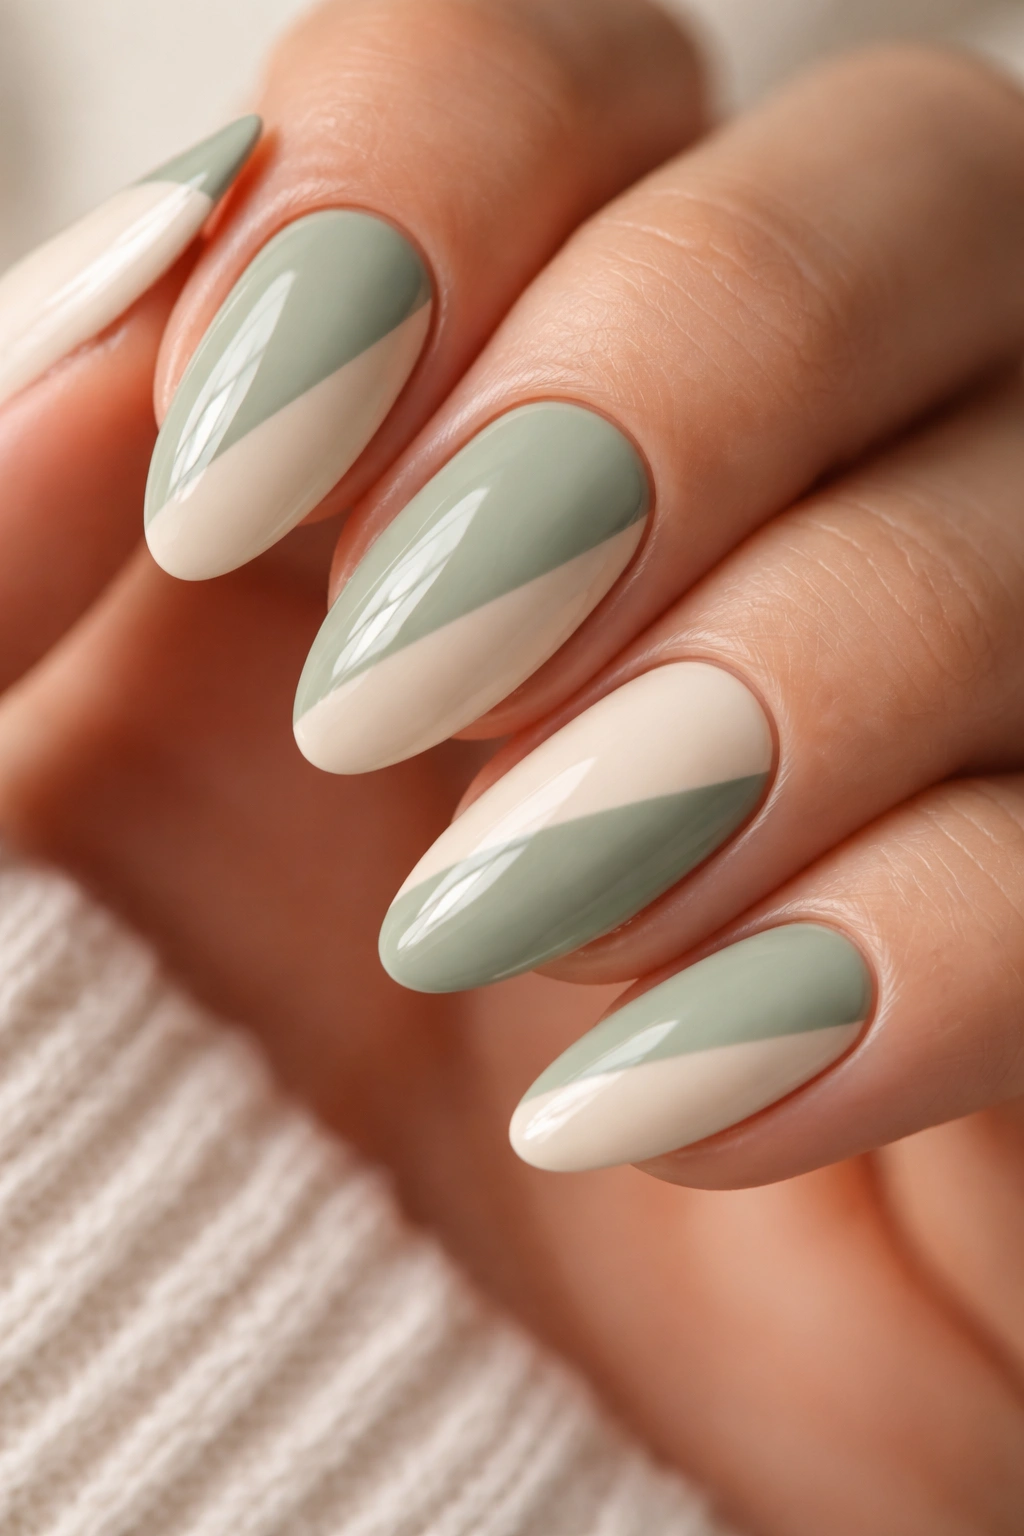
Two-tone color blocking is the fastest way to make sage look styled instead of simply painted. Cream keeps the manicure from getting heavy, and the contrast gives the almond shape a nice visual line to follow. It feels modern, but not cold.
I like this in a diagonal split, a half-moon split, or a clean side-by-side division down the center. The diagonal version is probably the easiest to wear because it moves with the nail shape instead of fighting it. A centered split looks sharper. Half-moon looks softer.
The key is spacing. If the two colors meet at a messy seam, the whole thing falls apart. If the line is crisp and the proportions are balanced, it looks deliberate. You don’t need much else here — the color block is already doing the work.
A tiny detail makes a difference: keep the cream slightly warm, not bright white. Warm cream softens the green and makes the manicure feel less graphic.
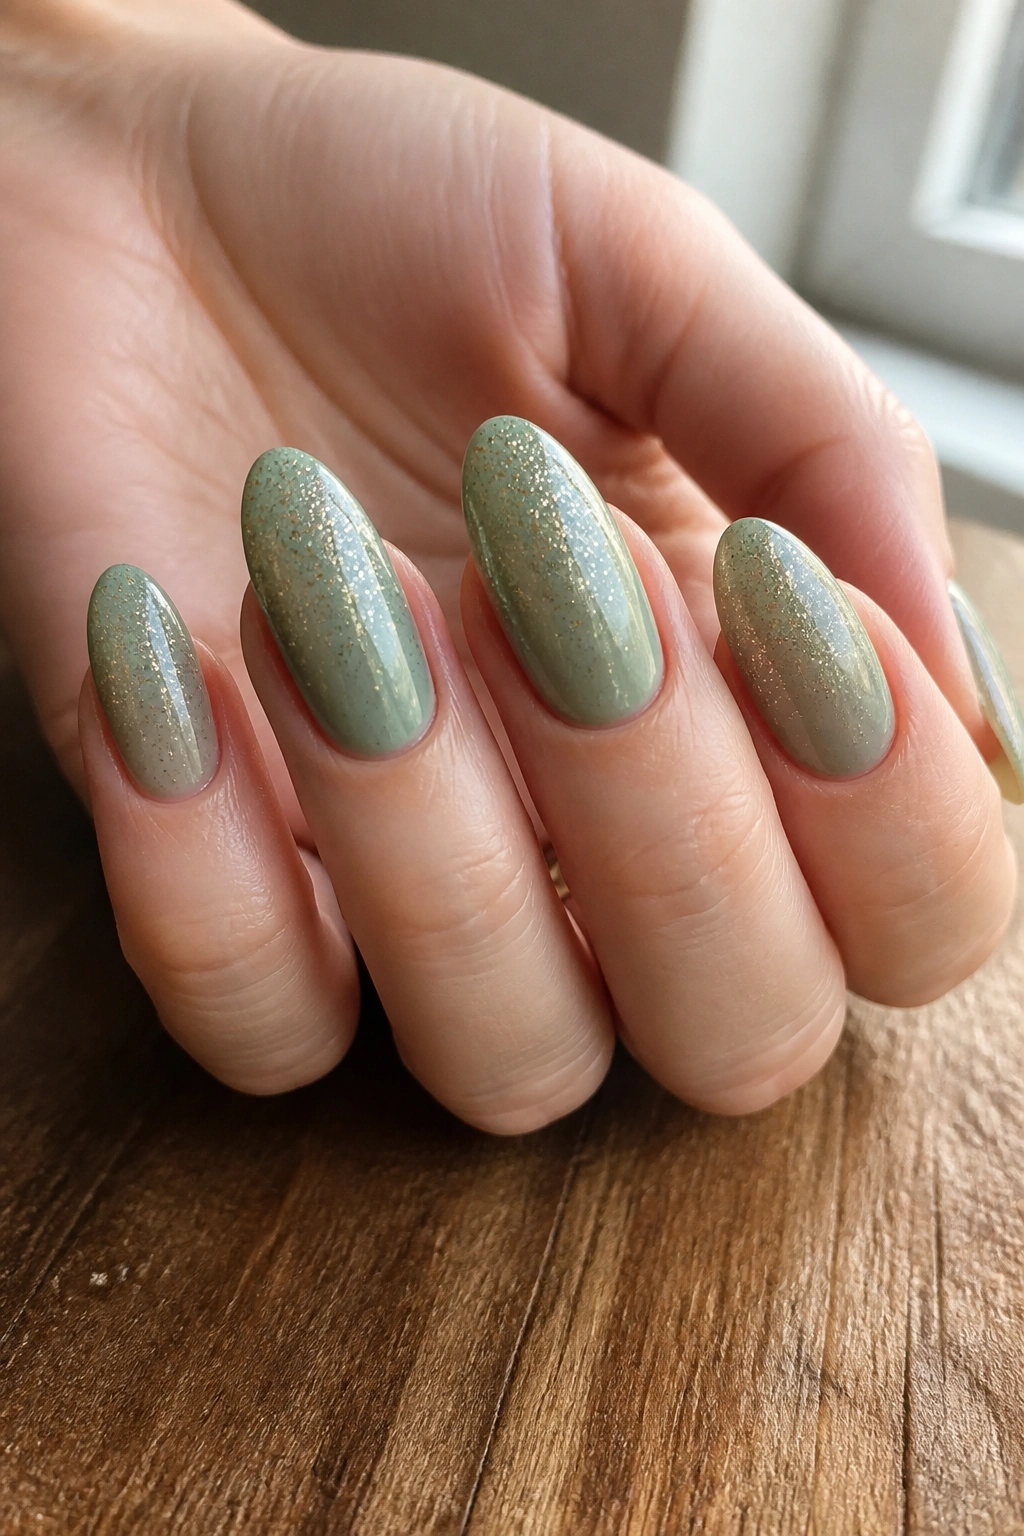
5. Sage Green Almond Nails with Micro Gold Foil
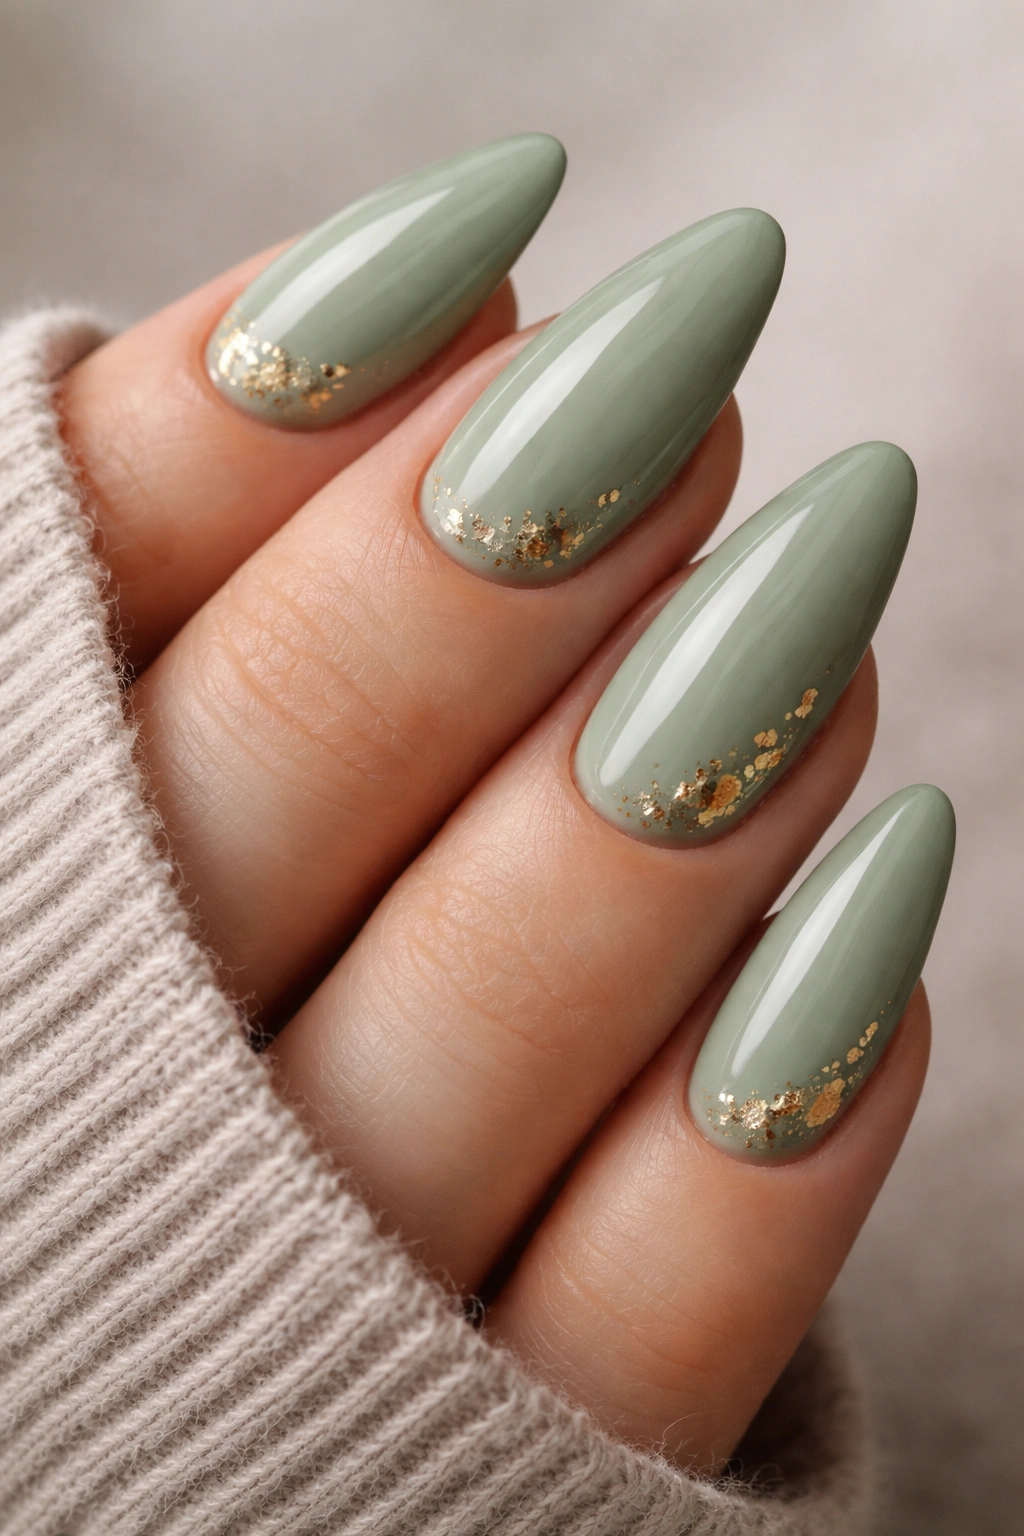
One or two flecks of gold can change the whole manicure. That’s why I like foil on sage green more than I like full glitter on it. Foil feels scattered in a controlled way, and the contrast between the muted green and the metallic flecks looks cleaner than you’d expect.
Where the foil belongs
The best placement is usually near the cuticle or off to one side, not spread evenly across every nail. A few tiny pieces per nail is enough. If the foil covers too much surface, the manicure starts to feel busy, and sage is a color that likes breathing room.
I’d put foil on one or two accent nails first. Ring fingers are the obvious choice, but an index finger accent can look sharper if the rest of the set is very quiet. The foil should be irregular — a little broken, a little uneven — because perfect foil tends to look pasted on.
Use a thick topcoat to seal everything down. Thin topcoats sometimes leave the foil edges sharp, and those edges catch on hair and clothing. Nobody wants that. A smooth seal keeps the manicure wearable for longer and makes the gold look embedded instead of floating on top.
6. Sage Green Ombré from Milky Nude to Green
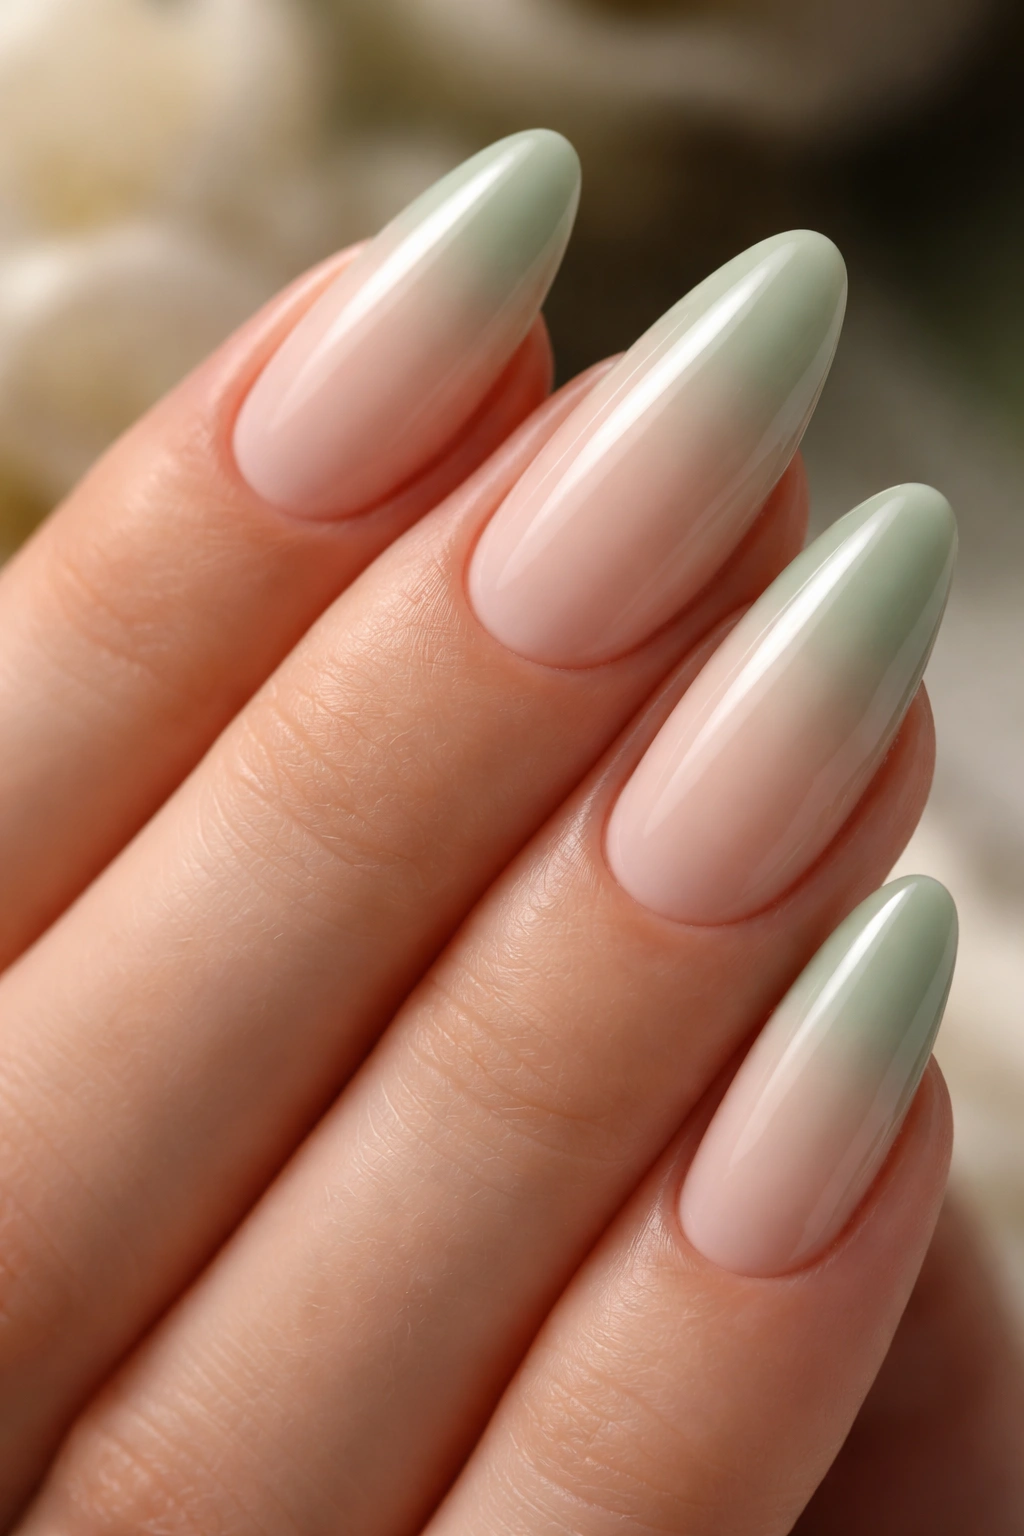
Unlike a flat coat, ombré gives the eye somewhere to travel. That’s the appeal here. The color can start soft and sheer at the base, then deepen into sage toward the tip, or reverse the fade if you want the cuticle area to feel brighter.
The nicest version blends a milky nude into sage without a harsh seam. On gel, a sponge or a soft blending brush makes the fade easier. On regular polish, two or three light passes with an almost-dry sponge are usually enough. Heavy dabs make the gradient muddy, and muddy ombré is a mess.
The direction matters
If your nails are longer, a fade that gets darker toward the tip gives the almond shape a little extra stretch. Shorter nails often look better with the sage starting lower and softening upward, because it keeps the color from feeling chopped off. Small choice. Big difference.
I prefer this look when the sage isn’t too saturated. A milky gradient feels expensive; a neon-leaning fade does not. The whole point is softness, not drama.
7. Sage Green Swirls with White and Beige Lines
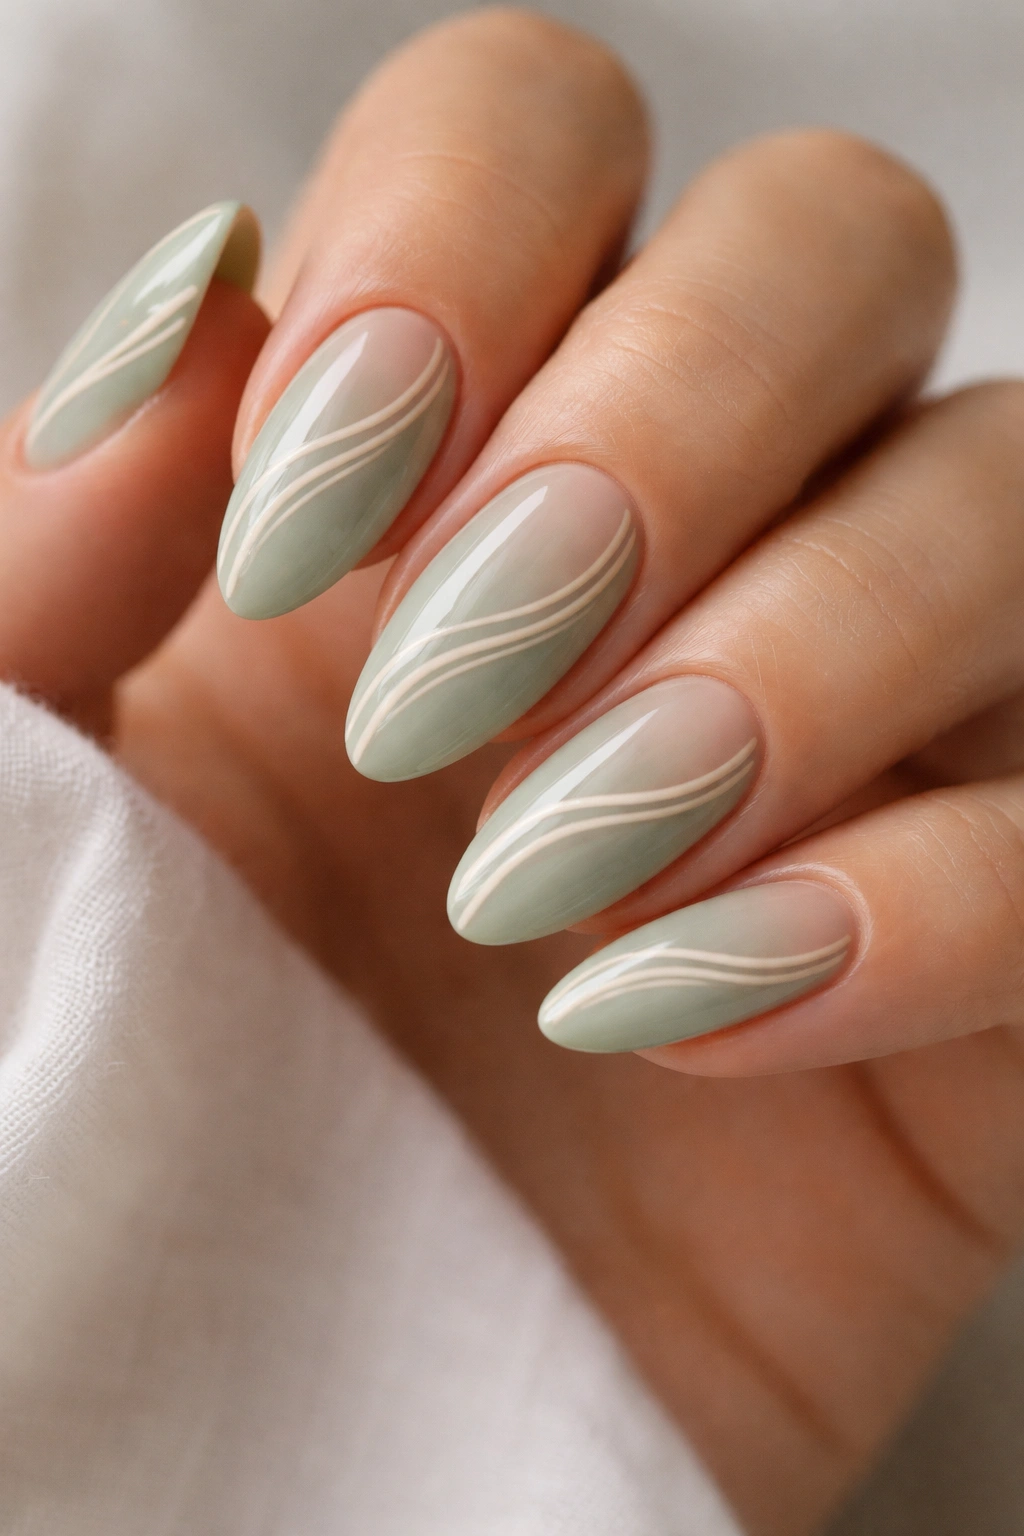
Swirls can go wrong fast. One extra line and they look chaotic. Keep them thin, and they turn into something airy and calm instead of noisy.
The nicest sage swirl manicure uses white, beige, and a little muted green, with each line flowing along the almond curve rather than slicing across it. A few uneven loops look better than a perfect repeat on every nail. Matching every swirl exactly is the fastest way to make the set feel stiff.
I like leaving part of the nail bare, especially near the sidewalls. That open space gives the design room to breathe and keeps the swirls from smearing across the whole hand. If you want the look to stay soft, skip black outlines. They fight the color story.
The best swirl sets are the ones that look hand-drawn in a good way — not sloppy, just human. A little variation in line width does that.
8. Sage Green and Olive Accent Nails
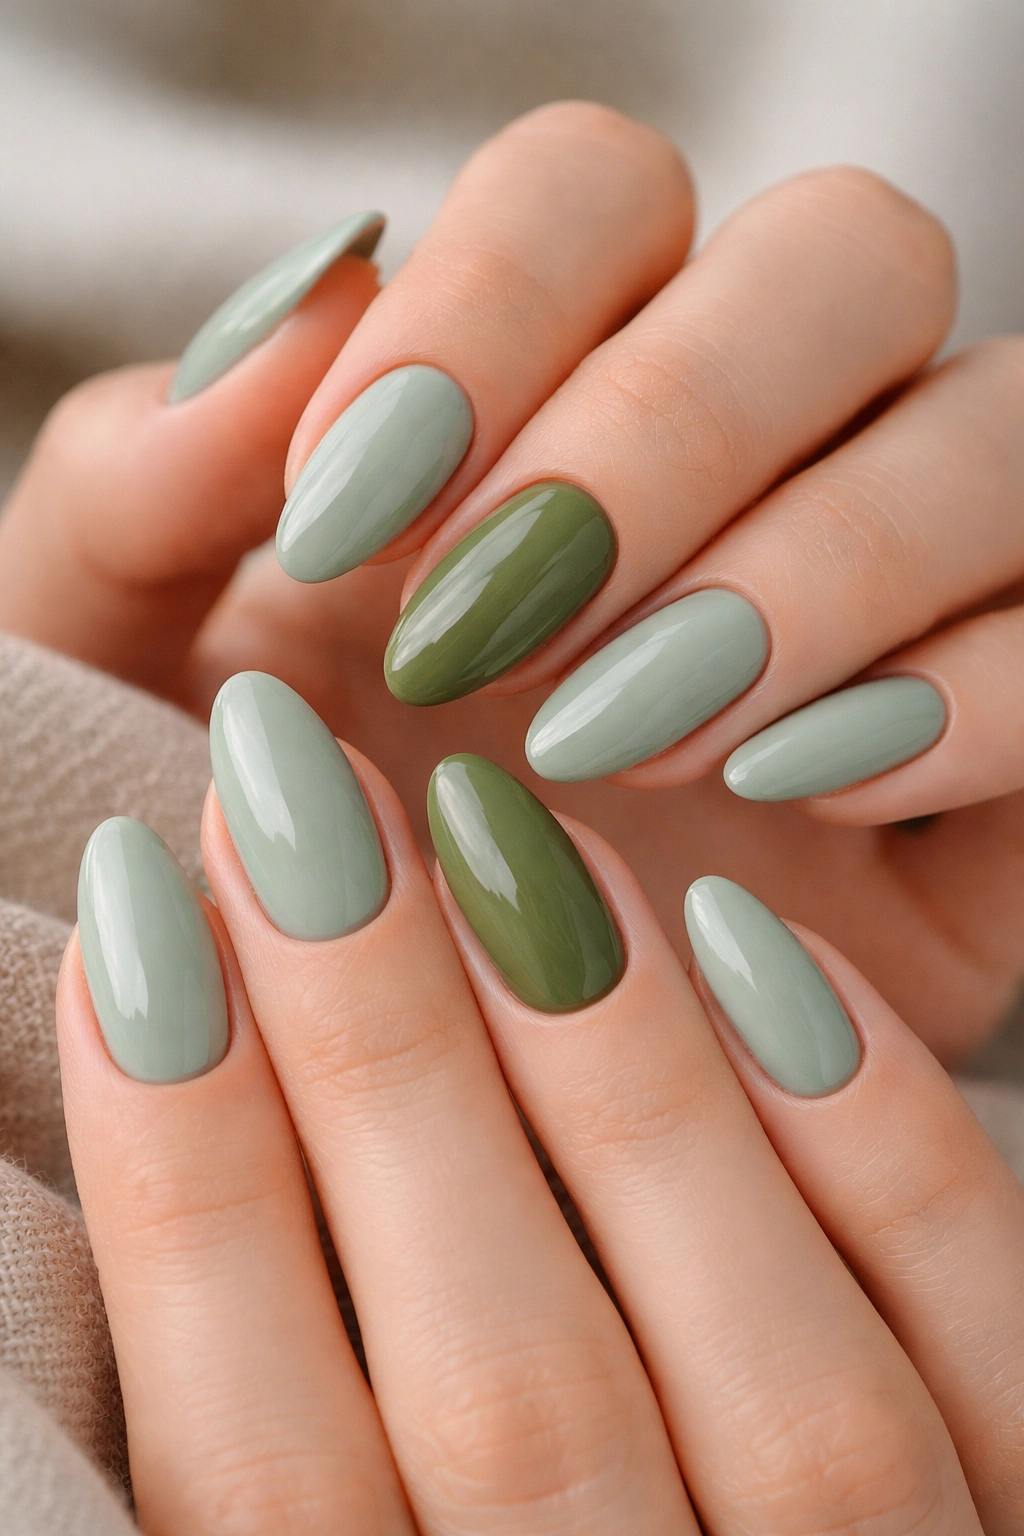
If you want the palette to feel layered instead of flat, add olive to one or two nails. Sage and olive sit close enough to feel related, but the difference in tone gives the set a deeper, more deliberate look. It’s subtle, and that’s exactly why it works.
Why the darker shade helps
Olive pulls the eye without overpowering the manicure. On almond nails, one olive accent nail can act like a pause in the pattern. It stops the set from looking too matchy and adds a quiet contrast that still feels grounded.
I like this best in three setups:
- Two olive accent nails on each hand, with the rest sage.
- A single olive French tip on a nude base.
- One nail split diagonally between sage and olive.
The trick is not to scatter the olive randomly. Place it where the hand naturally bends — ring finger, index finger, or a single feature nail near the center. That way the difference reads as design, not as leftover polish.
9. Minimal Sage Green Nails with Tiny Dots or Pinstripes

Can a minimal manicure still feel finished? Absolutely. It just needs one small detail that gives the eye a place to land.
A thin vertical pinstripe in cream or white can lengthen the almond shape without making the nail look busy. So can a single dot near the cuticle line, especially if the dot is about 1 mm wide and sits slightly off-center. Tiny sounds boring on paper. On the hand, it reads as crisp and deliberate.
I like this style on people who want color but don’t want art that takes over the whole nail. The sage base does most of the work, and the line or dot acts like punctuation. Nothing more. Nothing less.
Less can still feel finished.
If your nails are shorter, the pinstripe is usually the better choice. A dot is cute, but a stripe stretches the nail visually and keeps the almond point from feeling too tight.
10. Sage Green Marble Almond Nails
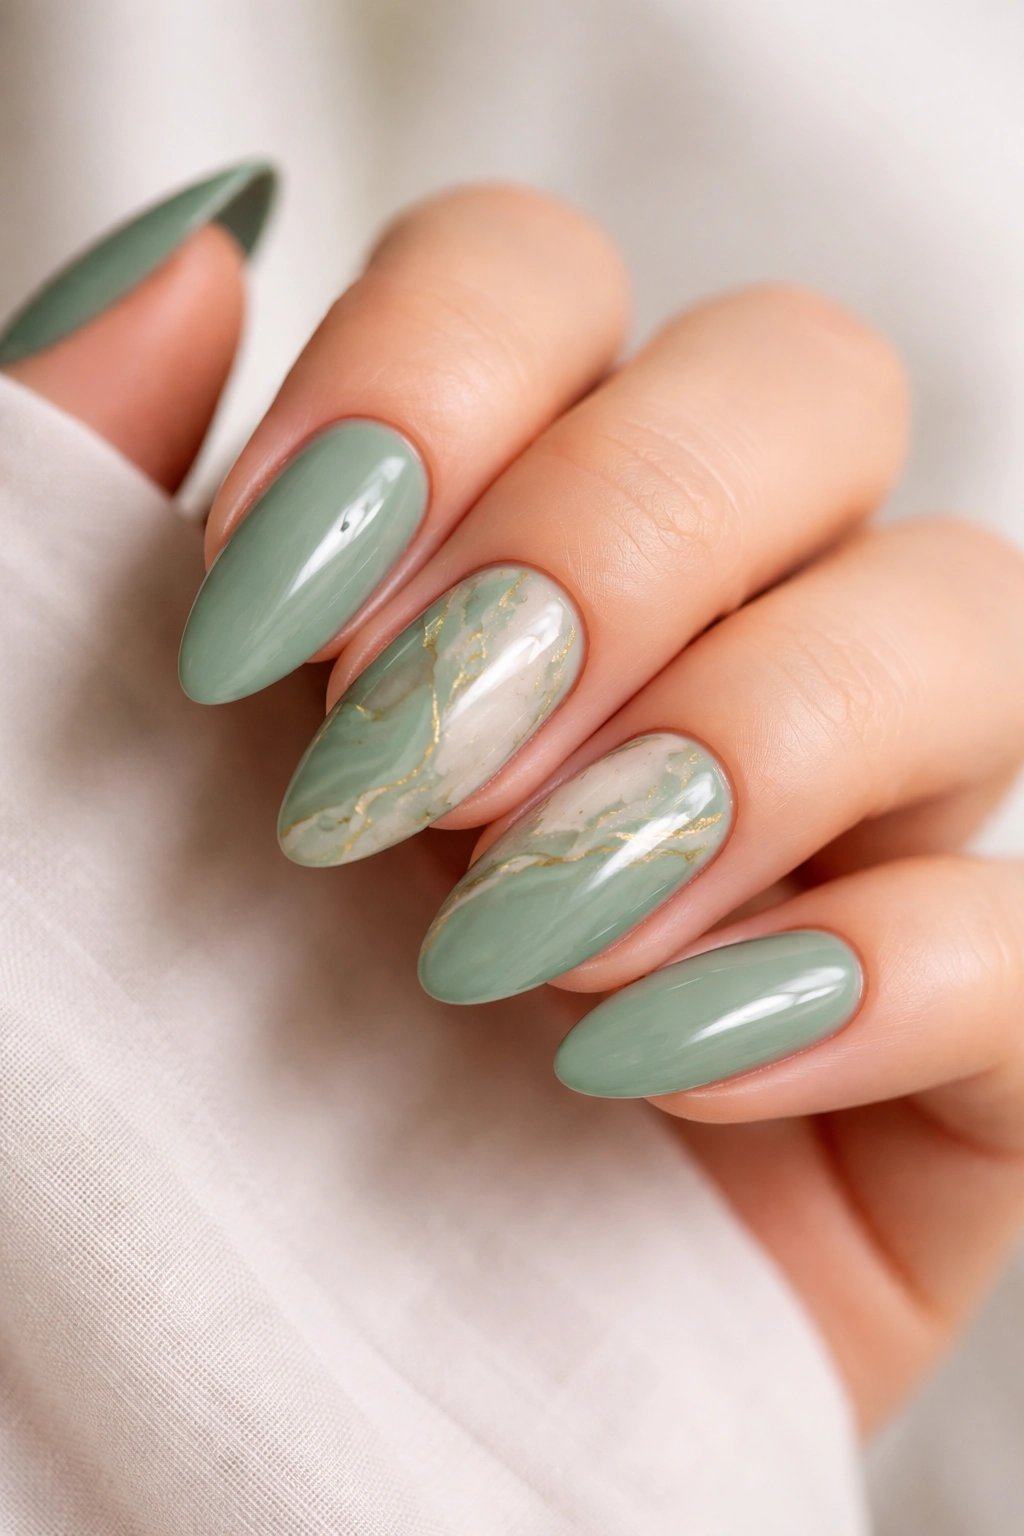
Marble only works when you resist the urge to fill every nail. A little clouding goes a long way. That is especially true with sage, which already has a soft, stone-like feel.
I’d keep the marble on one or two accent nails and leave the rest solid sage. White veins, a bit of beige, and maybe a whisper of gray are enough. Dark brown marble can work with sage, but it changes the whole mood and starts to feel heavier. If you want the manicure to stay airy, keep the veining pale.
The marble should look like it’s floating under the surface, not painted on top. That means the lines need to be thin and broken. A perfect, high-contrast veining pattern can look nice in photos and odd in real life. The softer version ages better because it doesn’t scream for attention.
I tend to like marble more on almond than square shapes. The curve of the nail and the softness of the pattern line up nicely.
11. Sage Green Chrome Almond Nails
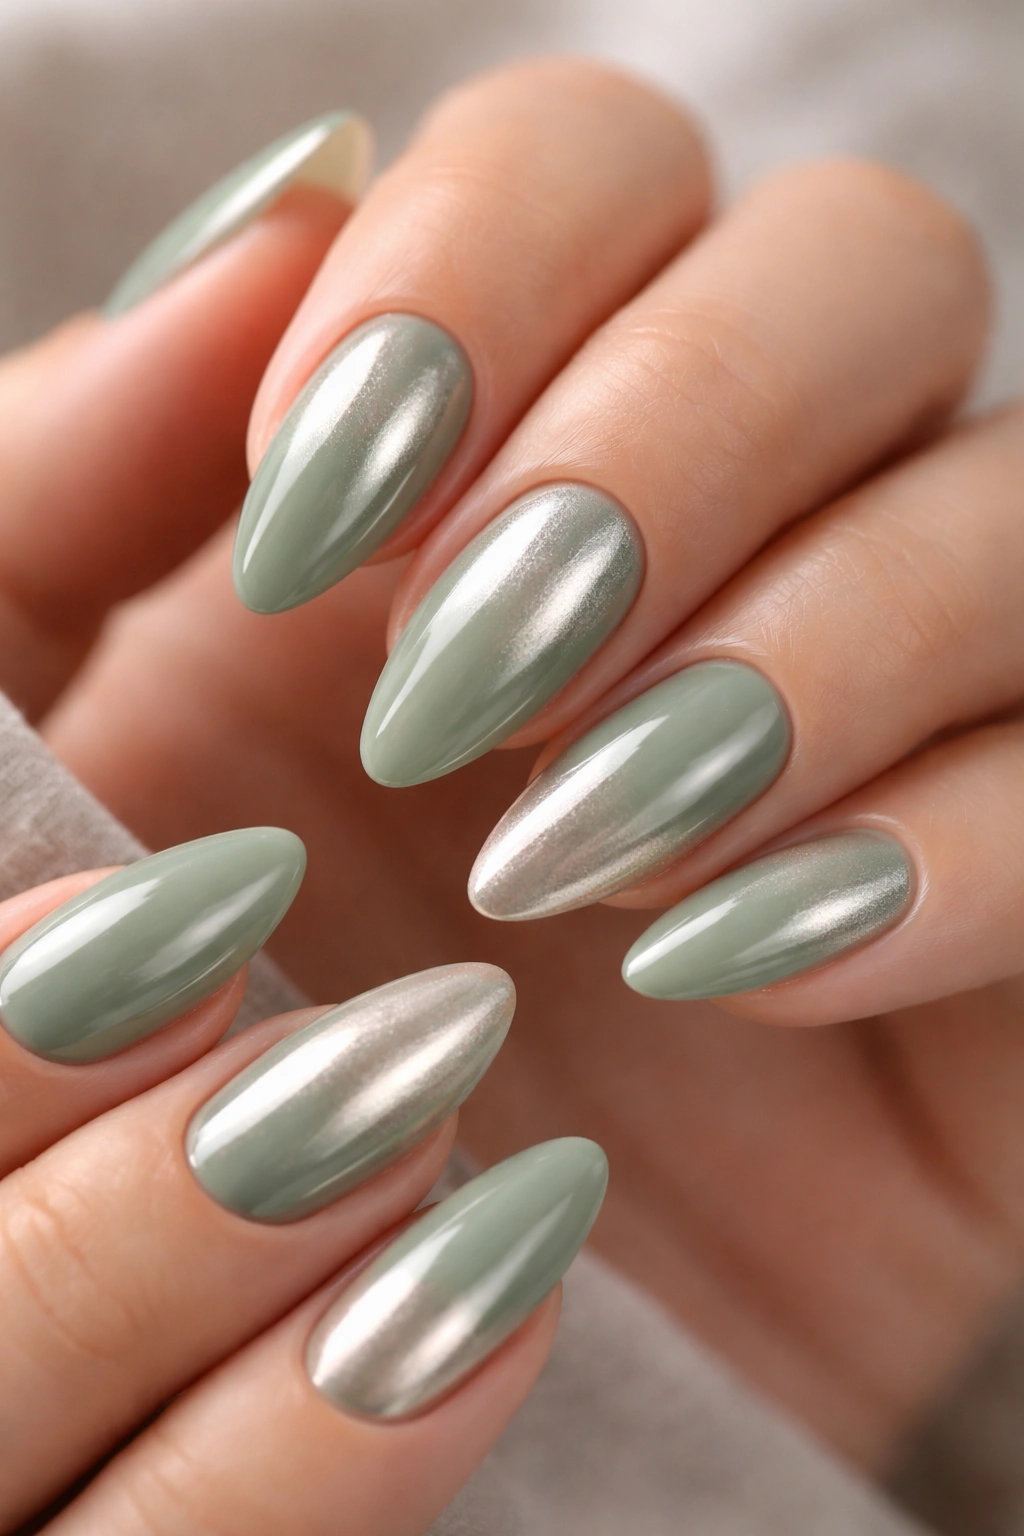
Chrome is not the obvious choice, and that is exactly why it feels fresh. On sage green, a chrome finish shifts the manicure from soft matte territory into something more reflective and sharp-edged. The color stays muted, but the surface gets a sleek finish that changes under different light.
What makes chrome work here
A smooth base matters more with chrome than with most other finishes. Any bump, ridge, or streak shows up fast once the powder goes on. That is why this look works best when the prep is clean and the almond shape is even all the way down the sidewalls.
I’d choose a green pearl or soft champagne chrome over a harsh silver one. Silver can flatten sage and make it look colder than intended. A gentler chrome keeps the manicure wearable. A tiny bit goes far.
If you want the look without going full mirror mode, ask for chrome just on the tips or as a thin overlay on one accent nail. That keeps the set from turning too metallic.
12. Sage Green Florals on Clear Negative Space
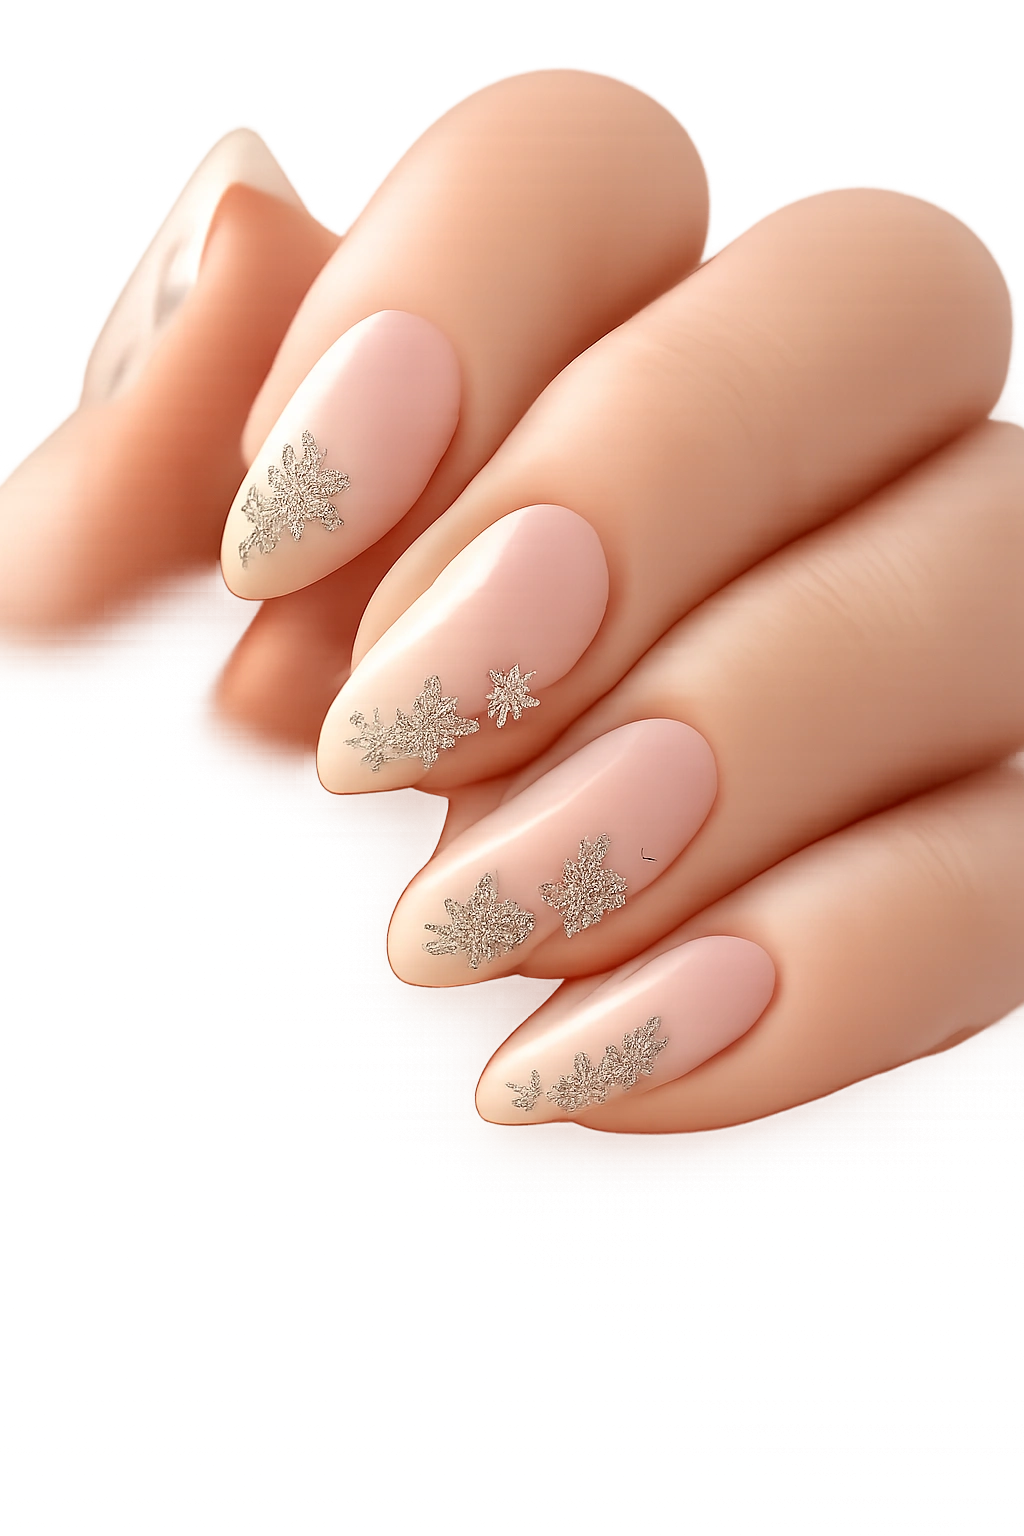
A few tiny flowers on a bare base can look calmer than a full coat of polish. That’s the strange little magic of negative space. The clear background makes the flowers feel lighter, and sage works well for petals and stems because it already has a soft edge.
How to keep it from getting busy
The flowers should stay small — think 3 to 5 petals per bloom, not giant blossoms that cover half the nail. A tiny white center and a sage leaf or two are enough. Leave plenty of clear space between the art so the nails don’t look crowded.
This style is strongest when the flowers cluster near the tip or near one side of the cuticle. Spreading them everywhere makes the manicure feel busy. A few careful placements give you a cleaner result, and the almond shape helps the flowers follow a natural curve.
I’d choose this if you like nail art but hate the feeling of wearing a full pattern. It’s decorative without becoming fussy.
13. Sage Green Plaid or Ribbon-Line Nail Art
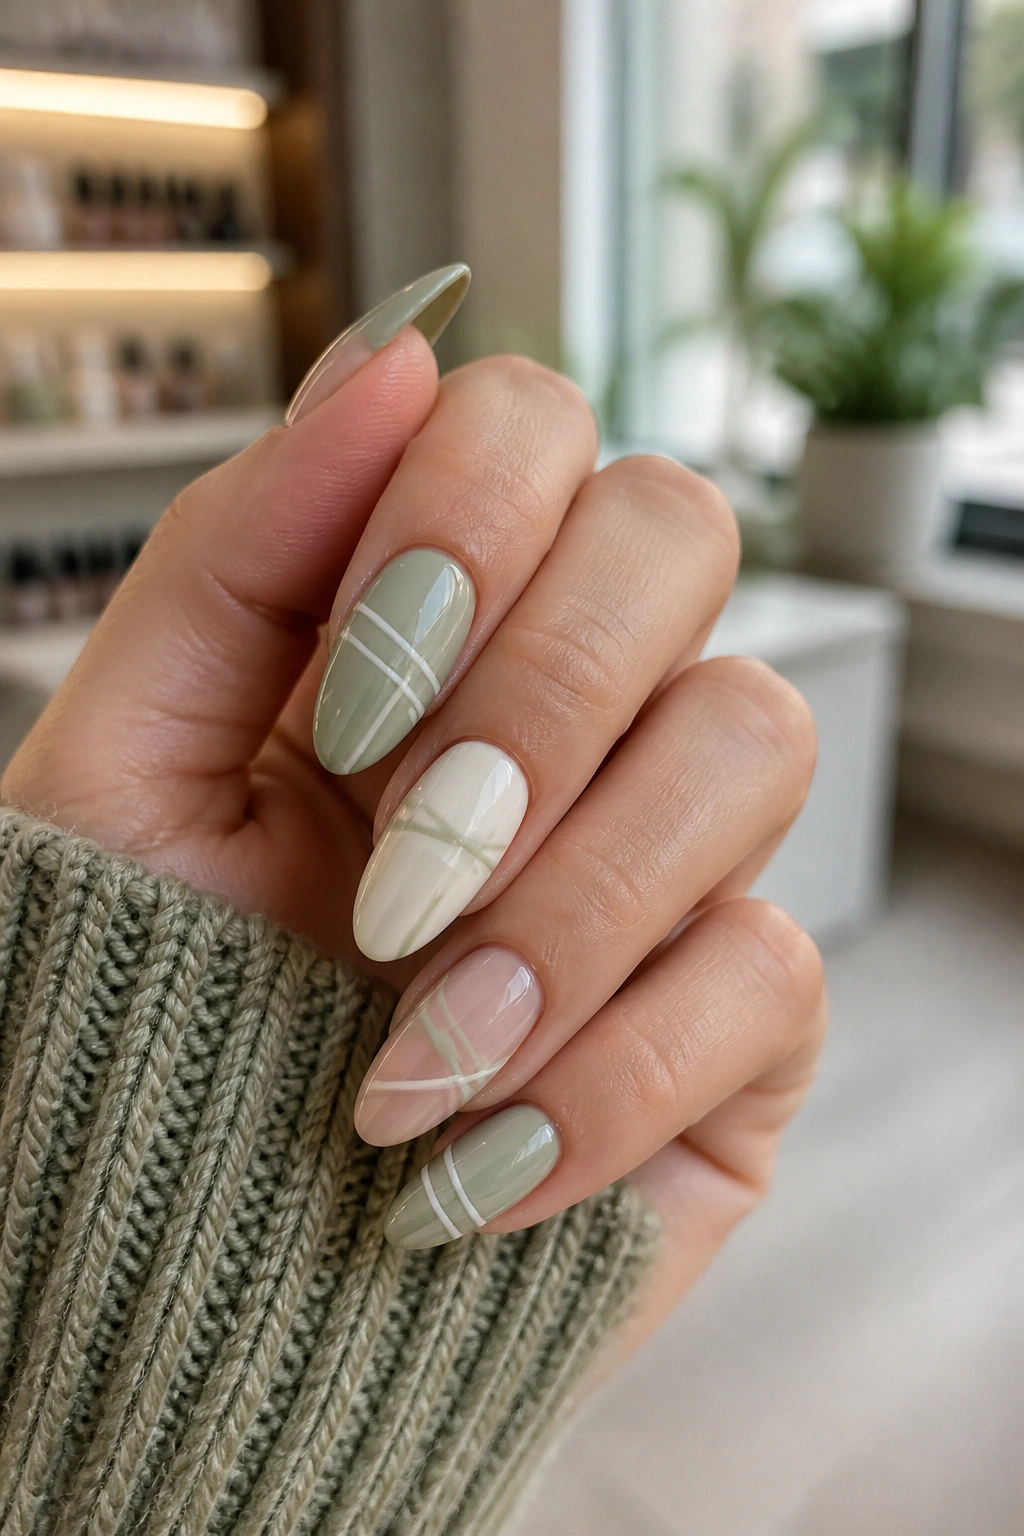
Thin crossing lines can look much softer than plaid usually gets credit for. On almond nails, the curve gives the pattern a little movement, so it doesn’t feel as rigid as it might on square tips. I like sage, cream, and a sheer nude base for this one.
The lines need to stay thin. A striping brush is better than thick tape unless you want a very graphic result. Keep the widths under 1 mm if possible. That gives the design a neat, ribbon-like feel instead of a heavy grid.
Thin lines beat thick tape
If the lines are too wide, the nail loses the softness that makes sage work so well. Thin lines feel lighter and let the shape of the almond nail stay visible underneath. That’s the part people sometimes miss. The nail shape should still be the star.
You can keep the plaid limited to one or two accent nails, or repeat a simpler ribbon line across the whole set. Both work. The first is quieter; the second feels more styled. I’d lean toward the simpler version unless you want the manicure to be the main statement.
14. Velvet Cat-Eye Sage Green Almond Nails
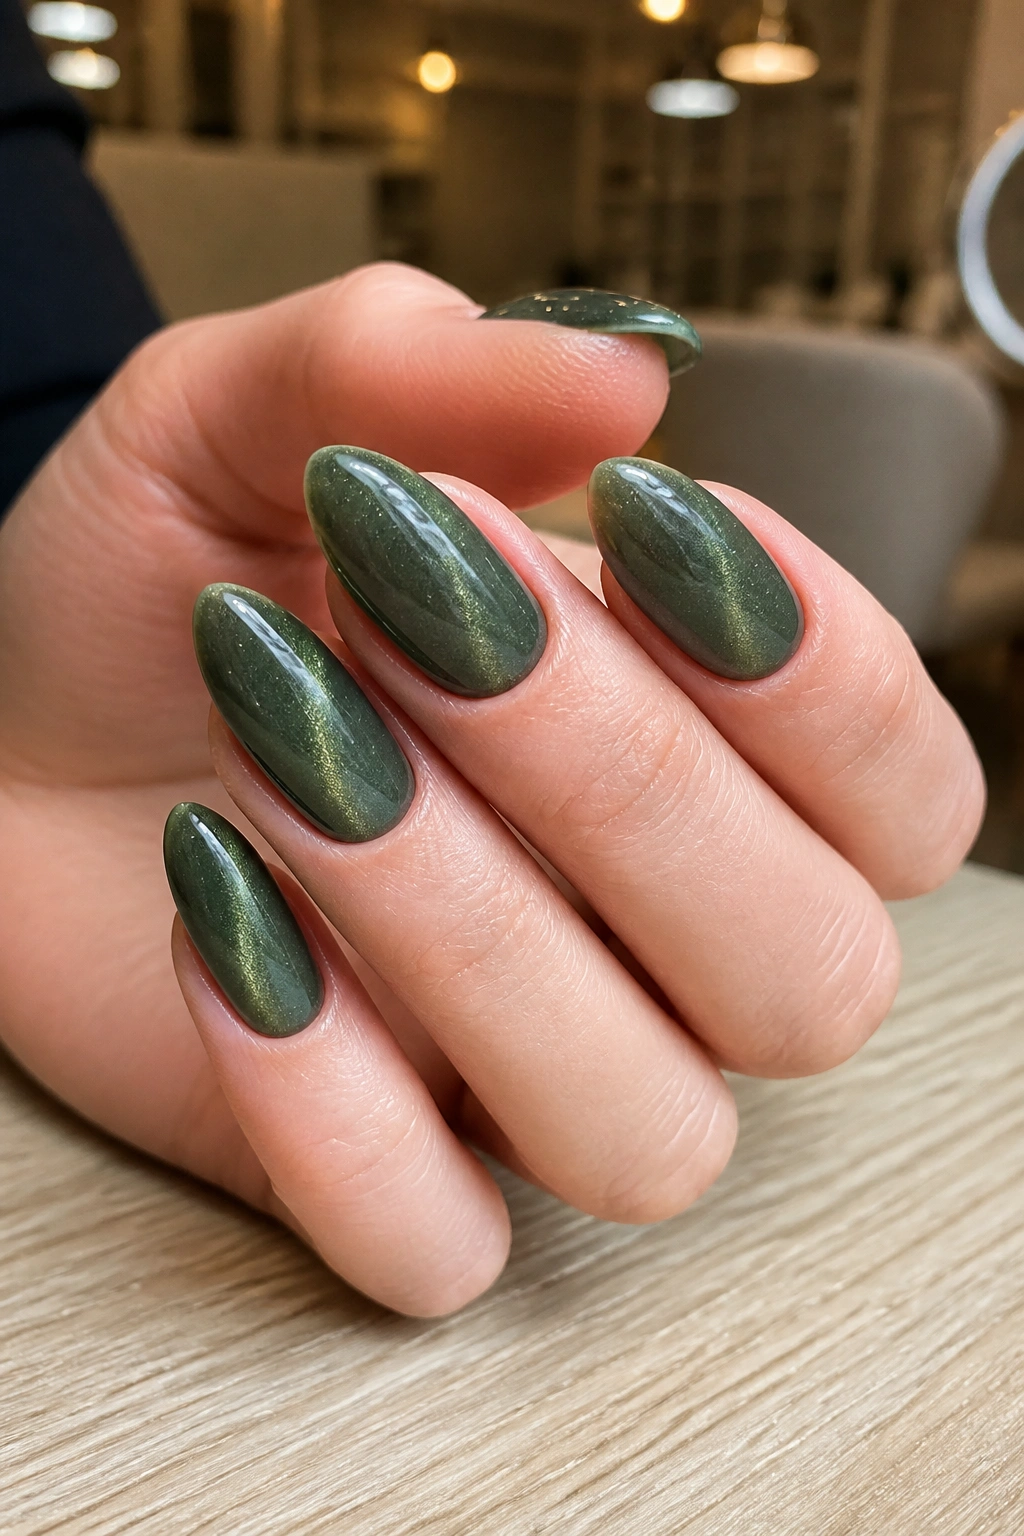
Want movement without glitter dust? Magnetic polish gives you that in one coat. The cat-eye effect creates a soft band of light that shifts as your hand moves, and sage green is one of the nicest shades for it because the color stays calm while the finish does the interesting part.
The best cat-eye version uses a deeper sage base so the magnetic streak has enough contrast to show. On almond nails, a diagonal band looks especially good because it follows the shape of the nail instead of sitting awkwardly across it. A center band works too, but it can read a little flatter.
Best magnet placement
Hold the magnet so the light band sits either down the center or just off to one side. Keep the effect soft, not harsh. If the streak is too narrow, it looks like a scratch. If it’s too wide, the polish loses that velvety depth.
This is one of the few finishes where gel usually makes life easier. The polish stays smoother, the streak holds better, and the result looks cleaner.
15. Half-Moon Cuticle Design in Sage Green and Nude
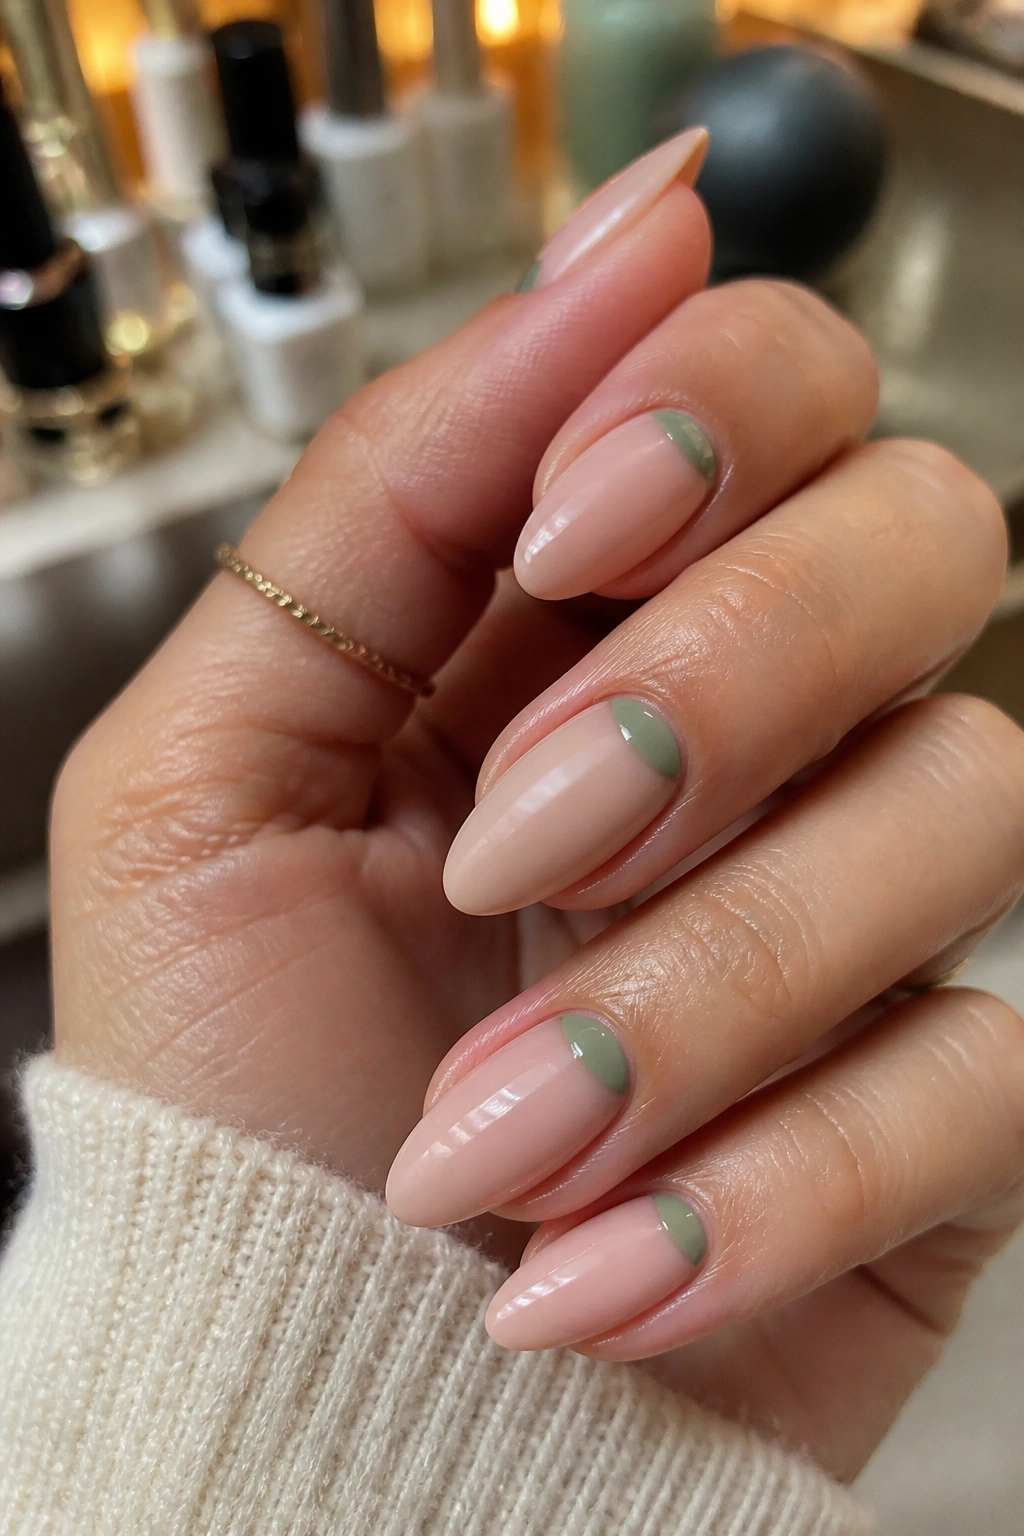
Half-moon nails are for people who like detail but not clutter. The crescent at the cuticle gives the manicure shape without crowding the rest of the nail, and sage green makes the whole thing feel softer than the old vintage versions you may have seen.
A slim crescent usually looks best, around 2 to 4 mm wide depending on nail length. Too wide, and the design starts to look bulky. Too thin, and the moon disappears. The curve should hug your natural cuticle line rather than floating above it.
I like this with a nude base and sage moon, or the reverse if you want the green to sit more quietly. On shorter almond nails, keeping the crescent tight to the cuticle helps the nail look longer. On longer nails, you can widen it a little and still keep the balance.
The nice thing here is that it feels finished even when the rest of the nail is plain. That’s a rare kind of win.
16. Sage Green Tortoiseshell Accent Nails
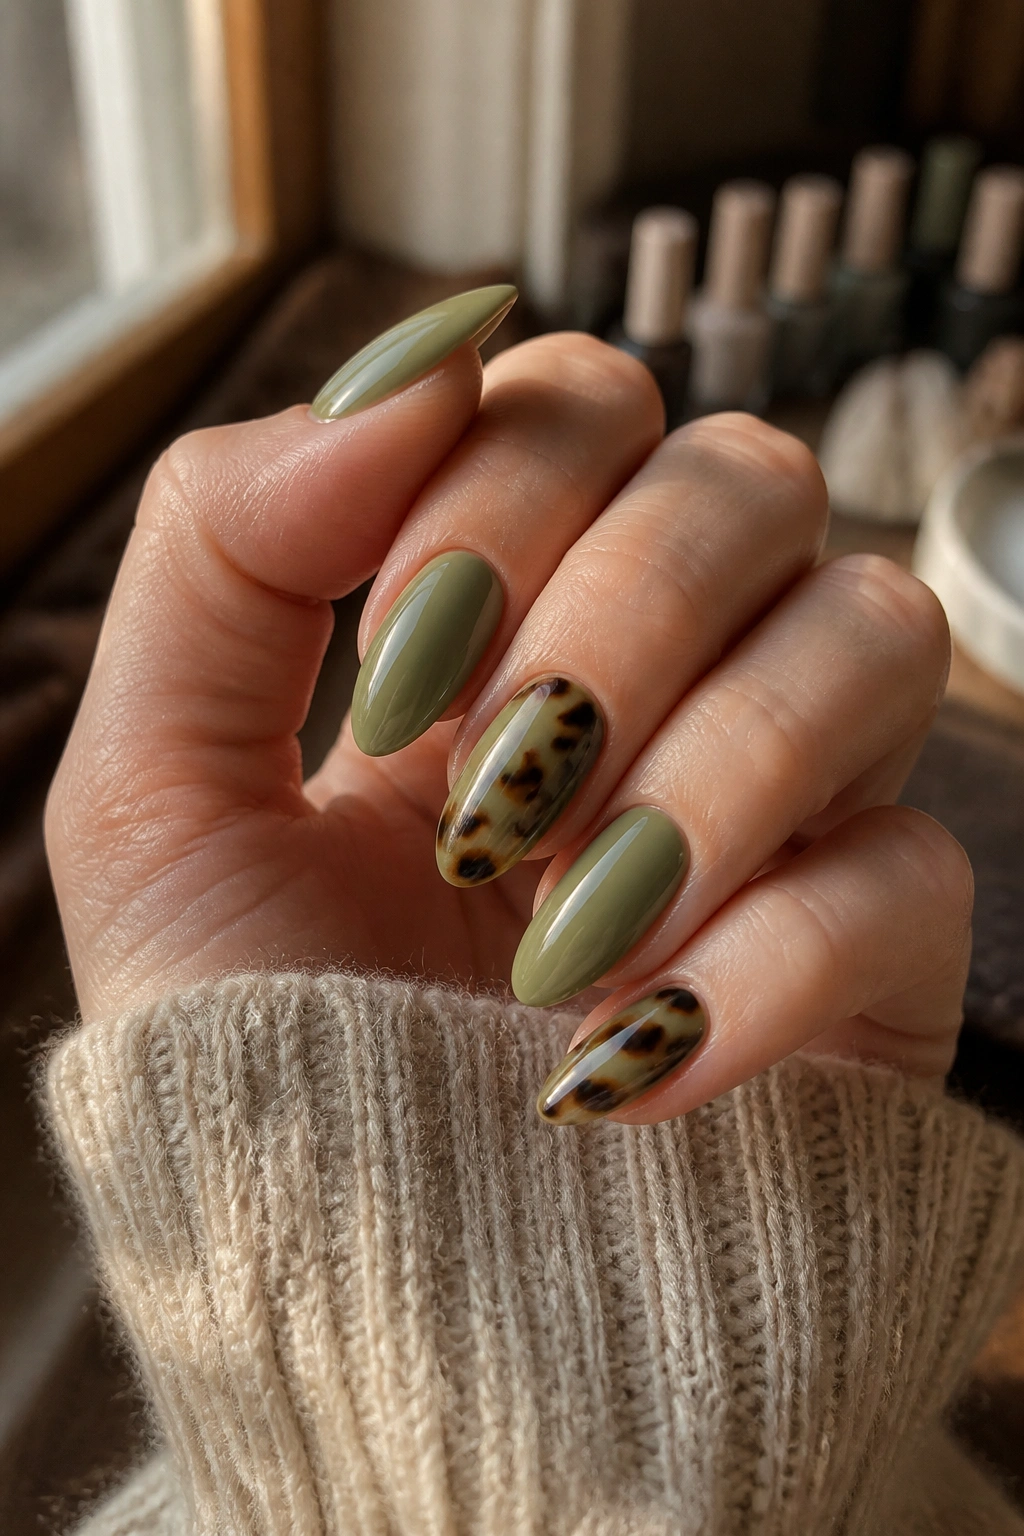
Tortoiseshell can look loud. As an accent, it turns clever. Sage green gives the brown-and-amber pattern a softer backdrop, so the whole manicure feels less flashy and more intentional.
I’d keep the tortoiseshell to one or two nails and leave the rest solid sage. The amber and caramel tones should stay translucent, not muddy. If the tortoise pattern gets too opaque, it stops looking like shell and starts looking like random brown polish. Thin layers matter here.
Why it stays wearable
The contrast between sage and tortoiseshell is enough to make the design feel styled, but close enough in warmth that it doesn’t feel chaotic. Almond nails help, too. The gentle taper makes the tortoise pattern look more elegant than it would on a blunt square shape.
If you wear a lot of gold jewelry, this combination looks even better. The amber in the tortoise pattern picks up the metal tone and keeps the set from feeling too cool. It’s one of those small details that makes the whole hand look more pulled together.
17. Sage Green Aura Nails with a Soft Center Glow
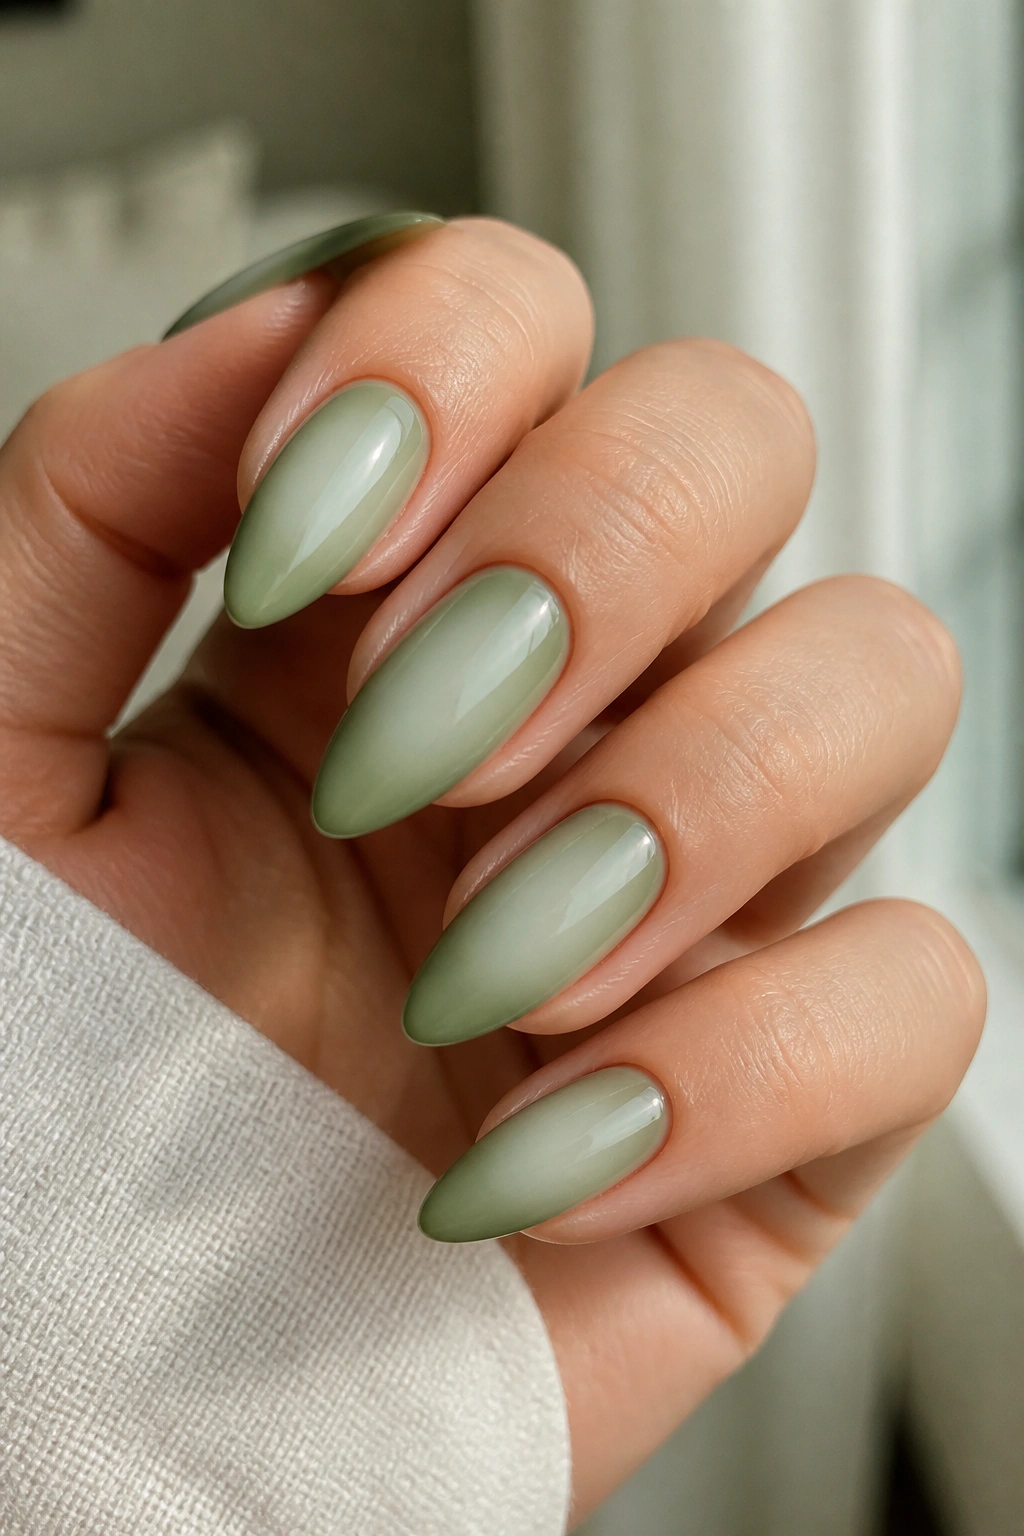
Aura nails and sage belong together more than they should. The blurred center glow gives the color a soft focus, and the almond shape keeps that glow from spreading too far. The result feels airy instead of heavy.
The trick is to keep the halo diffused. A lighter sage or milky white in the center, with the outer edges a little deeper, creates the right effect. You want a blur, not a hard ring. If the edge is too sharp, the nail starts looking graphic in a way that fights the softness of the color.
The best aura nails are the ones that seem to melt from the middle outward. That soft fade can make the nail bed look rounder and a little more lifted. It also gives the manicure a bit of movement without adding glitter, foil, or line art.
I’d pick this when you want something more styled than a solid color but less busy than full nail art. It sits right in that middle space.
18. Glitter Fade Sage Green Nails
Want sparkle without turning the whole manicure into glitter? A fade solves that. Put the shimmer where it matters, then let it taper out before it takes over the nail.
Fine glitter works best here — think small, even particles rather than big chunks. Champagne, soft silver, or pale green shimmer all work with sage. I’d concentrate the sparkle near the tip or near the cuticle, depending on whether you want the eye pulled upward or downward.
Placement changes the mood
A tip fade feels a little lighter and more casual. A cuticle fade feels more polished and a bit dressier. Both look good on almond nails because the shape gives the glitter a natural curve to follow.
Chunky glitter is the trap. It overpowers sage fast and makes the manicure feel busy. Fine glitter gives you texture instead of noise, and that’s the version worth wearing. The fade should look intentional from arm’s length and soft up close.
19. Short Almond Sage Green Nails with Negative Space
Short almond nails need less decoration, not more. That sounds counterintuitive if you love nail art, but it’s true. When the free edge is short, the design has to work harder to keep the shape looking clean.
A sheer base with sage crescents, side tips, or a narrow open stripe down the center usually works better than a full-coverage design. The negative space helps the nail breathe and makes the almond shape feel more defined. On a shorter nail, that definition matters.
Best details for shorter lengths
- Keep the almond taper gentle.
- Use one narrow stripe instead of two heavy ones.
- Leave a slim border of bare nail near the sidewalls.
- Choose softer sage shades over deep, heavy ones.
I’d skip anything too dense here. Dense art can make a short almond look crowded, and crowded nails read smaller than they are. Clean space does the opposite.
20. Milky Sage Green Almond Nails with Micro Gems
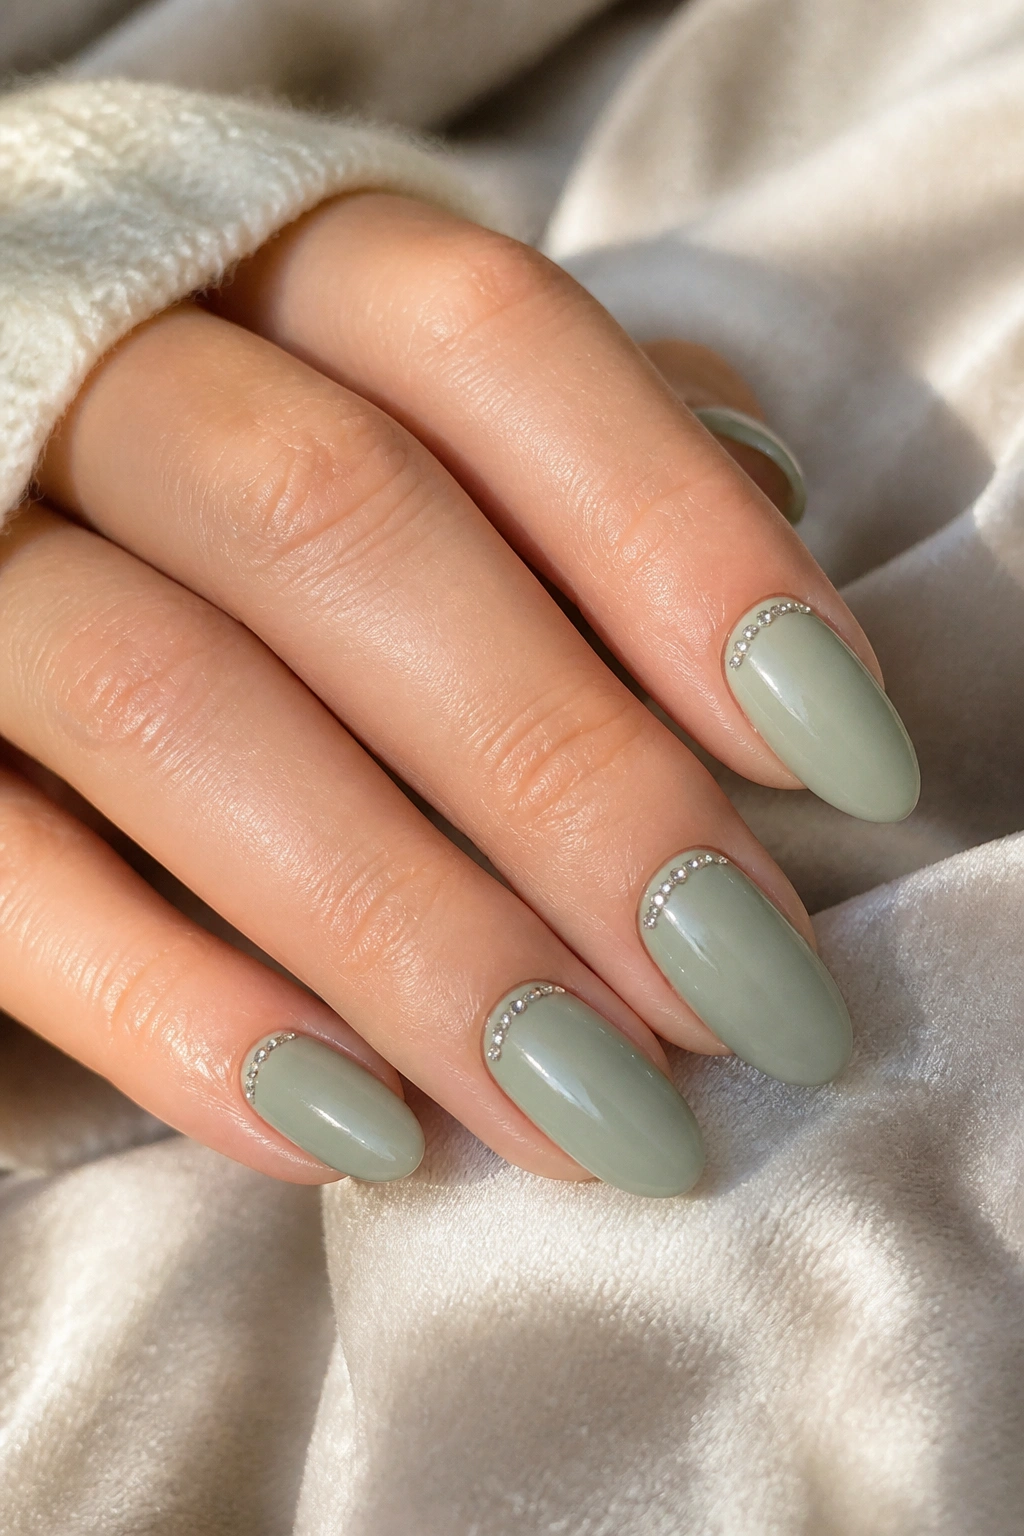
If you only want one design that can cover a lot of situations, this is it. A milky sage base with one slim line of 1 mm micro gems, or a single gem per accent nail, gives you enough detail to feel finished without crossing into overdone territory.
The milky base keeps the green soft. It’s less flat than opaque polish and less sheer than a jelly finish, which is a nice middle ground if you want something calm. The gems add a tiny bit of structure, but they should stay small and close to the nail bed. Big stones change the whole mood fast, and not in a good way.
I like this version because it works with almost any outfit and doesn’t fight with rings or bracelets. It also ages well over a few days, which matters more than people admit. A manicure that still looks neat after a week is worth far more than one that looks loud on day one and tired by day three.
If you want sage green almond nails that feel polished without trying too hard, this is the one I’d hand to most people first.
