

Red almond nail ideas on a budget work because the shape does half the heavy lifting. Almond nails soften the hand, stretch the look of the fingers, and make even a plain red polish feel more finished than it would on a blunt square tip.
The real trick is restraint. A single bottle of red polish, a decent top coat, and one small detail—thin French tips, a gold line, a matte finish—can look more pulled together than a set crowded with charms and thick stickers. I’m a fan of the versions that look deliberate from arm’s length and still survive dishwashing, typing, and a busy week.
Budget nail art gets messy when the design starts fighting itself. Thick crystals chip fast, complicated gradients take forever, and too many colors can make the manicure look noisy instead of chic. Red works best when it gets to be the main event.
These twenty looks stay in that lane. Some are sharp, some soft, some a little playful, and almost all of them can be pulled off with a few basic tools or a single polish bottle. The easiest place to start is the plainest one, and that is not a boring answer at all.
1. Classic Cherry Red Almond Nails
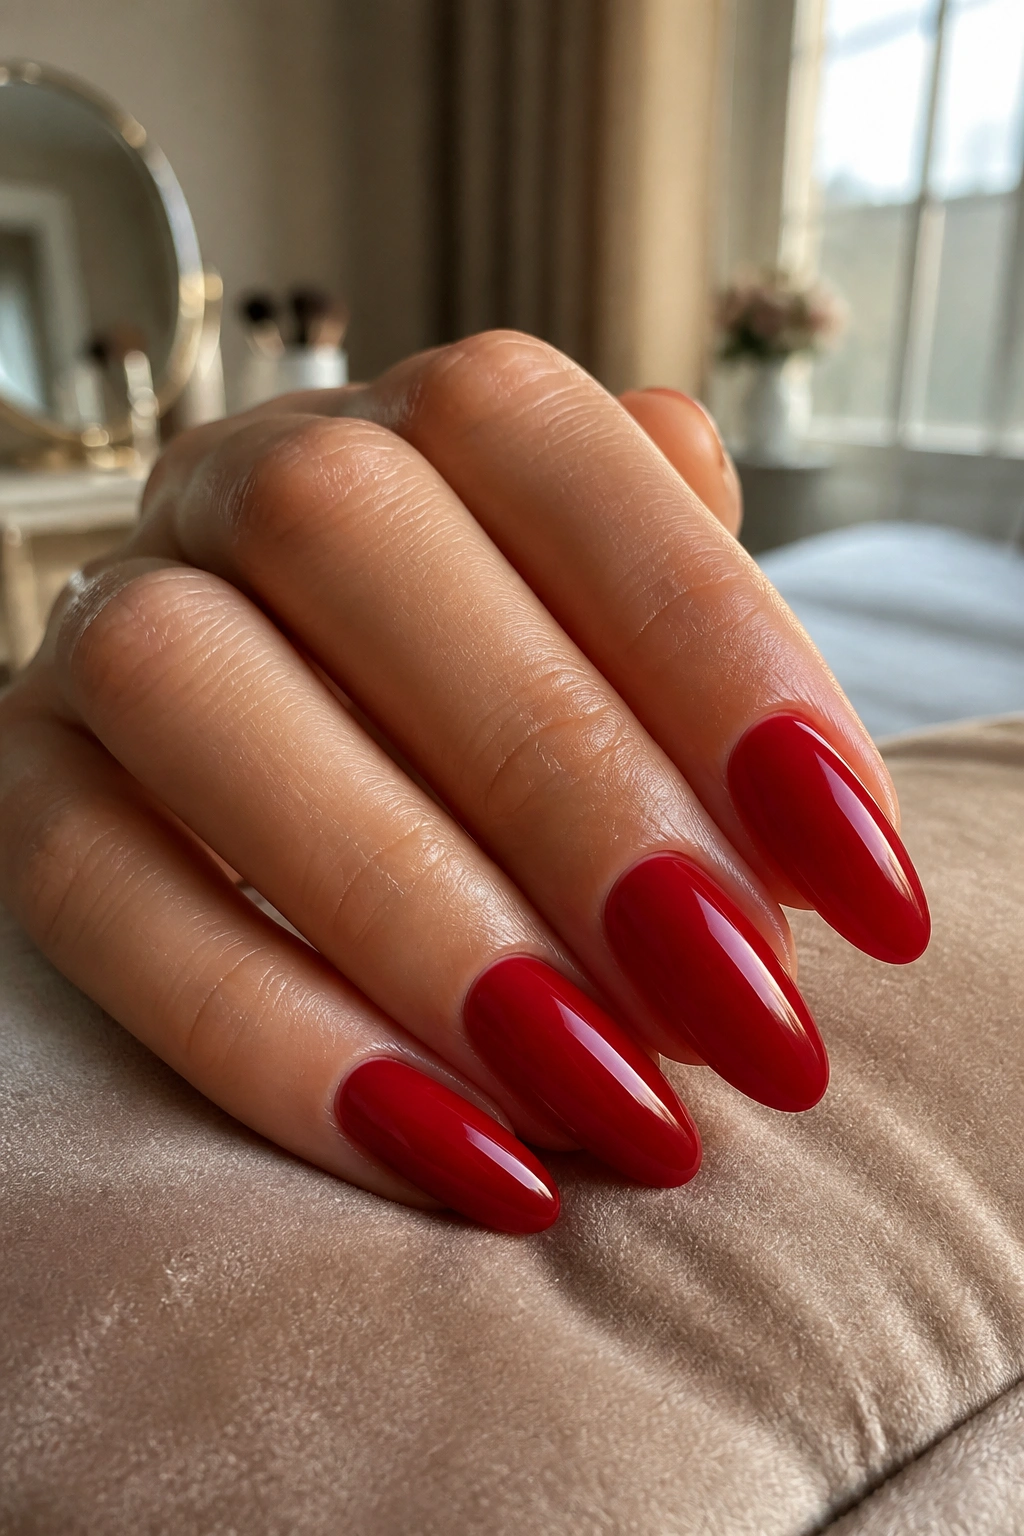
A glossy cherry red on almond nails is the safest place to spend almost nothing and still walk away looking polished. If you file the sidewalls smooth and keep the tip softly pointed, the red shade does the rest. No glitter. No decals. No drama.
Why I Reach for It First
This is the manicure that makes the most sense when you want maximum payoff from minimum product. One rich red polish, one top coat, and a clean almond file are enough to make it look intentional.
- Use two thin coats instead of one thick one so the color dries evenly.
- Seal the free edge with top coat to help the tips last longer.
- Keep the almond point soft, not sharp; a hard point chips faster.
- Wipe the brush on the bottle neck before painting near the cuticle so the line stays neat.
One thing people miss: a cherry red can look cheap when the finish is dull. That’s the whole game here. A glossy top coat turns a basic color into something that looks like you planned it.
Best for: anyone who wants red almond nails on a budget without feeling like the manicure is trying too hard.
2. Thin Red Micro-French Tips
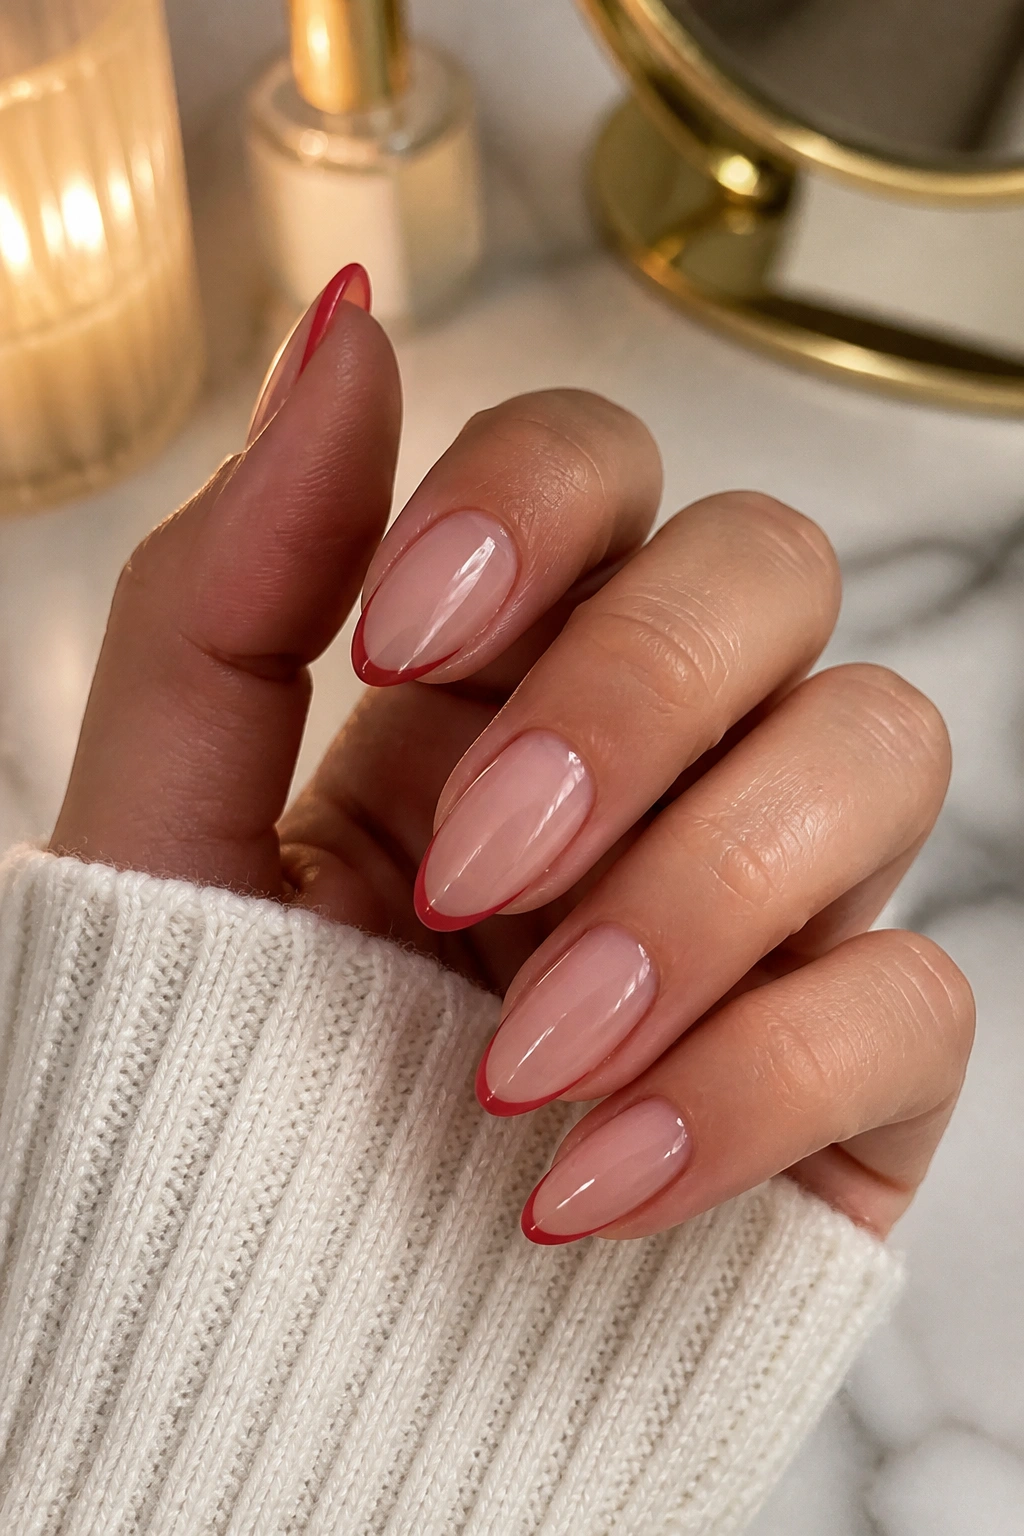
Why do micro-French tips keep looking expensive even when they’re painted with a toothpick? Because the eye sees the precision first. The thin red edge gives just enough structure, and the nude base keeps the whole thing light.
This design is one of my favorites for a low-cost manicure because it uses barely any polish. You can do the tips with a slim brush, a liner brush, or even a sturdy striping tool if you already own one. And if one tip comes out slightly wobbly, the almond shape forgives it more than a square nail ever will.
The other nice thing is grow-out. Tiny French tips stay neat as the nail grows, so you don’t get that harsh line that makes older manicures look tired. That matters if you are trying to stretch one set for more than a few days.
My tip: anchor your painting hand on the table and rotate the finger, not the brush. It sounds fussy. It saves time.
3. Matte Scarlet Almond Nails
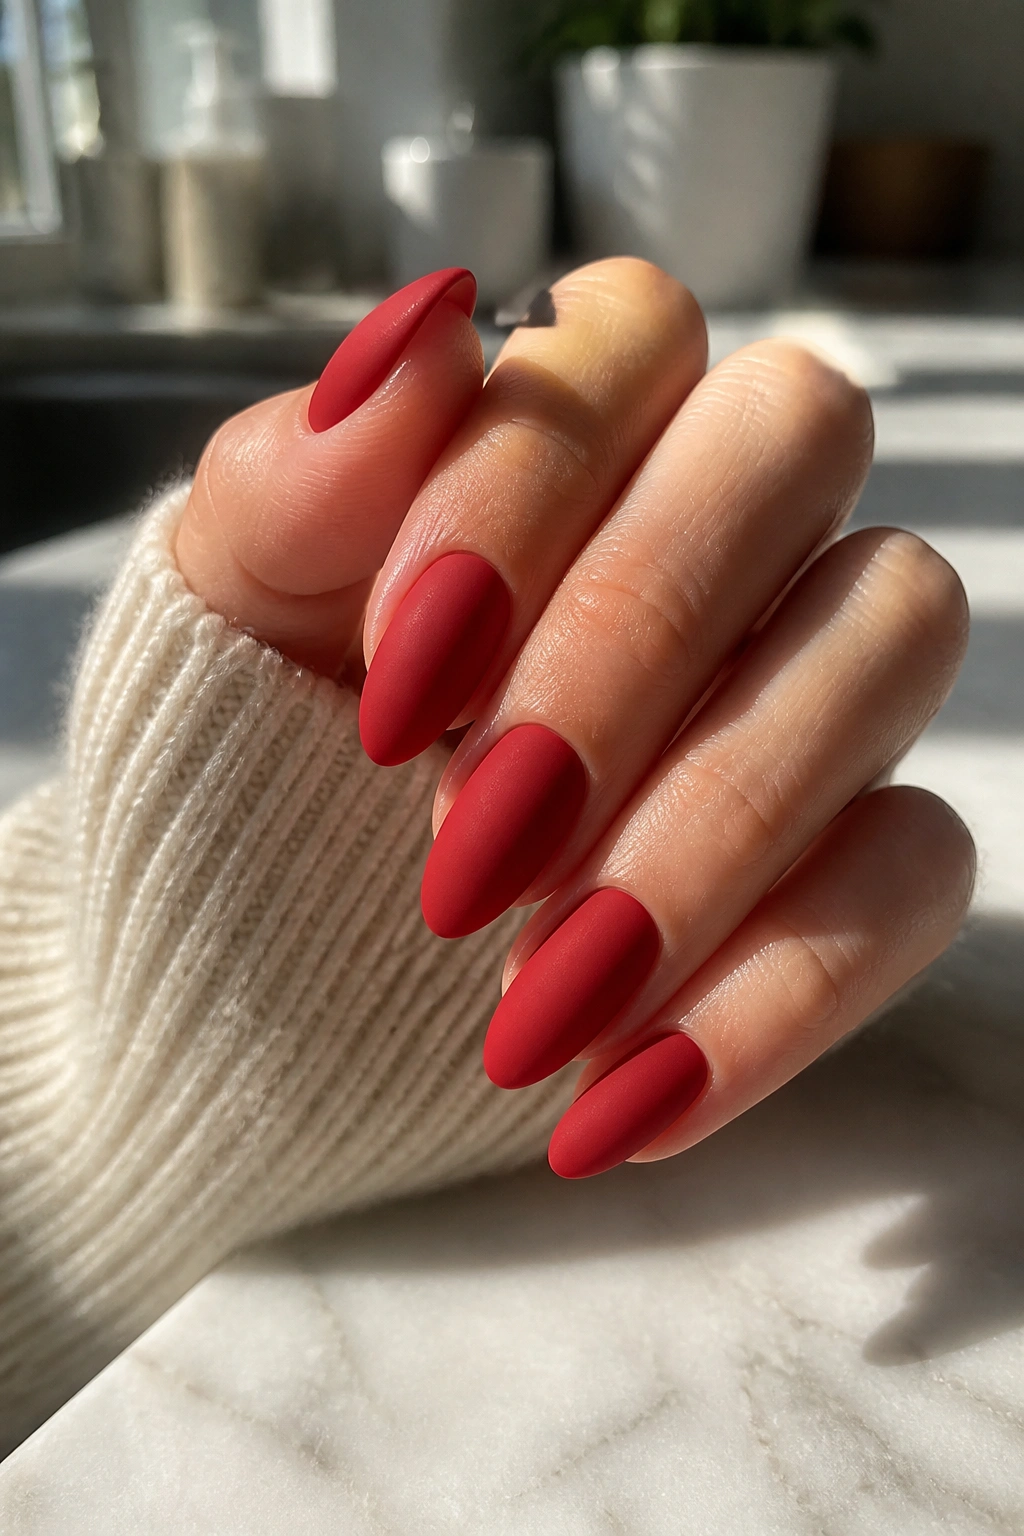
Matte scarlet is the cheapest way to make red look edited instead of basic. A matte top coat strips away the shine and leaves you with a flat, velvety finish that feels sharper than gloss.
What Matte Covers Well
Matte finishes are forgiving in a way shiny polish is not. They hide tiny brush marks, soften small imperfections, and make a color read a little deeper than it did in the bottle.
- Use a smooth base coat so the matte finish does not cling to ridges.
- Put down two thin coats of red, not one heavy one.
- Let the polish dry longer than you think before adding matte top coat.
- Skip oily hand cream right before painting; oil can make the finish patchy.
I like matte red on almond nails because the shape stays elegant while the surface goes moody. It is a good choice if you want something with edge but do not want to buy chrome powder, charms, or extra colors. A matte top coat costs far less than a full nail art setup, and it changes the whole mood.
Cheap, yes. Plain, no.
4. Reverse Red Half-Moon Nails
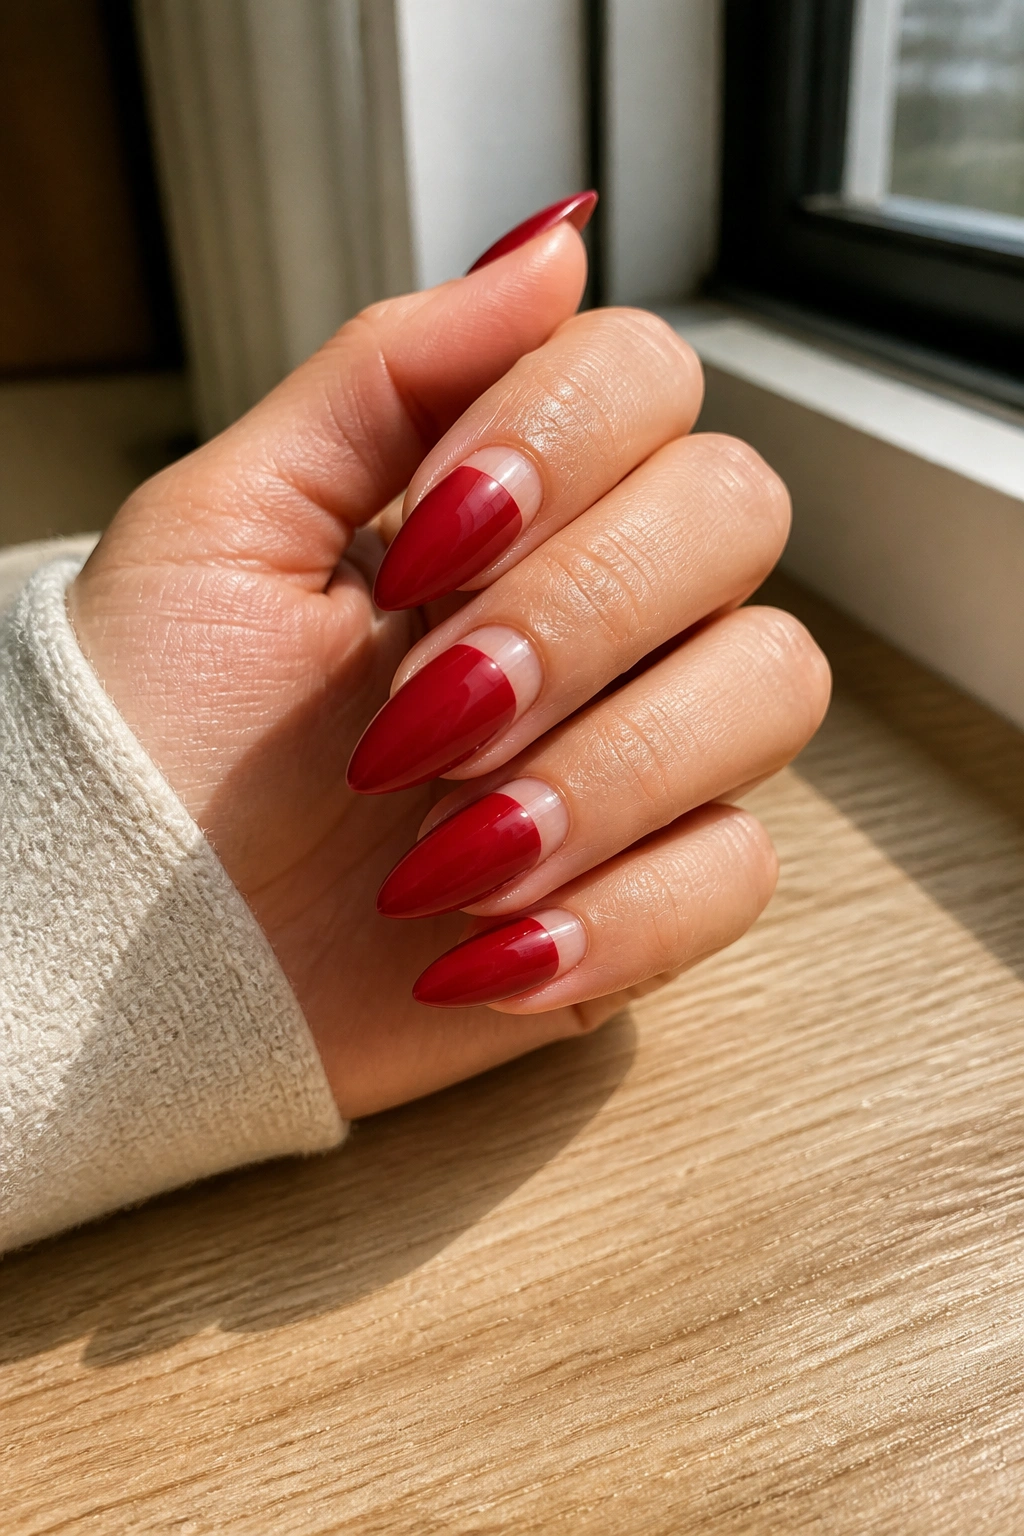
If chips bother you more than artistry, reverse half-moon nails are a smart move. You leave a small crescent near the cuticle bare or sheer, then paint the rest of the almond nail in red. It grows out softly and looks intentional even when it starts to wear.
This design has old-school charm, but it still feels modern on almond tips because the curve at the base echoes the curve of the nail itself. That makes the whole manicure look clean without needing a lot of decoration. It also uses less opaque polish than a full-coverage set, which is a quiet budget win.
You can make the crescent with a sticker guide, a round reinforcement hole, or a tiny strip of tape if you already have it at home. I prefer a sticker guide because it gives the base line a rounder shape, which fits almond nails better than a hard edge.
Less polish. Less fuss. Better grow-out.
5. Red Almond Nail Ideas With Nude Negative Space
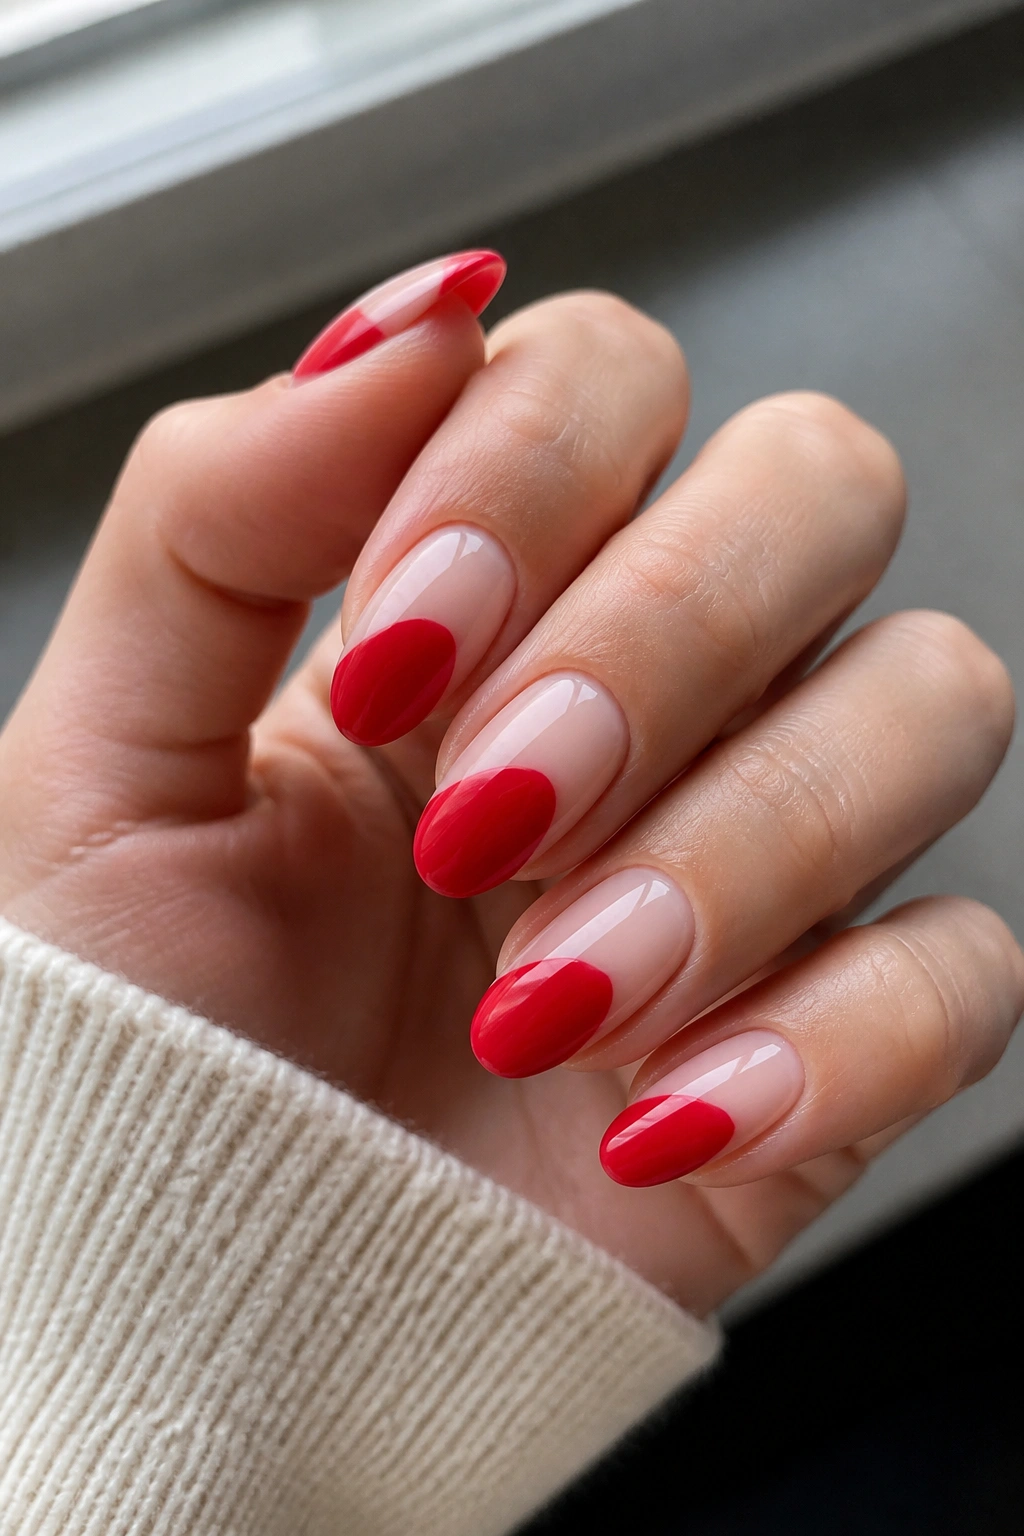
Negative space is one of the smartest ways to stretch a red manicure on a budget. Instead of covering the entire nail, you leave part of the natural nail or base coat showing, then let the red sit in a diagonal block, a cut-out stripe, or a slim frame around the edge.
Where the Empty Space Goes
The best part is that the design looks purposeful even when the polish count is low. A single red panel across the center of each almond nail can feel cleaner than a full coat, especially if the rest of the nail stays sheer and glossy.
- Use a nude base coat that matches your skin tone closely.
- Paint the red section with a thin brush so the edge stays crisp.
- Let the negative space sit near the cuticle or sidewall for a sharper look.
- Keep the design consistent across both hands; uneven spacing looks accidental fast.
This one is also good if you like your nails to grow out quietly. The bare sections blur the line between new growth and old polish, which buys you a little more time between touch-ups. That matters when you are stretching a manicure on a small budget.
I reach for this when I want red to feel clever instead of loud.
6. Red Nails With a Single Gold Stripe
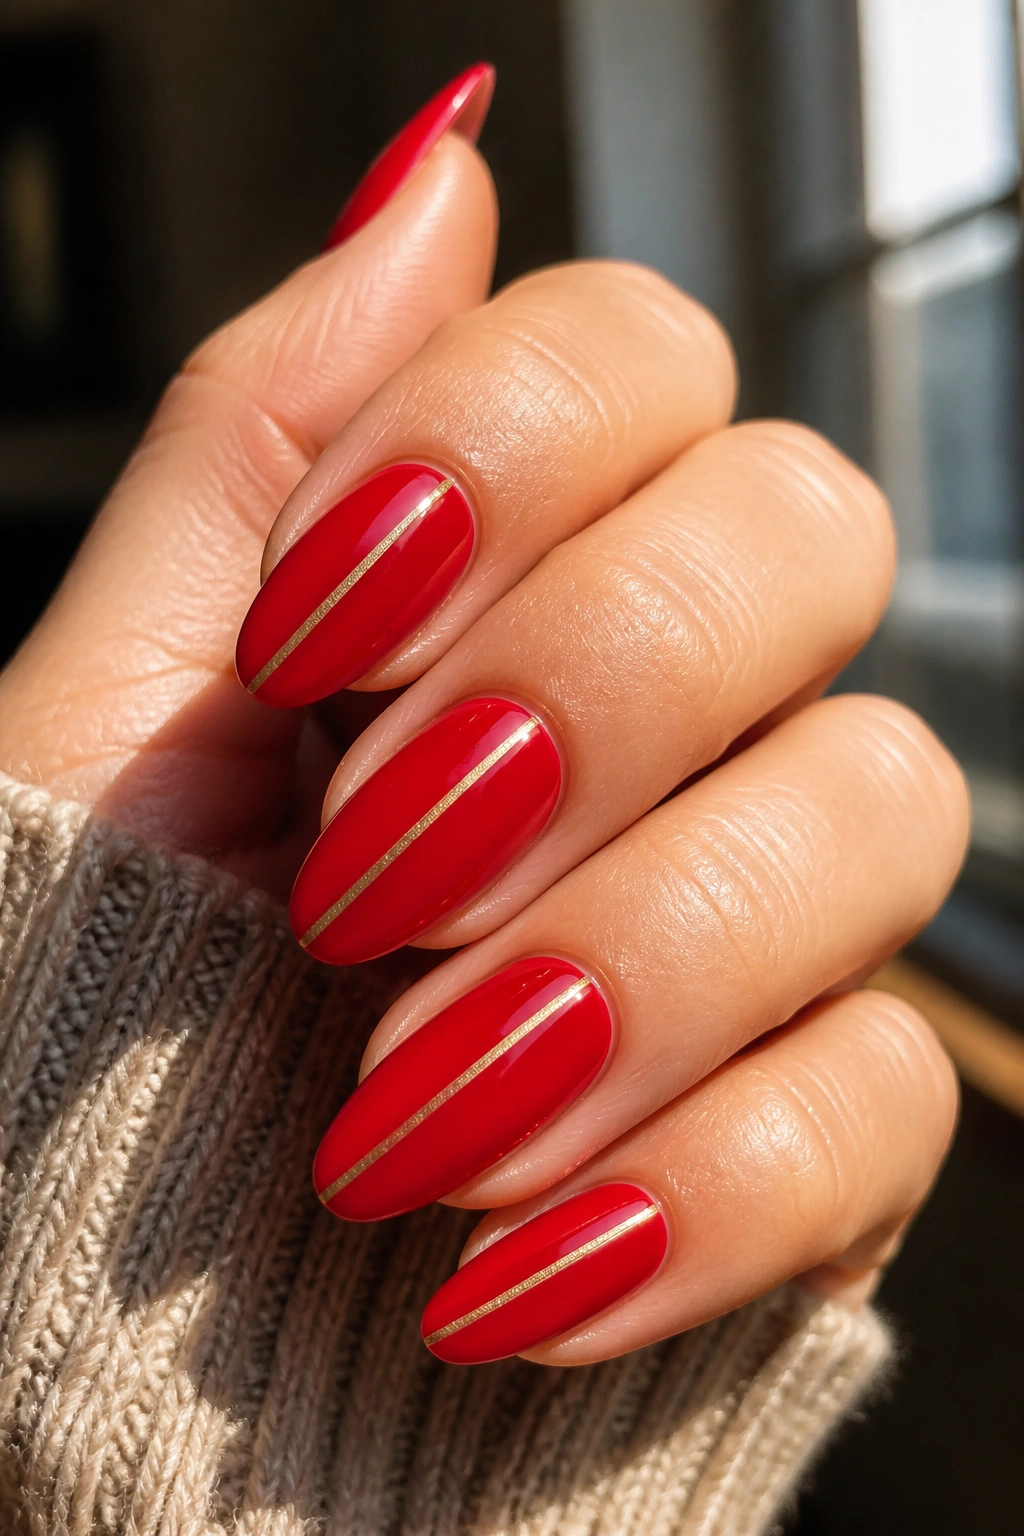
Compared with full crystal work, a single gold stripe is almost absurdly cheap. One roll of striping tape or one metallic liner polish can carry the entire design, and the result still looks sharp on almond nails.
The trick is to keep the stripe narrow. One line running vertically down the center or slightly off to one side gives the nail a tailored feel, like a red dress with one clean seam. Thick gold bands can look heavy. A slim one reads as deliberate.
This style works especially well if you like a red manicure that can go from casual to dressed-up without changing anything else. The red keeps it grounded, and the gold adds a little flash without tipping into full sparkle. I’d choose this over bulky gems almost every time.
If you already own a red polish and one metallic accent product, you have enough.
7. Tiny Cherry Dot Accent Nails
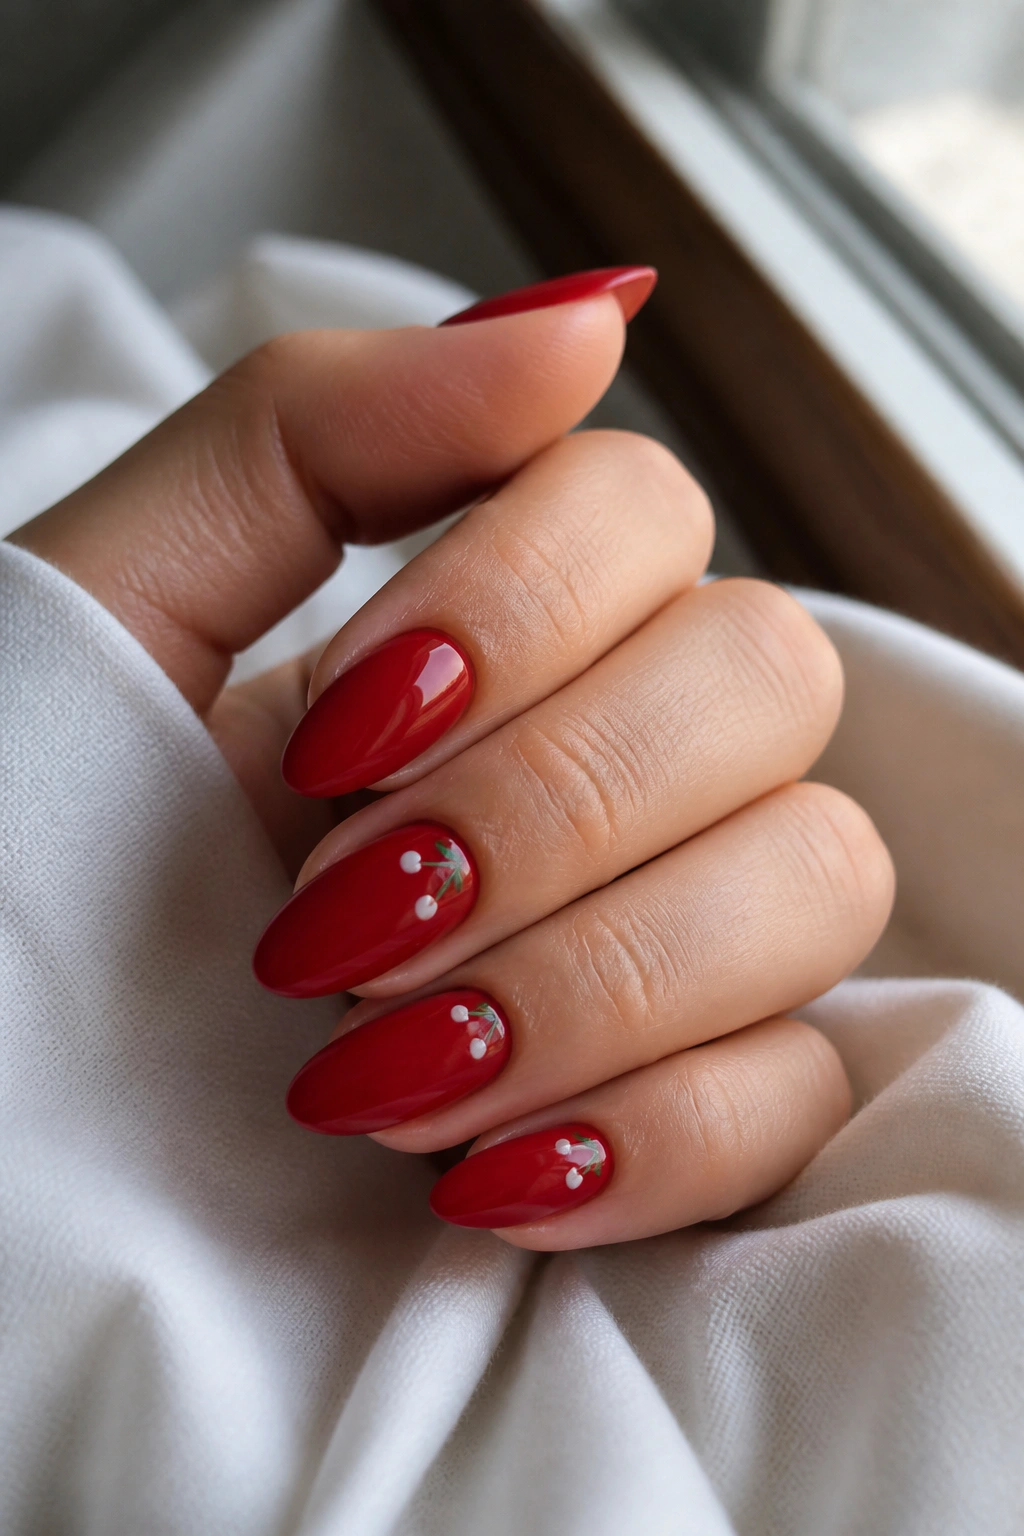
Tiny dots change the whole tone of red almond nails. Two white dots, a little green stem, and suddenly you have a cherry accent that feels playful instead of childish when you keep the rest of the hand simple.
This is one of those designs that looks much more complicated than it is. A bobby pin, a toothpick, or the end of a dotting tool can make the spots. You do not need a whole art kit. You need a steady hand and the discipline to stop before the idea gets crowded.
I like this best on one or two accent nails rather than all ten. Too many tiny motifs can make the manicure feel busy. One or two cherries on a red or nude base keeps it cute and clean.
Small tip: let the red dry fully before adding the dots. Otherwise the white sinks into the color and the little cherries look blurry.
8. Velvet Red Magnetic Nails
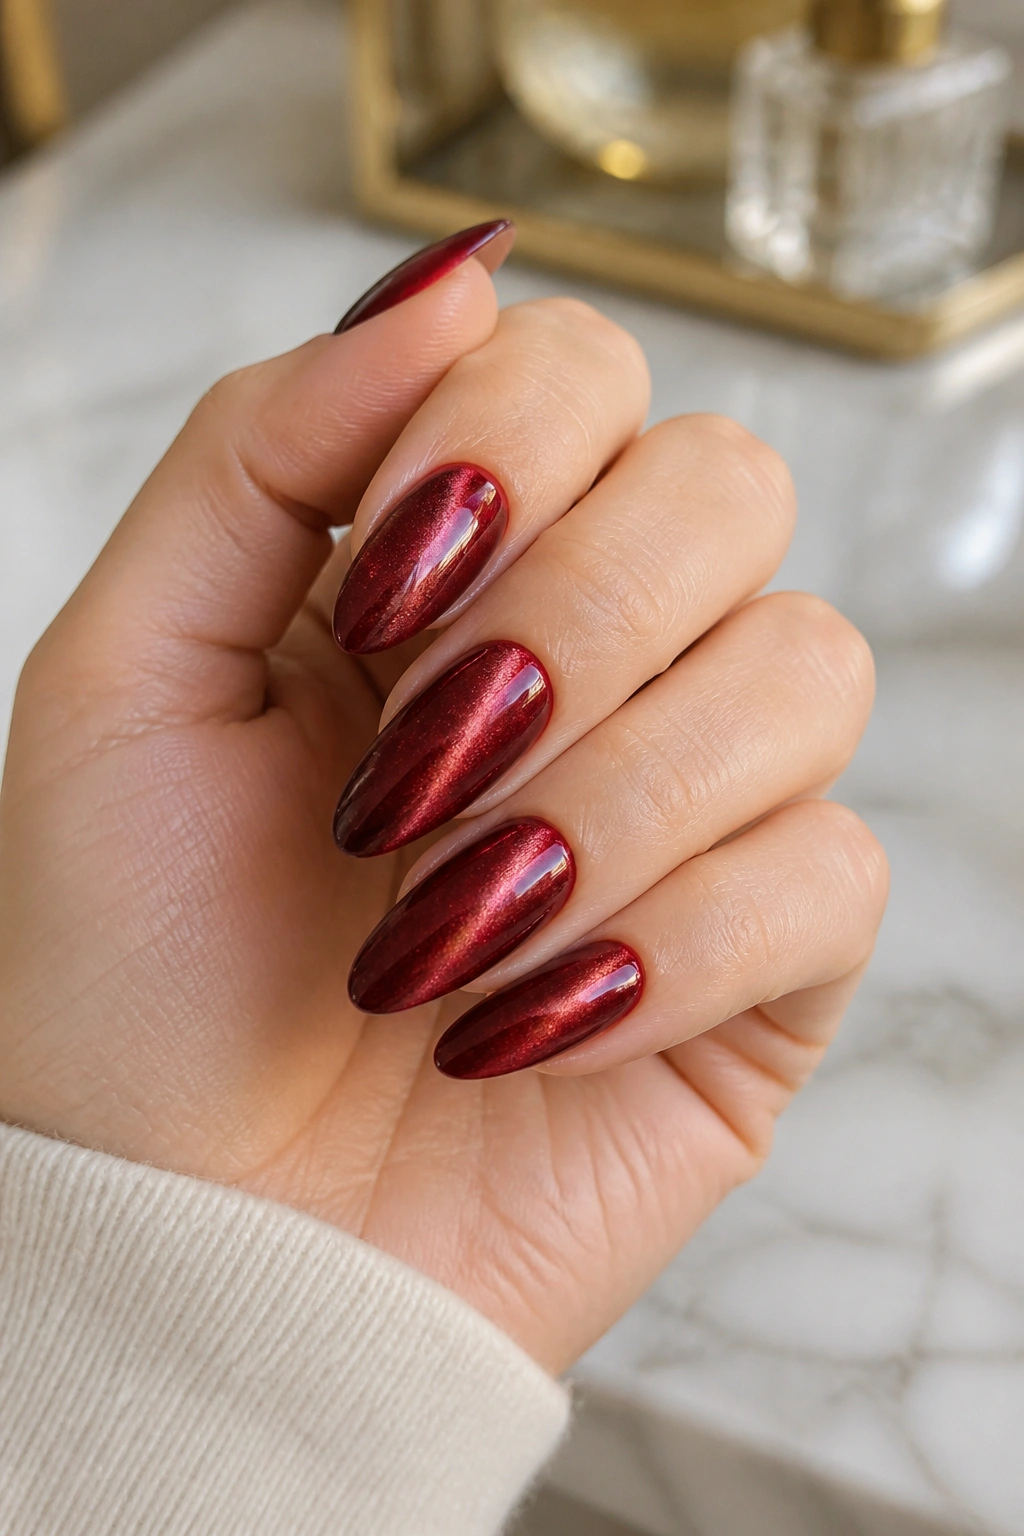
Can velvet red work on a budget? Absolutely, if you keep the rest of the look simple. A magnetic polish gives you that soft, cat-eye sheen without any extra art on top, so the bottle itself does most of the work.
The effect is richer on almond nails because the elongated shape gives the reflective band a nice curve. On short, blunt nails it can feel stiff. On almond tips, it looks smoother and more expensive than the actual tools involved. You only need the magnetic polish and the magnet that comes with it.
The key is not to pile on other decorations. Velvet polish already has motion in it. Add rhinestones or heavy glitter and the whole thing gets muddled. Let the magnetic line sit where it lands, and keep the base clean.
This is one of the few red nail ideas that can look fancy without asking you to become a nail artist. A little patience. That’s it.
9. Milky Base With Red Tips
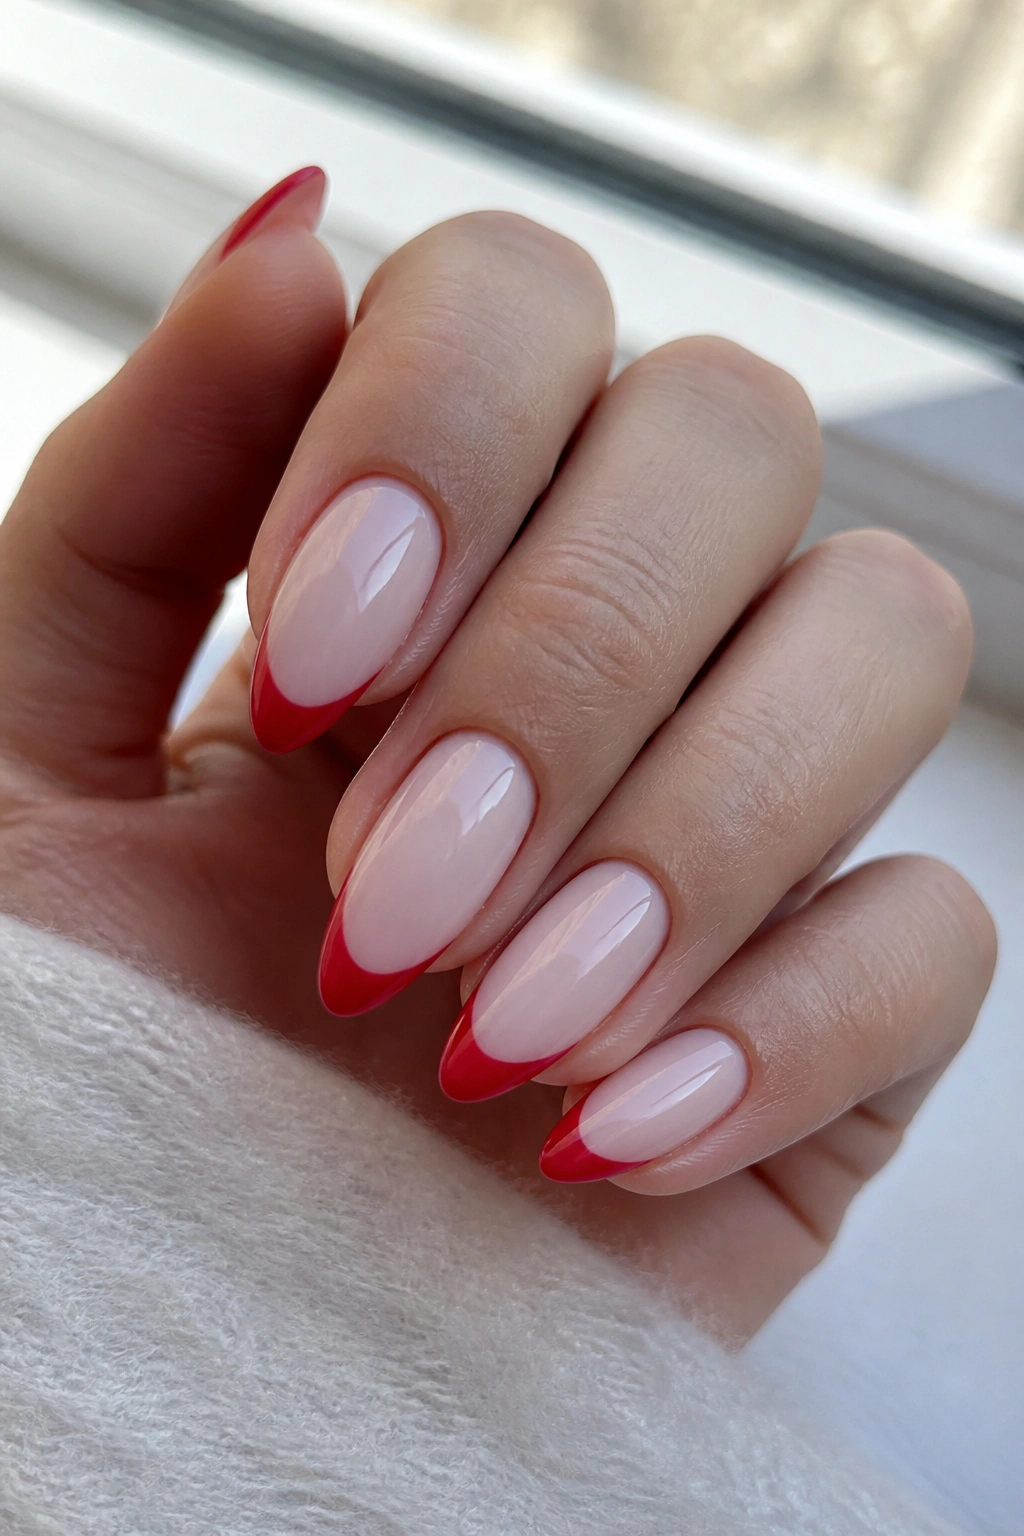
A milky base with red tips is basically a softer French manicure, and I think it is one of the easiest ways to make red almond nail ideas on a budget feel fresh. The sheer base keeps the nails light, while the red tips give you enough color to read from across the room.
This style is kinder to imperfect nails than a full opaque red. Slight ridges, tiny discolorations, and uneven free edges disappear behind the milky wash. Then the red tip sharpens the shape at the end, which is where almond nails look best anyway.
You can do it with one sheer pink or milky nude polish and one red. That’s the whole setup. If the line at the tip is a little soft, it still looks fine because the design itself is supposed to feel airy.
I’d choose this over a full red set if your hands take a beating during the week. It wears in a softer way.
10. Crimson Swirl Almond Nails
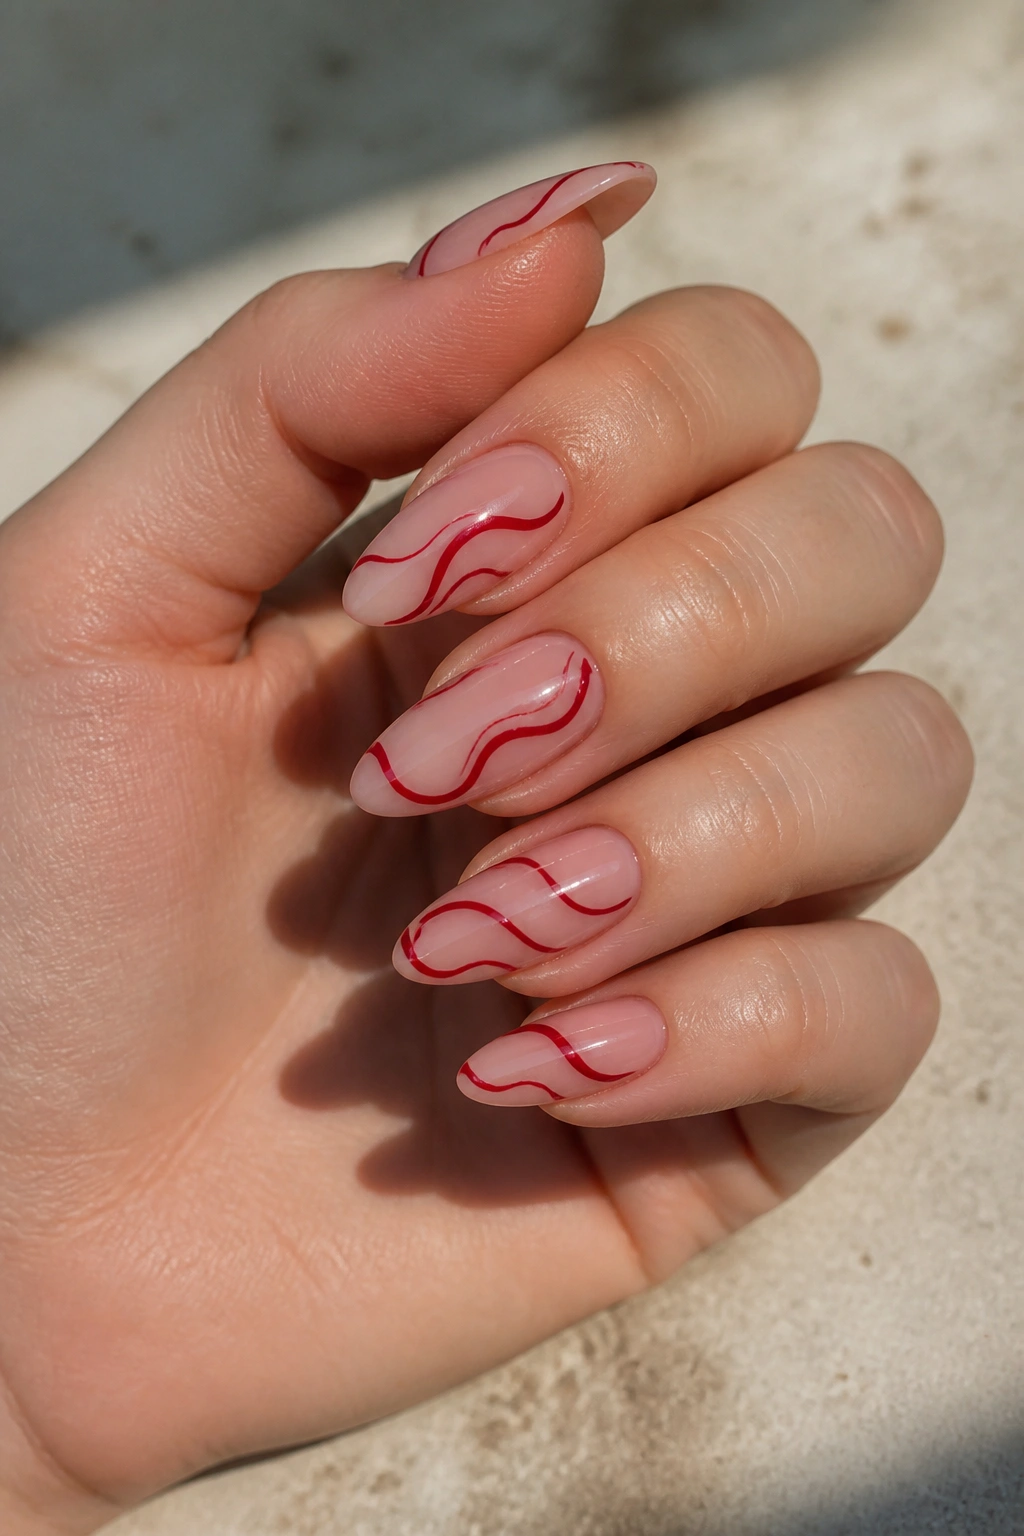
Crimson swirls look expensive only if you let the lines breathe. Too many curves, too many colors, too much polish—then the whole thing starts to feel cluttered. Keep the base sheer or nude, and let the red lines dance across the nail in thin, uneven ribbons.
How to Keep the Lines Clean
A liner brush makes this easier, but a toothpick can work in a pinch if the polish is thinned a little. The secret is to wipe the brush often so you are drawing, not dragging a blob of color.
- Paint the base first and let it dry fully.
- Load only a small amount of red onto the brush.
- Make each swirl in one motion instead of trying to redraw it five times.
- Clean the edges with a tiny brush dipped in remover if the line wobbles.
This design is budget-friendly because it uses very little polish, and mistakes are less obvious than they would be in a solid block of color. The swirls can also vary from nail to nail, which takes pressure off making every hand identical. That matters. Nails are tiny. Perfect symmetry is overrated.
11. Red Plaid Accent Nail
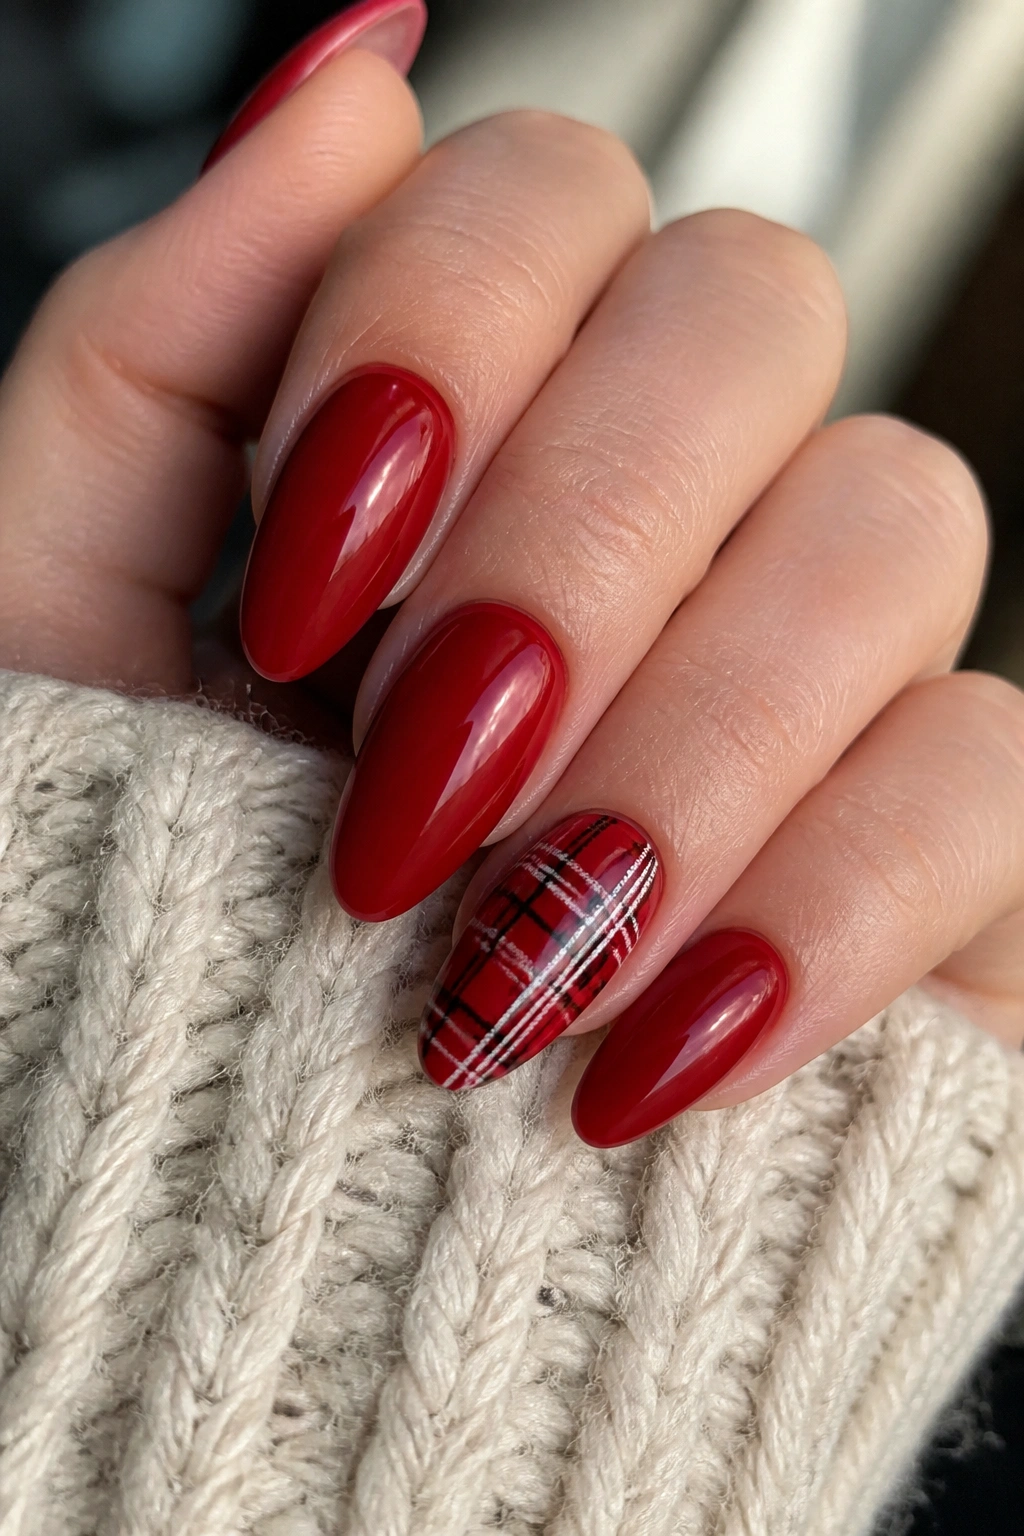
A red plaid accent nail gives you one little moment of pattern without turning the entire manicure into a project. Paint most nails a deep red, then choose one accent nail and build plaid with thin white and black lines.
This is the kind of design I like when I want a nod to a print without paying for a full set of hand-painted details. One accent nail is enough. Any more than that and the whole thing starts to get busy fast.
The lines should stay slim. Two or three stripes in each direction usually do the job. Plaid looks better when it is a little imperfect anyway; that slight handmade feel keeps it from looking sticker-flat. If you are nervous, start with the accent nail on your ring finger. It is less visually demanding than the thumb.
A fine brush is the only real extra here, and most people already own one from some other manicure experiment. That’s the nice part.
12. Red Chrome Accent Nails
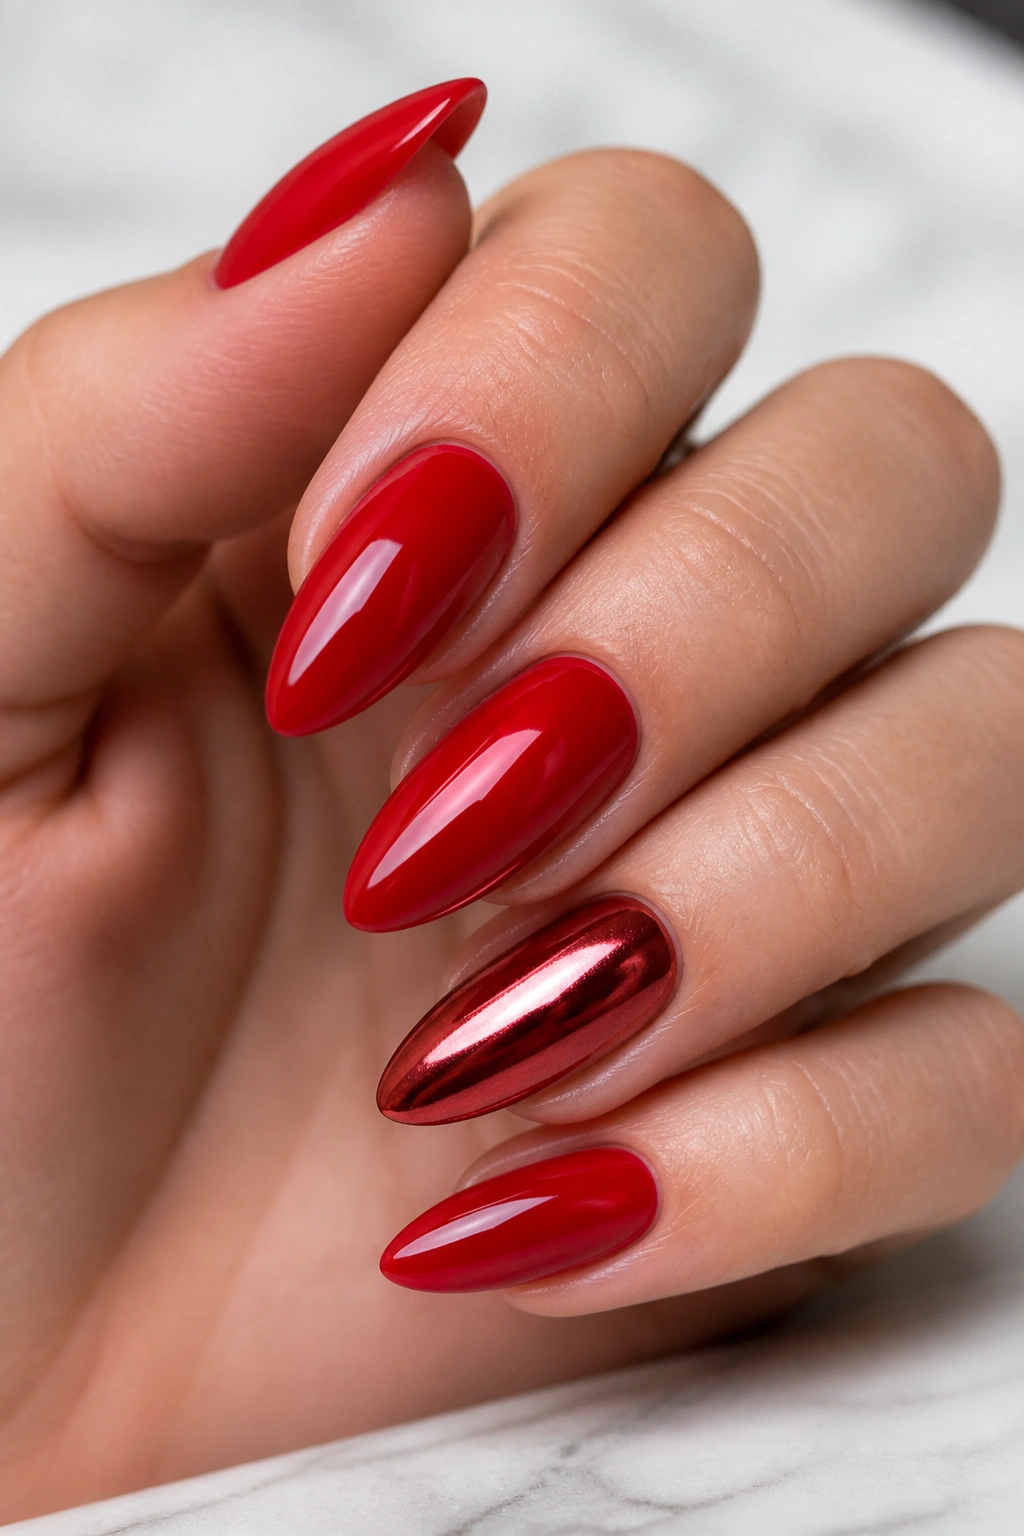
A full chrome set can feel like too much. One or two chrome nails hit the sweet spot, especially on almond tips where the shine has a nice long line to travel across.
Red chrome works best when you use it as an accent instead of covering every nail. Paint most of the hand in a normal glossy red, then choose one or two nails for a chrome overlay. That keeps the look from tipping into costume territory and saves you from buying extra powder for every finger.
The budget trick here is simple: one small pot of chrome powder lasts much longer than a jar full of rhinestones or glitter mix. If you already have a red polish and a no-wipe top coat, the added cost stays low. The result still looks like you put thought into it.
I’d pick this when you want a manicure that flashes under indoor light but still reads wearable during the day. It has edge without being noisy.
13. Burgundy Ombré Almond Nails
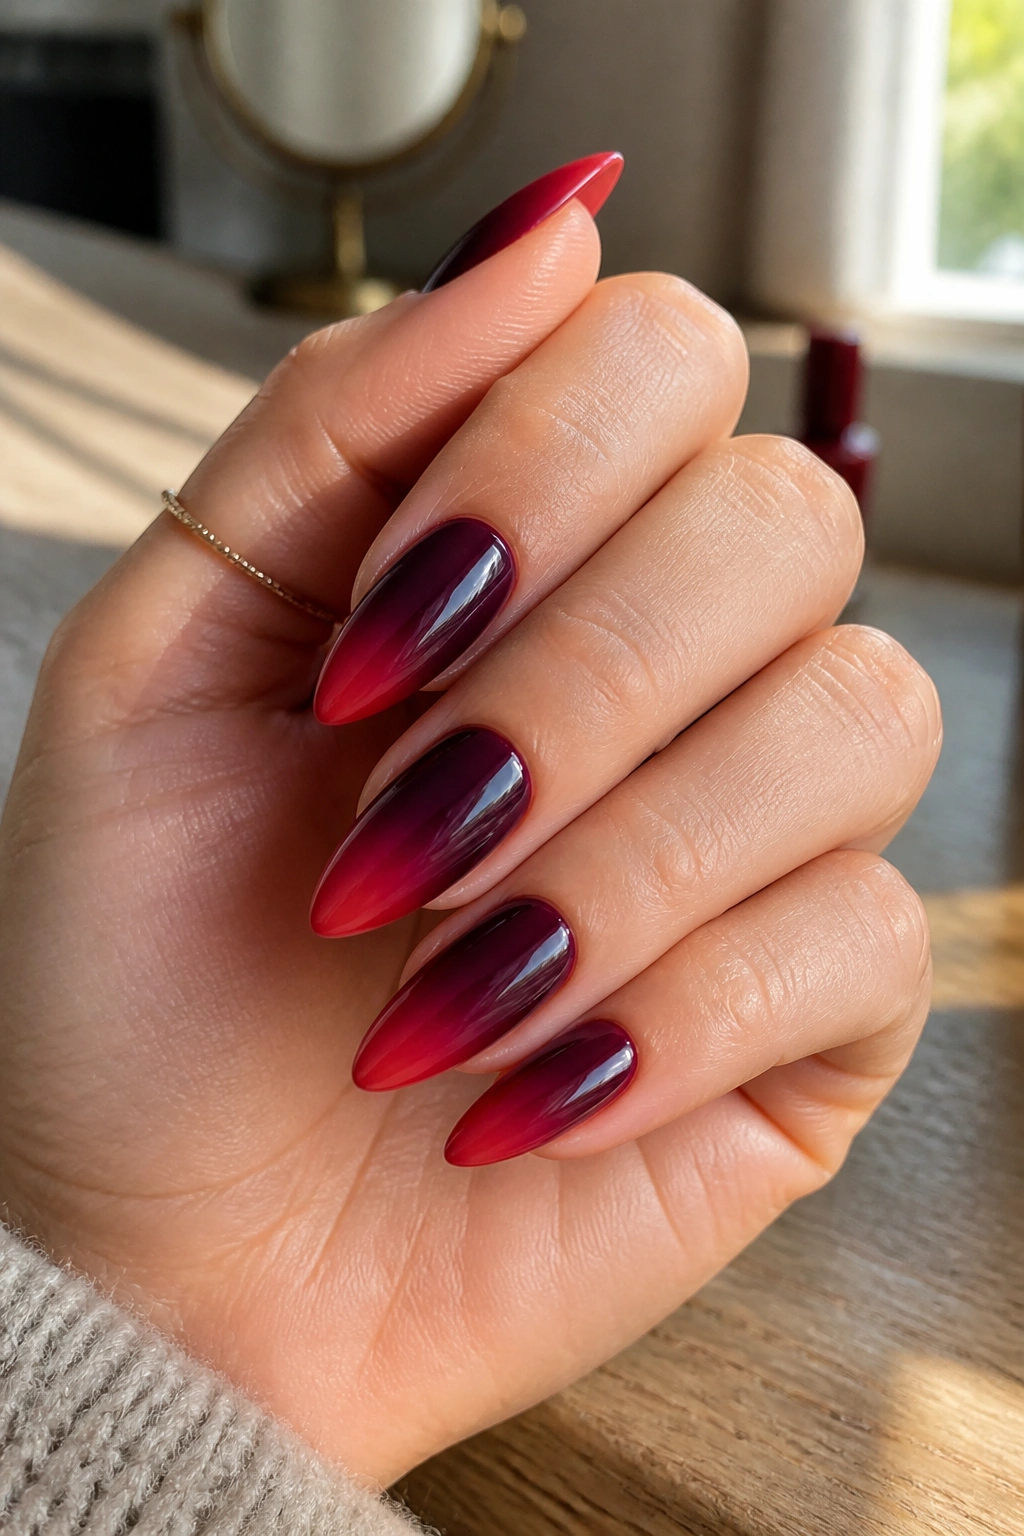
Burgundy ombré has a softer, richer feel than a flat red manicure. The color fades from deep wine near the base to brighter red at the tip, or the other way around, and the almond shape makes the gradient look natural instead of forced.
A makeup sponge makes this easier than people expect. Two reds, or a red plus a touch of black or brown to darken one end, are enough. You do not need special products if you already own a few basic polishes. The blur hides small mistakes, which is why this works on a budget better than a highly detailed pattern.
The nicest thing about ombré is how forgiving it is. A little unevenness in the fade usually looks intentional because the eye expects movement. That is not true of every nail design. Some styles punish every wobble. Ombré tends to smooth over them.
A deep burgundy version feels especially good if you like red but want it to land on the darker side.
14. Red Tortoiseshell Accent Nails
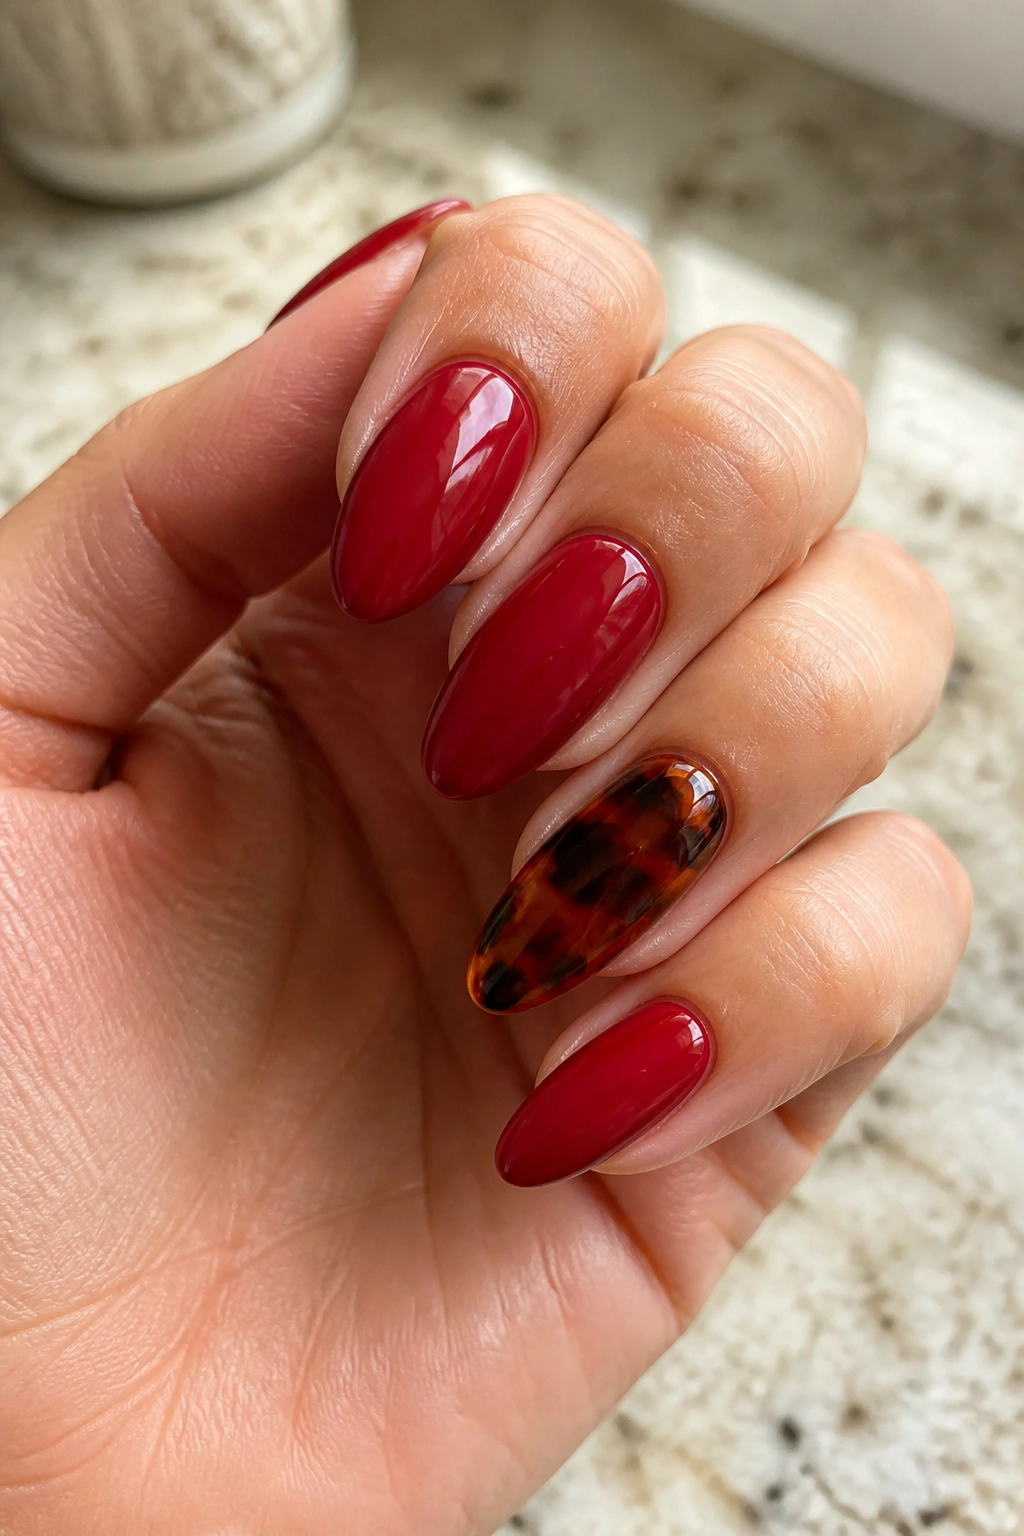
Could tortoiseshell feel too fancy for a budget manicure? Not if you keep it to one or two accent nails. That is the whole trick. Use red jelly layers with amber, brown, and a little black to make the tortoiseshell pattern, then let the rest of the hand stay solid red.
What Makes It Look Rich
The pattern works because it is translucent. You are not painting a flat picture; you are stacking sheer layers and letting them show through each other. That gives the nail depth even when the materials are basic.
- Start with a sheer caramel or amber base.
- Drop in irregular red patches.
- Add thin brown edges around the patches.
- Finish with a glossy top coat so the layers look wet, not dusty.
This is a very good choice if you want one statement nail that does not require every finger to match. Accent nails save time and product, and almond nails make the tortoiseshell look softer than it would on a square shape. I like the balance here. It feels slightly moody, slightly polished, and not at all overworked.
15. Tiny Heart Detail Almond Nails
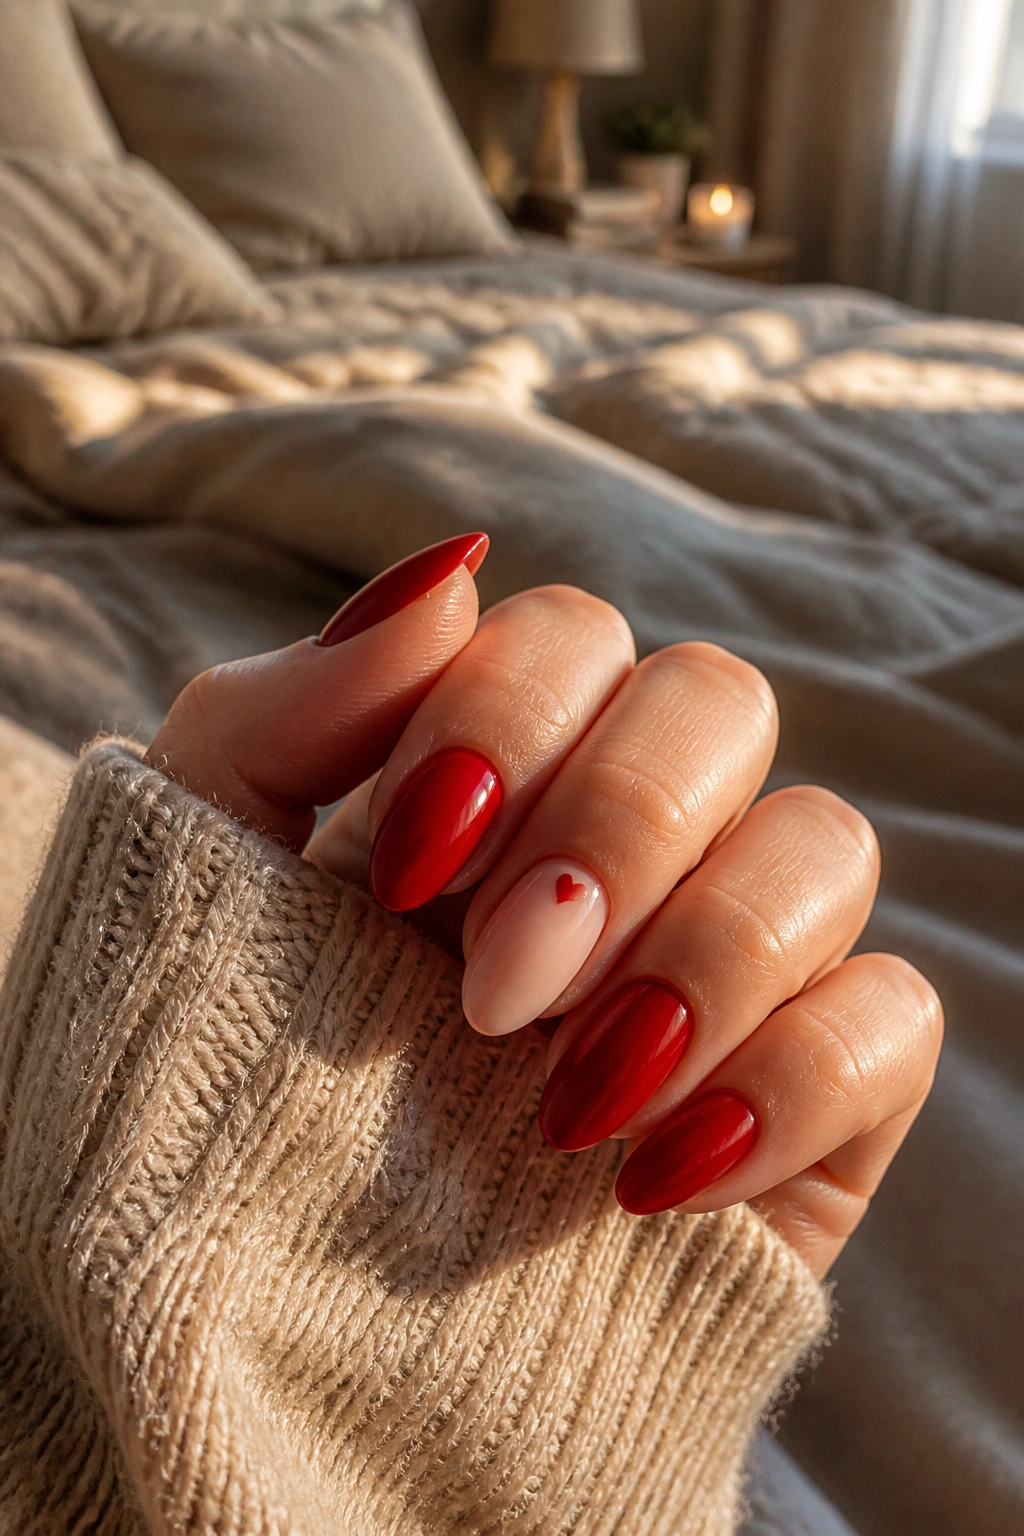
If you want something cute without drifting into teen territory, tiny hearts are the answer. One small red heart on a nude base, or a tiny nude heart cut into a red nail, is enough. No full valentine theme. No glitter explosion.
This idea works because the scale stays small. A single heart near the cuticle or tucked off to one side keeps the manicure feeling light. On almond nails, that little shape echoes the point of the tip in a way that feels surprisingly neat.
You can make the heart with two dots and a quick pull downward using a thin brush or toothpick. That’s it. No stencil required. I like this better than stickers because stickers can lift at the edges, especially if you wash your hands a lot.
One tiny detail goes further than a crowded set of decals. Every time.
16. Short Almond Press-Ons Painted Red
Short almond press-ons are one of the smartest budget moves in nail art, and people overlook them because they assume press-ons look fake. They do not have to. Choose a blank short almond set, file the shape a little if needed, and paint them red at home.
Why Press-Ons Make Sense
They cut out salon labor, which is where a lot of the cost lives. They also give you a uniform shape fast, which matters more than people admit. A neat almond line makes even a plain red finish look cleaner.
- Pick a short almond length so the tips do not snag.
- Lightly buff the press-ons before painting so the polish grips.
- Use a strong glue if you want them to last several days.
- Save the unused tips in the box so you can reuse the set later.
I like this option when you want red almond nails for a single event or a short stretch of time. It is easier to swap out than maintaining a salon set, and the cost stays controlled because you only need one good polish bottle and a blank set of tips.
No need to overthink it. Paint. Press. Go.
17. Red and White Candy Stripe Nails
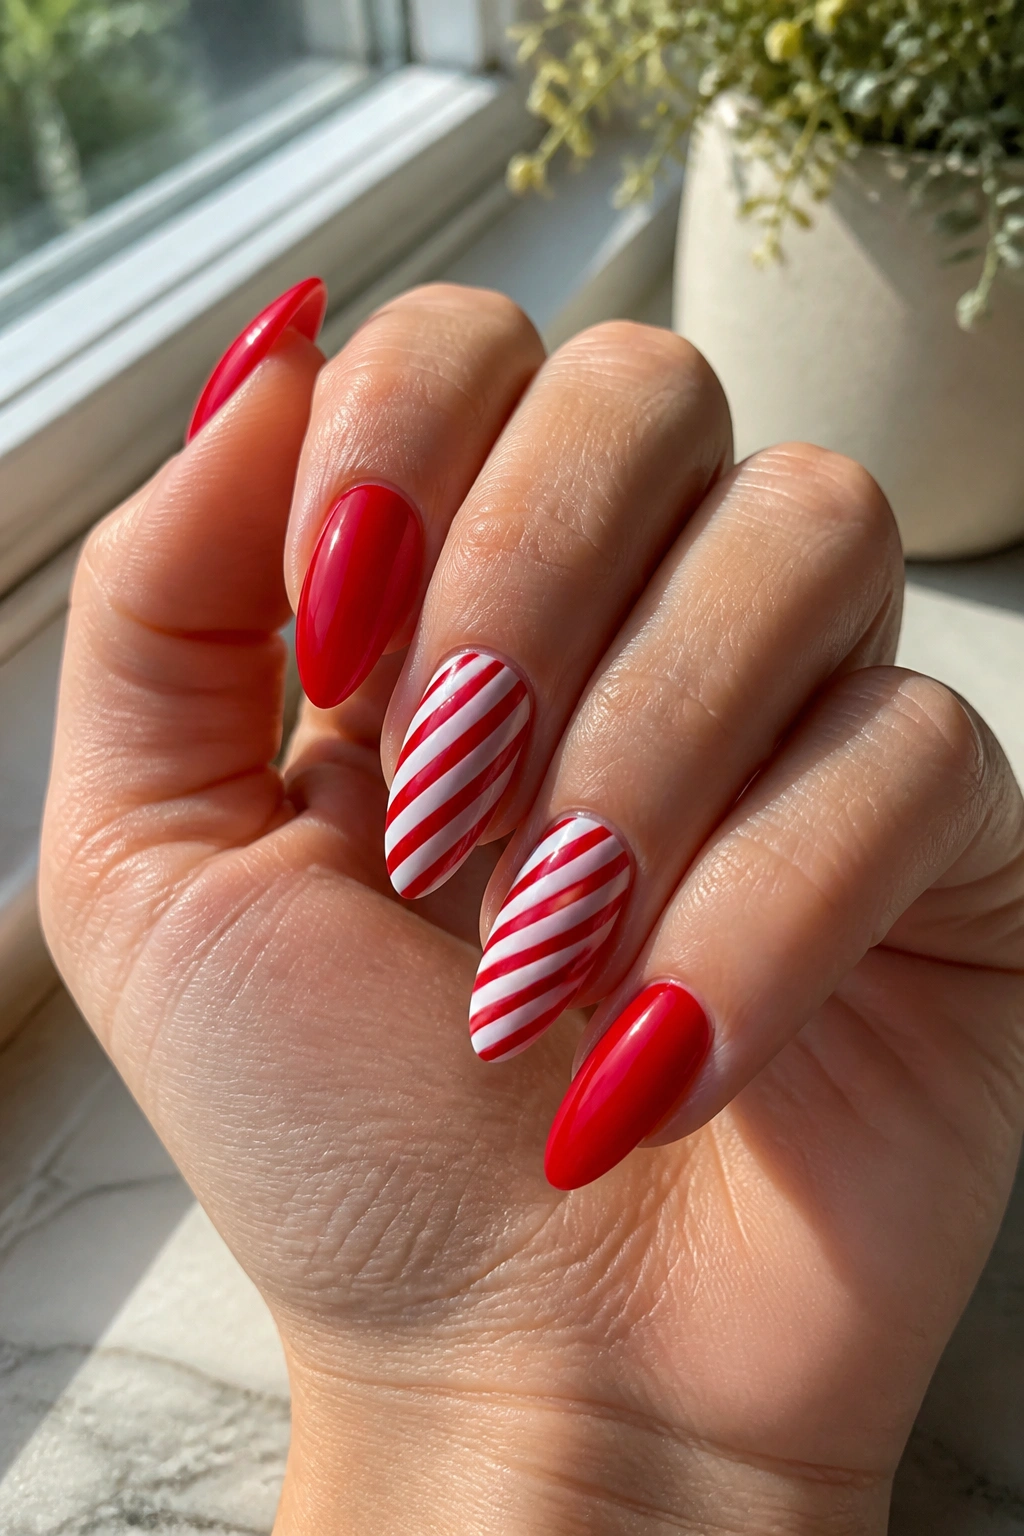
Red and white candy stripes can look playful or sharp depending on how thin you make the lines. On almond nails, I like them thin. Thin stripes feel crisp. Thick ones can start to look costume-like.
A striping brush or line tape makes this easier, but you can also fake the effect with a skinny detail brush. Keep the number of striped nails low if you want the design to stay neat. One accent nail, or a striped tip on each finger, is enough. Full-hand stripes take longer and use more correction time.
The money-saving part is obvious: a red polish, a white polish, and a fine brush are all you need. You do not need a separate art set or a bunch of add-ons. The pattern itself carries the look.
The trick is width, not skill. Thin lines make the manicure feel crisp even if the spacing is slightly uneven.
18. A Single Rhinestone Line on Red Nails
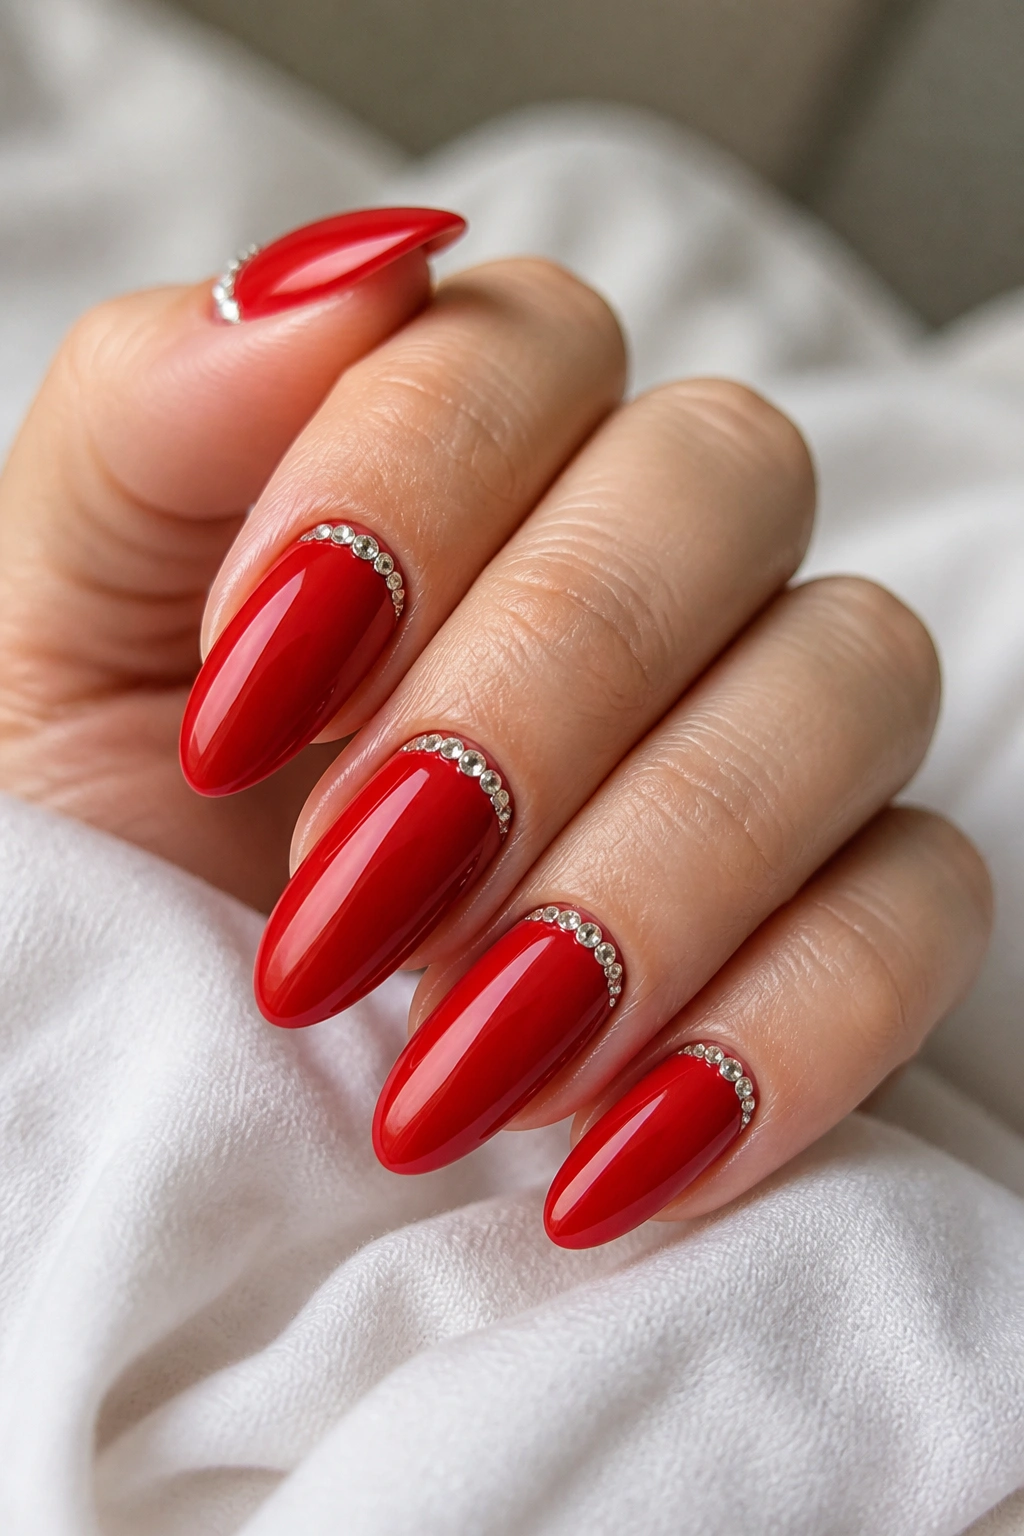
A full bed of rhinestones is where budget nails go to die. A single rhinestone line, though, is sharp. It gives you that little flash near the cuticle or down one side of the nail without swallowing the whole manicure.
I prefer this on deep red almond nails because the stones have room to stand out against the color. Keep the stones tiny and flat-backed. Big chunky gems lift, catch on sweaters, and make the nail feel clumsy. A clean line of six to ten small stones on each hand is enough.
This is another design where restraint saves money. You only need a tiny packet of stones and a dab of nail glue or a thick top coat to hold them in place. That’s far cheaper than decorating every nail with crystal clusters.
If you want a red manicure with a little shine but no heavy sparkle, this is the one I’d pick. It lands in the sweet spot between plain and fussy.
19. Burgundy Jelly Almond Nails
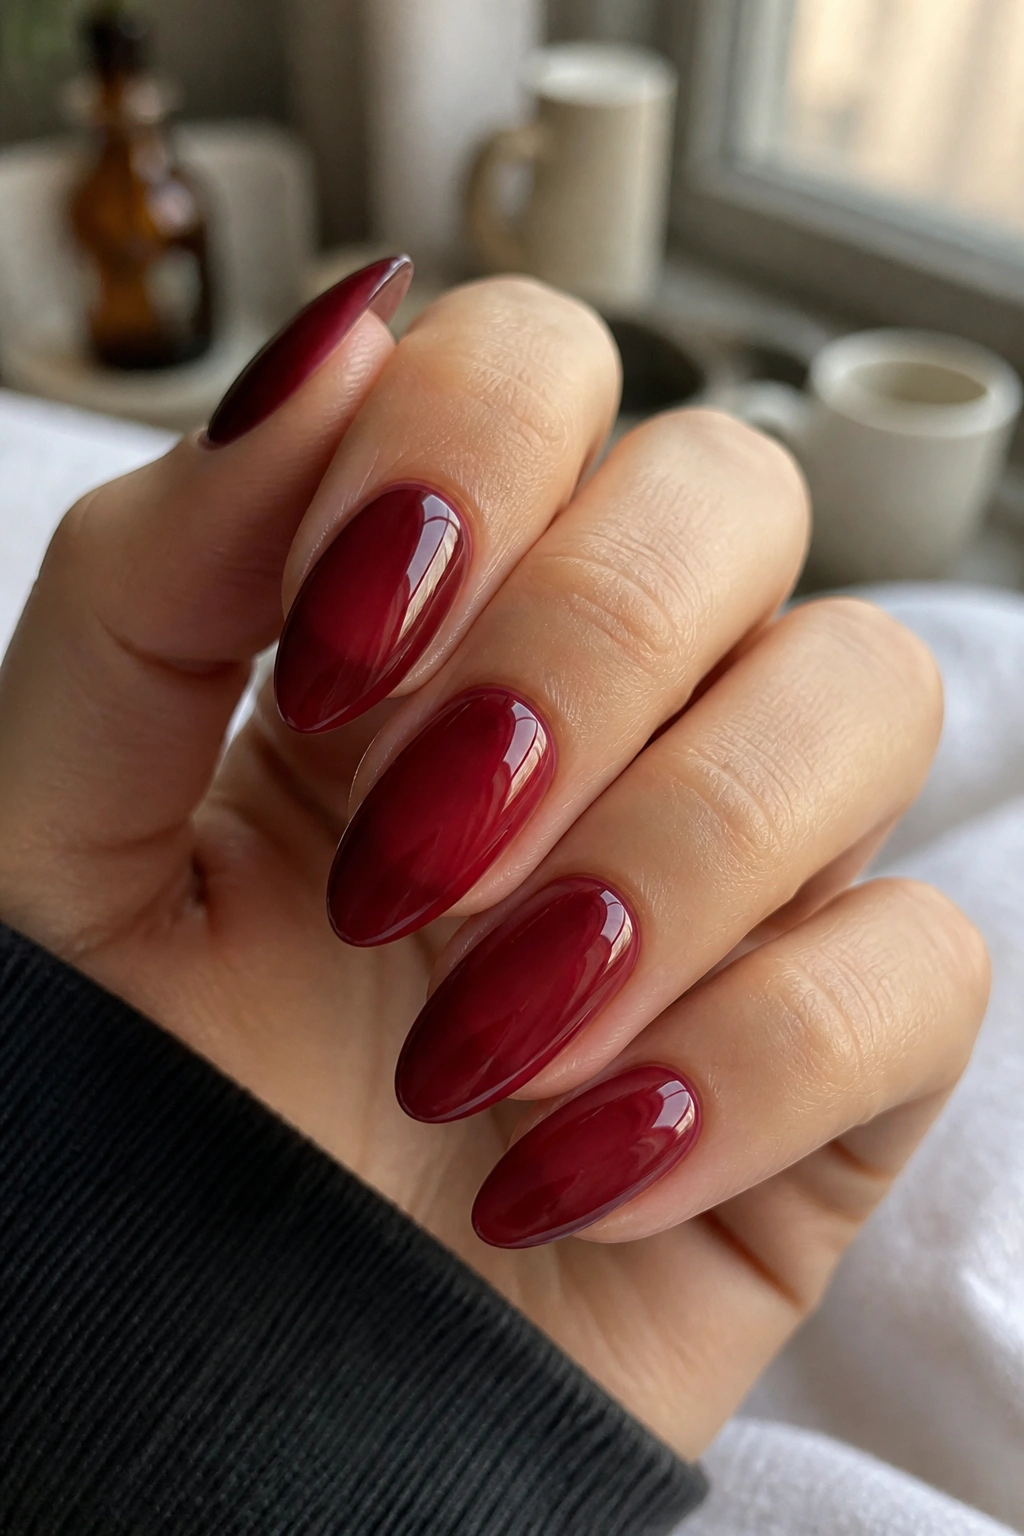
Burgundy jelly nails have that syrupy, glass-stained look that makes a red manicure feel deeper without making it louder. The polish is translucent, so the natural nail still shows through a little, and that gives the color a soft, almost wet finish.
This style is budget-friendly because one sheer bottle can look expensive on its own. You do not need layers of art or extra decoration. You need a good jelly polish and a glossy top coat. The almond shape helps here, too, because the translucent color follows the curve of the nail in a way that feels smooth and clean.
The other benefit is wear. Jelly finishes tend to hide small chips and uneven grow-out better than opaque creams. They are not magic, but they are forgiving. That alone makes them smart for a low-cost manicure.
If you like red but want it to feel a little darker and smoother, burgundy jelly is a solid place to land.
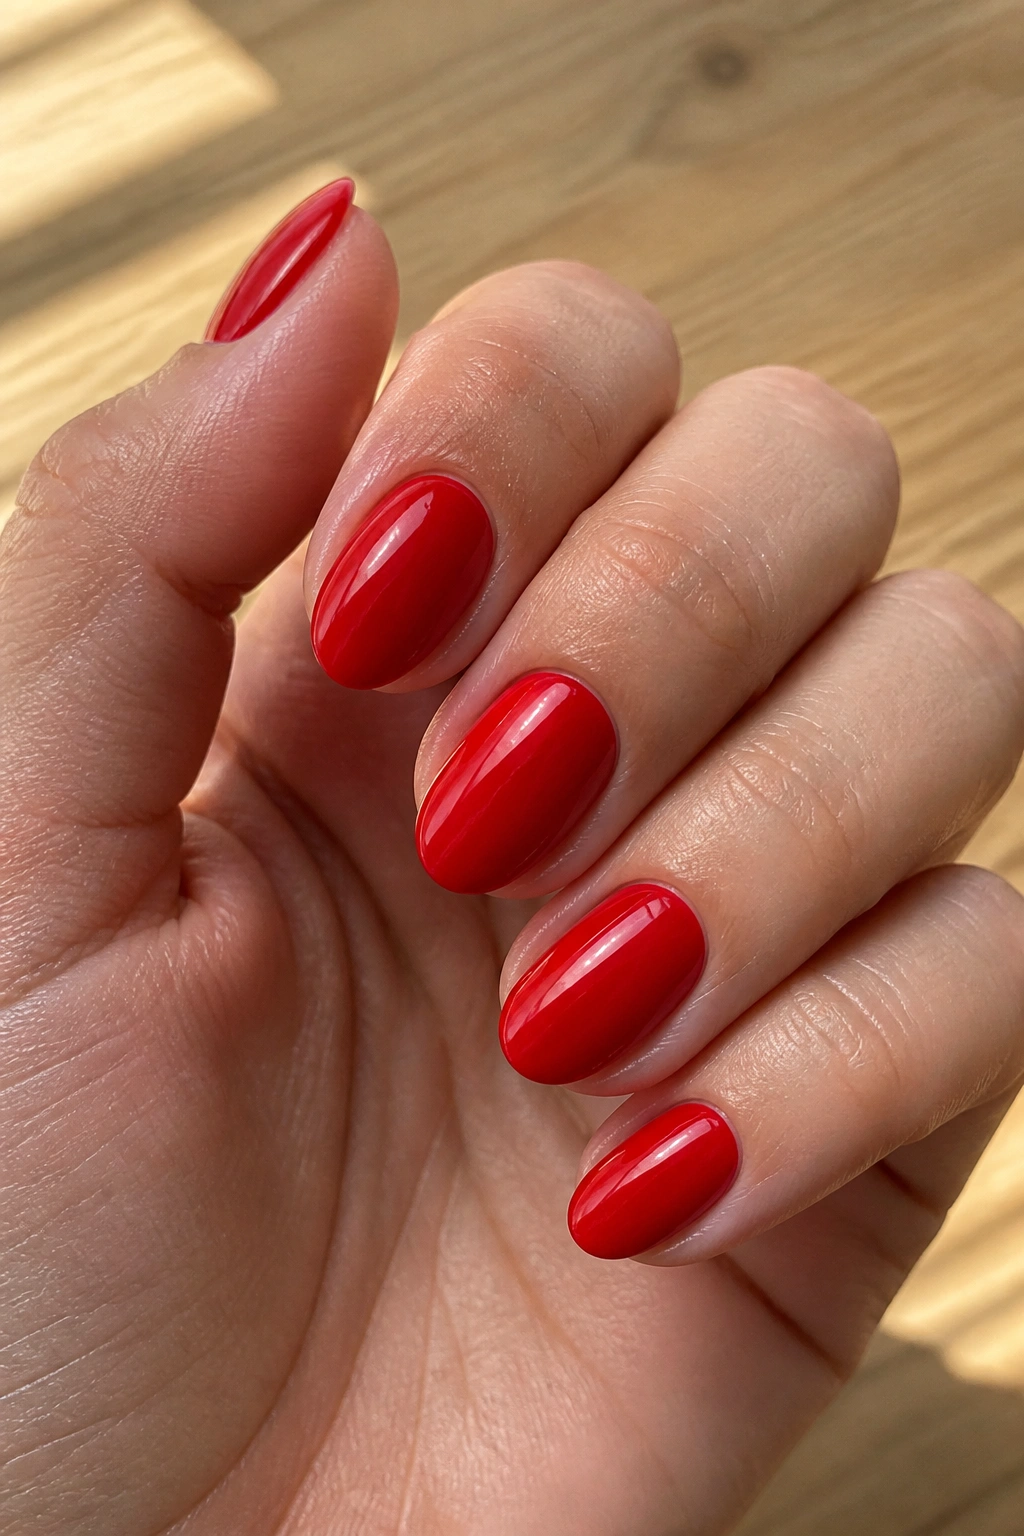
20. Clean Glossy Red Almond Nails on a Budget
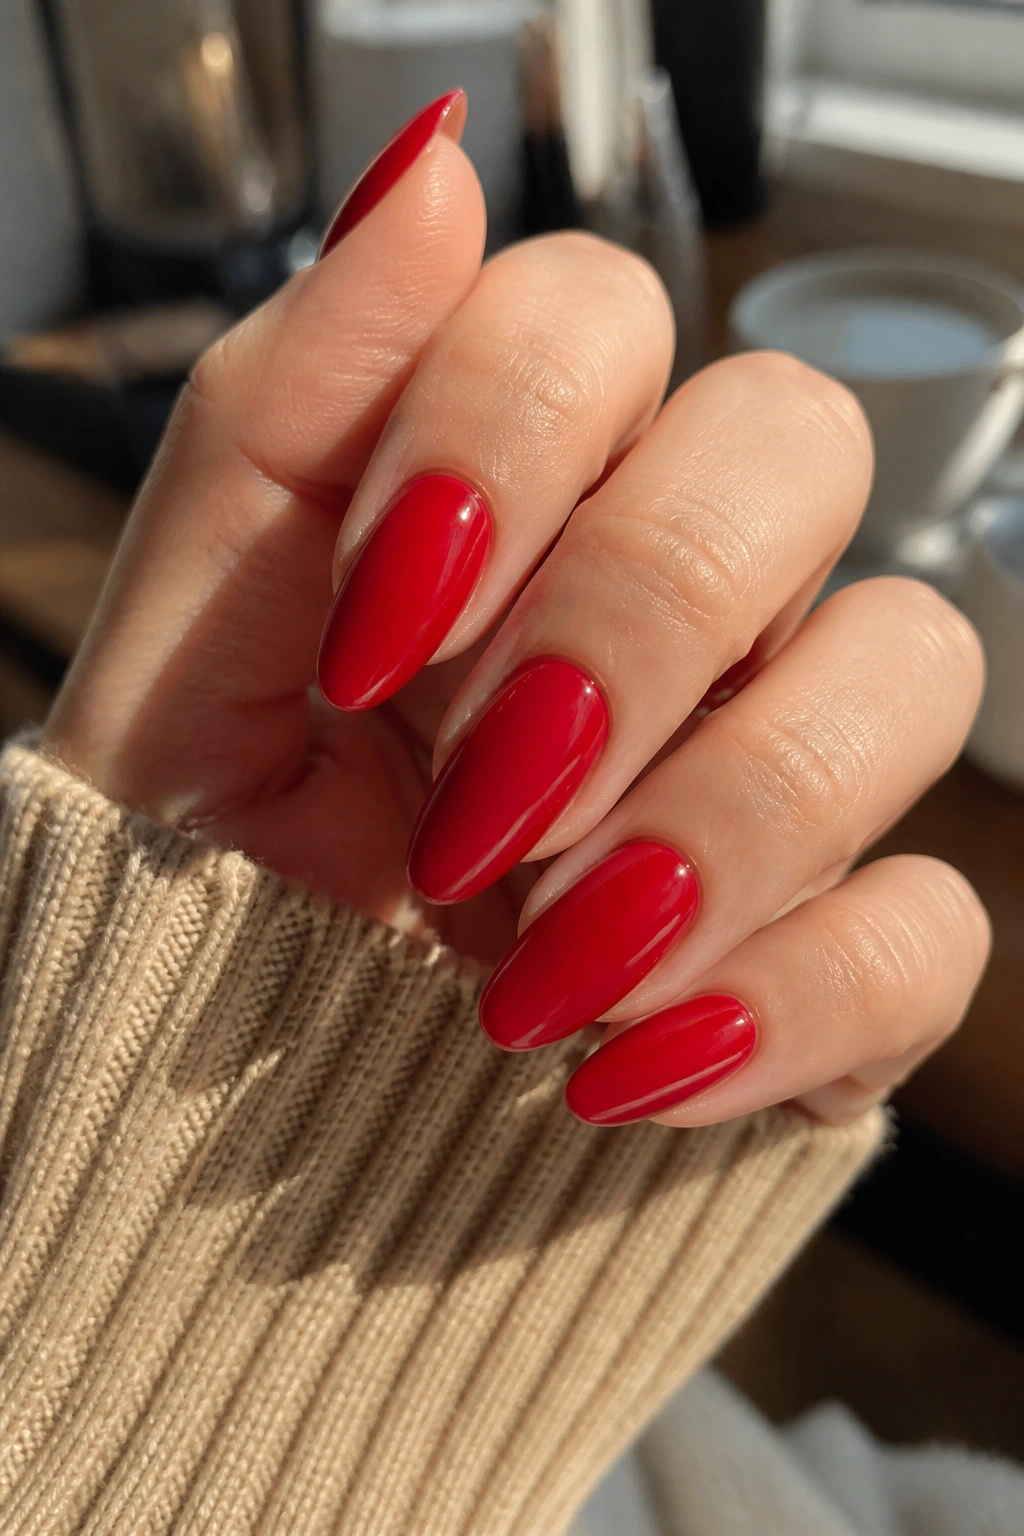
If you only buy one red, make it a clean glossy shade with a blue or neutral undertone. Those reds tend to look sharper against the almond shape, and they do more work for less effort. A brick red can feel warmer and softer; a blue-red reads crisper and a bit more polished.
I keep coming back to this version because it does not need extras to feel finished. A careful file, two thin coats, and a mirror top coat can carry the whole look. That is especially useful when you are trying to keep nail spending under control and still want your hands to look tidy.
The best part is how well this style handles real life. Keyboard work, hand washing, grocery bags, all of it. There is nowhere for the design to hide, which is exactly why it works. Clean nails, clean line, clean shine.
If you want red almond nails on a budget and you do not want to gamble on art that may chip or lift, this is the one I would trust first. Simple wins here.
