

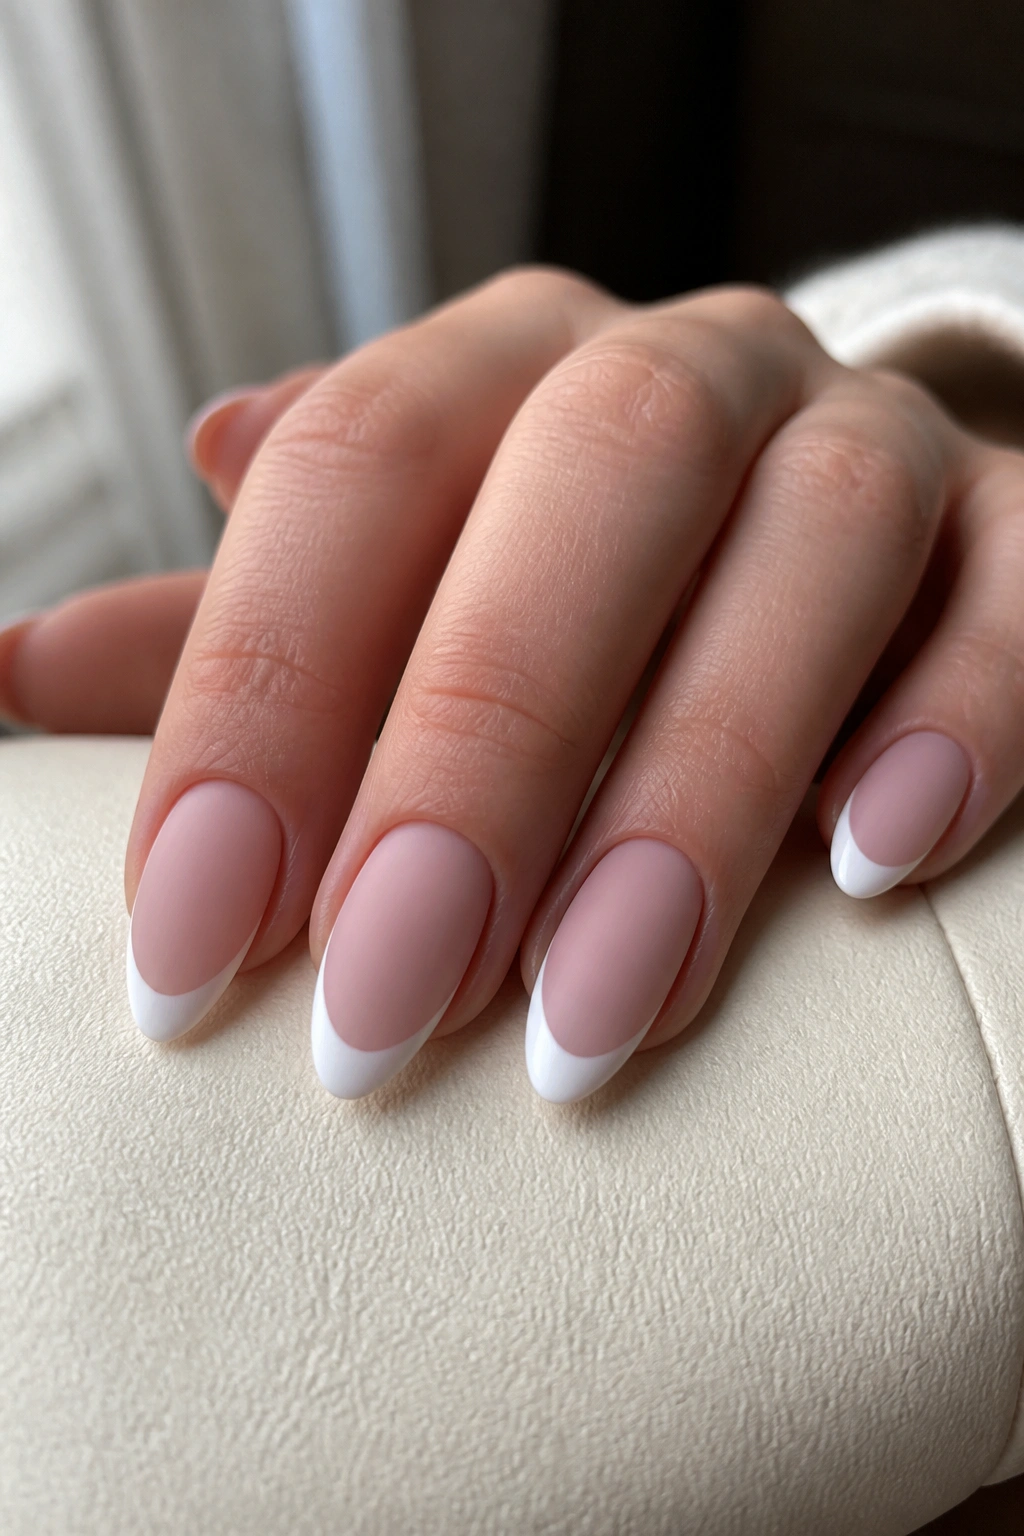
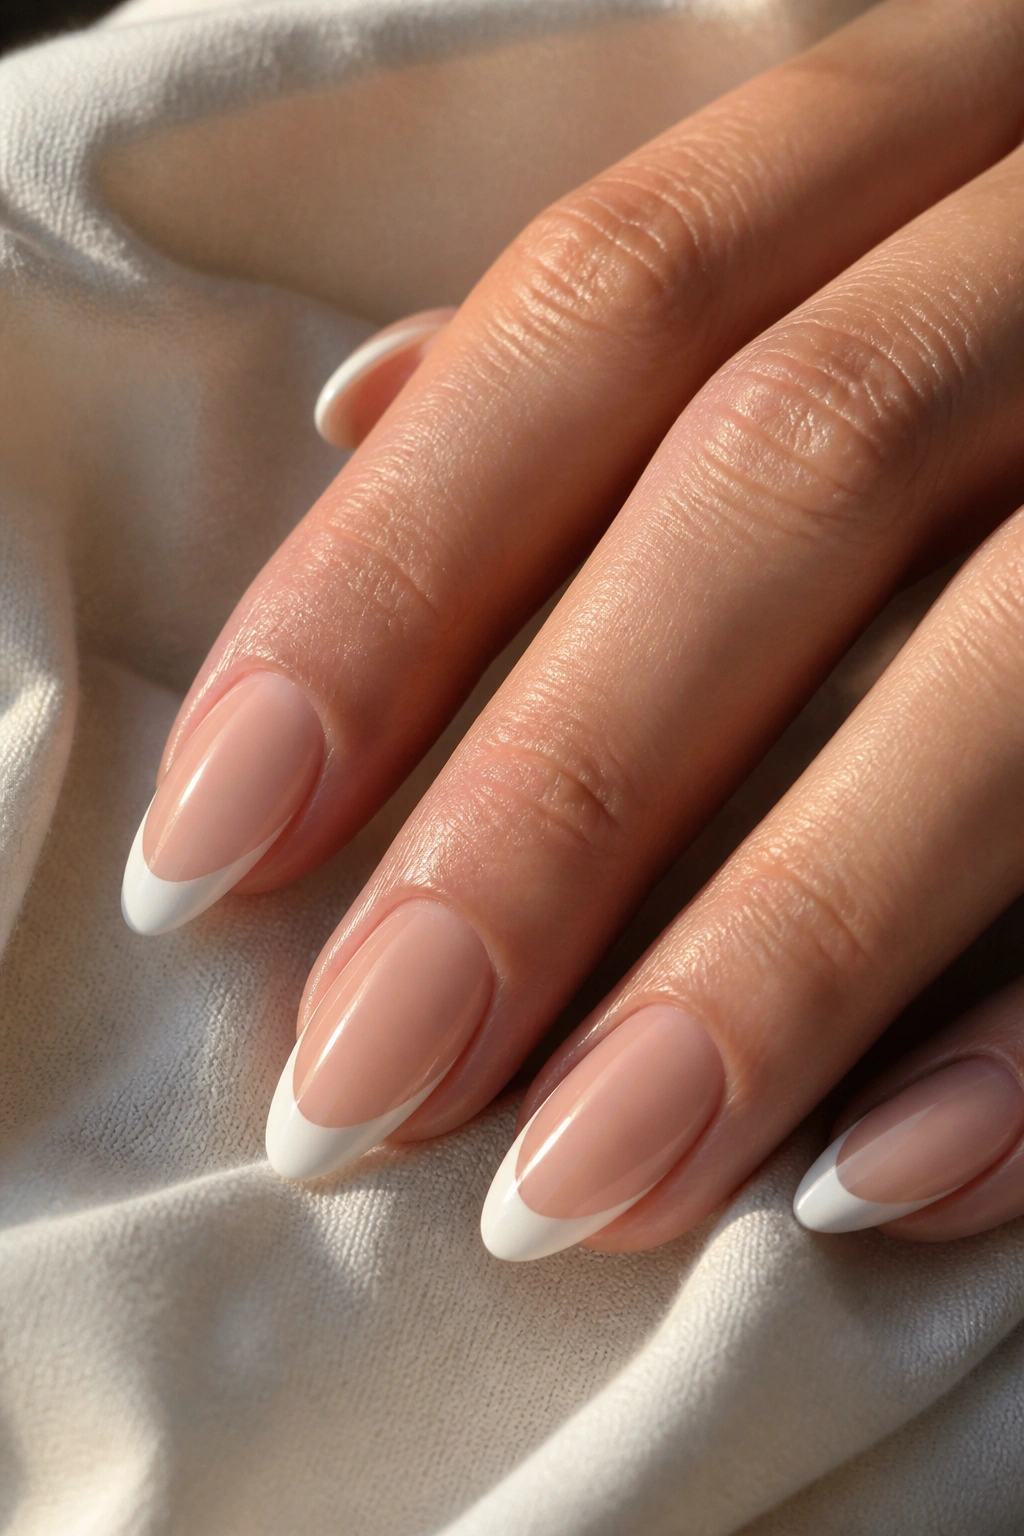
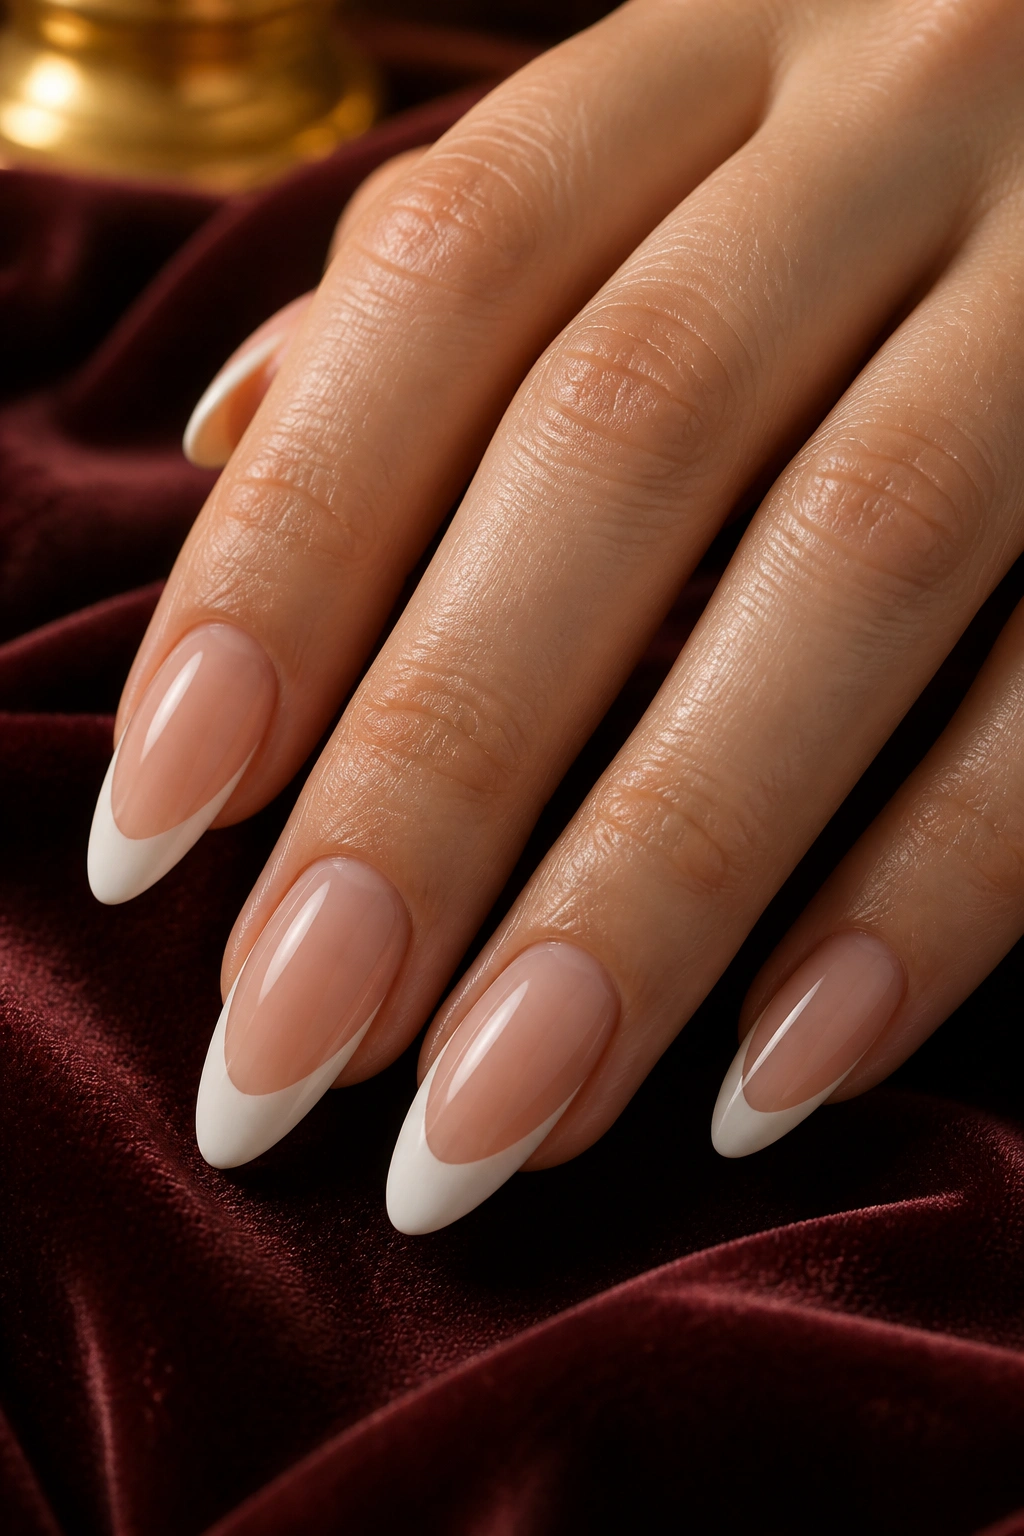
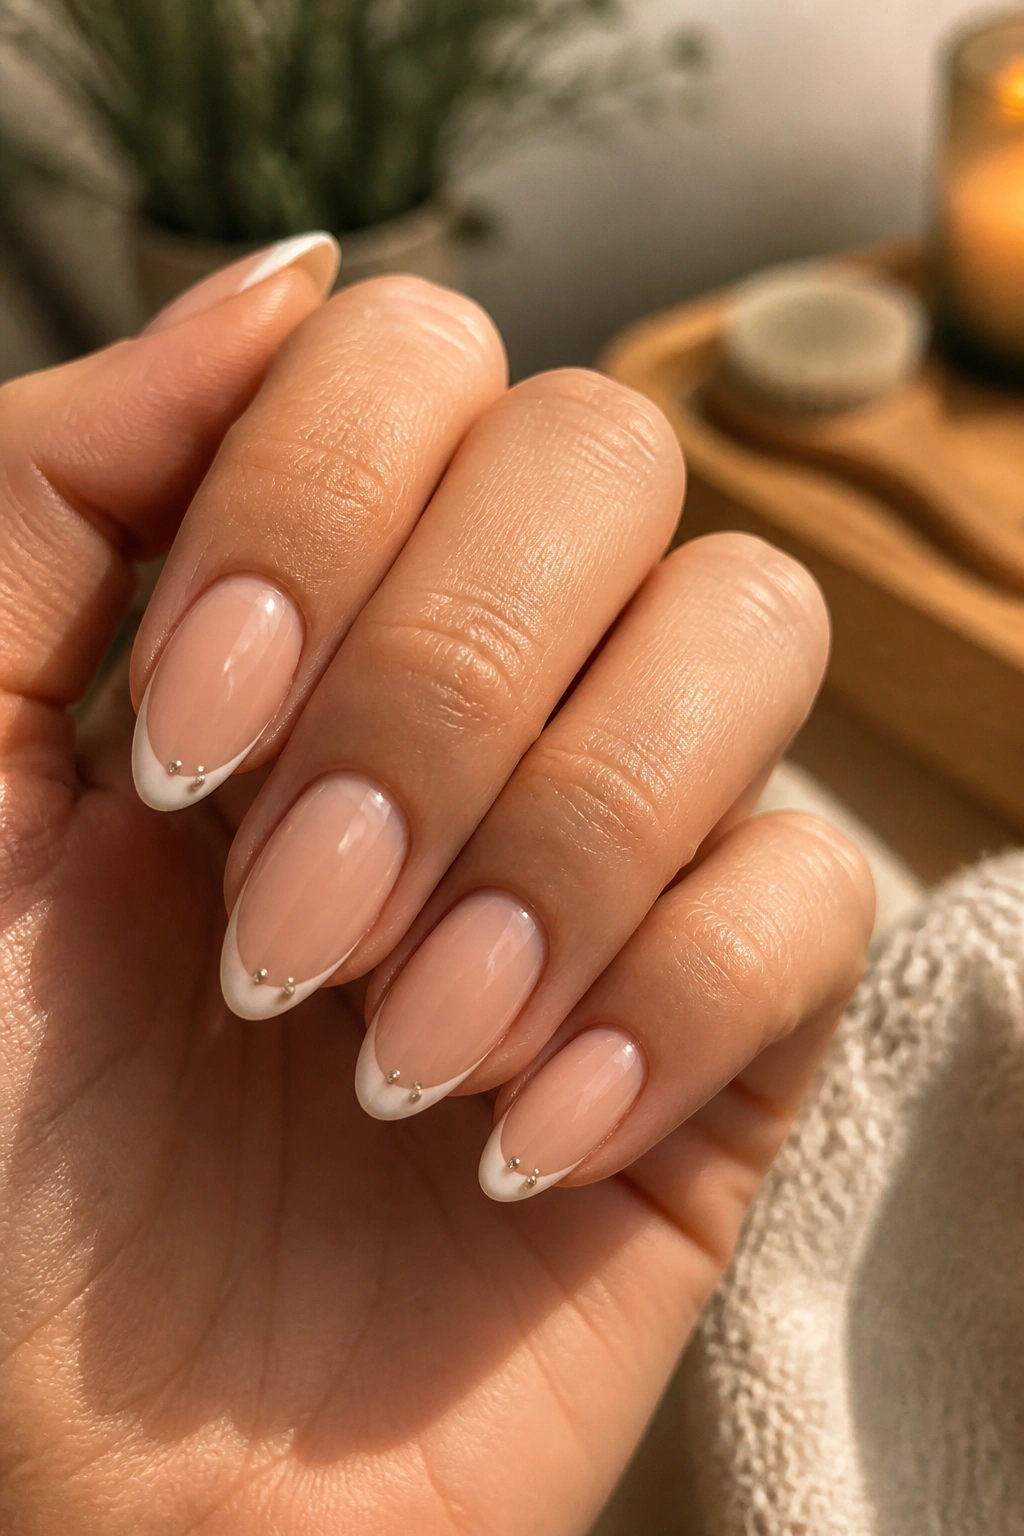
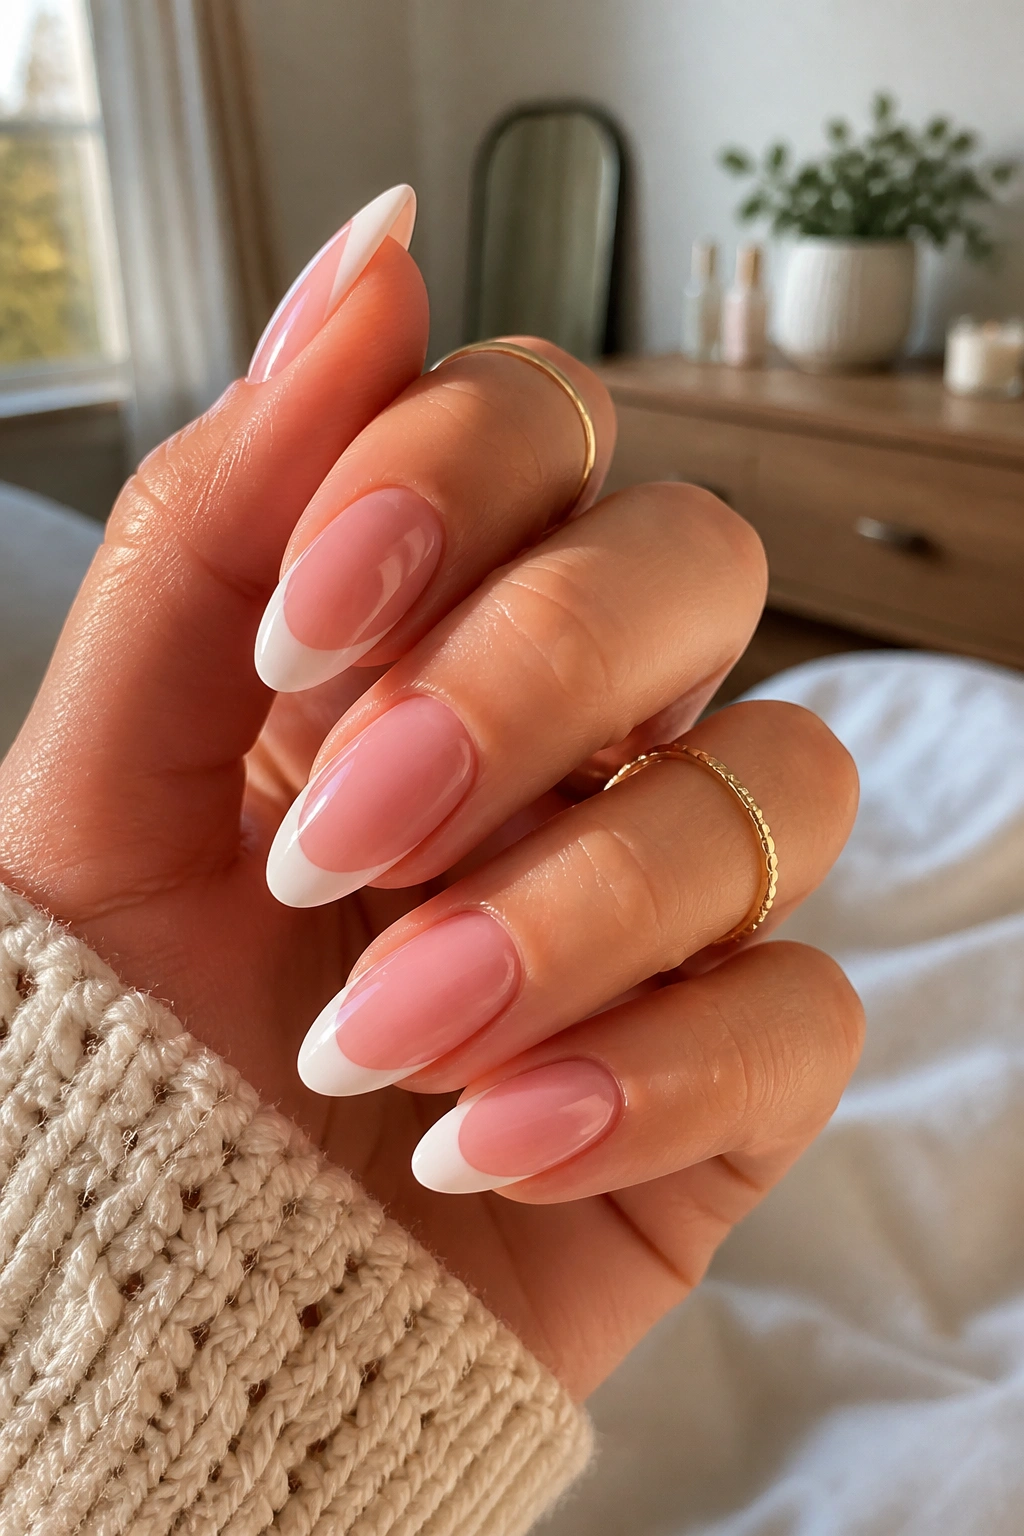
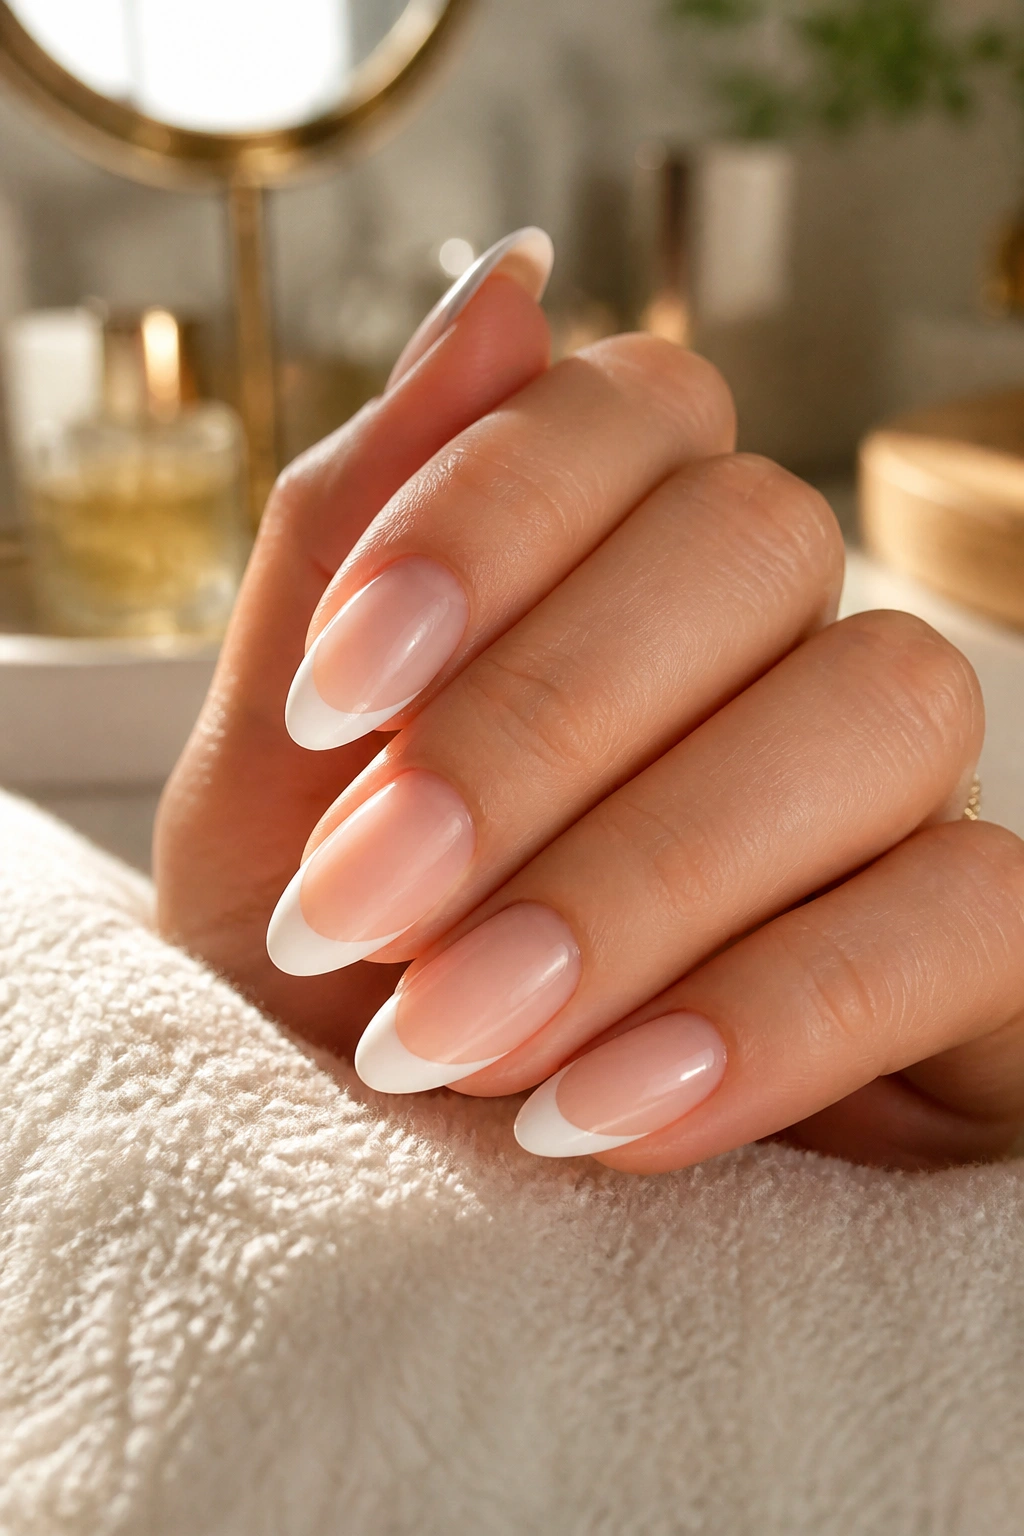
Salon prices can make a French manicure feel fancier than it really is. On almond nails, though, the shape does half the work for you. The taper already looks elegant, so a thin white line or a soft color at the tip goes a long way.
The math is kinder, too. A tiny liner brush, one sheer base color, and a decent top coat can stretch much farther than a full drawer of nail art supplies.
I’ve always liked French tip almond nail ideas for one simple reason: they age well on the hand. A full design can start looking busy after a week, but a narrow tip on an almond shape stays neat even as it grows out a little. That matters when you want the look of a salon set without paying for constant fixes.
And that’s the real sweet spot here. You want nails that look polished, not precious. You want them to hold up through typing, dishwashing, and the ordinary roughness that ruins prettier, fussier manicures. These twenty ideas stay on the affordable side without sliding into plain.
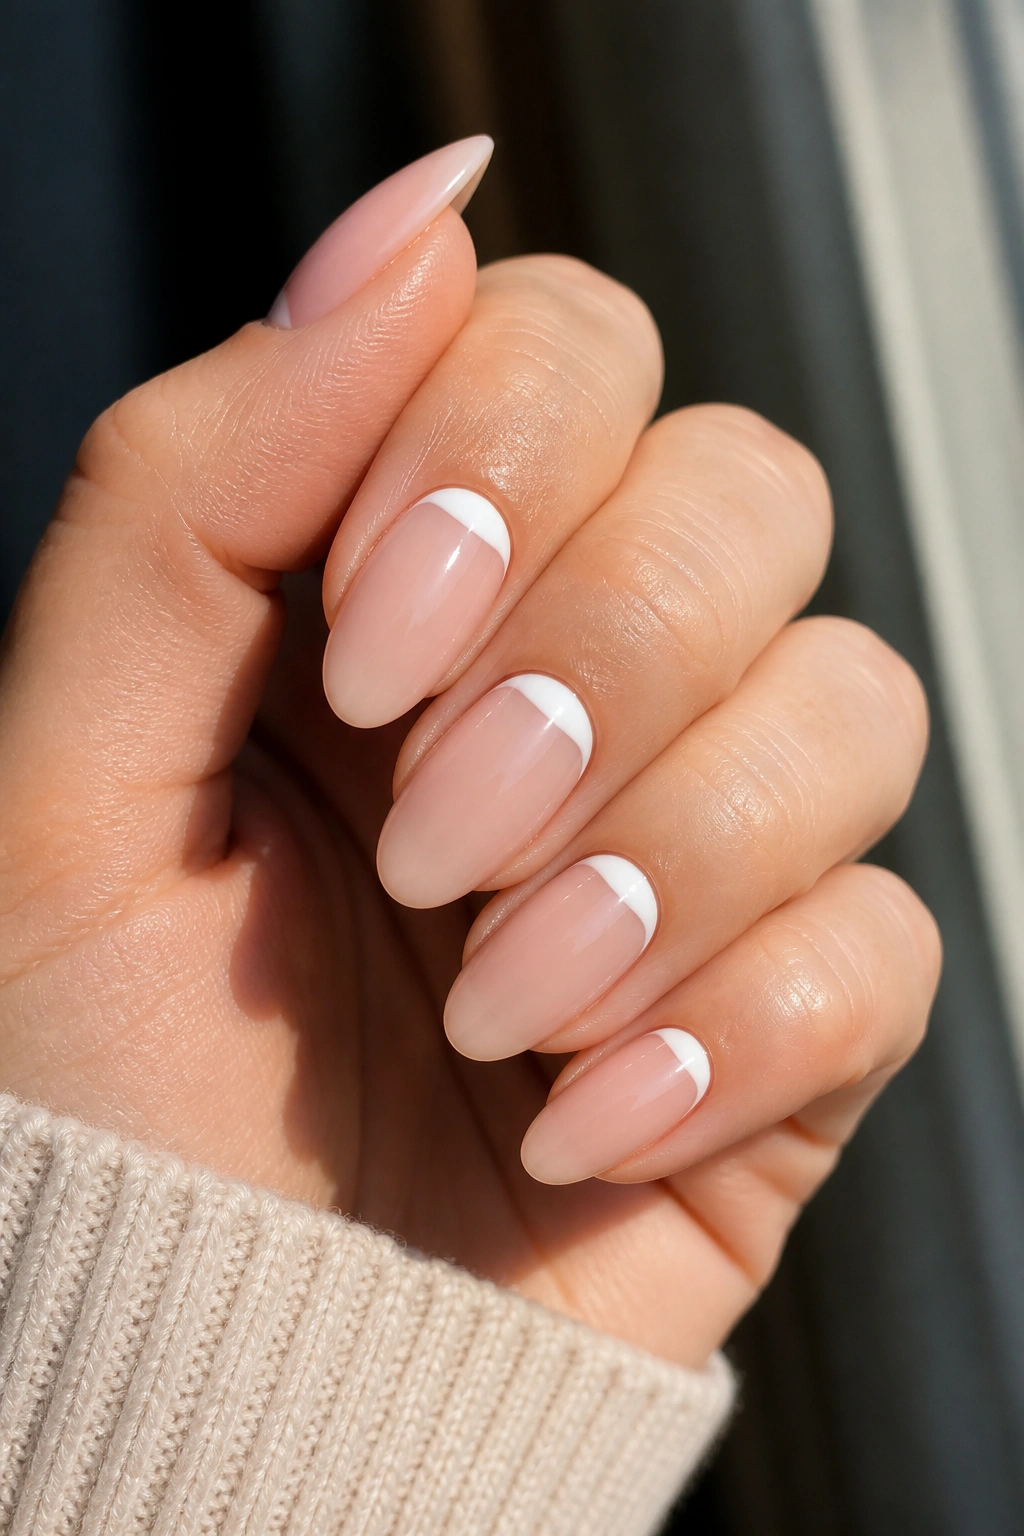
1. Micro White French Tips on Short Almond Nails
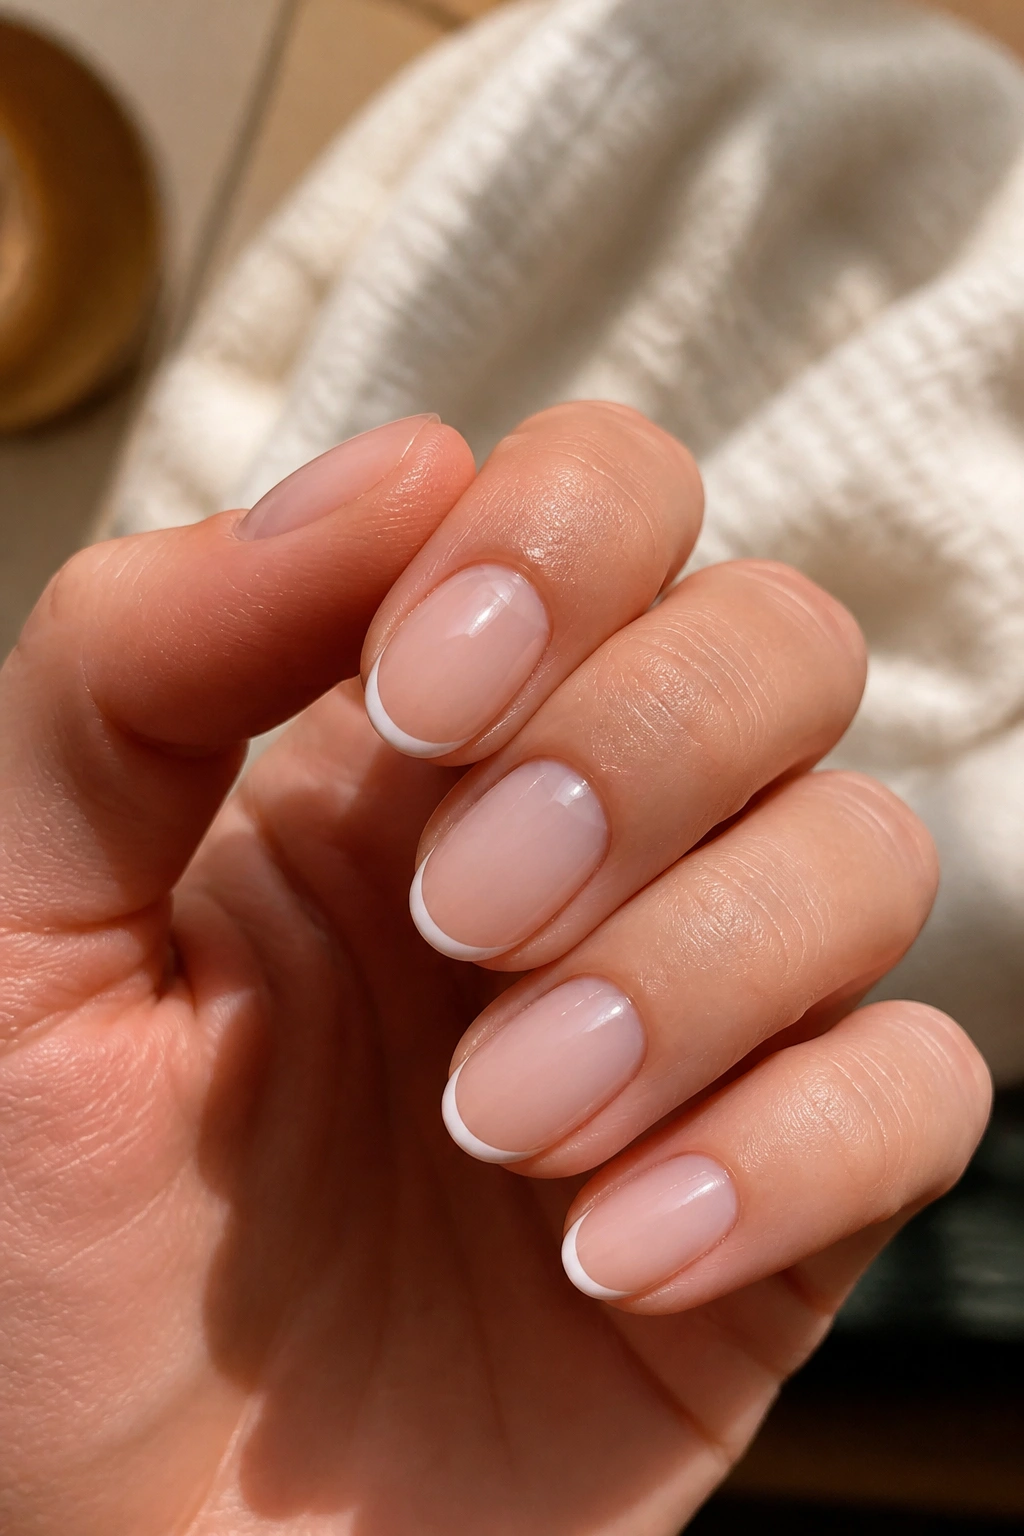
A micro French is the easiest place to start if you want clean, expensive-looking nails for very little money. The tip is so slim that one bottle of white polish lasts a long time, and the whole look is forgiving if your line isn’t perfect.
Why It Works on a Budget
On short almond nails, a thin white edge gives you the French manicure effect without covering half the nail. That means less polish, less cleanup, and less chance of the tip chipping into an obvious chunk.
- Keep the base sheer pink or beige.
- Use a 1 mm liner brush or a narrow nail art pen.
- Paint the white line no thicker than 2 mm.
- Finish with a glossy top coat for a smooth edge.
Best tip: let the first white line dry fully before you add a second coat. Smudged micro tips look sloppy fast.
2. Soft Pink Base With a Skinny White Edge
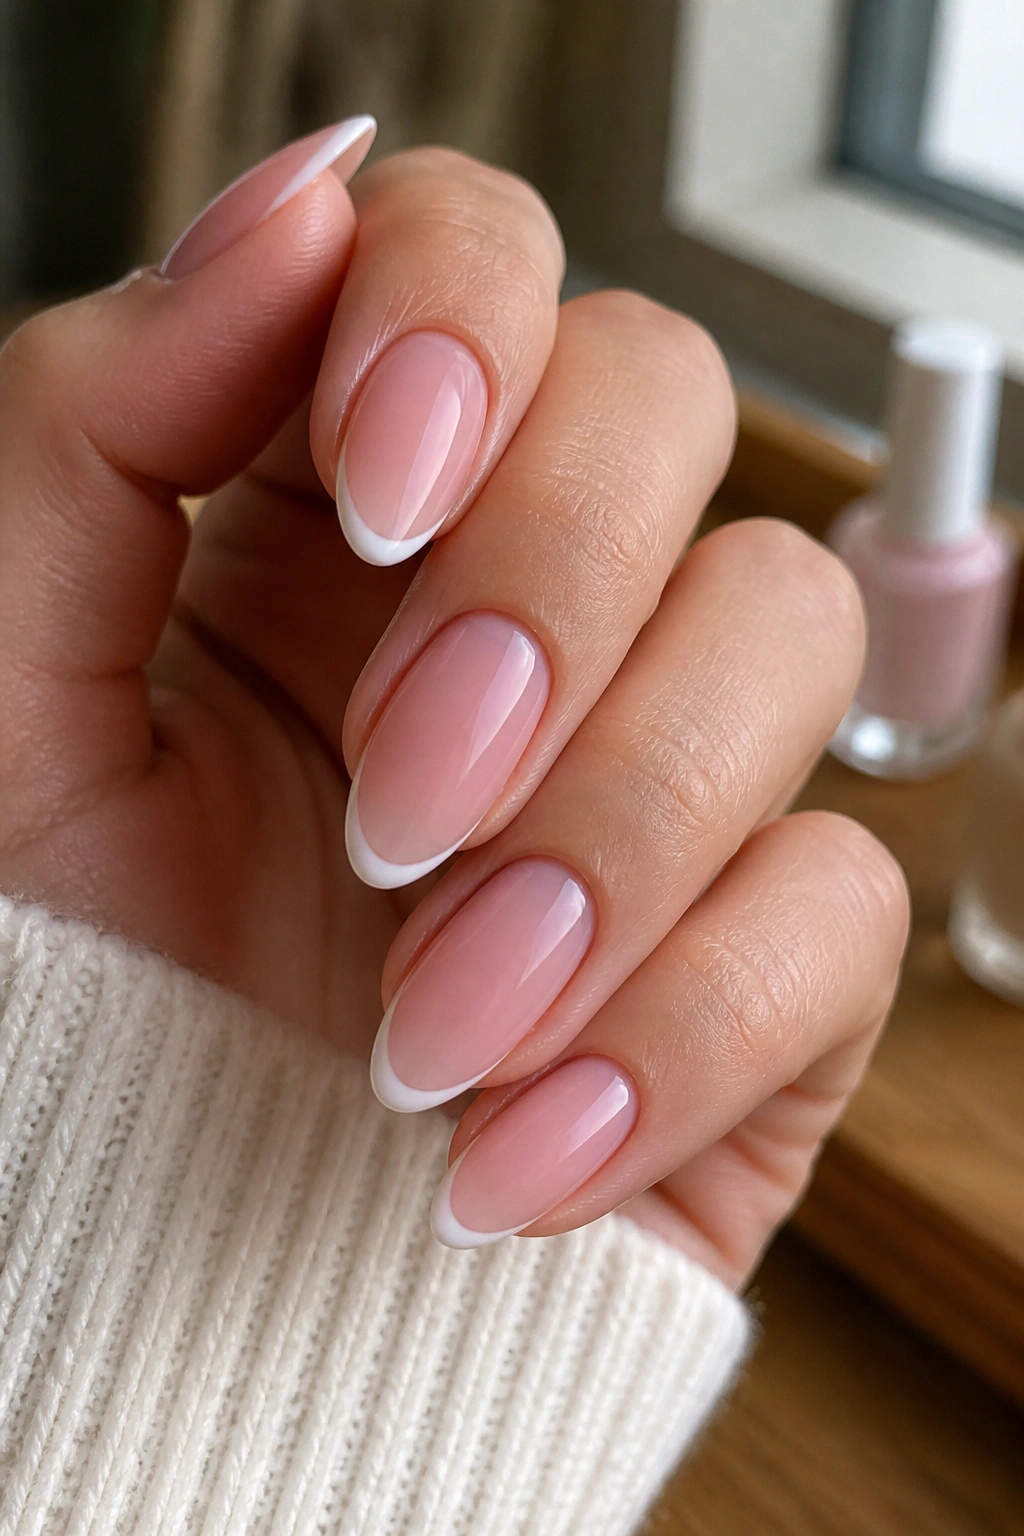
This is the manicure I’d pick if I wanted people to think I’d just left a nail salon. The soft pink base blurs tiny flaws, and the skinny white edge keeps the look crisp without asking for much product.
The trick is to keep the pink sheer, not milky in a heavy way. One or two thin coats is enough. If the polish is too opaque, the whole nail can start to look flat, and that kills the light, airy feel that makes French tips work so well on almond nails.
A cheap way to get the shade right is to mix a drop of pink polish into clear top coat on a clean palette. You get a custom sheer color without buying yet another bottle you’ll barely use. Then paint the white tip narrow and tidy. It’s plain, but not boring. That’s the point.
3. Pastel French Tips in a Mixed Set
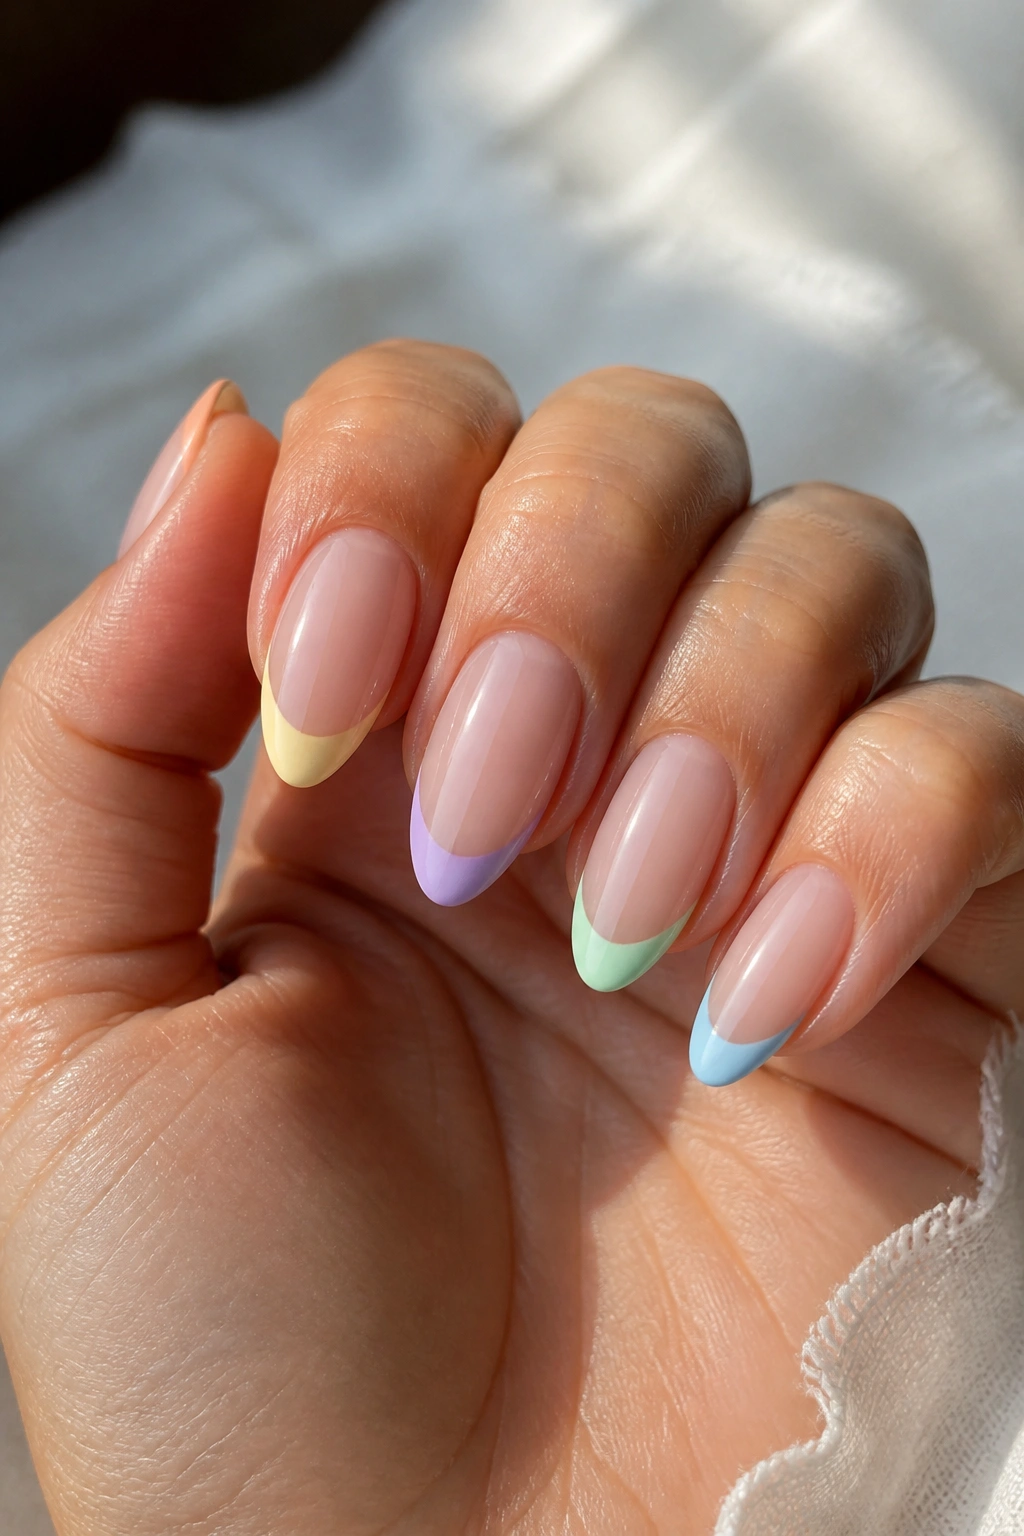
Why buy five separate full manicures when one nude base and a few pastel tips can do the same job? This look is cheerful, but it stays small enough to feel easy and cheap.
How to Wear It
Pick three to five pastel shades that live in the same softness level: butter yellow, dusty lilac, pale mint, cloud blue, and soft peach are the usual suspects. Keep the tips thin so the color reads as a detail, not a costume.
A mixed pastel set looks best when the base stays neutral and the colors repeat in a loose rhythm across both hands. You do not need every nail to be different. A few repeats calm the whole thing down.
Use the leftover polish strategy here. Tiny French tips barely use any product, so those half-dead pastel bottles in your drawer become useful again. That alone makes this one a budget win.
4. Milky Nude Nails With a Gold Tip Line
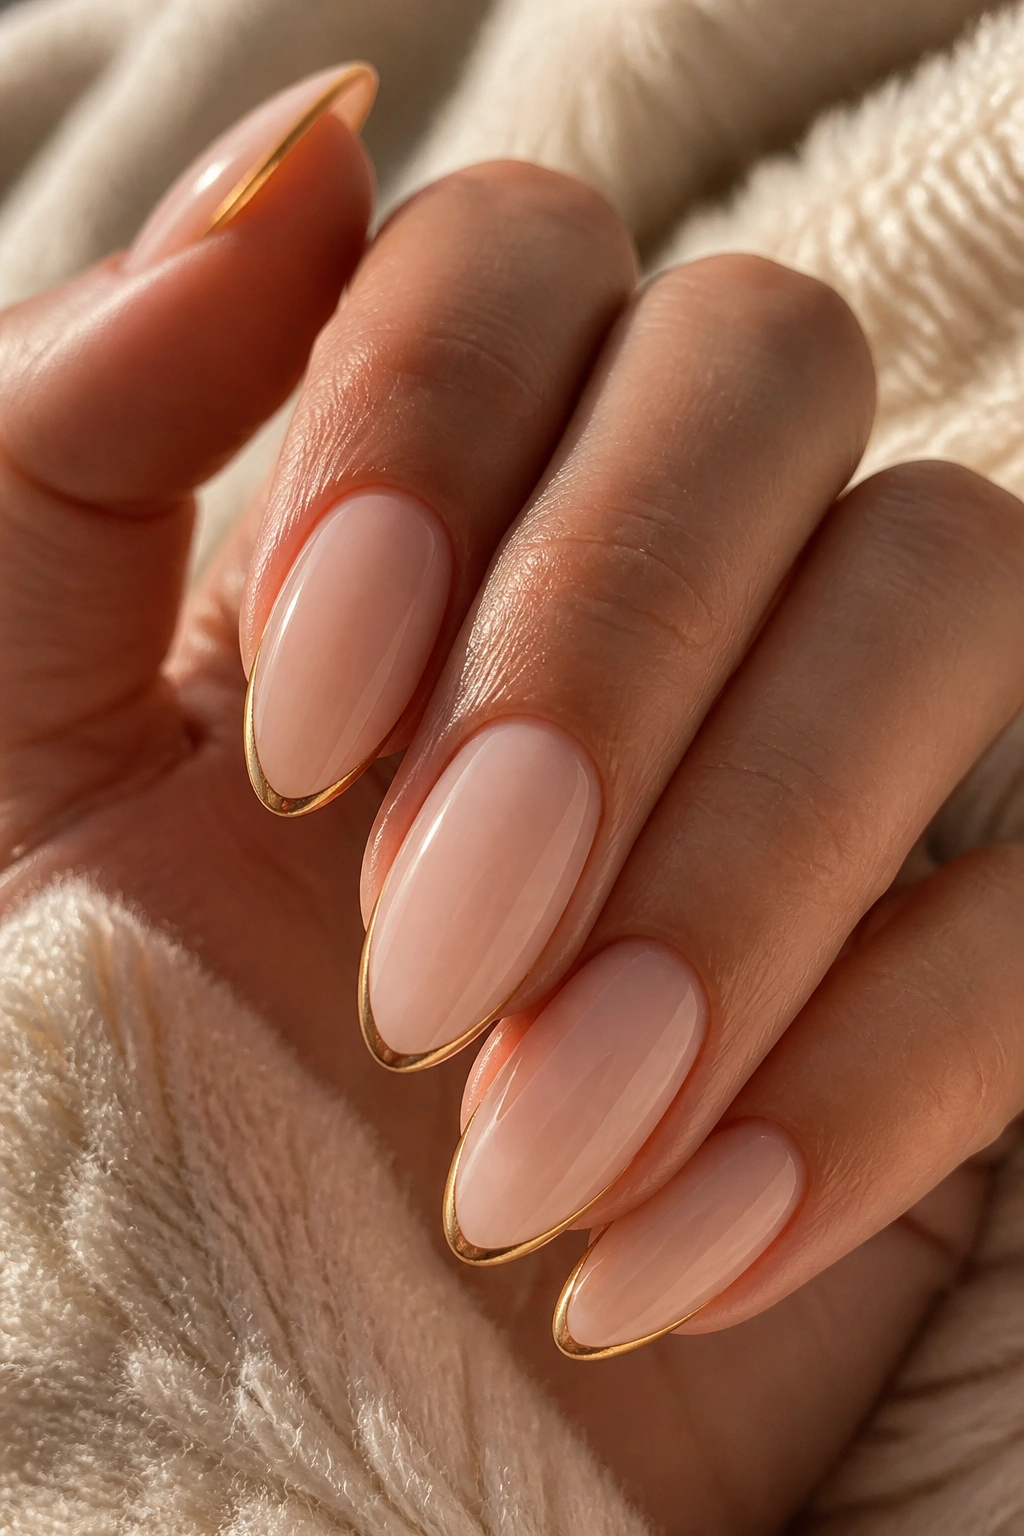
A thin gold tip line is one of those small details that looks more expensive than it is. You only need a striping pen or a metallic liner polish, and the line sits nicely on almond nails because the shape already points upward.
The base should be milky nude or soft beige. Too much pink can fight the gold and make the finish look warmer than intended. Keep the line very thin, almost like jewelry at the edge of the nail. That’s the whole appeal.
Quick Details That Matter
- Use a metallic gold nail art pen instead of loose foil.
- Keep the line under 1 mm if you can.
- Let the nude base dry completely before adding metal.
- Pair it with a high-shine top coat, but use only one thin layer.
This is a good pick for dressier days, but it never needs to cost much. The line does the dressing.
5. Double French Tips on a Bare Base

Double French tips look fancy because they feel considered. In practice, they’re just two thin lines sitting close together, and that’s why I like them. You get a strong graphic effect without buying extra embellishment.
The easiest version uses one white line and one metallic line just below it. The almond shape helps because the two curves echo the nail’s taper instead of fighting it. On a rounded square nail, this can look boxy. On almond, it looks intentional.
A bare or very sheer base keeps the design light, and it also gives you a little room to miss a line without the mistake shouting back at you. Use the same liner brush for both lines. One steady hand goes farther than a drawer full of tools.
If you want something that looks more expensive than it is, this is a smart place to spend ten extra minutes.
6. Reverse French Tips at the Cuticle
Unlike a standard French, the reverse version puts the color near the cuticle and leaves the tip clean. That sounds like a small shift, but it changes the whole mood of the manicure.
This style is useful when your nails grow fast or when you hate the way a normal French starts to tilt as it grows out. The color stays tucked low, so the manicure can keep its shape longer. It also uses less polish than a full tip design, which I love on principle.
A nude base with a white or soft brown half-moon near the cuticle is enough. You can draw the curve with a dotting tool, a small brush, or even a guide sticker if your hands are shaky. Keep the arc small and smooth. Sharp edges make it look clumsy.
If you want low-cost and low-maintenance in the same manicure, this one earns its spot.
7. Glitter-Tipped Almond Nails
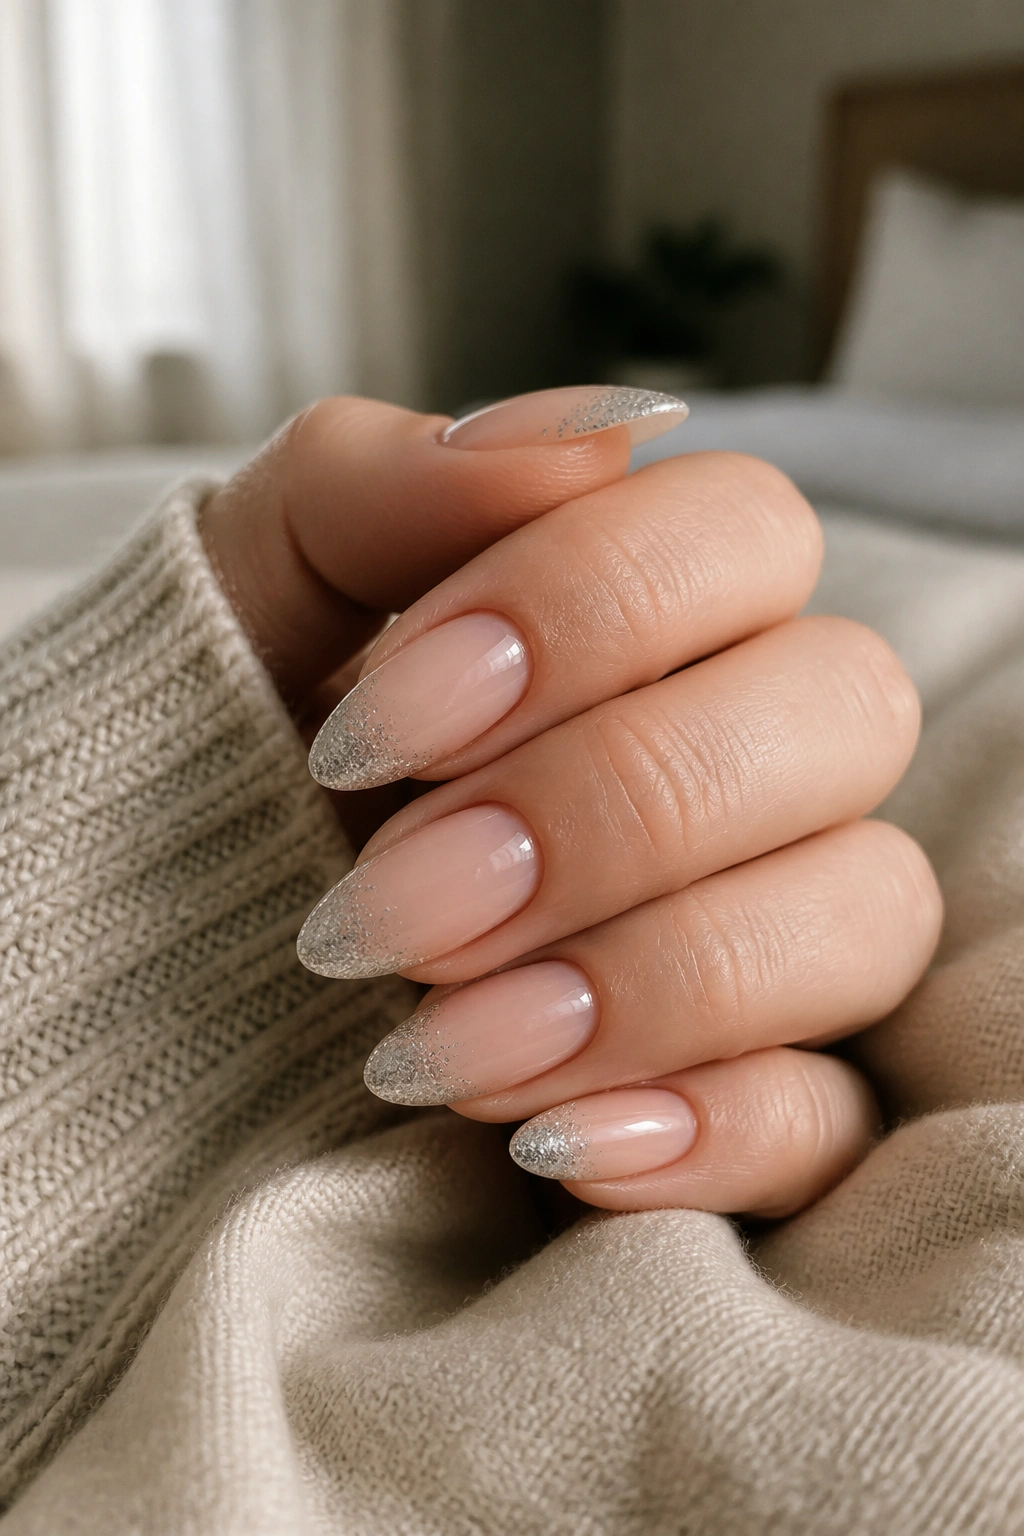
Glitter tips are one of the rare nail ideas that can look festive without turning into a full glitter bomb. The trick is to keep the sparkle on the edge only. A fine glitter polish works better than chunky glitter every single time.
What Makes It Cheap
You do not need a pot of loose glitter and a special adhesive unless you enjoy making cleanup harder. A bottle of fine silver, rose gold, or champagne glitter polish does the job nicely. Paint it only across the tip, and let the sheer base show through underneath.
- Best with a nude or milky pink base.
- Use fine glitter, not large flakes.
- Apply two thin coats instead of one thick one.
- Seal the free edge with top coat so the sparkle doesn’t shred first.
The look is especially good on almond nails because the pointed end gives the glitter a natural stopping point. It feels finished. Not fussy.
8. Matte Nude With Glossy French Tips
A matte base with glossy tips is a sneaky little manicure. It looks custom because the contrast is subtle, and it costs almost nothing if you already own a matte top coat.
Paint the whole nail in a soft nude or pink. Then add a glossy French edge in the same color family, or go a shade lighter if you want the contrast to show more. The finish does the work here, not the color.
This style is nice when you want a polished look without drawing a lot of attention. The gloss catches light only at the tip, which makes the almond shape feel sharper. It also hides tiny chips better than a fully glossy manicure, since the eye goes to the finish difference instead of the wear.
A matte top coat can be picky, so make sure the base is dry before you use it. Sticky layers ruin the effect. Easy to say. Easy to miss.
9. Brown and Taupe French Tips
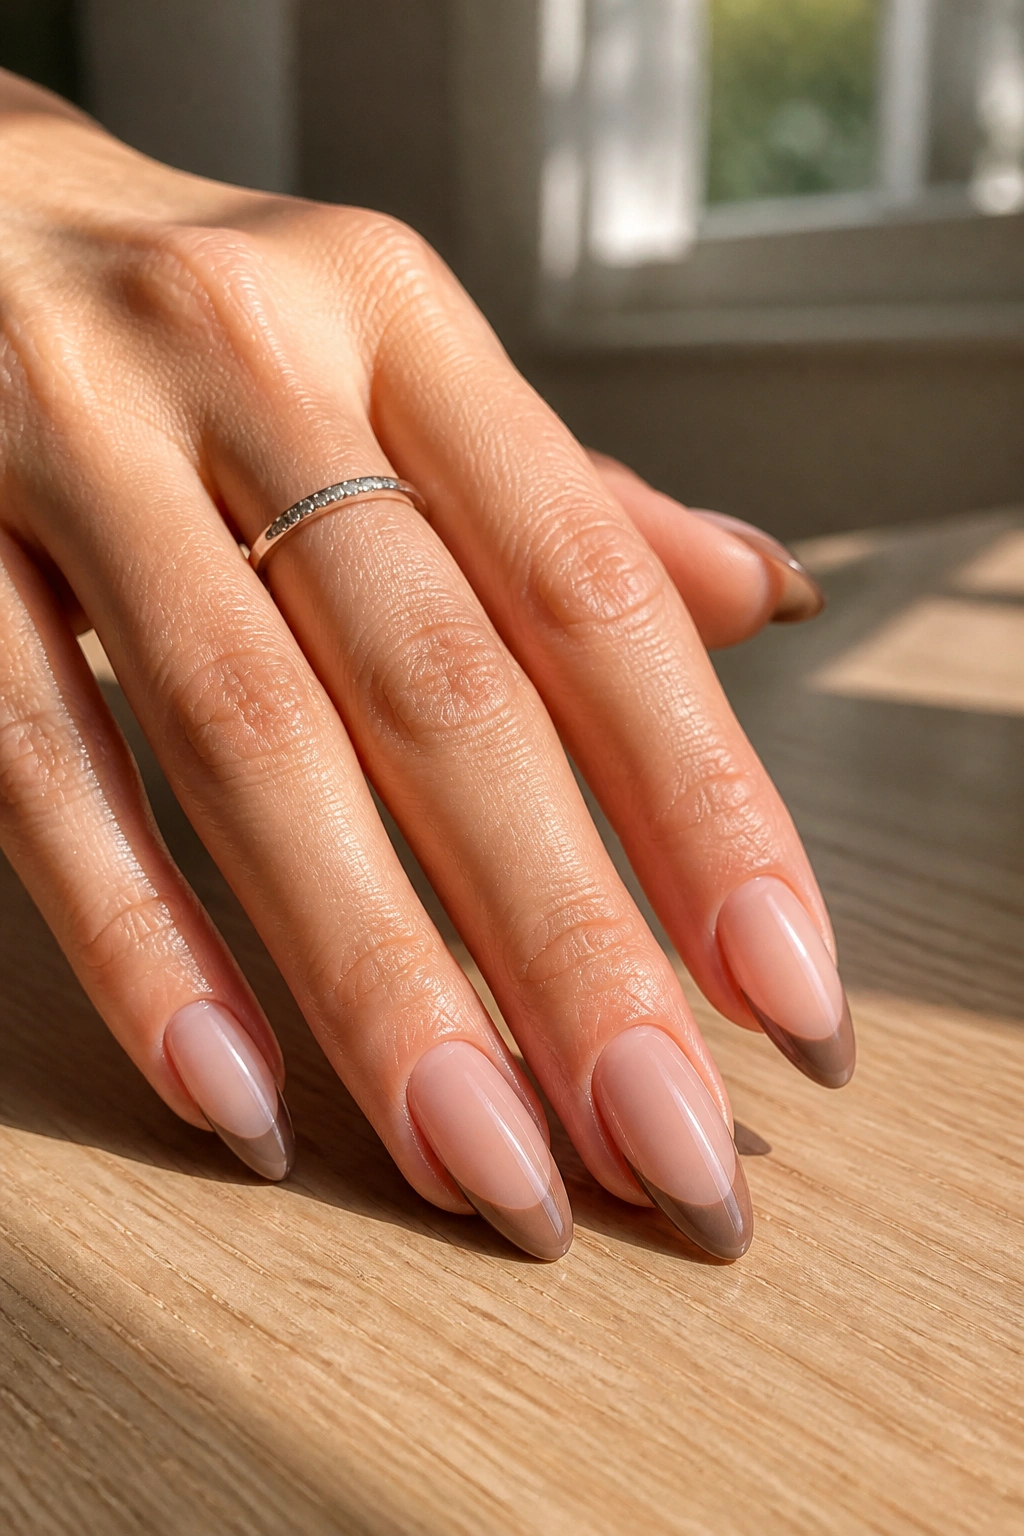
Can a brown French tip look softer than white? Absolutely. In almond shape, taupe, cocoa, and mushroom tones give you a quieter manicure that still reads deliberate.
How to Make It Work
The base should stay sheer beige, creamy nude, or soft peach. Then choose a tip color that sits one step darker than your skin tone or one step richer than your base. That keeps the design calm instead of heavy.
Brown French tips are nice because they hide tiny flaws in the line better than white does. White shows everything. Brown is kinder. That matters when you’re painting your own nails at a kitchen table and not under salon lights.
- Best shades: taupe, caramel, mocha, cool cocoa
- Best brush: a narrow liner brush or a flat angled art brush
- Best finish: glossy, not matte
If you want something that looks expensive but doesn’t beg for constant attention, this is one of the strongest choices on the list.
10. Black Micro French Tips
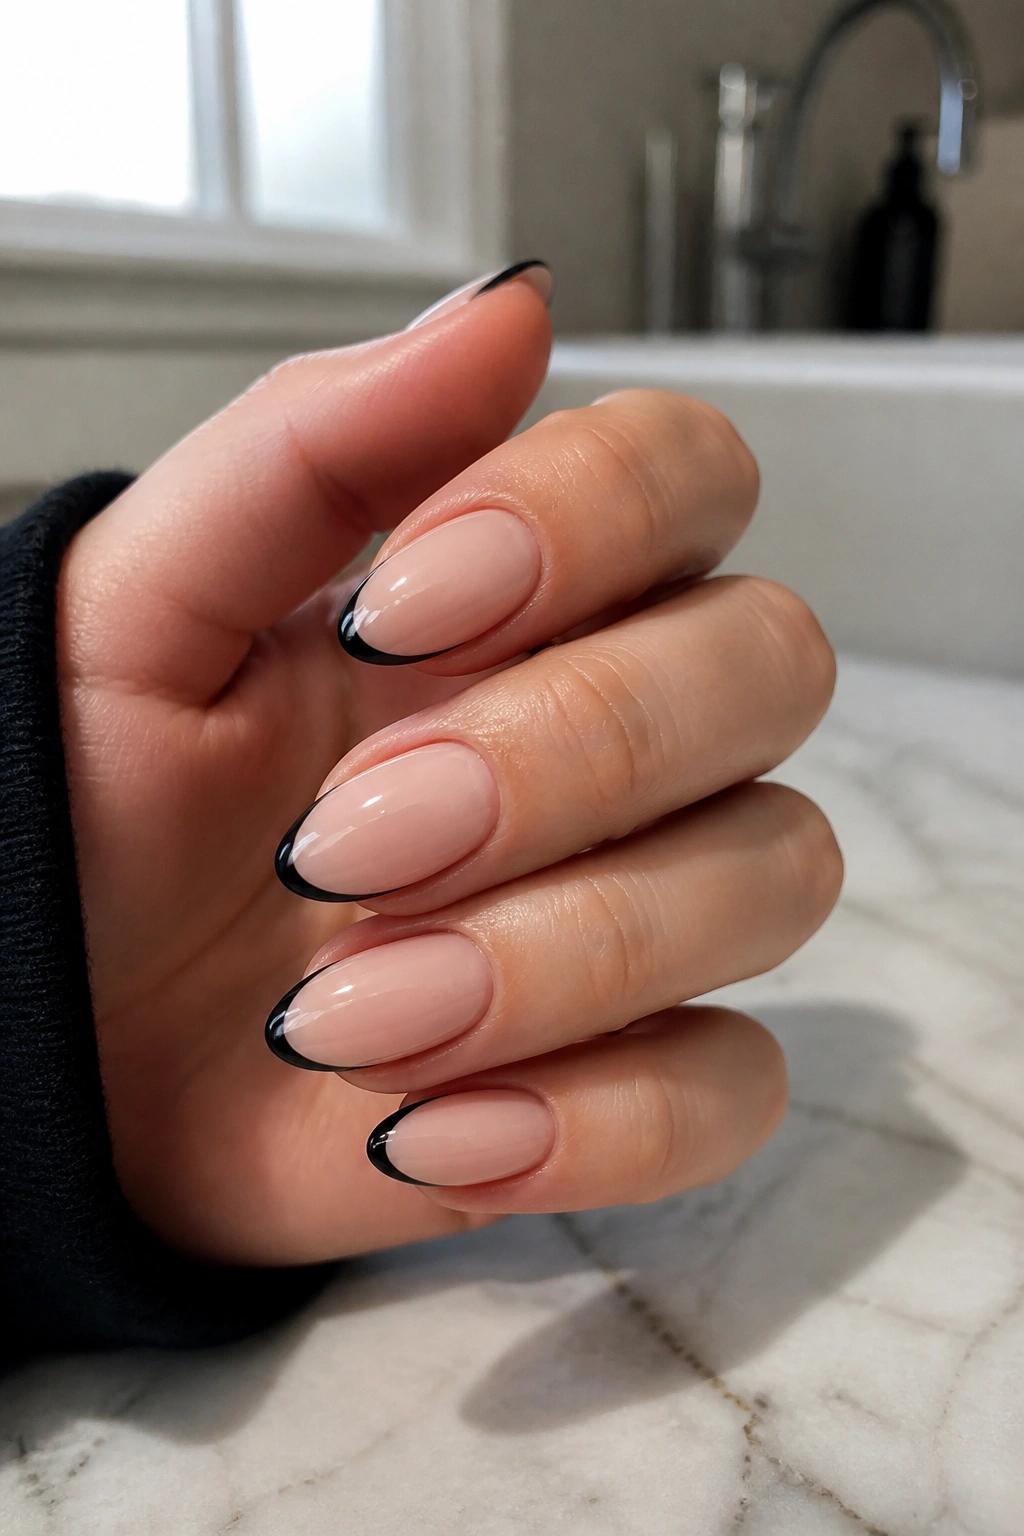
If your nails keep getting noticed anyway, black micro French tips make the point with almost no effort. The look is sharp, but the amount of polish you need is tiny.
A black line at the edge of an almond nail is cleaner than a full black manicure, which can sometimes feel heavy. The micro version keeps the hand looking long and neat. It also wears well because a slim line doesn’t chip as dramatically as a full opaque tip.
Key Details
- Start with a sheer nude base.
- Paint the black line very thin.
- Use a gel-like top coat if you want extra shine.
- Keep the edges symmetrical; black shows crooked lines fast.
This style is one of the cheapest dramatic looks you can do. One bottle of black polish goes a long way, and you only need a tiny amount per nail. That’s a nice thing to say about a bold manicure.
11. Side-Swept French Tips
A side-swept French tip follows the curve of the nail instead of sitting straight across the top. It’s a small change, but it makes almond nails look longer and more fluid.
I like this look when a nail has a slightly uneven free edge or one side grows faster than the other. The diagonal tip disguises those little differences. It also gives you more room to play with color if your nail bed is short.
The easiest version uses a nude base and one curved side band in white, gold, or soft red. Tape helps, but a steady liner brush works too. Keep the sweep smooth from one sidewall toward the point. If the line stops and starts, the design loses its clean shape.
This is one of those ideas that looks complicated from a distance and oddly simple once you try it. That’s the sort of manicure I respect.
12. Deep Smile Line French Tips
A deep smile line makes the white tip curve lower into the nail bed, and that can change the whole balance of the manicure. Compared with a classic French, it gives you a bolder shape and a little more room to show color.
This style is especially good if your almond nails are medium length and you want them to look a bit longer. The deeper curve pulls the eye downward and narrows the look of the nail bed. It’s not magic. It’s just a smart line placement.
The budget part is simple: you need one base color and one tip color. That’s it. The line needs care, though. Start in the center, mark the deepest point of the smile line, then connect both sides evenly. If one side dips lower than the other, the asymmetry jumps out fast.
A deep smile line is a nice move when you want a French manicure that feels a little less basic and a little more tailored.
13. Baby Boomer French Ombre
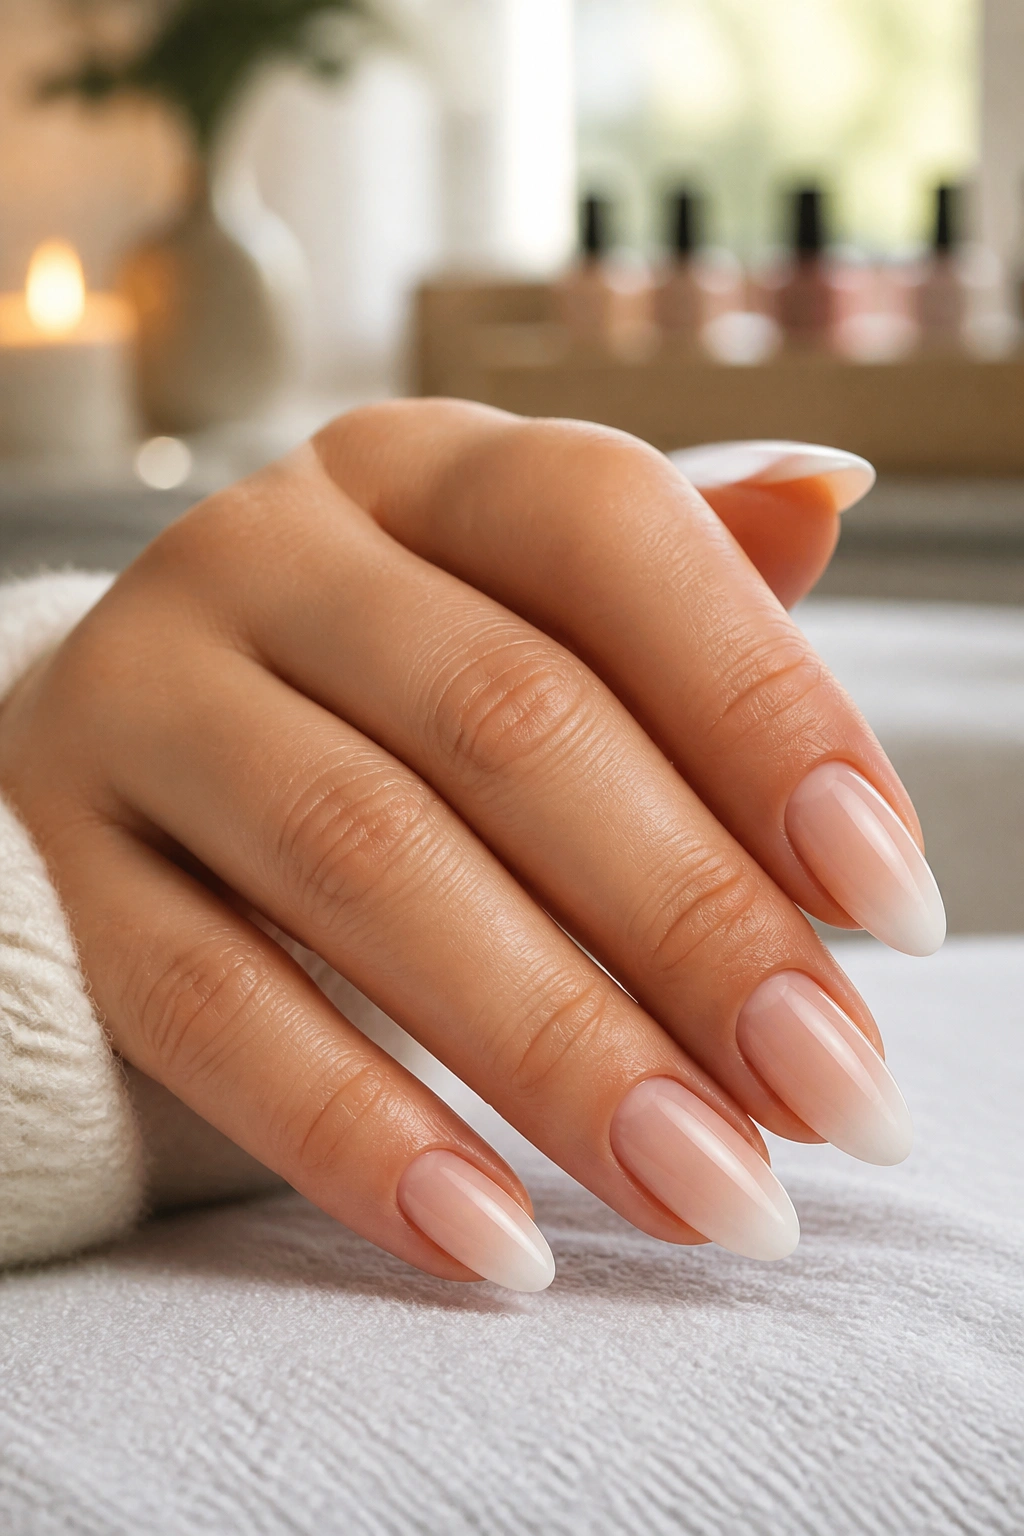
A baby boomer French softens the hard line between nude and white, and that blur is part of why it looks so good on almond nails. The fade makes the tip feel airy instead of blocky.
Why It Saves Money
You do not need a perfect freehand curve here. A makeup sponge or a small blending sponge can do the job, which means less precision and fewer failed attempts. That’s a relief if your brush hand gets shaky.
- Use a sheer nude base first.
- Dab white near the tip with a sponge.
- Blend in two thin layers instead of one heavy pass.
- Clean the skin around the nail before curing or top coating.
The ombre effect also hides grow-out nicely, which stretches the life of the manicure. That matters more than people admit. A design that still looks tidy after a week is a design that saves money.
14. Negative Space V-French Tips
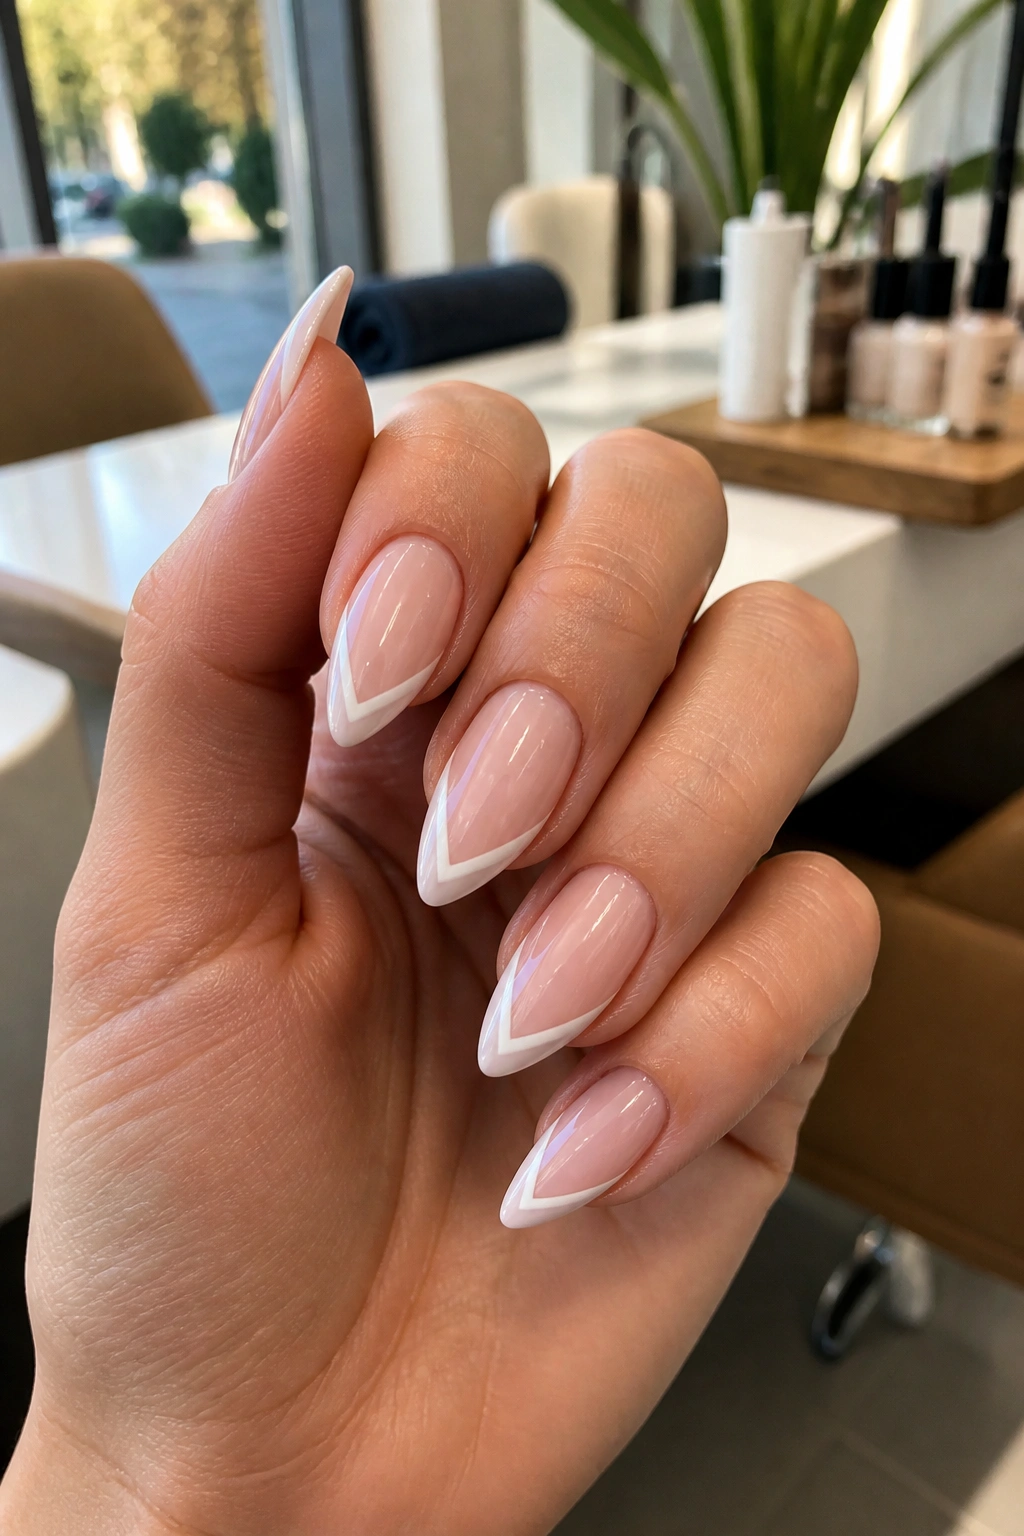
A V-shaped French tip makes the nail look longer with very little product. That’s the whole appeal. The open center keeps the nail from feeling crowded, and the sharp point adds a little edge without forcing you into a loud design.
This is one of the easiest ways to make a budget manicure look intentional. A narrow V at the tip can be painted with striping tape or a fine brush, and the empty space in the middle does half the visual work. It’s a smart design for shorter almond nails because the shape naturally points toward the center.
Use two colors if you want, but you don’t need them. A single white V on a sheer nude base already looks clean. The lines should meet in a neat point; if the angles are uneven, the whole thing looks off. Small details matter here.
If you like tidy, graphic nails that don’t eat through polish, this one’s a solid pick.
15. Tortoiseshell French Tips
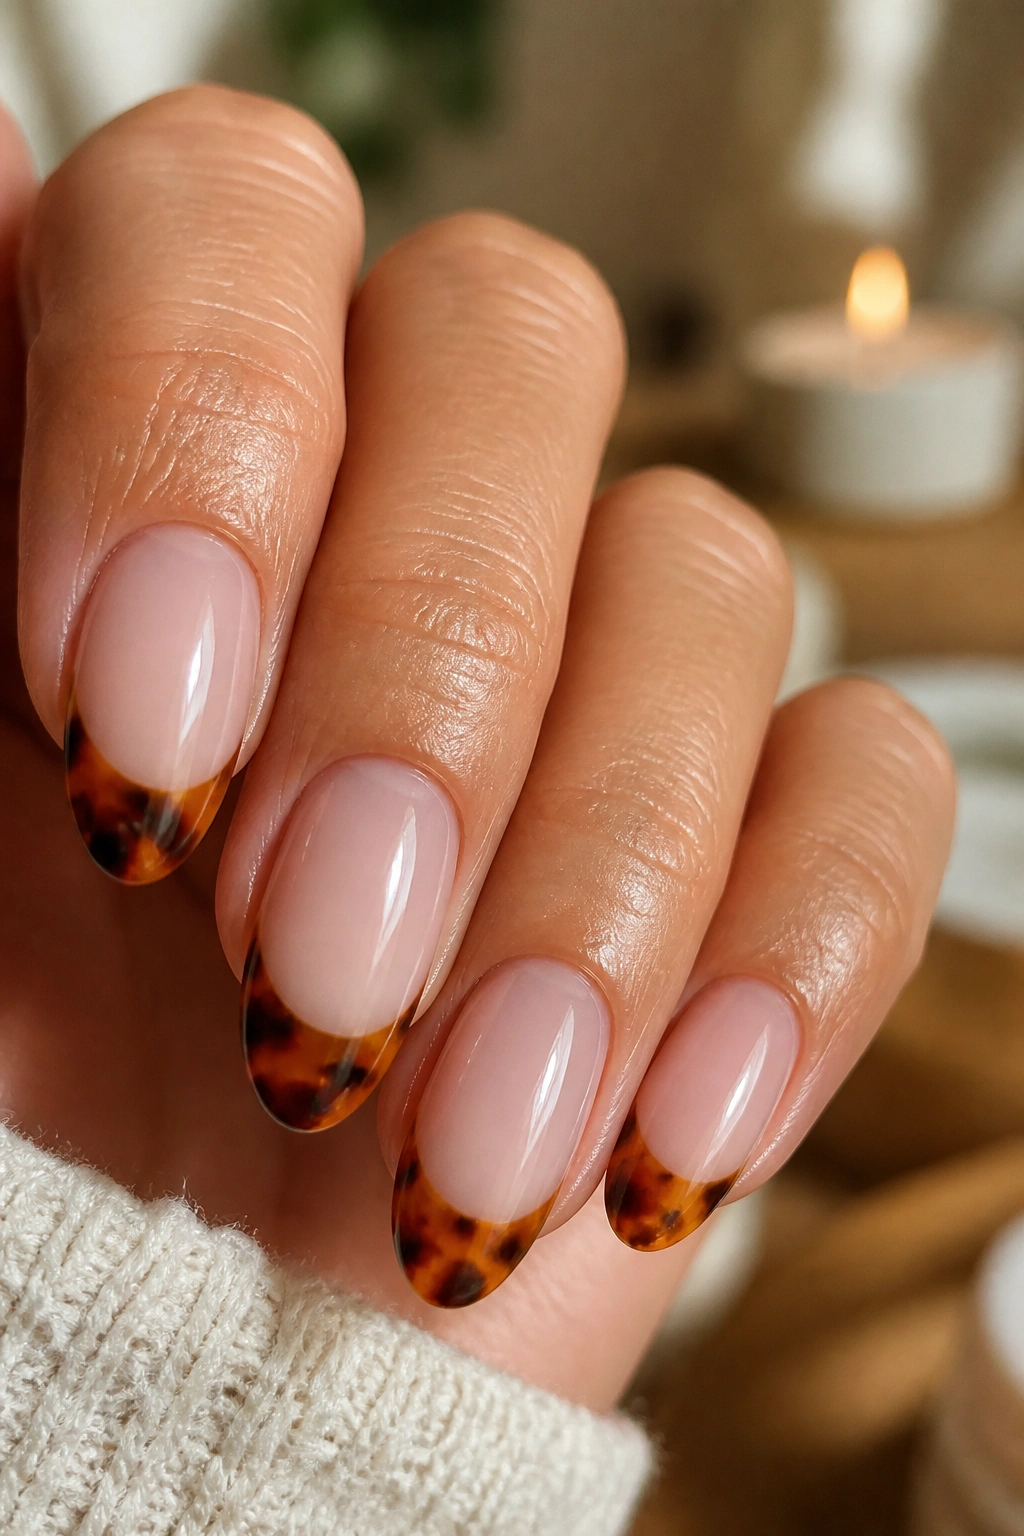
Do you want a French tip that looks expensive without painting the whole nail? Tortoiseshell tips are one of the smartest places to start. The pattern lives only at the edge, so you use a tiny amount of color and still get that rich, layered look.
How to Keep the Cost Down
Tortoiseshell is built from translucent brown, amber, and black patches. You can make it with a few regular polishes and a dotting tool or the tip of a small brush. The magic comes from layering, not from buying anything fancy.
- Use amber, caramel, and dark brown polish.
- Keep the design on the tip only.
- Finish with a shiny top coat to deepen the pattern.
- Make one or two accent nails if you want to stretch the look further.
This style suits almond nails because the pattern follows the curve without looking crowded. It’s a little richer than a plain French tip, but not loud. That balance is rare.
16. Chrome-Lined French Tips
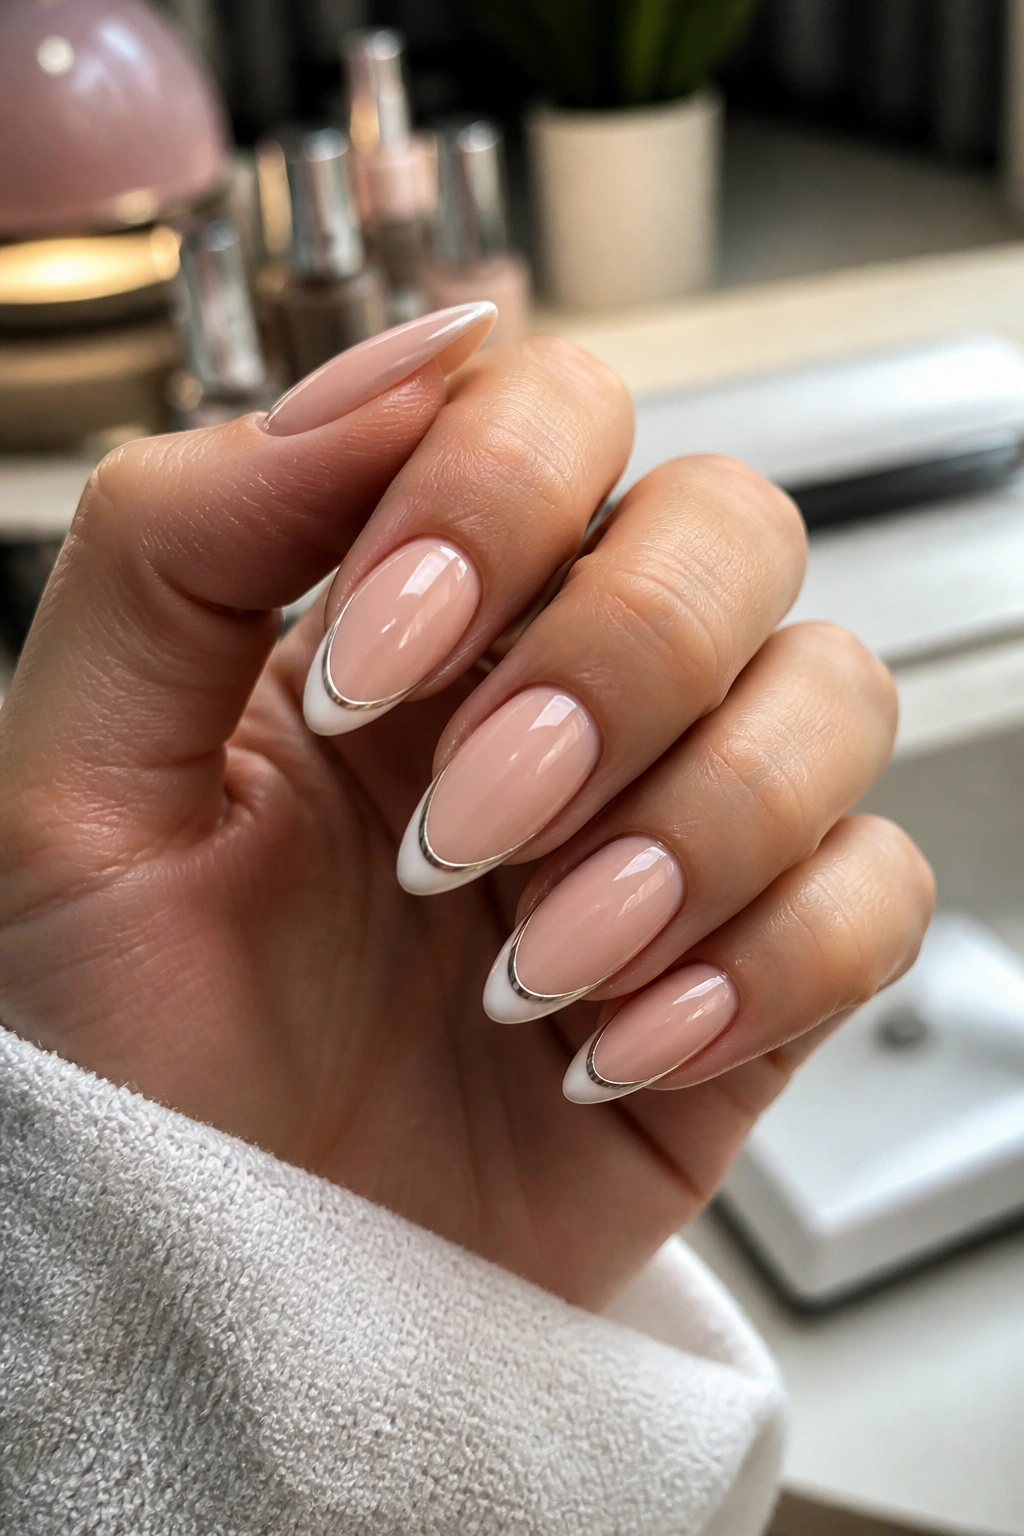
A chrome line can make a basic French tip look like you spent twice as much as you did. The reflective finish does most of the talking, and on almond nails the shine follows the curve nicely.
If you already own a metallic powder or a chrome pen, this is a low-cost way to make it earn its keep. Keep the chrome line thin and place it right at the edge of the tip or just under the white line. Too much chrome turns the manicure into armor. A little goes a long way.
What to Watch For
- Use a no-wipe top coat if you’re applying chrome powder.
- Buff gently; don’t scrape the base coat.
- Seal the edges well, because chrome flakes chip fast when they’re left exposed.
- Choose a nude base so the shine stands out.
This look does better on medium almond shapes than on very short nails. The extra length gives the chrome space to read cleanly.
17. Mismatched Rainbow Micro Tips
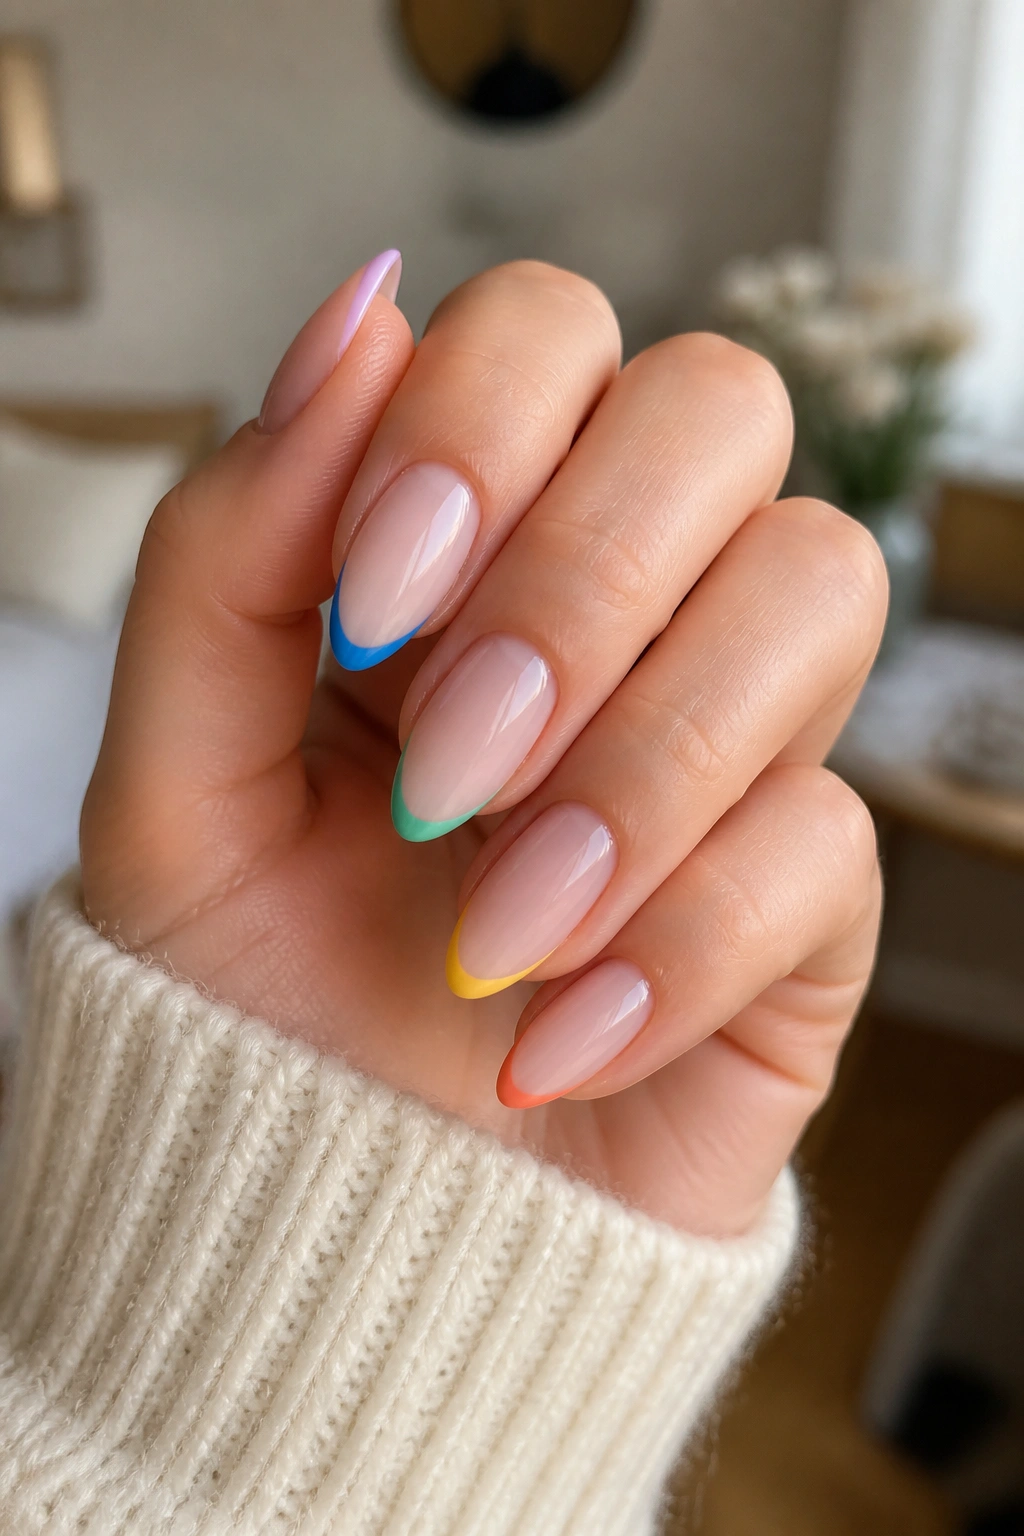
A rainbow micro French sounds playful, but the budget math is excellent. You only need a tiny amount of each color, and you can use leftover polish that’s been sitting around forever.
The trick is to keep every tip narrow and the base uniform. If the colors are all bright, stick to the same saturation level so the set feels planned. If one nail is neon and the next is dusty, the design starts arguing with itself.
I like this idea on almond nails because the shape keeps the color organized. The taper acts like a frame. One tiny stripe of coral, one of sky blue, one of green, and so on. That’s enough. You do not need full color blocks.
This is also a good way to test shades you might want to buy later. Paint one nail, live with it for a day, then decide if the color deserves a full set. Cheap testing. Handy, too.
18. Tiny Rhinestone Edge French Tips
A full crystal nail can get expensive fast. A tiny rhinestone edge, though, gives you the sparkle with a fraction of the cost and none of the bulk.
Comparison That Matters
Think of this as the calmer cousin of full glam nail art. Instead of covering the nail, you place one tiny stone near the French line or along the outer edge of just one or two nails. That means you only need a small packet of crystals and a dot of nail glue.
- Best sizes: SS3 to SS4 stones.
- Best placement: one stone at the smile line or tip corner.
- Best base: nude, pink, or soft white.
- Best finish: glossy top coat, but leave the stone itself uncovered.
This works especially well on almond nails because the pointed shape gives the stone a natural resting place. Any more than a few crystals, and the design can tip into costume territory. Keep it small. Keep it neat. Done.
19. Blush Aura French With a White Outline
A blush aura French is softer than a standard pink-and-white manicure, and that blurred center gives the whole look a modern feel without needing expensive tools. The base looks like a little glow sitting inside the nail.
Why It Looks Soft
You can get the effect with a sponge, a small makeup applicator, or a tiny piece of foam. Dab a rosy pink in the middle of the nail, fade it outward, then add a crisp white French edge on top. The contrast between the blurred center and the sharp tip is what makes it work.
- Use one rosy pink and one white polish.
- Keep the aura centered, not too wide.
- Leave the sidewalls lighter so the nail still feels airy.
- Seal with a shiny top coat for depth.
This style is a nice choice when you want something feminine but not sugary. It also hides small imperfections in the base because the blur does half the camouflage.
20. Budget Press-On French Almond Sets
If you want the cheapest route to a polished French almond manicure, press-ons win. They cost less than a salon visit, and they can be trimmed, filed, and reused if you treat them well.
The trick is to pick a set with an almond shape that already matches your hand. Then you can file the sidewalls a little, soften the point, and paint or sticker on the French line if the design needs a better fit. Pre-made French press-ons often look better after a tiny adjustment than they do straight out of the box.
Use adhesive tabs if you want them for a night, or nail glue if you need them to last longer. Either way, prep matters. Push back the cuticles, lightly buff the natural nail, and wipe away oils before applying anything. Skipping that part is how press-ons pop off early.
If you want the look fast, cheap, and clean, this is the one I’d keep in my pocket.
Final Thoughts
The prettiest French tip almond nail ideas usually have one thing in common: they keep the line slim. A narrow tip looks cleaner, costs less to paint, and grows out with less drama.
If you want the most mileage for the least money, start with micro white tips, soft pink sheers, or press-ons you can file to fit. Those three options cover the ground pretty well. They’re simple, they wear well, and they don’t ask for a cart full of supplies.
One last tip: spend your money on a good top coat before you spend it on ten colors you’ll use twice. A smooth finish makes even the simplest almond French look finished, and that little bit of shine does more work than people give it credit for.
