

Burgundy long oval nails have a funny habit of looking expensive even when the rest of the outfit is doing nothing special. A plain sweater. A black coat. Hair in a clip. Suddenly the hands look finished, pulled together, and a little bit dangerous in the best way.
That’s the appeal of burgundy on an oval shape. The color does the heavy lifting, sure, but the shape matters just as much. Long ovals soften the hand, stretch the fingers visually, and keep deep shades from feeling harsh. Square tips can make burgundy feel blunt. Almond can push it romantic. Oval lands in that sweet middle place: elegant, smooth, and easy to wear.
There’s also a practical reason people keep coming back to it. Burgundy is one of those shades that can go glossy, velvety, wine-dark, brownish, or nearly black depending on the light. On long oval nails, those shifts actually look better because the curve catches the finish in a way that flat shapes don’t. Add in chrome, French tips, tortoiseshell, or a single accent nail, and the look moves from simple to polished without getting fussy.
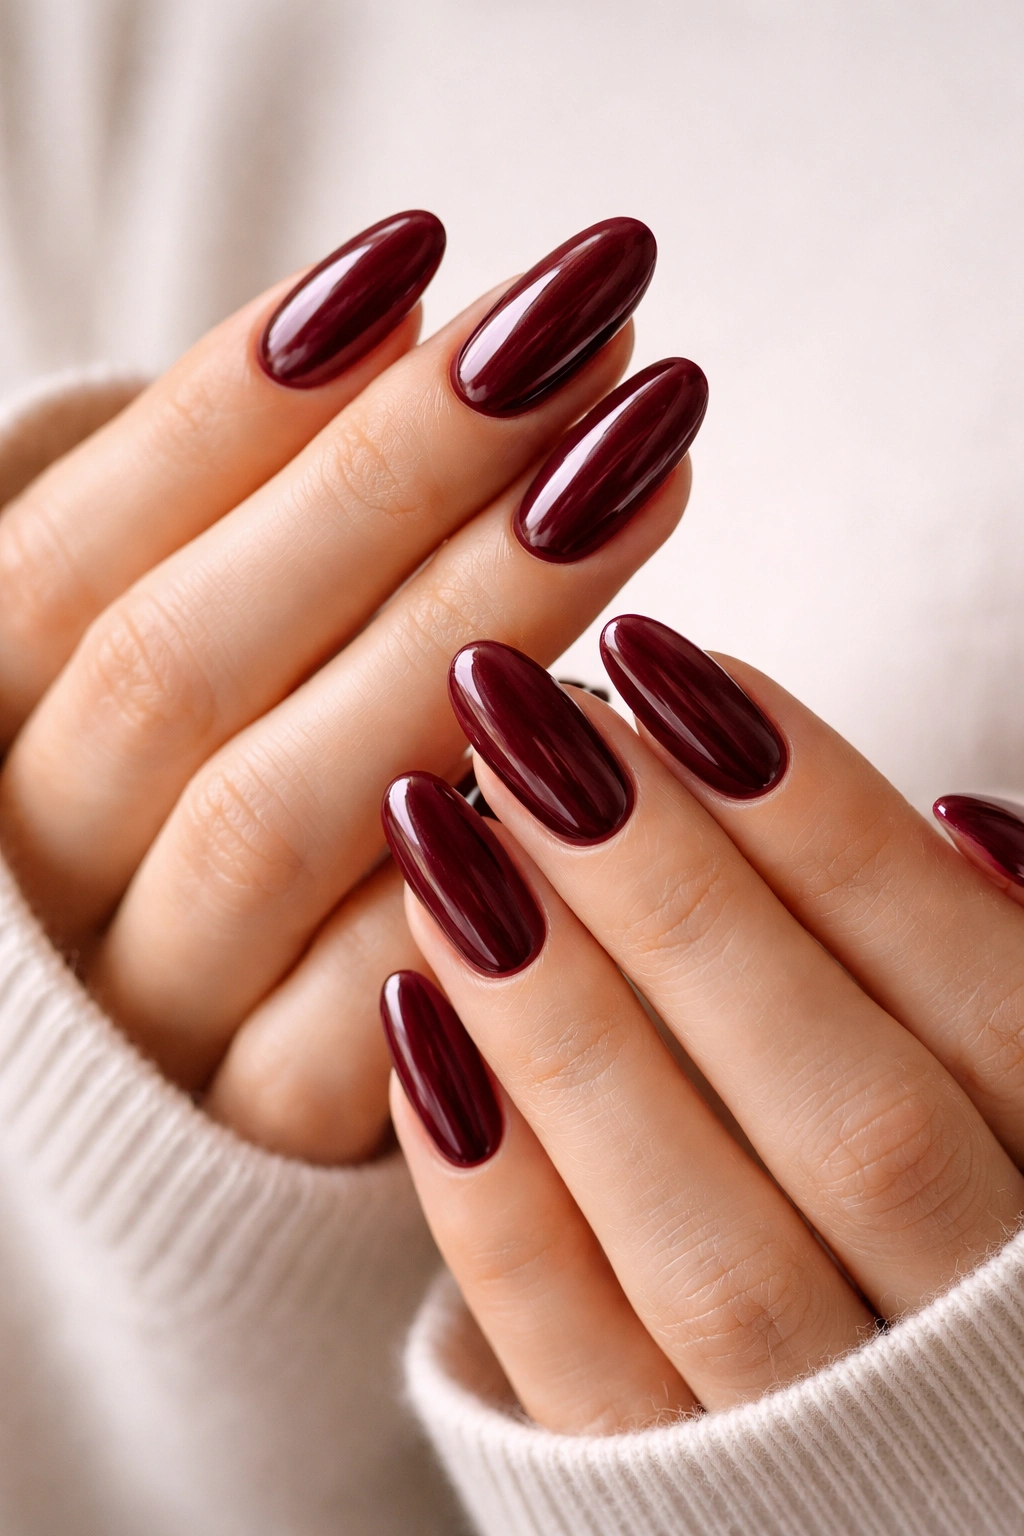
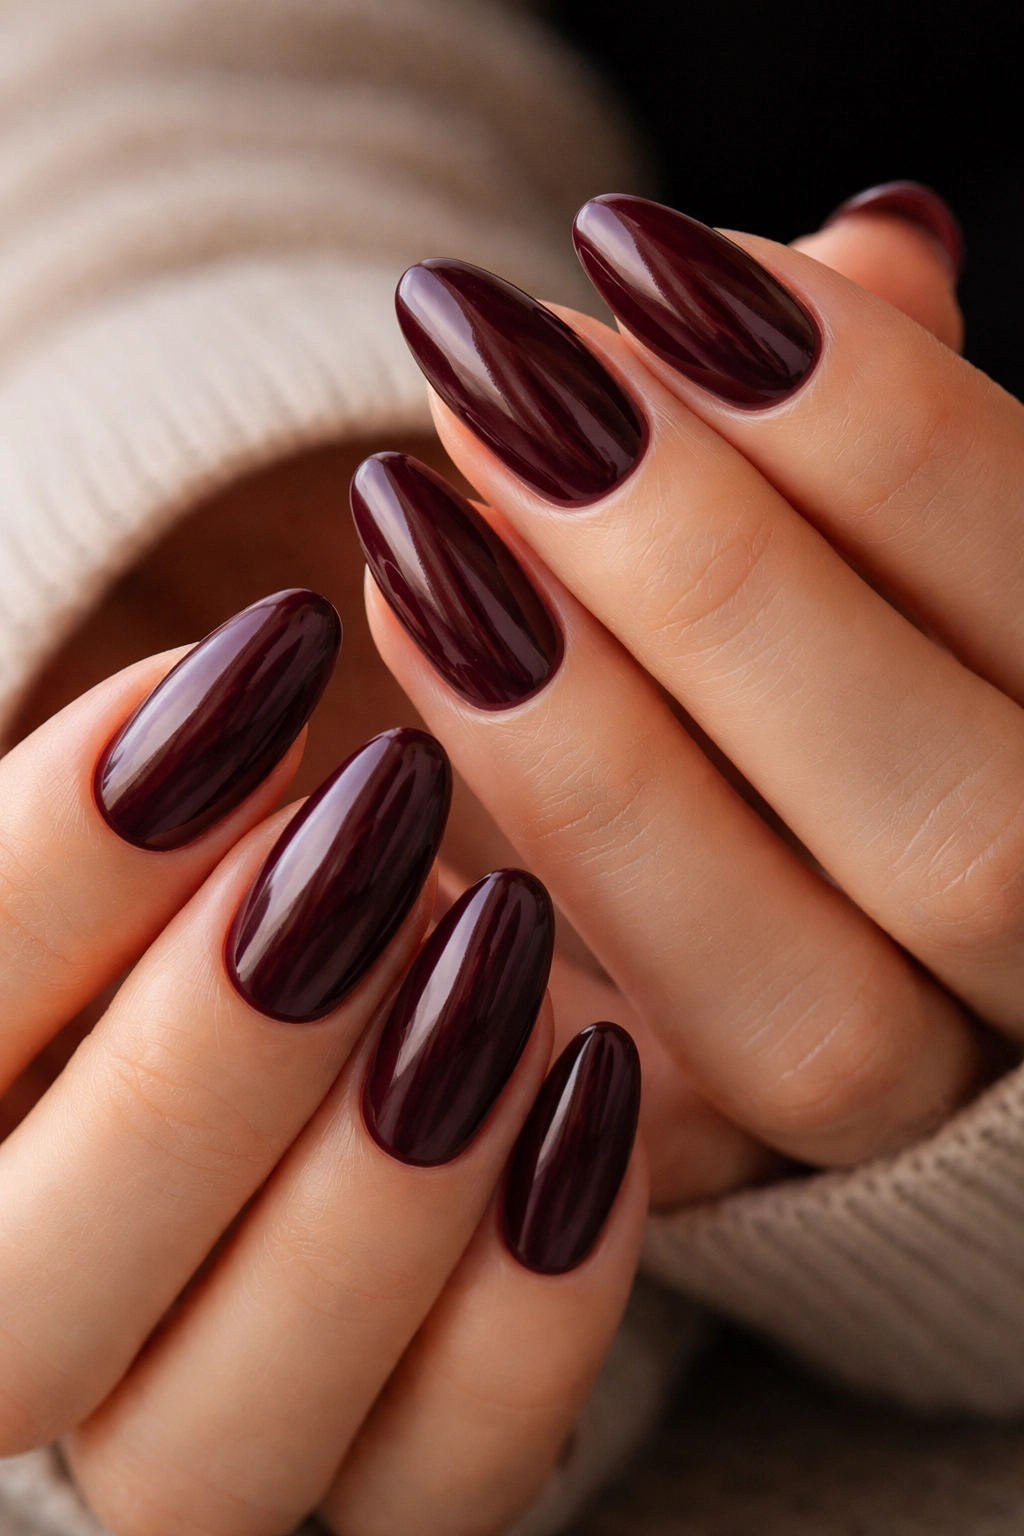
1. Deep Wine Gloss on Long Oval Tips
A pure deep wine burgundy is the easiest way to make long oval nails look rich without doing too much. It’s the kind of manicure that looks expensive in a quiet way, not loud or flashy. On oval nails, the glossy surface follows the curve and gives the color room to shift between red, plum, and brown as the light changes.
Why It Works
The best part of this look is that it relies on shape and finish, not decoration. That keeps the manicure clean, and clean almost always reads as more expensive than busy. A long oval also helps the deep shade feel softer around the edges, which matters because very dark burgundy can look severe on sharp tips.
A high-shine top coat is the whole game here. You want that glassy surface, not a dull finish that swallows the color. If your polish is slightly translucent on the first coat, don’t panic. That richness builds in two to three thin coats, and the depth is worth the wait.
What to Ask For
- A deep burgundy with blue or plum undertones
- A high-gloss gel or regular polish finish
- A long oval shape with softly tapered sides
- Two thin color coats instead of one thick layer
- A capped free edge so the color lasts longer
Pro tip: Keep the cuticle area neat. Dark polish shows sloppiness fast.
2. Burgundy Velvet Nails with a Matte Finish
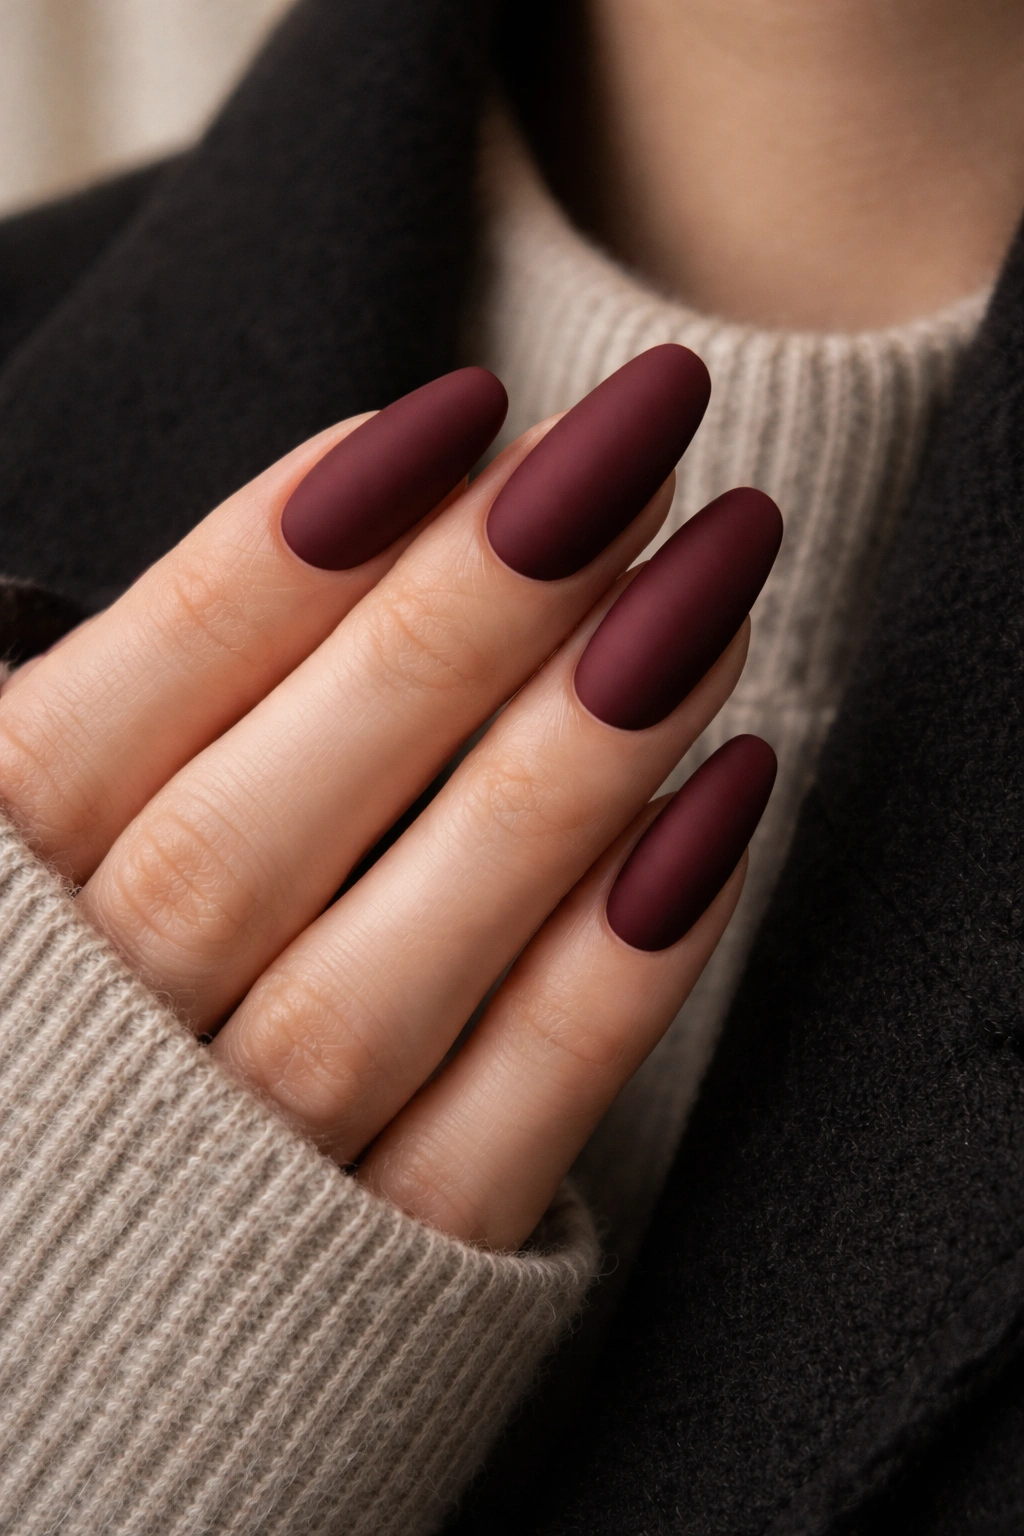
Matte burgundy has a completely different mood. It turns the color into something like crushed velvet, which is a little softer, a little moodier, and frankly harder to ignore than standard gloss. On long oval nails, the matte finish makes the length feel even smoother because there’s no shine breaking up the shape.
The trick is choosing a burgundy that still has enough depth to stand up to the matte top coat. If the red base is too bright, matte can make it look flat. But a wine, merlot, or oxblood tone? That’s where matte gets interesting. It looks plush, especially in cooler lighting or against gold rings.
This is also a smart option if you want a rich look without sparkle. Not every manicure needs a rhinestone moment. Sometimes the texture alone is enough.
Best Details to Add
- One matte top coat over a fully cured burgundy base
- A slightly darker burgundy than your usual gloss shade
- Shorter elongation near the cuticle for a cleaner finish
- Minimal nail art, if any at all
One caution: matte shows oil and hand cream faster than glossy nails. If you use lotion often, you may need to refresh the top coat sooner.
3. Burgundy French Tips on a Sheer Pink Base
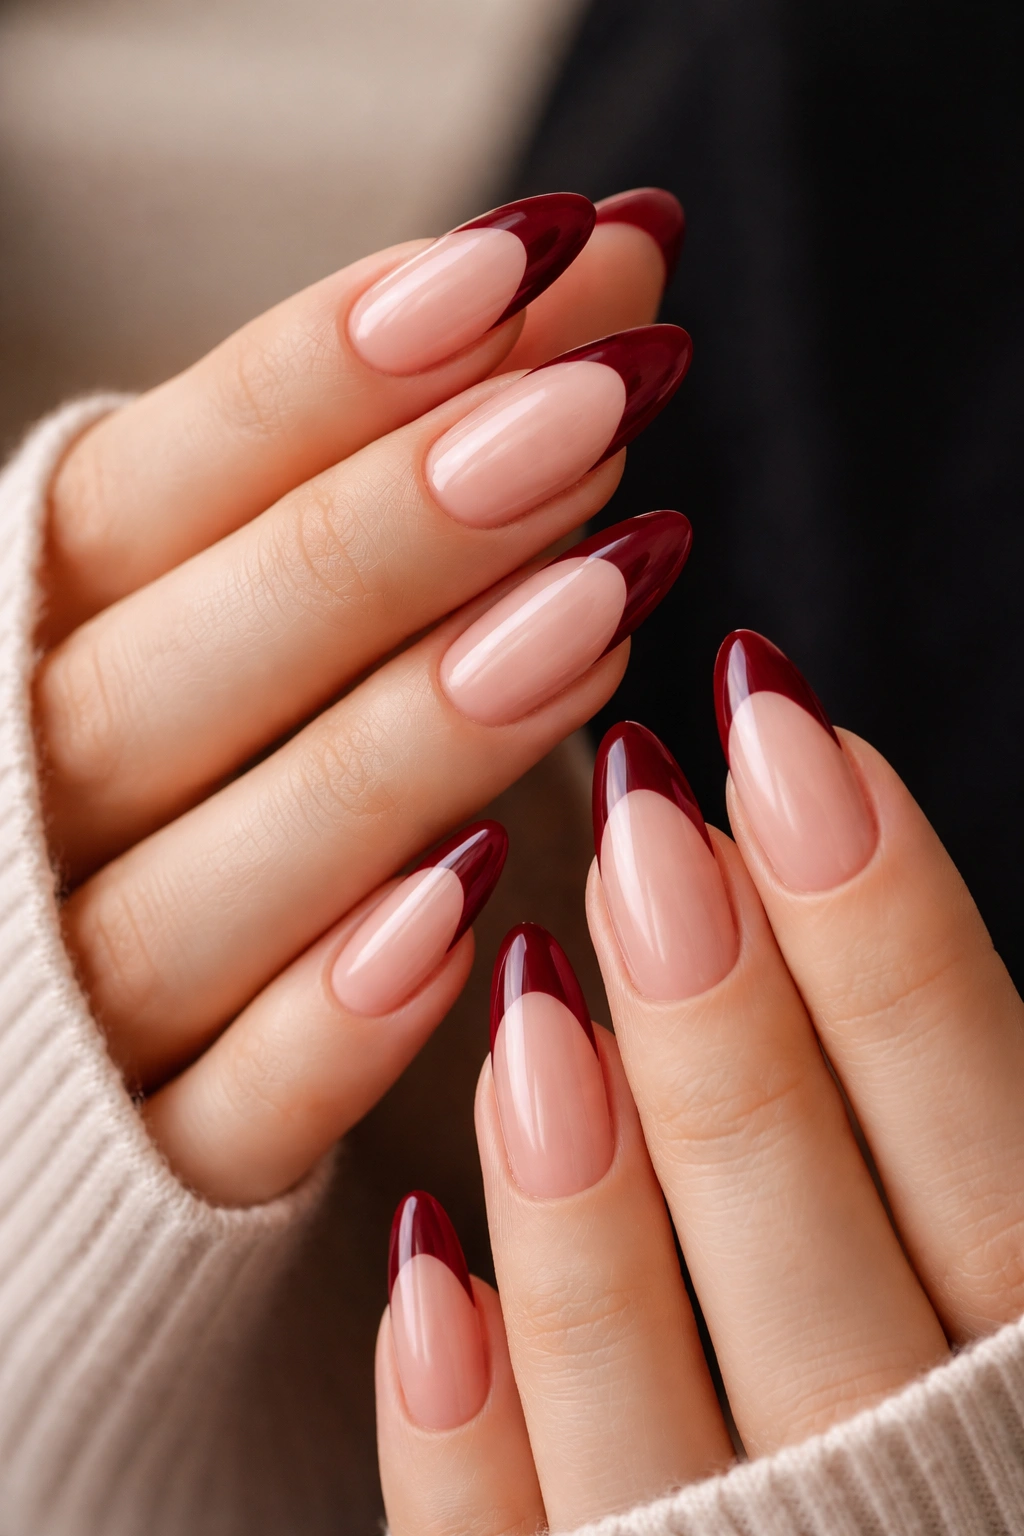
French tips in burgundy feel sharper and richer than the classic white version. On long oval nails, the curved tip line follows the natural shape beautifully, so the design looks graceful instead of dated. A sheer pink or milky nude base keeps the manicure light, while the burgundy tips pull it into deeper territory.
This is one of those looks that works because of restraint. The burgundy is only at the edge, so the manicure doesn’t overwhelm the hand. Yet the color still makes a statement, especially if the tip line is crisp and a little thicker than a standard French. Thin, overly delicate burgundy tips can disappear. A slightly fuller arc has more presence.
If you like polish that feels tailored, this is the move. It has structure. It has contrast. And it wears well with almost anything.
How to Shape the Tip
- Keep the smile line soft, not harshly straight
- Let the burgundy follow the oval curve instead of forcing a point
- Use a sheer nude base with a neutral undertone
- Seal the design with a glossy top coat
A tiny detail matters here: make both hands match in tip thickness. Uneven French tips are the fastest way to make a beautiful idea look rushed.
4. Burgundy Chrome with a Mirror Sheen
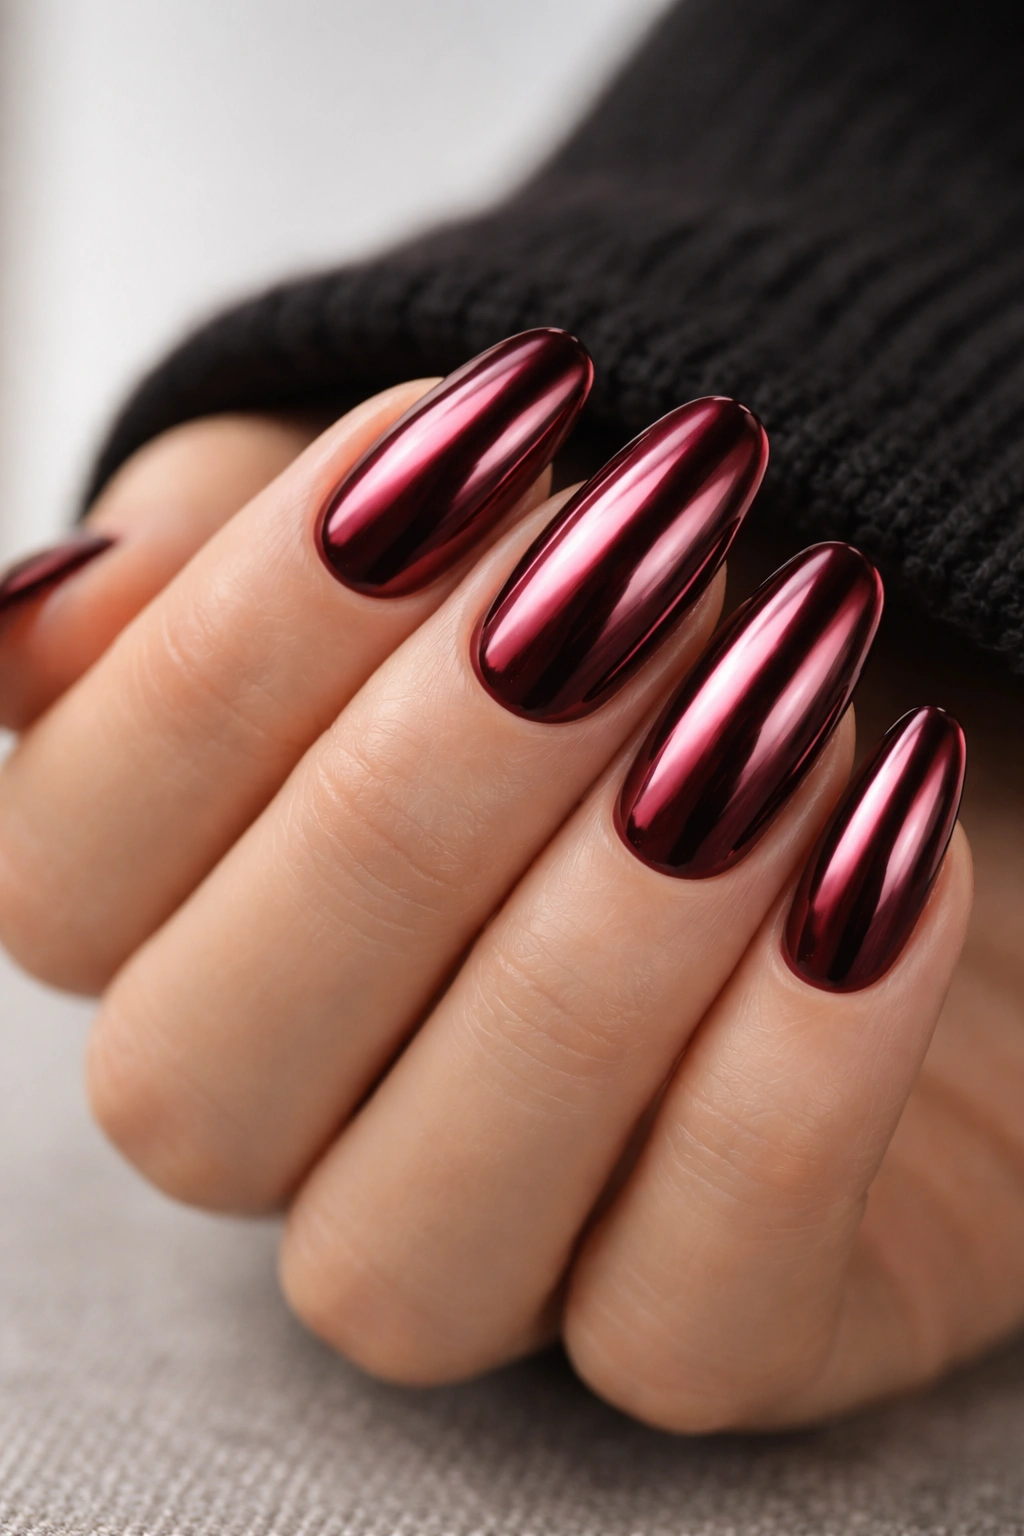
Chrome burgundy is not subtle. That’s the point. It gives the color a reflective, metallic finish that looks almost liquid on long oval nails. The oval shape helps the chrome look smoother because there are no sharp corners interrupting the shine.
What makes this version rich instead of costume-like is the shade underneath. A deep burgundy base with a fine red or copper chrome powder gives you depth first, shine second. When the polish leans too bright, chrome can turn garish. When the base is darker, the finish looks like polished metal in low light.
This manicure works especially well if you want something that feels dressed up without adding gems or nail art. It already has enough visual interest on its own.
What Makes It Different
Unlike glitter, chrome reflects in a clean sheet. That means the manicure reads sleeker and more modern, not sparkly.
A few things make the difference:
- A smooth, ridge-free nail surface
- A dark burgundy gel base
- A no-wipe top coat before chrome application
- A soft buff after powdering to remove excess dust
Chrome is unforgiving. Any ridge, dent, or uneven application shows. But when it’s done well, it looks almost tailored.
5. Burgundy and Gold Foil Accents
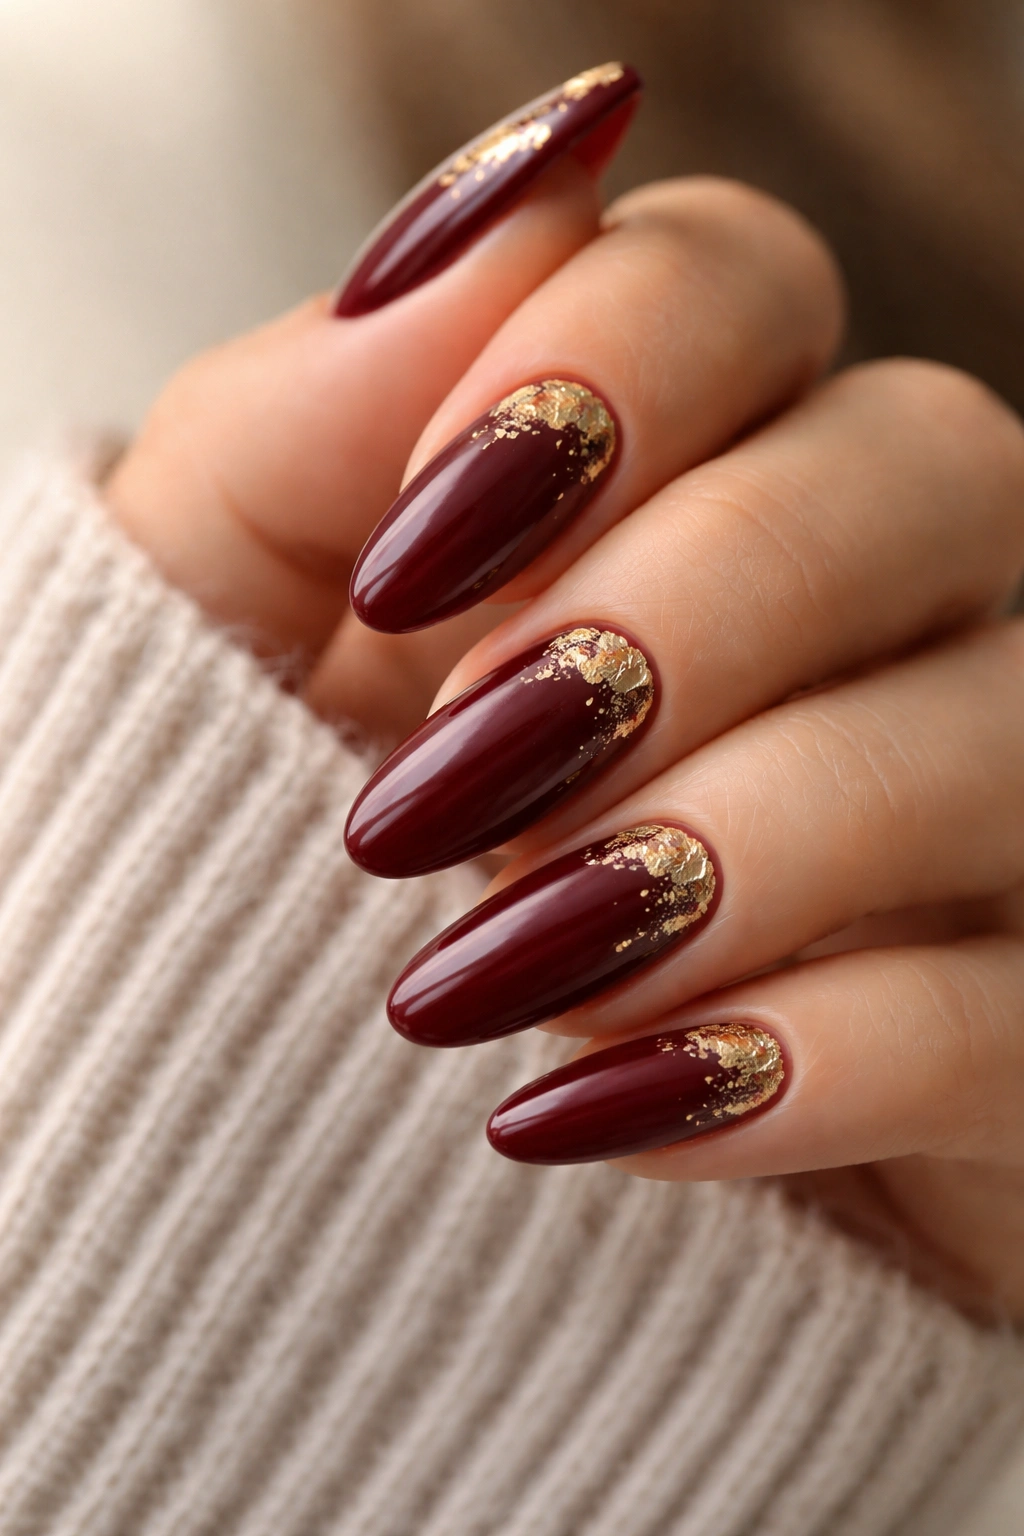
Gold foil on burgundy nails is one of those combinations that never really goes out of favor because it just works. The deep red base gives the foil somewhere luxurious to land, and the metallic gold adds a little broken-light texture that feels expensive without being loud. Long oval nails are a good canvas here because the soft curve keeps the design from looking too rigid.
You do not need to cover every nail with foil. In fact, that usually makes the manicure busier than it needs to be. A few flecks near the tips, a band at the cuticle, or one accent nail with heavier foil placement is often enough. The best versions look a little uneven on purpose, like torn leaf, not a sticker sheet.
This style has a dressy feel that works well for evenings, events, or any time you want your hands to look done with minimal fuss.
Pair It With
- A deep wine base
- Warm gold foil, not brassy yellow
- One or two accent nails only
- A glossy seal to keep the foil from snagging
If you’re torn between festive and refined, this is the compromise. It leans rich either way.
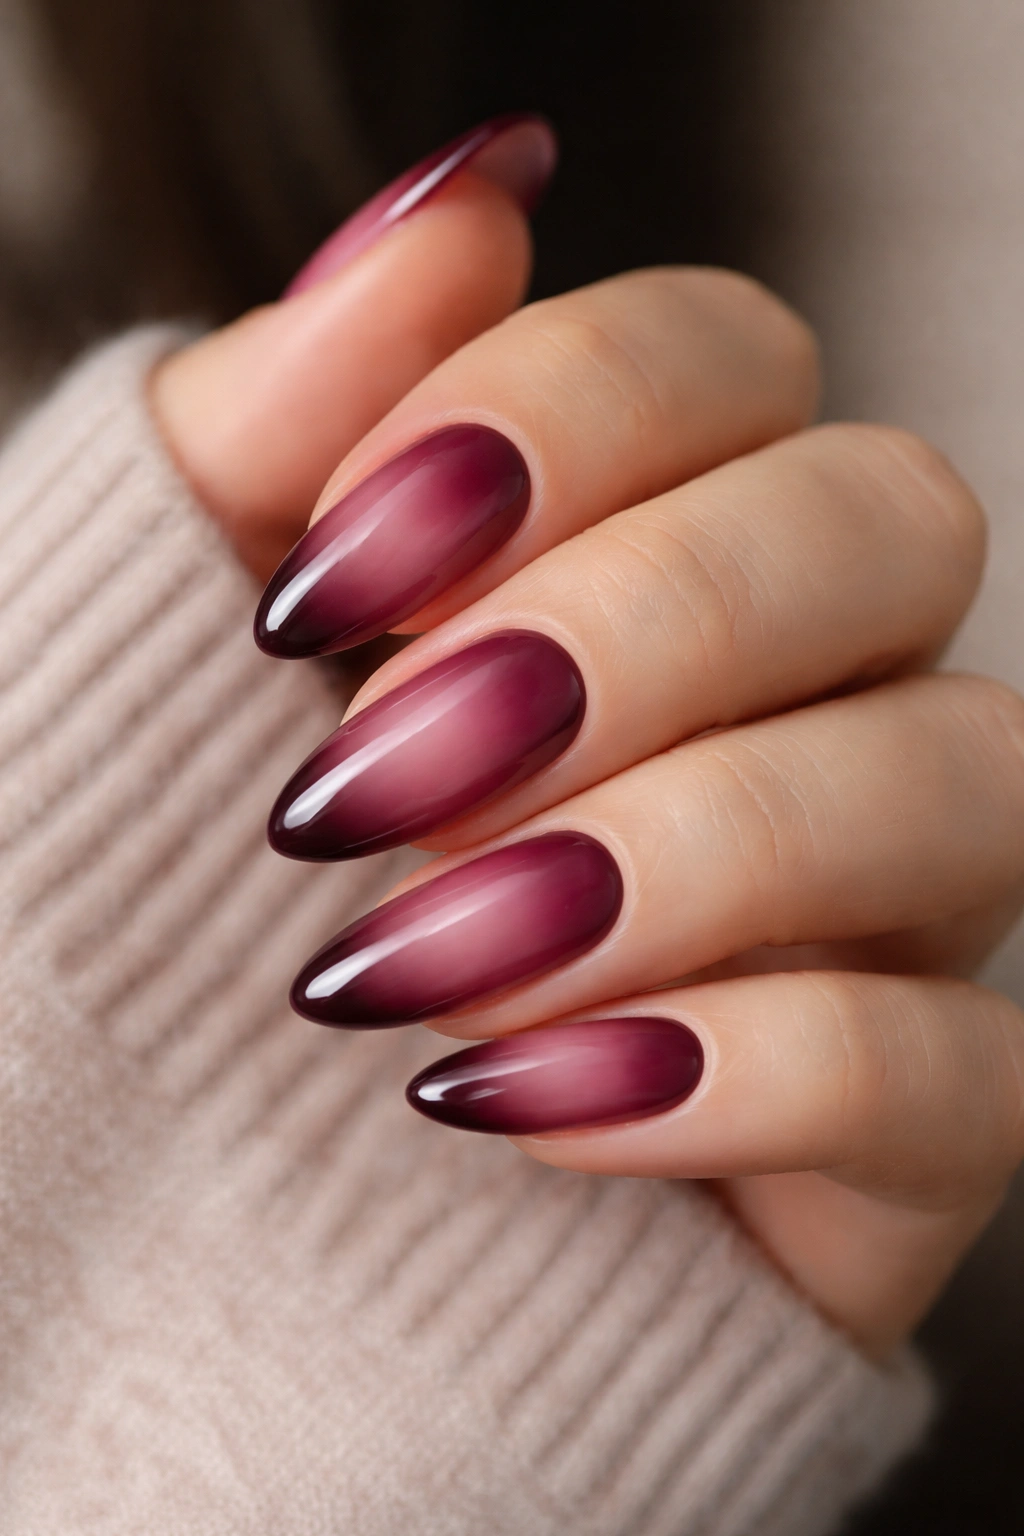
6. Burgundy Ombre Fading Into Black
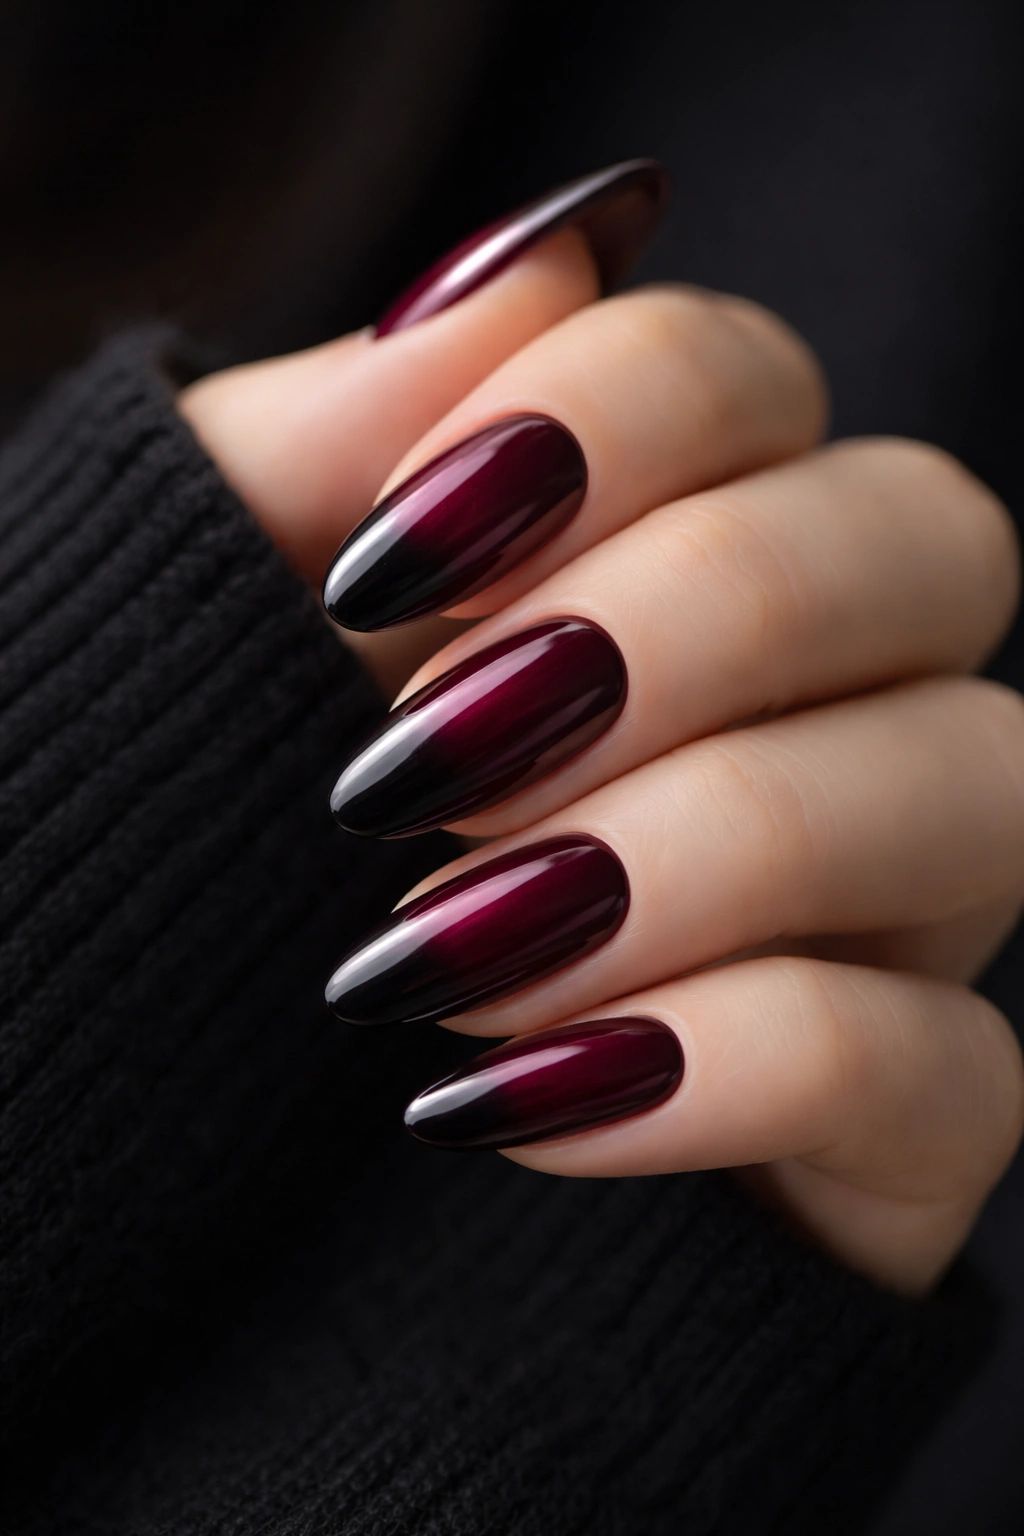
A burgundy-to-black ombre on long oval nails has real drama, but it’s the polished kind, not the costume kind. The fade usually starts with burgundy near the cuticle or tip, then melts into black for a smoky effect that looks smooth and expensive. Oval nails are ideal because the shape makes the gradient feel continuous.
The secret is blur, not contrast. If the transition line is too obvious, the look turns heavy. You want a soft fade where the two colors seem to bleed into each other. An airbrush effect is the cleanest route, but a sponge can work too if you keep the layers thin and patient.
This is one of the more wearable dark designs because it keeps the manicure from looking flat. There’s movement in it. Your eye keeps traveling.
Why It Feels So Rich
Burgundy and black sit close enough in depth that the fade looks intentional, but different enough to create dimension. That’s why it has more depth than a single dark shade.
A few good choices:
- A burgundy base with black at the free edge
- A vertical fade for extra length
- Glossy top coat to intensify the shift
- Medium-opacity polish for softer blending
I like this design on longer lengths because the fade has room to breathe. On short nails, it can look cramped.
7. Burgundy Nails with One Crystal Accent
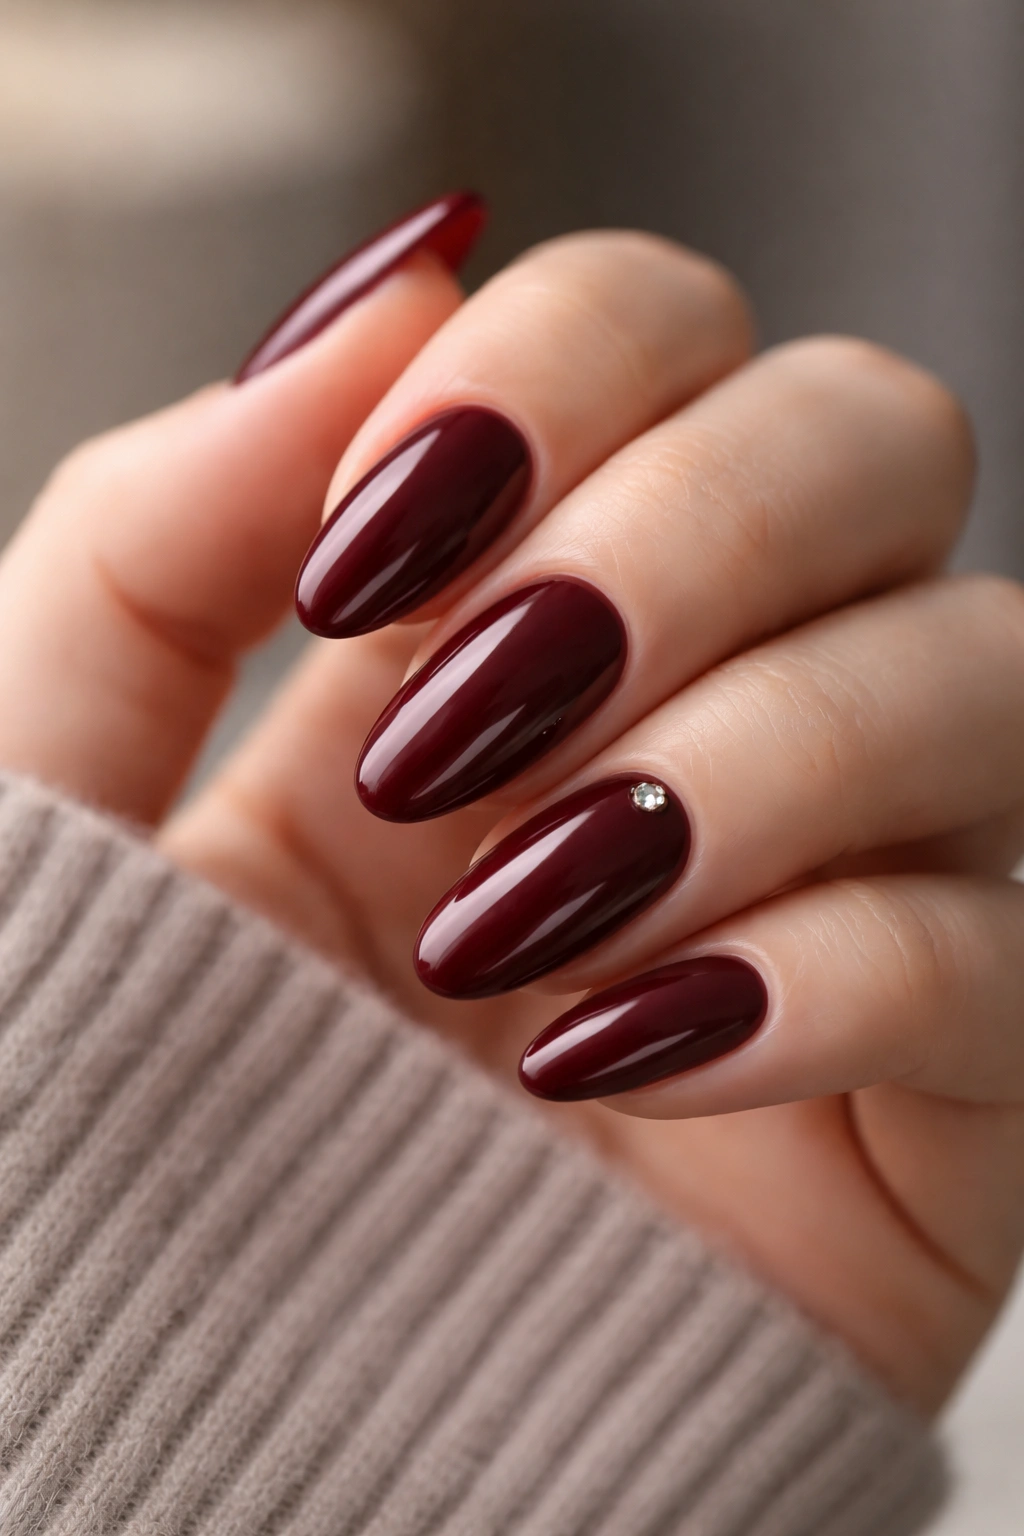
One crystal accent can change the whole mood of burgundy oval nails. The trick is keeping the embellishment restrained. A single crystal cluster on one ring finger, or a small line of stones near the cuticle, gives the manicure sparkle without tipping it into overdone territory.
Burgundy already has enough presence. That’s why one accent works better than a full crystal set. The color stays the star, and the crystals act like jewelry for the nail rather than the whole outfit. Long oval nails are especially good for this because the shape feels delicate enough to support a tiny bit of shine.
If you wear rings, this design plays nicely with them. It doesn’t fight for attention. It just sits there looking expensive.
Keep the Accent Small
- Use clear or champagne crystals
- Place them on one or two nails max
- Keep the base color a solid glossy burgundy
- Avoid oversized stones that lift too easily
A big cluster can look bridal or costume-like. A small, clean line looks finished.
8. Burgundy Tortoiseshell Mix
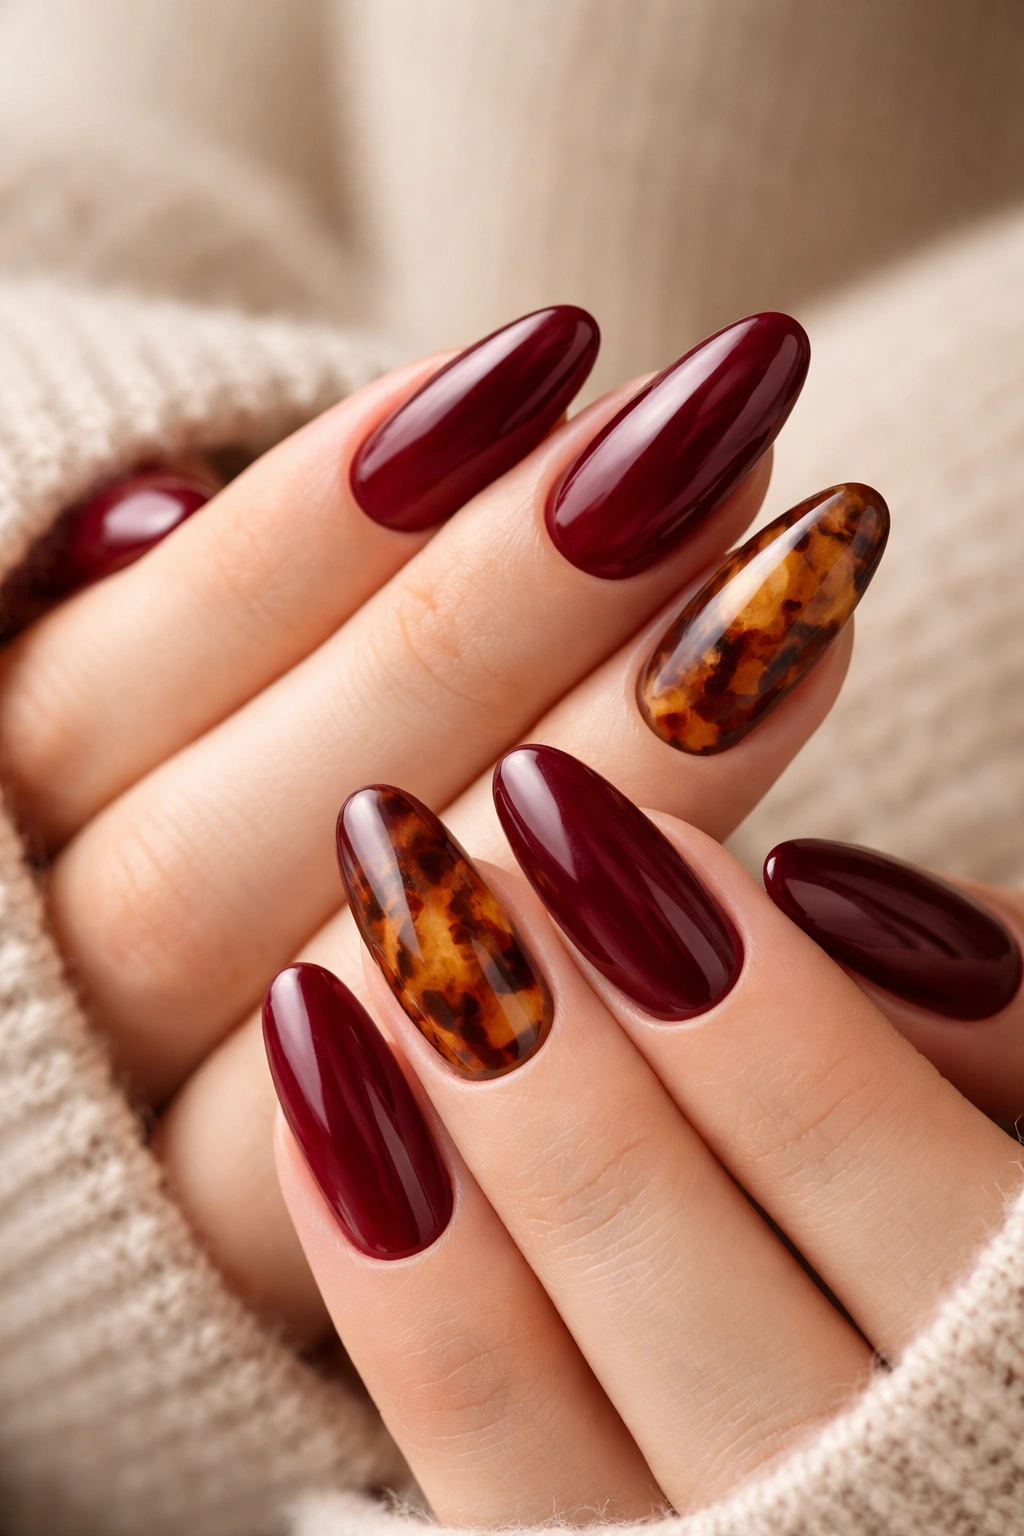
Tortoiseshell nail art and burgundy is a stronger pairing than a lot of people expect. The amber, brown, and black spots of tortoiseshell bring warmth to the cool richness of burgundy, and long oval nails give the pattern enough room to look intentional. On shorter nails, tortoise can feel crowded. On long ovals, it breathes.
The best version usually splits the manicure between solid burgundy nails and one or two tortoiseshell accent nails. That balance matters. Too much tortoise and the look becomes busy; too little and it feels random. You want the pattern to feel like a deliberate texture break, not an afterthought.
This is also a nice bridge if you like brown nails but want something deeper. Burgundy keeps the whole look from drifting too orange.
What to Notice
The pattern should have soft, layered amber spots, not harsh blotches. That layered look is what gives tortoiseshell its depth.
A strong combination looks like this:
- Three to four burgundy nails
- One or two tortoiseshell accents
- A glossy finish for contrast
- A slightly elongated oval shape to show the pattern clearly
It’s a quietly smart design. Not flashy. Just good-looking in a way that gets noticed later.
9. Burgundy Nails with Thin Gold Outlines
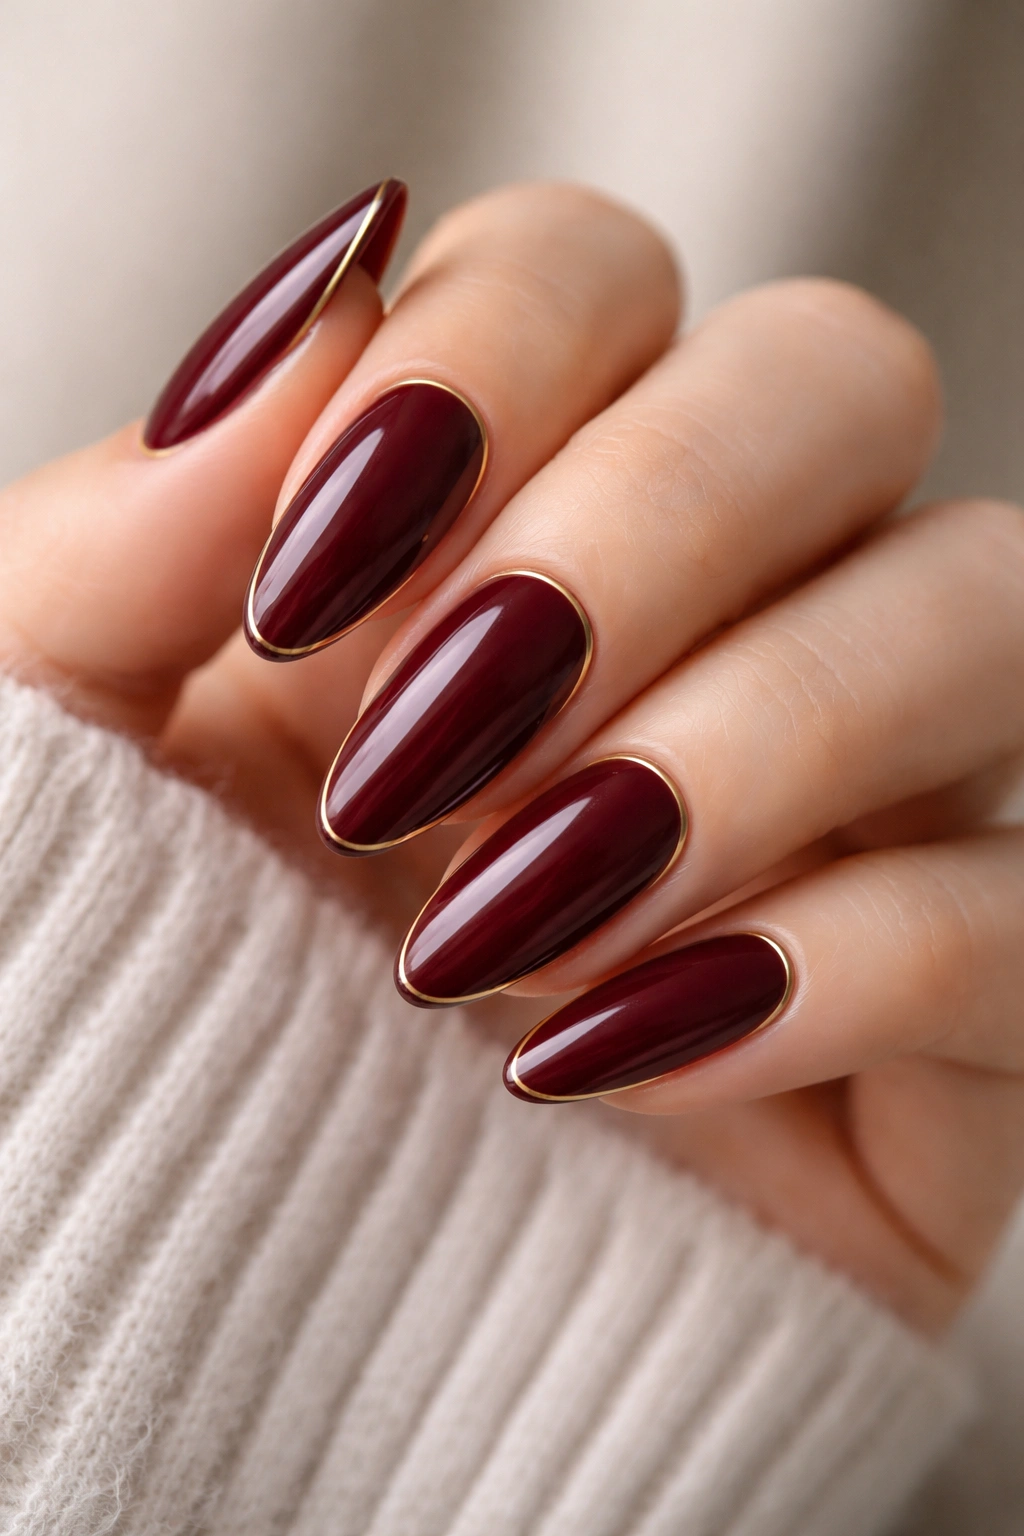
Thin gold outlines around burgundy long oval nails are a great option if you like detail but hate clutter. A narrow metallic line tracing the edge of the nail, or framing just the cuticle, gives the manicure a fitted, jewelry-like finish. It’s one of the cleanest ways to make burgundy look expensive.
The long oval shape helps because the lines follow a soft curve rather than an angular corner. That makes the whole design feel lighter. The gold should be thin enough to look deliberate and precise. If the line gets too thick, the manicure starts to read as decorative instead of tailored.
This is the kind of style that rewards steady hands. The concept is simple, but the execution needs care.
Best Use Cases
- A single gold line near the cuticle
- A metallic outline on accent nails only
- A glossy burgundy base
- Fine liner brush or striping tape for clean edges
I prefer this on medium-to-long ovals because the space lets the line sit neatly. On very short nails, the design can get crowded fast.
10. Burgundy Aura Nails
Aura nails have a soft center glow, and burgundy makes that effect feel richer than usual. Instead of a flat full-coverage color, you get a darker edge and a lighter, diffused center that looks almost airbrushed. On long oval nails, the soft gradient follows the shape naturally and gives the manicure some depth without needing extra decoration.
The key is tone. A burgundy aura design works best when the center is a muted rose, mauve, or softened berry shade rather than bright pink. The shift should be subtle enough that you notice the glow first and the technique second. That’s what makes it feel polished.
This look is a little more romantic than some of the others here, but not fussy. It has a soft-focus quality that reads expensive because it looks carefully blended.
How It Differs
Unlike a standard ombré, aura nails keep the brightest area concentrated in the middle. That gives the design a gentle halo effect.
A good setup includes:
- A dark burgundy perimeter
- A diffused rose or plum center
- Airbrush or sponge blending
- Glossy top coat to smooth the transition
It’s softer than chrome, warmer than black fade, and a little dreamy without getting sugary.
11. Burgundy Marble Swirls
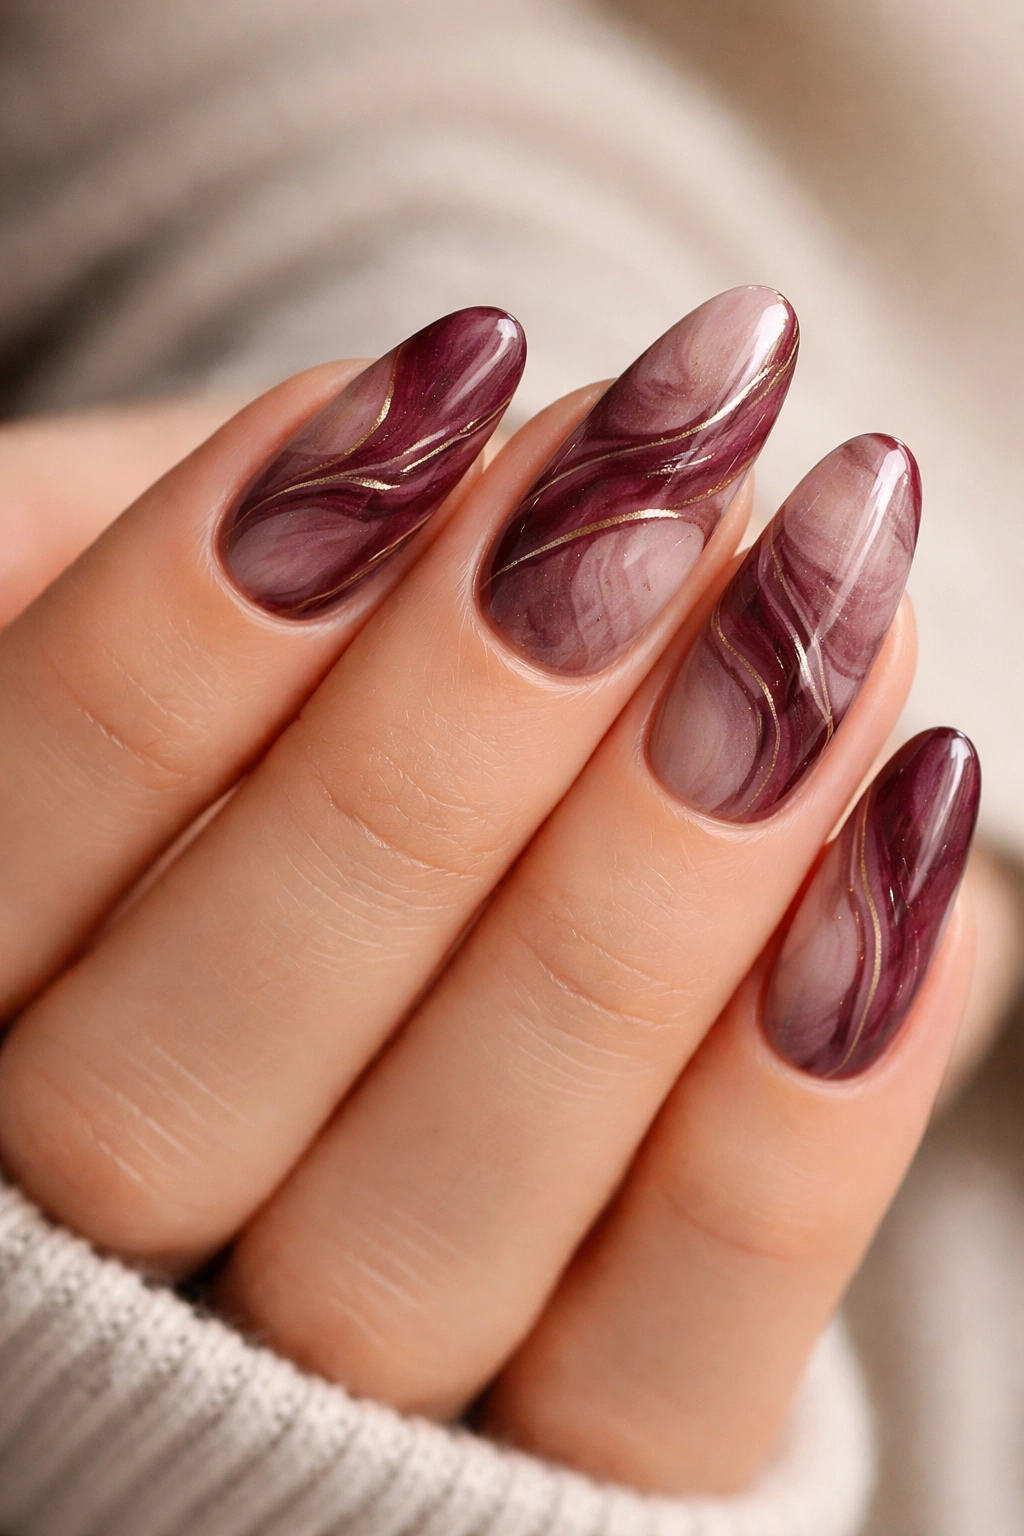
Marble swirls on burgundy nails can look incredibly rich if you keep the contrast under control. White marble on burgundy is common, but I actually prefer a warmer version: burgundy, taupe, deep rose, and a little soft gold veining. Long oval nails give the marble space to stretch, which keeps the design from looking like random streaks.
The thing with marble is restraint. Too many colors and it turns muddy. Two or three tones are enough. You want movement, not chaos. A translucent base helps too, because it lets the layers peek through instead of sitting on top of each other like stickers.
This design works well when you want something artistic but still grown-up. It’s decorative, yes, but not in a loud way.
Practical Notes
- Use thin, wispy lines, not thick ribbons
- Keep the swirls asymmetrical
- Add one faint metallic vein if you want extra depth
- Finish with high-gloss top coat to make the layers look wet
The marble effect looks best when every nail is slightly different. Matching too closely makes it feel manufactured.
12. Burgundy Glitter Fade
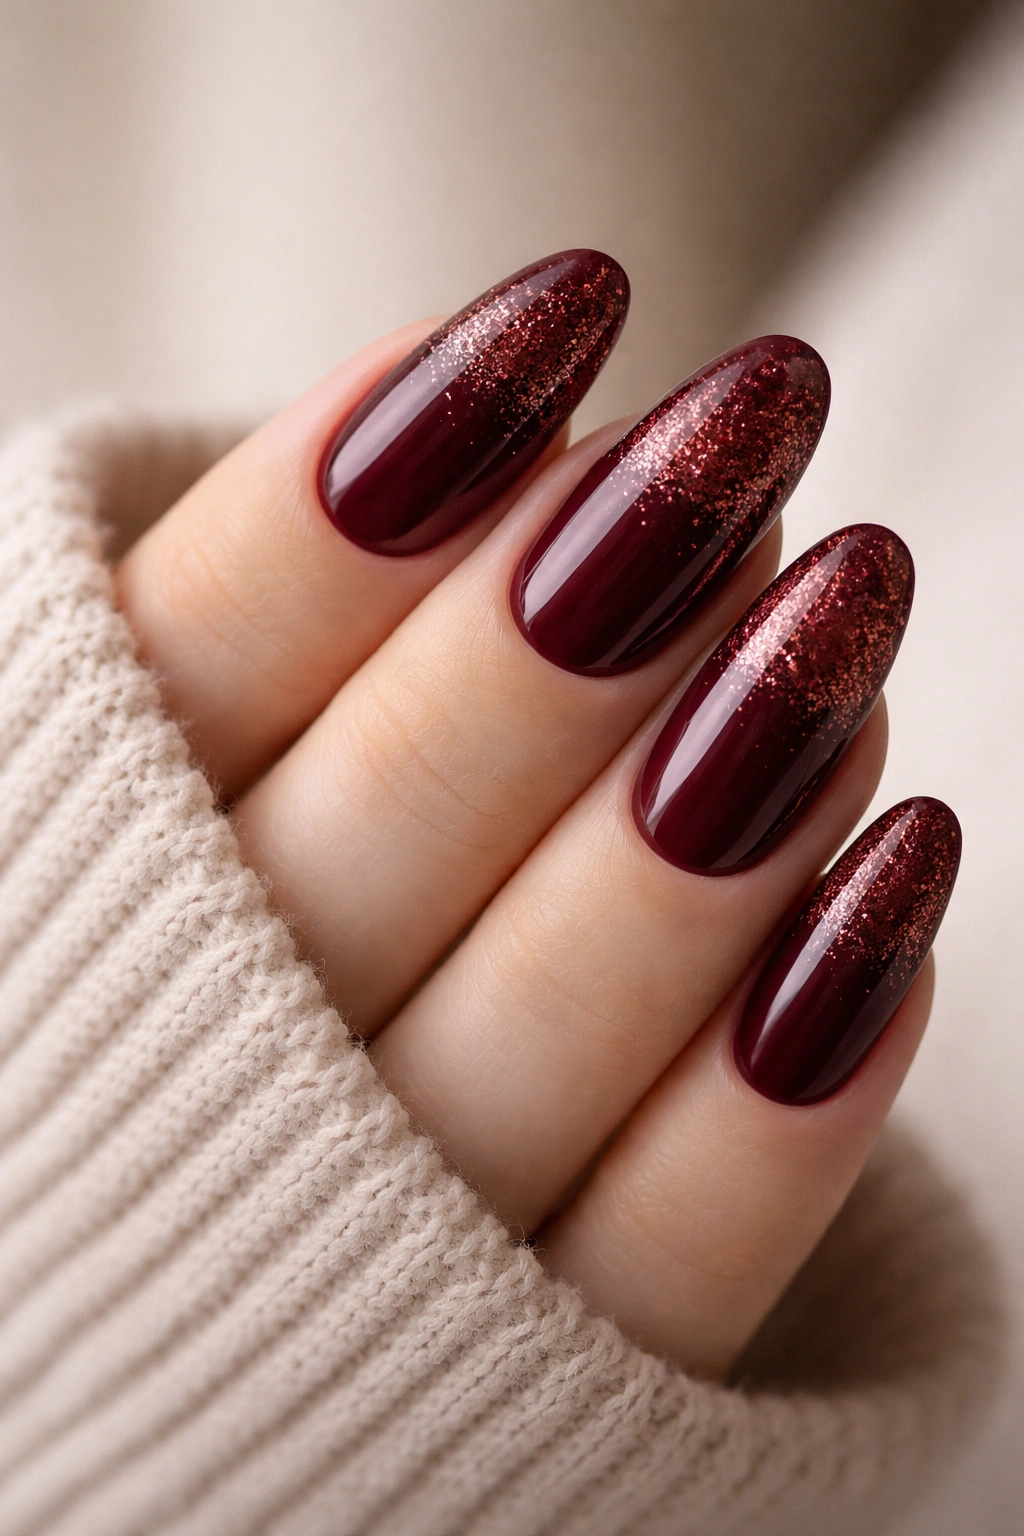
A glitter fade gives burgundy nails a bit of sparkle without covering the whole surface. The glitter usually starts dense near the tips or cuticle and tapers off until it disappears. On long oval nails, that fading pattern keeps the nail looking sleek while still giving you shine.
Fine glitter is better than chunky glitter here. Chunky pieces can fight the richness of burgundy and make the manicure feel busy. Fine red, copper, or champagne glitter lets the base color stay visible. The result is more elegant and easier to wear.
This is a strong choice if you want something evening-ready that still works in daylight. It catches movement without screaming for attention.
What Works Best
A smooth gradient usually looks better than random sparkle placement.
Try:
- Fine copper glitter over burgundy
- Dense concentration at the tips
- Clear or sheer base layers
- A sealed top coat to smooth texture
If you like a manicure that looks different from across the room and close up, this one does that job well.
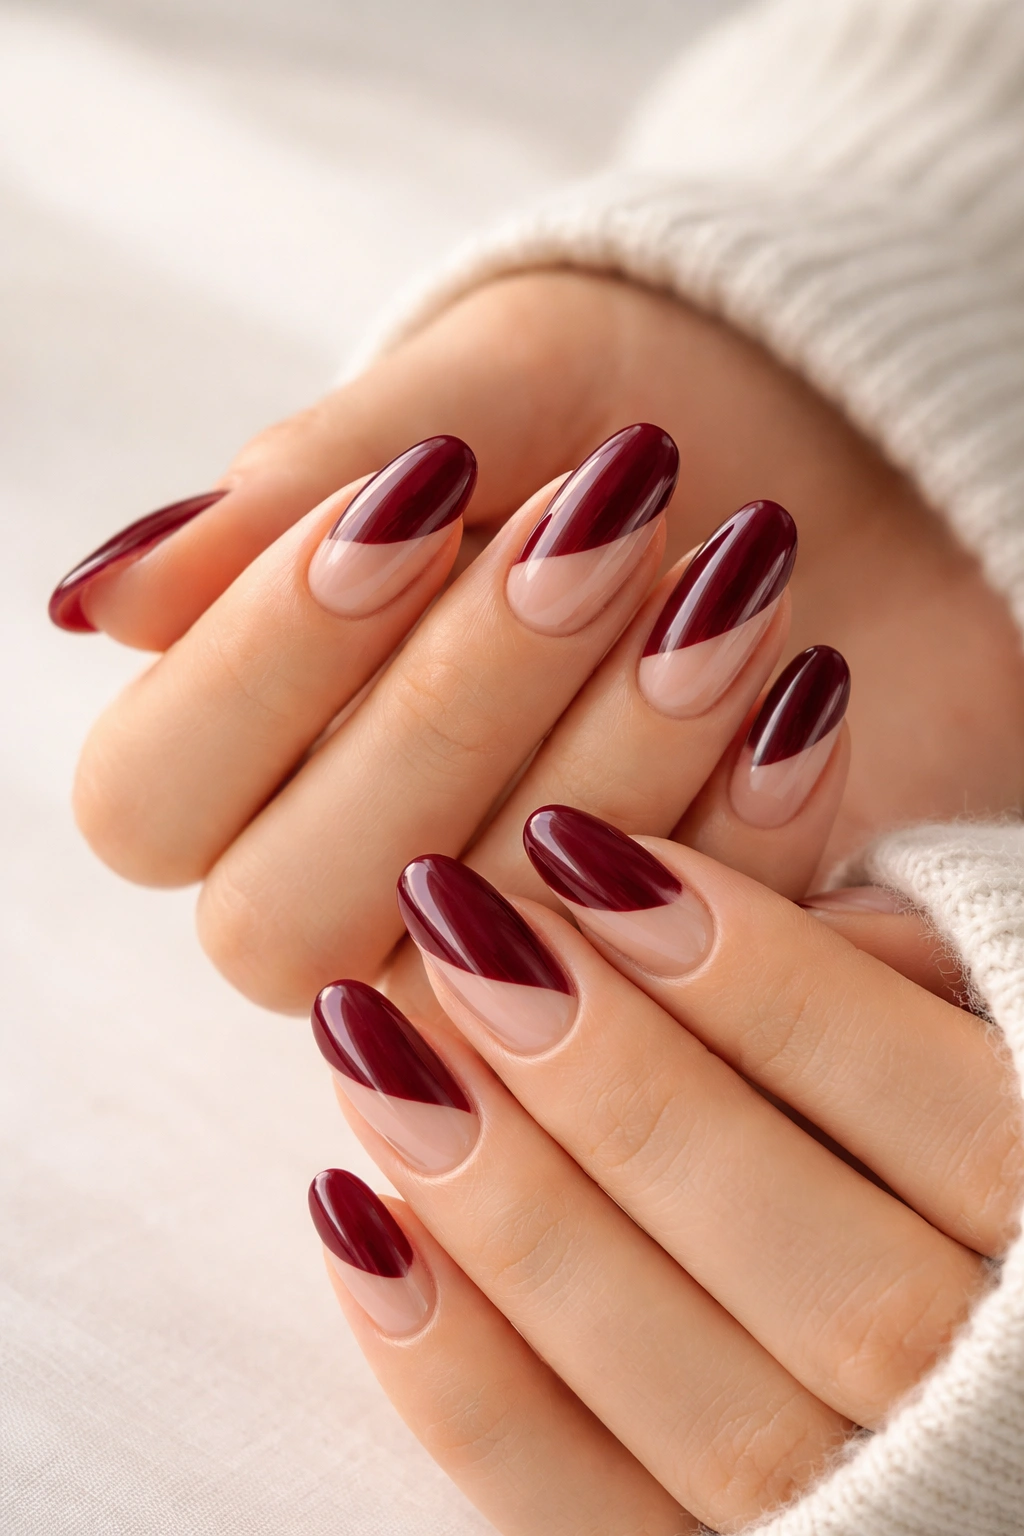
13. Burgundy and Nude Split Nails
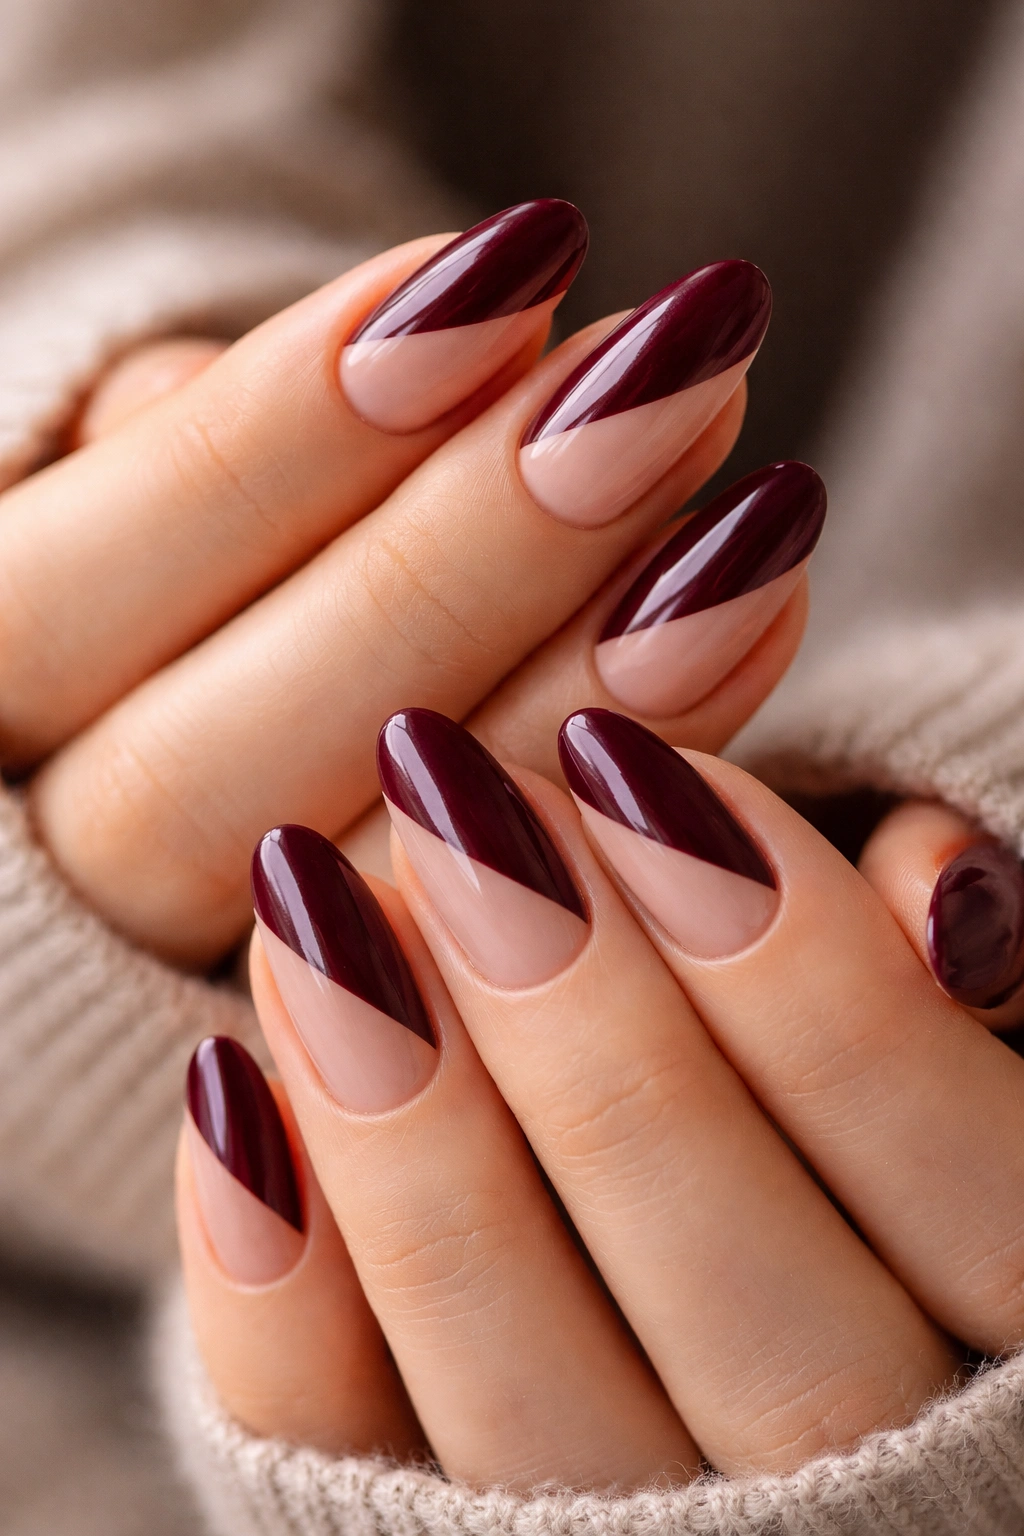
Split nails use two tones in one design, and burgundy plus nude is a crisp, expensive-looking combination. One half of the nail, or one diagonal section, stays nude while the other carries the burgundy. On long oval nails, the split line can curve gently with the nail shape, which makes the whole thing feel custom.
This is a good look if you want contrast without glitter, chrome, or heavy art. The nude softens the burgundy and keeps the manicure from going too dark overall. It also helps elongate the nail when the placement is done well.
Diagonal splits usually feel more dynamic than straight vertical ones, though both can work. A curved cutout near the cuticle can be elegant too, if you like a cleaner, more modern look.
Design Choices That Matter
- Choose a nude shade that matches your skin’s undertone
- Keep the burgundy side opaque and even
- Use thin striping tape for a sharp division
- Finish with gloss to keep the contrast polished
The sharper the line, the more refined this style looks. Sloppy edges ruin the effect fast.
14. Burgundy Cat Eye Nails
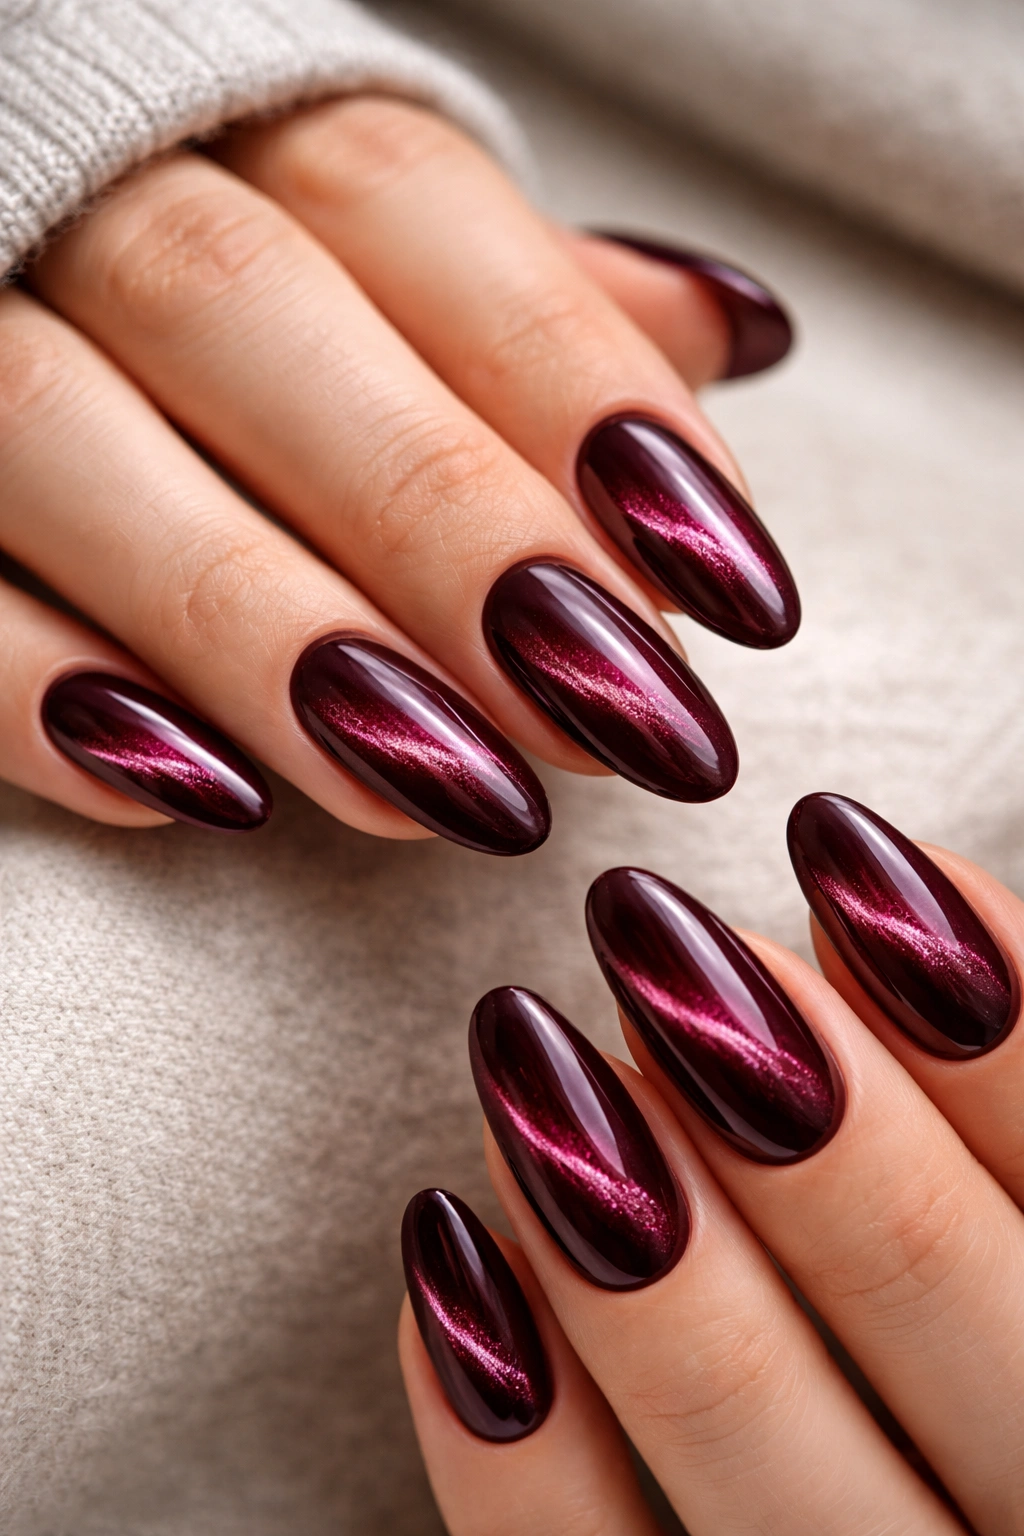
Cat eye burgundy has a magnetic, dimensional look that works beautifully on long oval nails. The reflective line shifts as your hand moves, which makes the manicure feel alive instead of flat. Burgundy is especially good for this finish because the darker base gives the shimmer room to show off.
The look can lean reddish, plum, or nearly smoky depending on the magnetic polish and the angle of the magnet. That’s part of the appeal. It feels a little mysterious, but not in a costume-y way. Long oval nails help because the narrow shape lets the shimmer stretch along the center like a ribbon.
If you’ve ever wanted a manicure that looks different every time you tilt your hand, this is the one.
What to Watch For
- Use a strong magnetic polish
- Hold the magnet close to the nail before curing
- Keep the base coat even and smooth
- Try a diagonal cat-eye line for more length
This design needs patience. Rush the magnet step and you lose the effect.
15. Burgundy Nails with Negative Space
Negative space designs leave part of the nail bare, and that open area can make burgundy feel lighter and more modern. On long oval nails, a bare crescent near the cuticle or a transparent stripe down the center keeps the manicure from looking too dense. The color still reads rich, but the breathing room matters.
This is one of the best ways to wear dark polish if you like a cleaner feel. Too much burgundy on long nails can sometimes look heavy. Negative space solves that by breaking up the surface and making the color feel deliberate instead of all-consuming.
The design can be simple or graphic. Either way, the bare sections need to be clean. Any unevenness shows immediately because your eye is drawn right to the contrast.
Simple Formats to Try
- A clear crescent at the cuticle
- A diagonal burgundy sweep with a nude gap
- Half-and-half placement on accent nails
- Thin burgundy borders around clear sections
This style feels a little art-school and a little polished. I like that mix.
16. Burgundy Velvet and Gold Swirl Mix

If you want one design that feels rich, dramatic, and still wearable, burgundy velvet with gold swirls is the showpiece. The matte burgundy base gives you that soft, plush finish, then thin gold swirls layer on top like jewelry lines. On long oval nails, the combination looks balanced because the shape keeps the design graceful.
The swirls should be light and fluid, not dense. You want them to skim the surface, almost like drawn ribbon. A tiny amount of negative space between the swirls keeps the manicure from feeling crowded. This is the kind of look that gets mistaken for complicated work, even when the details are pretty simple.
I’d save this one for when you want the manicure to do more of the talking. It has presence.
Best Ways to Wear It
- Use a matte burgundy base
- Add thin gold swirls on one to three nails
- Keep the rest of the nails solid burgundy
- Seal carefully so the gold doesn’t chip at the edges
The finish matters here. If the matte surface gets shiny from wear, the whole effect changes, so a good top coat helps.
How to Keep Burgundy Long Oval Nails Looking Clean
Burgundy is forgiving in color and ruthless in execution. Smudges, uneven edges, and chipped tips show faster than you’d like, especially on a dark shade. That’s not a flaw in the color. It’s the nature of the pigment.
A good manicure prep makes a huge difference. Push back the cuticles cleanly, buff lightly, and wipe away dust before polish goes on. On long oval nails, tiny shaping mistakes are more obvious because the eye follows the curve all the way down. If one side is a touch flatter than the other, you’ll see it. Not maybe. You will.
Also, don’t go too long without sealing the free edge. Burgundy chips can look harsh, and a single bare spot near the tip can ruin an otherwise polished set. A careful top coat, refreshed every few days, helps the manicure keep its depth.
Final Thoughts
Burgundy long oval nails work because they combine two things that rarely fail together: a strong color and a soft shape. The result feels rich without needing much decoration, and that’s a relief. Not every manicure has to shout.
If you’re choosing between styles, start with what fits your habits. Glossy wine if you want easy elegance. Matte burgundy if you like texture. Chrome, foil, or cat eye if you want something more dramatic. The shape will do a lot of the heavy lifting either way.
