

Short oval nails are one of those shapes people underestimate. They’re tidy, easy to wear, and far less fussy than long extensions, but they still give you enough canvas to do something fun. Butterfly nail art works especially well here because the motif can be tiny, scattered, soft-edged, or bold in a way that does not swallow the whole nail.
That matters more than it sounds. A butterfly design on short oval nails has to be edited down a little. The wings need breathing room. The spacing has to make sense. And if the art is too bulky, the nail starts to look crowded instead of cute. Get the scale right, though, and the result is sharp, feminine, and surprisingly versatile.
Butterfly nails also sit in a sweet spot between playful and polished. You can make them sweet with pastels, sleek with black linework, dreamy with chrome, or a little edgy with dark French tips and metallic accents. The oval shape helps every version. It softens the edges and keeps the design from feeling boxy.
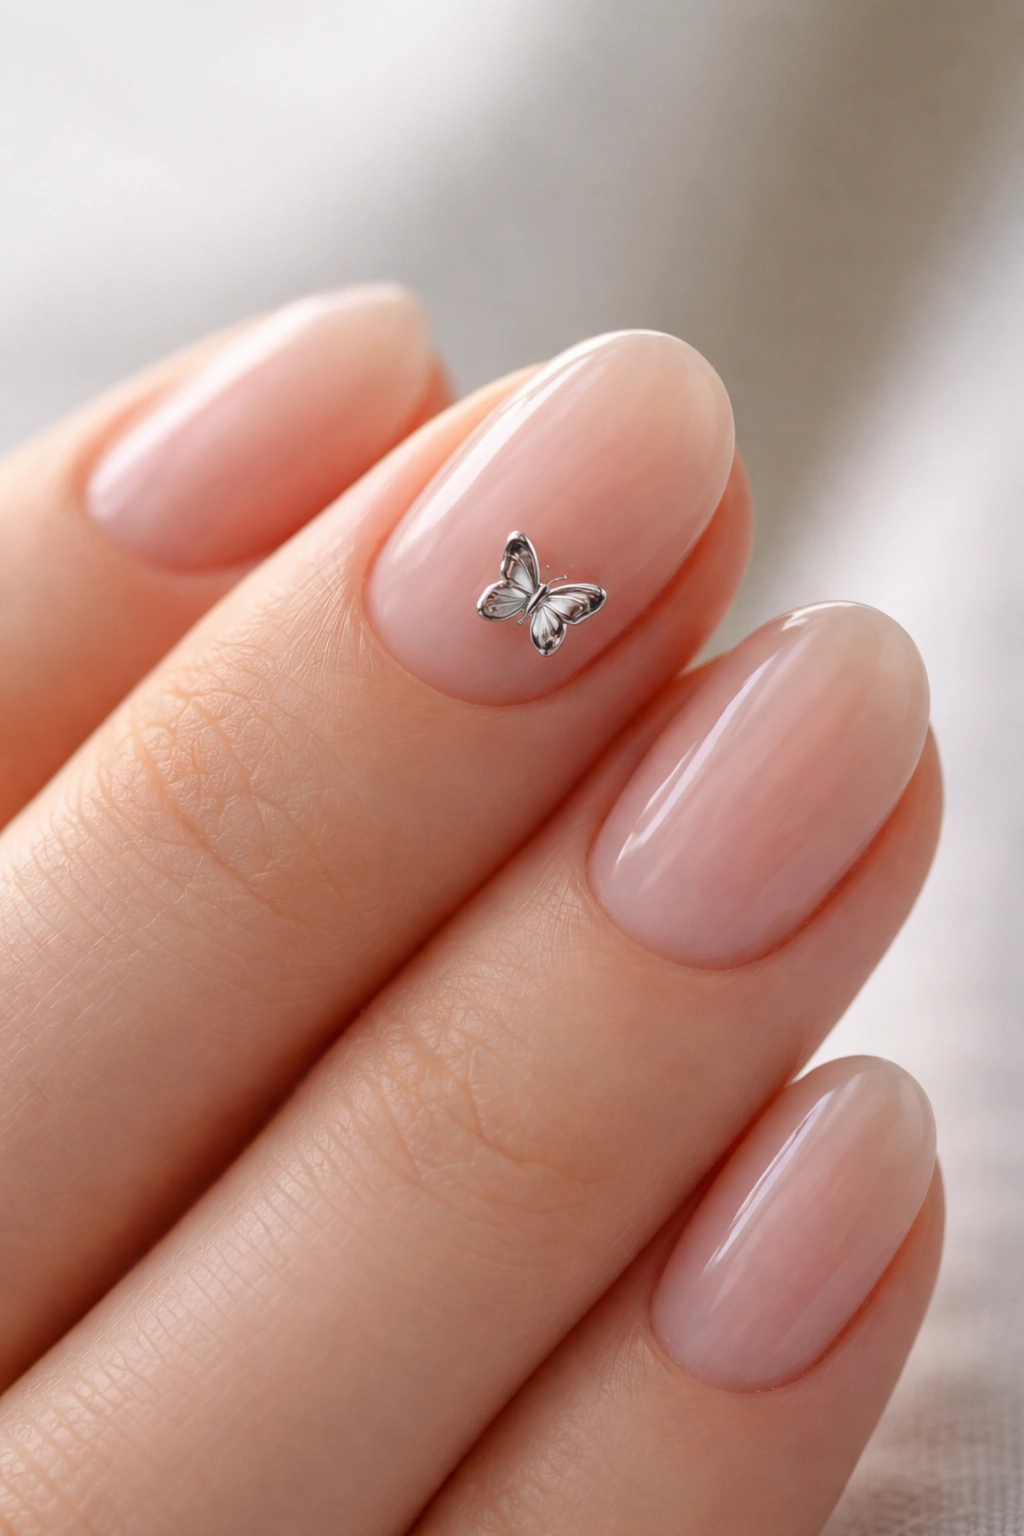
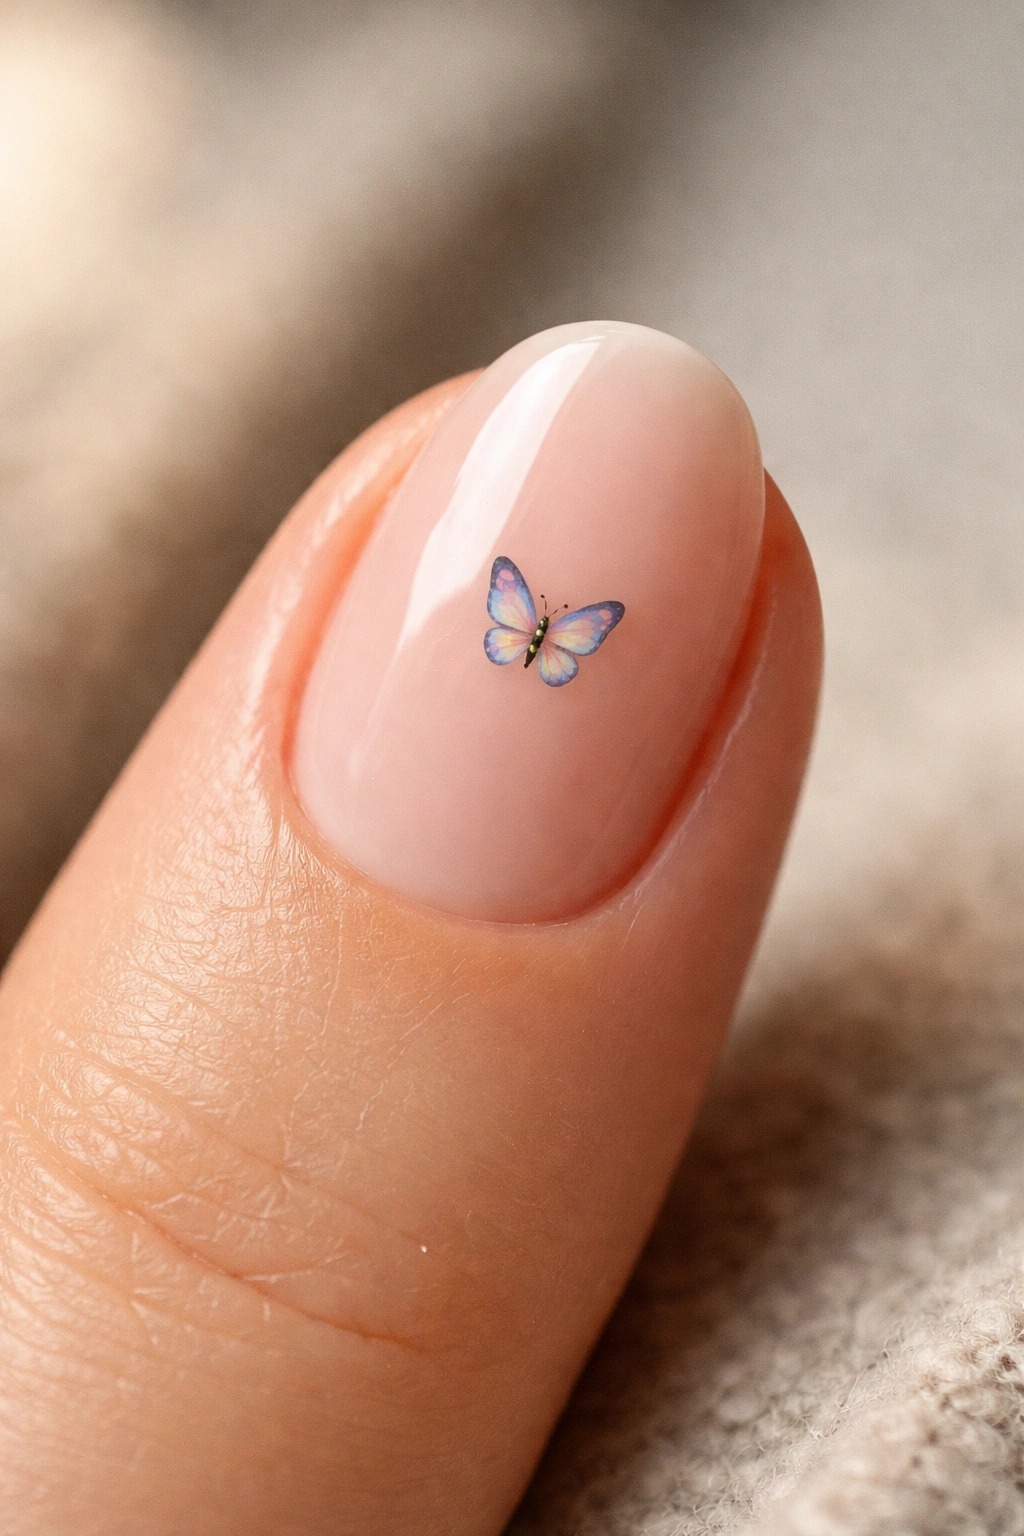
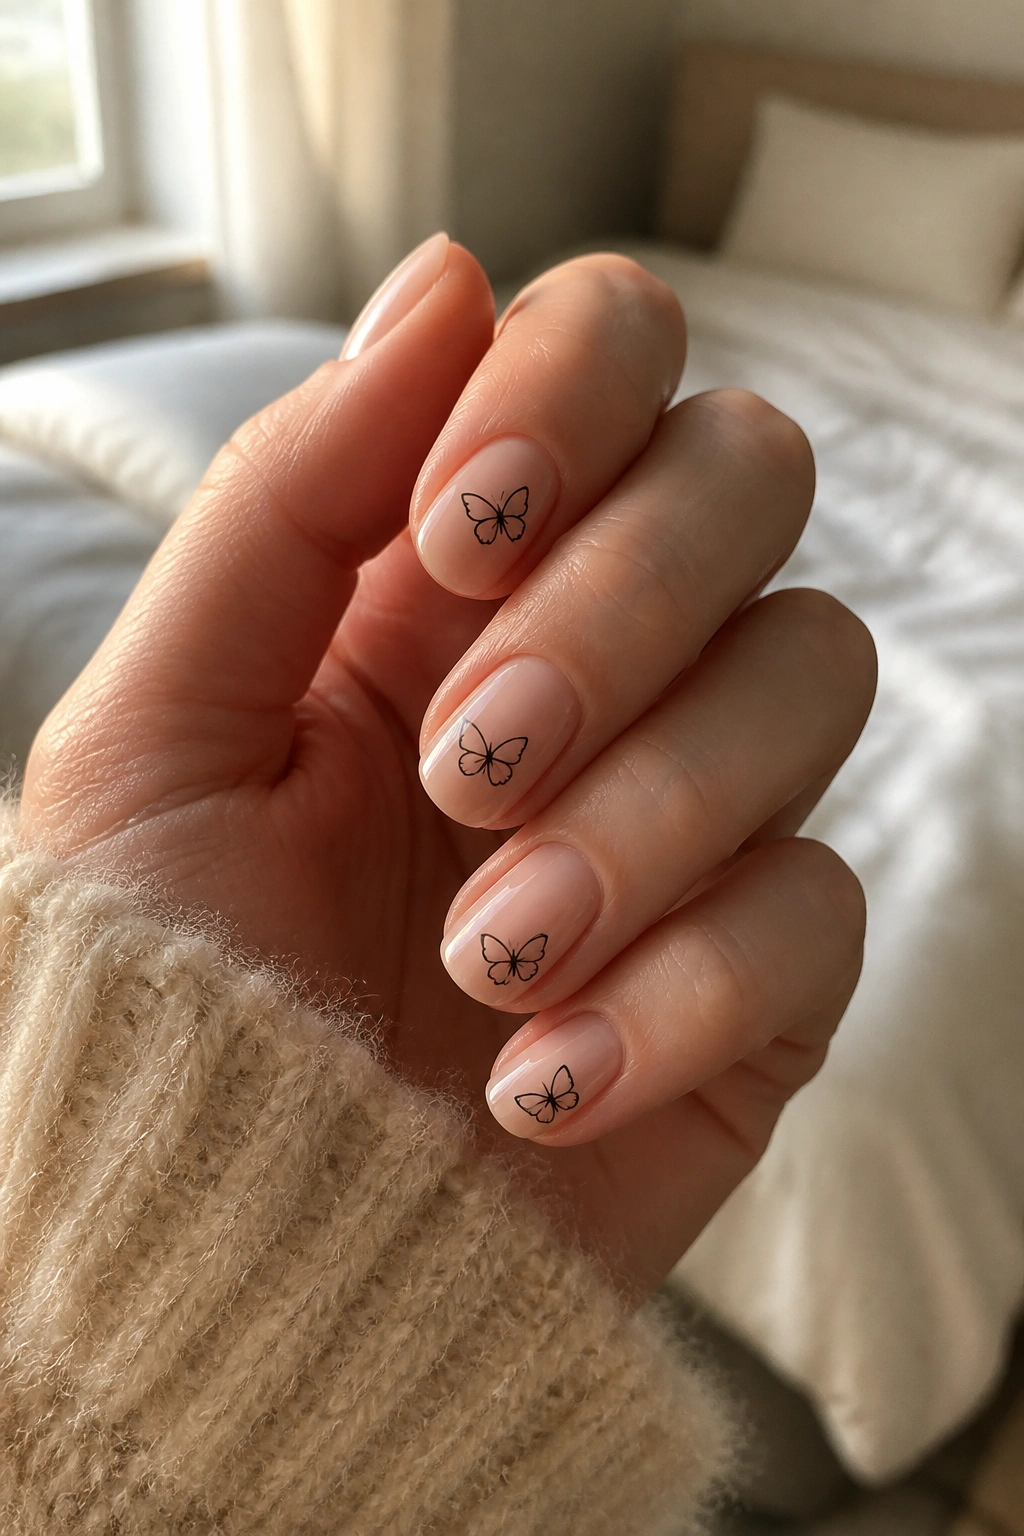
1. Tiny Butterflies on a Nude Sheer Base
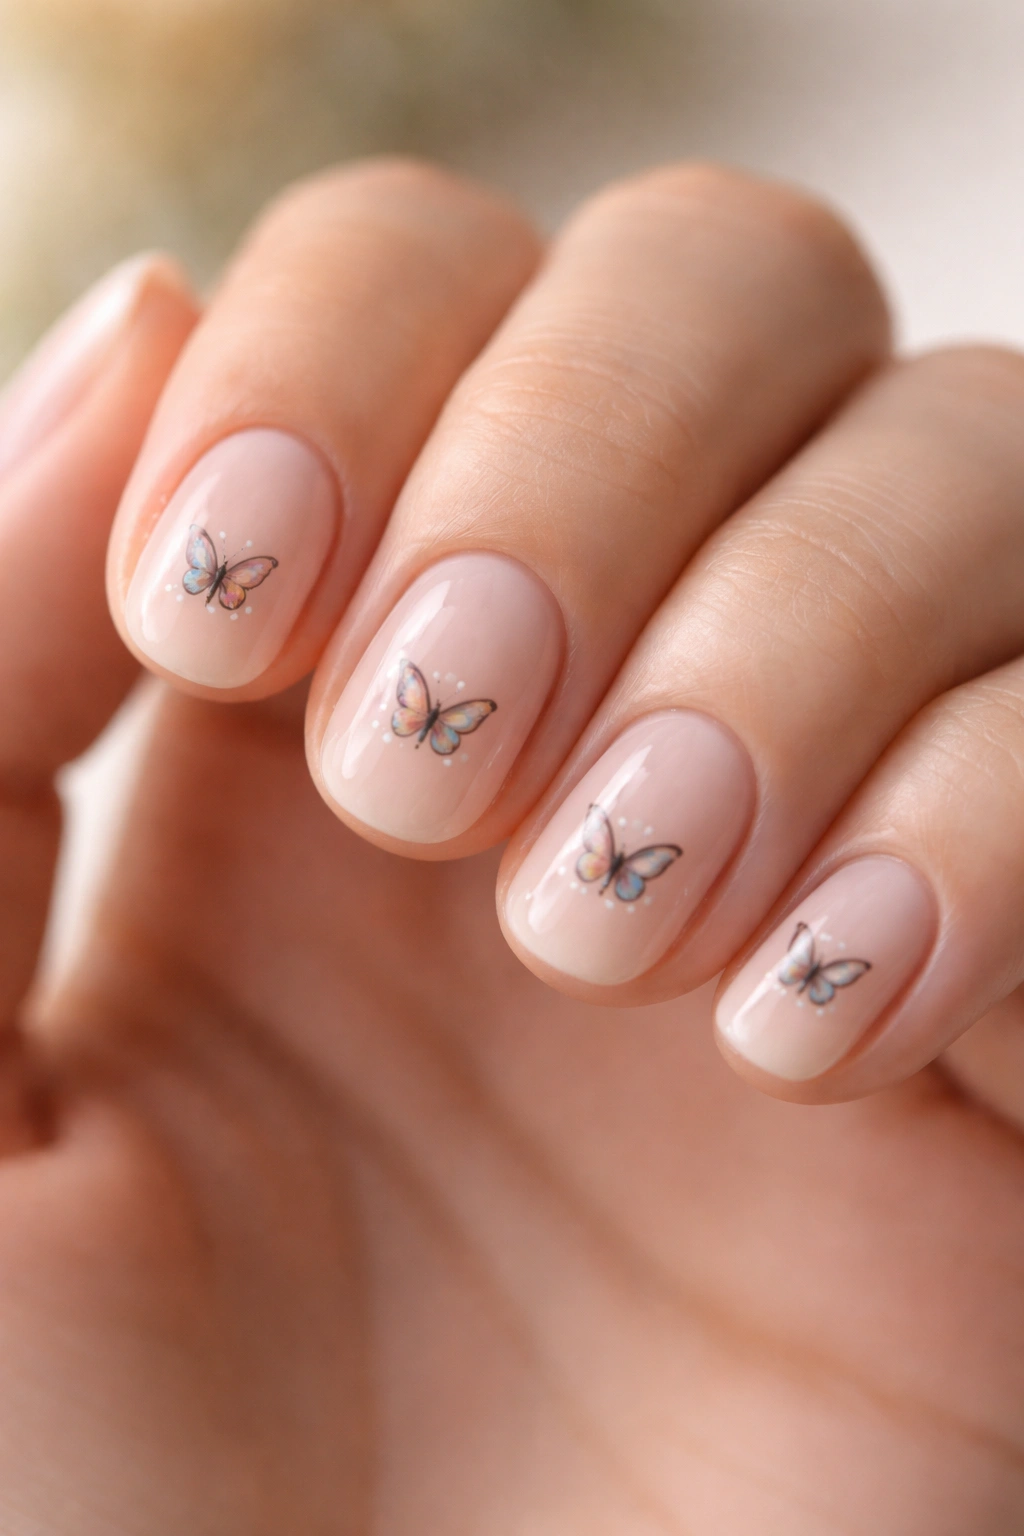
A sheer nude base is the easiest way to make butterfly nail art feel clean on short ovals. The nail stays airy, which gives even the smallest butterfly room to stand out. I like this version because it looks intentional instead of crowded, and that’s the real trick on short nails.
Why it works on short ovals
Short oval nails already have a soft shape, so a tiny butterfly stamped or hand-painted near the center or upper corner of the nail looks natural. You do not need a full-wing spread to make the idea read. One well-placed butterfly per nail, or even two accent nails, is enough.
Keep the butterflies small. Around 3 to 5 mm across is usually the sweet spot. Bigger than that, and the design starts fighting the nail shape. A sheer pink-beige, milky nude, or slightly peachy base keeps the whole look delicate.
Best details to ask for
- A translucent nude or jelly base
- Fine black or chocolate-brown linework
- One butterfly per accent nail
- A glossy top coat for a clean finish
Best for: anyone who wants butterfly nail art without committing to a loud design.
2. Micro French Tips with Butterfly Accents
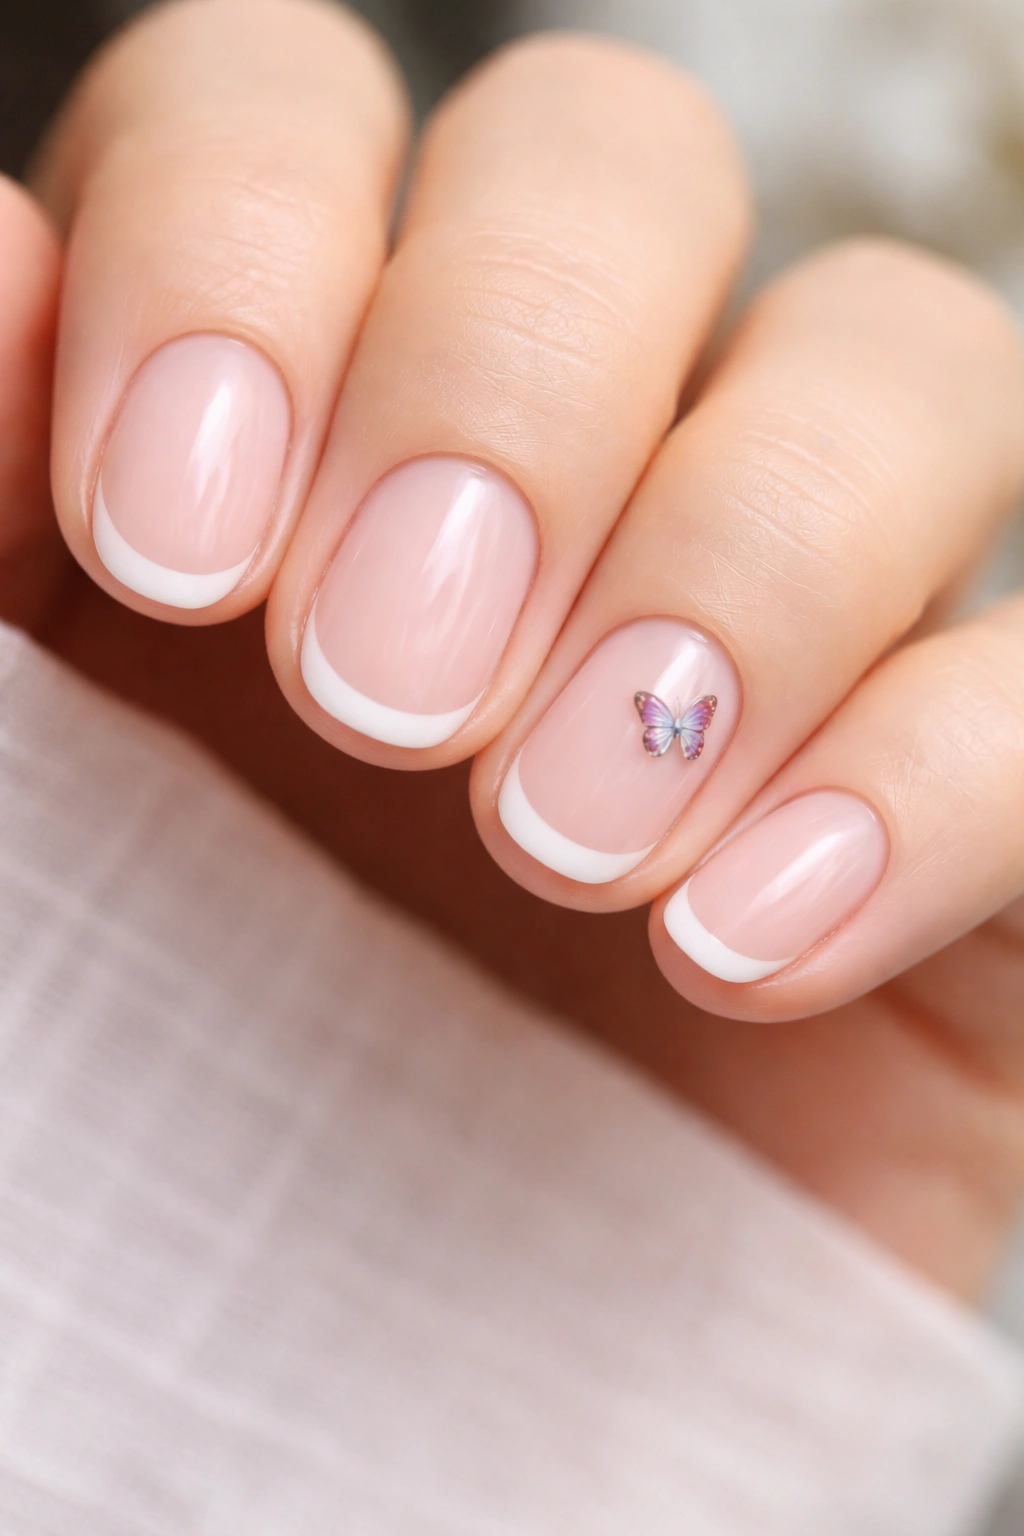
This one is quietly smart. Instead of putting the butterfly in the middle of the nail, you keep the French tip tiny and let the butterflies float near the cuticle or sidewall. The short oval shape makes this feel balanced, not busy.
A micro French tip is especially useful if you like structured nails but still want something soft. On short ovals, a tip line that’s about 1 to 2 mm wide is enough. Add a small butterfly on one or two nails and the whole set feels custom rather than copied from a salon chart.
What makes it different
The contrast is what sells it. The tip gives the nail a crisp edge, while the butterfly keeps it from looking too severe. I’ve always liked this pairing because it works in both neutral and brighter palettes. White tips with black butterflies look classic. Pink tips with lavender wings feel sweeter.
How to wear it
- Use nude, blush, or milky pink as the base
- Paint very thin French tips in white, black, or soft color
- Place butterfly accents on ring fingers or index fingers
- Finish with a high-shine top coat so the edges stay neat
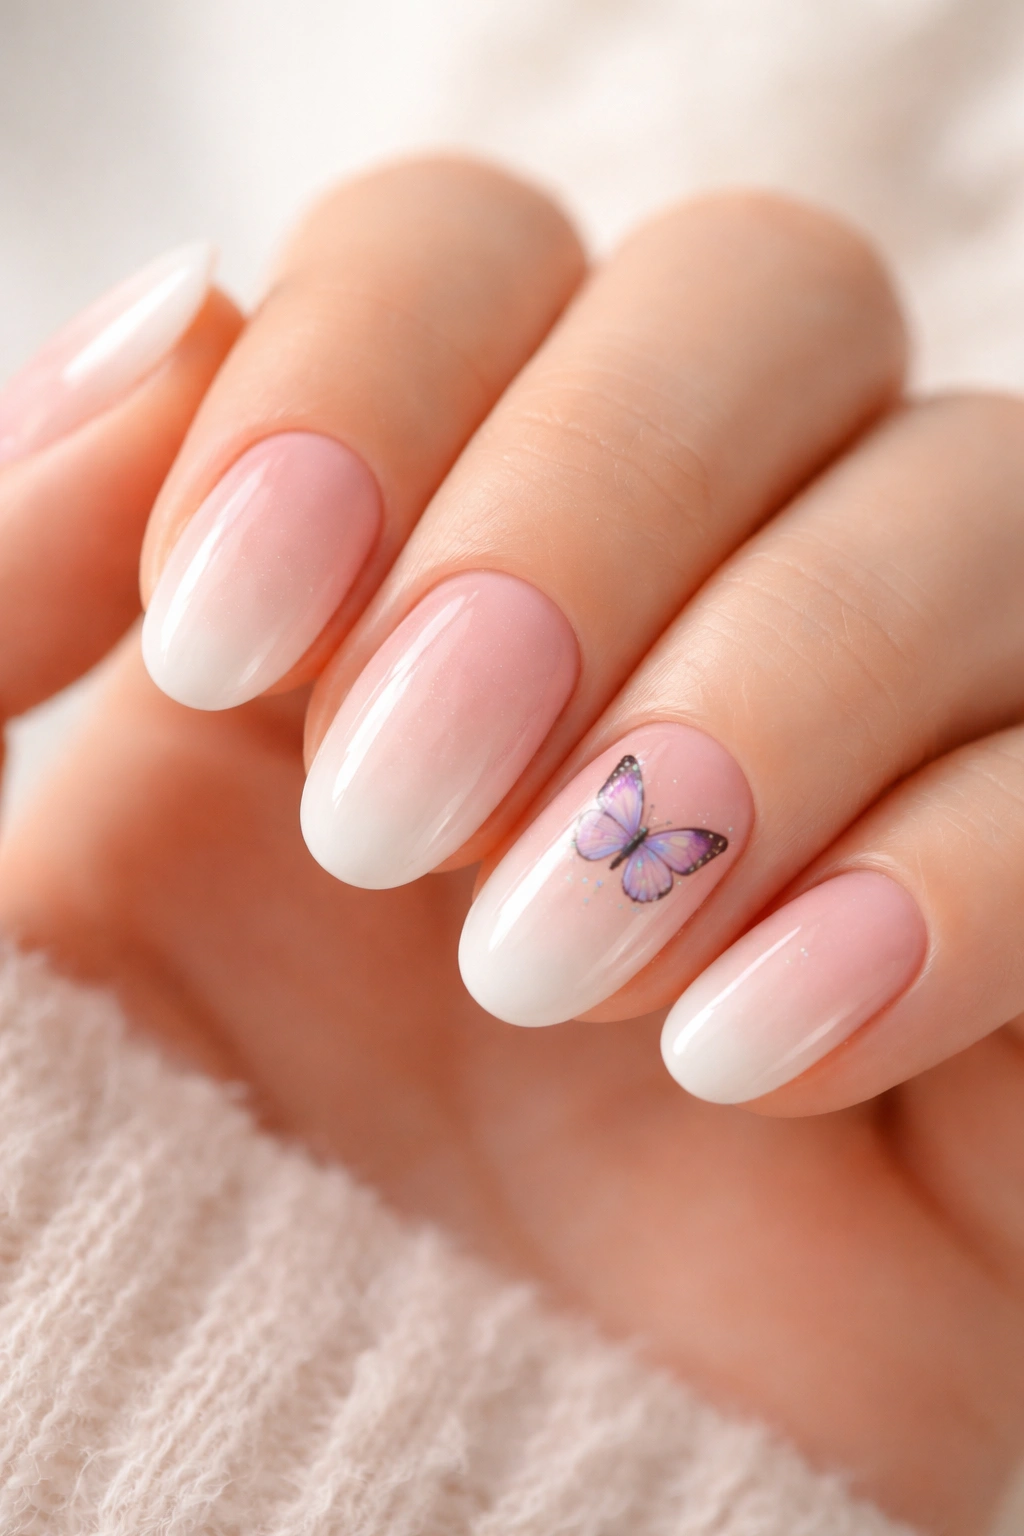
3. Pastel Butterfly Wings Across a Milky Base
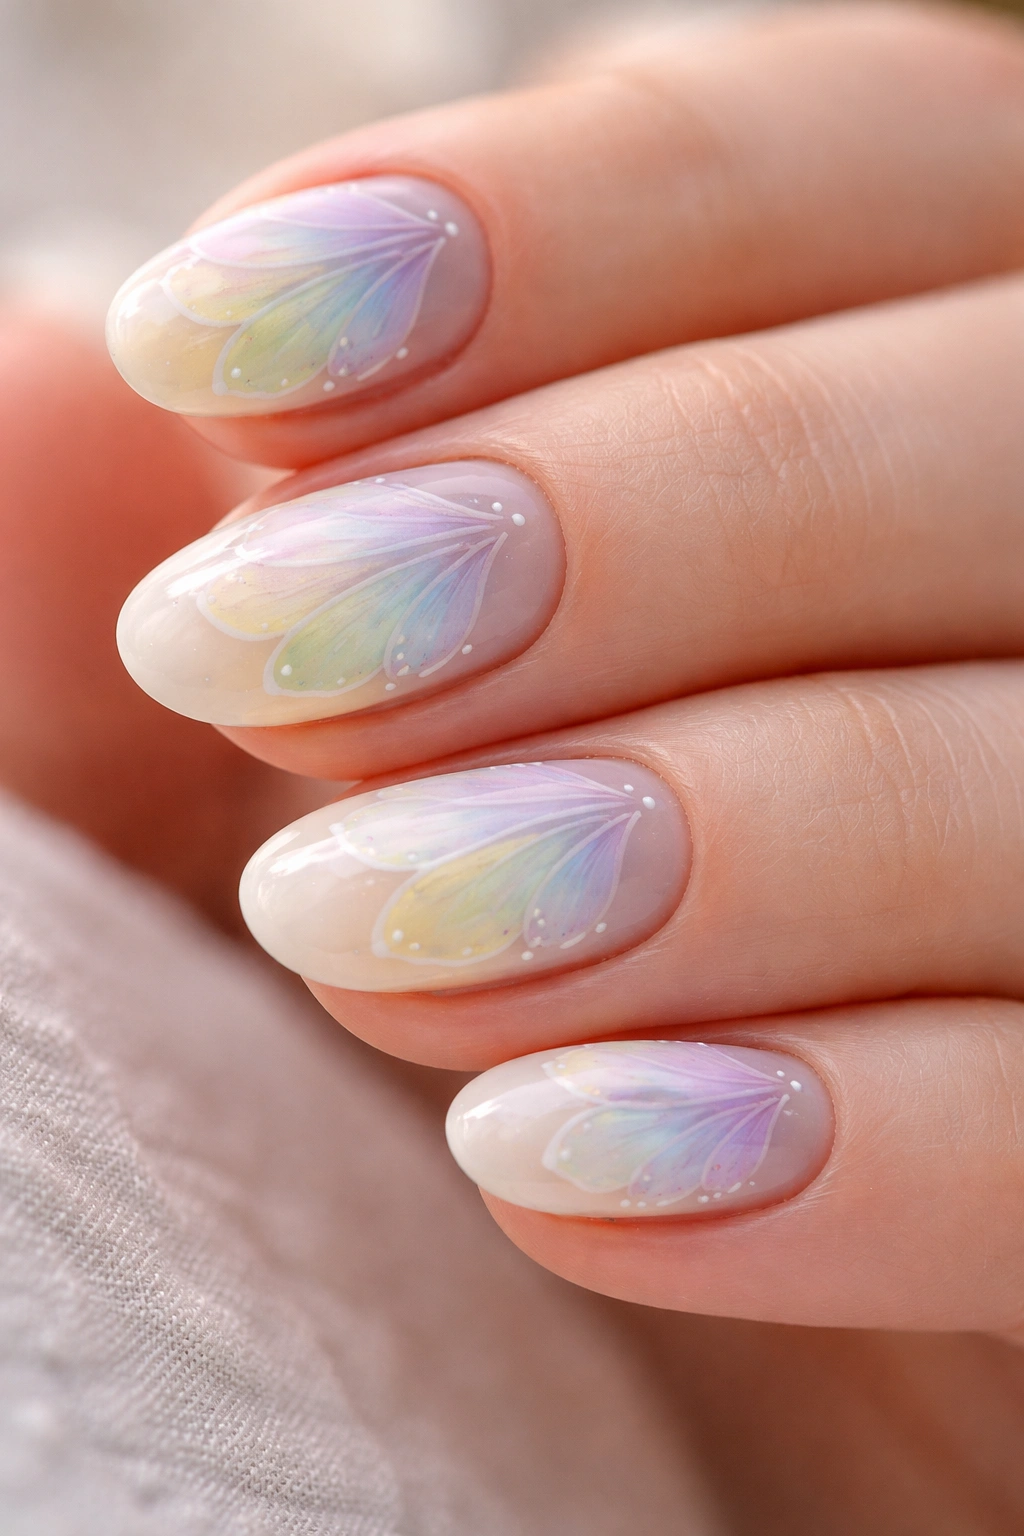
Pastels and butterflies are an obvious pair, but that does not make them boring. On short oval nails, pastel wing art can be surprisingly refined if the colors stay soft and the lines stay light. Think mint, lilac, baby blue, and pale lemon used sparingly.
The milky base matters here. A pure white base can feel harsh on short nails, while a milky sheer base lets the pastel tones float on top. It gives the design a soft-focus look that feels almost airbrushed, even when the art is hand-painted.
The science behind the softness
Butterfly wings are naturally layered and semi-transparent, so pastel polish mimics that effect well. If you use two-toned wings with a slightly darker outline, the design reads more clearly from a normal viewing distance. Without that outline, the colors can blur together on a short nail.
Best color pairings
- Lilac and soft blue
- Peach and cream
- Mint and pale pink
- Butter yellow and sheer nude
A little contrast helps. Too much sameness and the design disappears.
4. Black Line Butterflies on Clear Negative Space
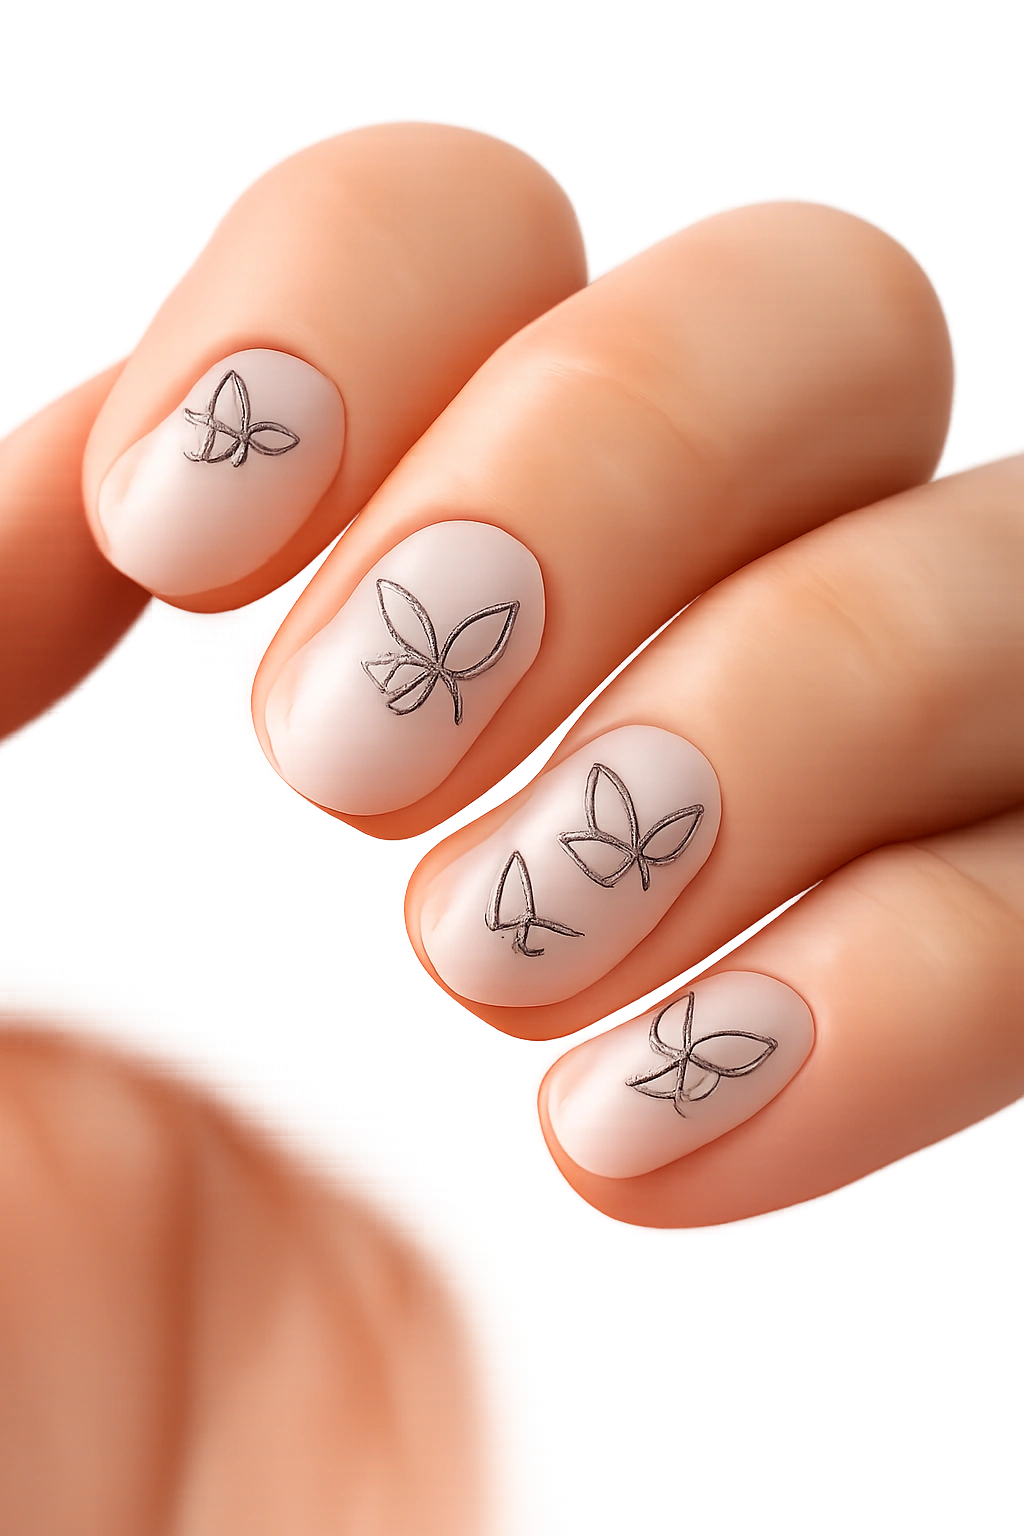
If you want butterfly nail art that feels modern instead of sugary, negative space is the move. A clear or semi-clear base leaves parts of the natural nail visible, and the butterflies are drawn in crisp black lines on top. The result is sharp, graphic, and easy to wear.
Short oval nails are excellent for this because the rounded edge keeps the design from looking too harsh. You get the structure of line art with the softness of the oval shape. That combination is much better than people expect.
What to watch for
The linework has to be thin. Thick outlines make the butterfly look clumsy on a smaller nail bed. A fine detail brush or a good stamping plate helps here. If you’re doing this at home, keep the wings slightly open rather than fully spread. It gives the design more air.
This style is also one of the easiest to refresh. Chips are less obvious because the negative space hides small imperfections. Nice bonus.
Try it with
- Clear base coat or jelly nude
- Fine black line butterflies
- One accent nail per hand, or a full set with tiny motifs
- Glossy top coat for definition
5. Chrome Butterfly Charms on Short Ovals
Chrome changes the whole mood. A butterfly with a metallic finish can look delicate or dramatic depending on the base underneath. On short oval nails, I think silver chrome usually works best because it reflects light without making the nail look bulky.
This is the design I’d pick if you want something with a little shine that still feels wearable. It pairs well with sheer pink, taupe, soft lilac, or even a pale gray base. The butterfly can be painted in chrome powder, foiled, or outlined in metallic gel.
Why it reads well on a small nail
Chrome has a way of catching the eye fast, so you do not need a large design. A single butterfly near the center or cuticle is enough. If you try to cover the whole nail with reflective art, the short oval shape can start to feel overloaded.
Good placement options
- One chrome butterfly per ring finger
- Tiny chrome outlines on every nail
- A chrome butterfly over a sheer nude base
- Mixed chrome and matte finishes for contrast
Matte chrome can be a little finicky, but it looks expensive when done cleanly.
6. Butterfly French Fade with Soft Gradient Ends
A French fade gives you a softer version of the classic tip, and butterflies fit right into that haze. On short oval nails, the gradient can run from a blush base into white, lilac, or peach near the edge, then a tiny butterfly sits over the fade. It looks pretty without being loud.
I prefer this over a hard French line for short nails because the fade makes the nail look longer. That matters. A blunt tip can shorten the visual line of the nail if you are not careful, while a blend keeps everything lifted.
How to make the fade look clean
Use a sponge or an airbrush effect if your nail tech offers it. The gradient should be soft enough that you cannot spot the transition line from a normal distance. Then add the butterfly after the fade dries, not before. If you place the art too early, the blending can muddy it.
Best color families: blush-to-white, nude-to-lilac, peach-to-cream.
That’s the whole trick. Keep the fade quiet, then let the butterfly do the talking.
7. 3D Butterfly Appliqués on a Minimal Base
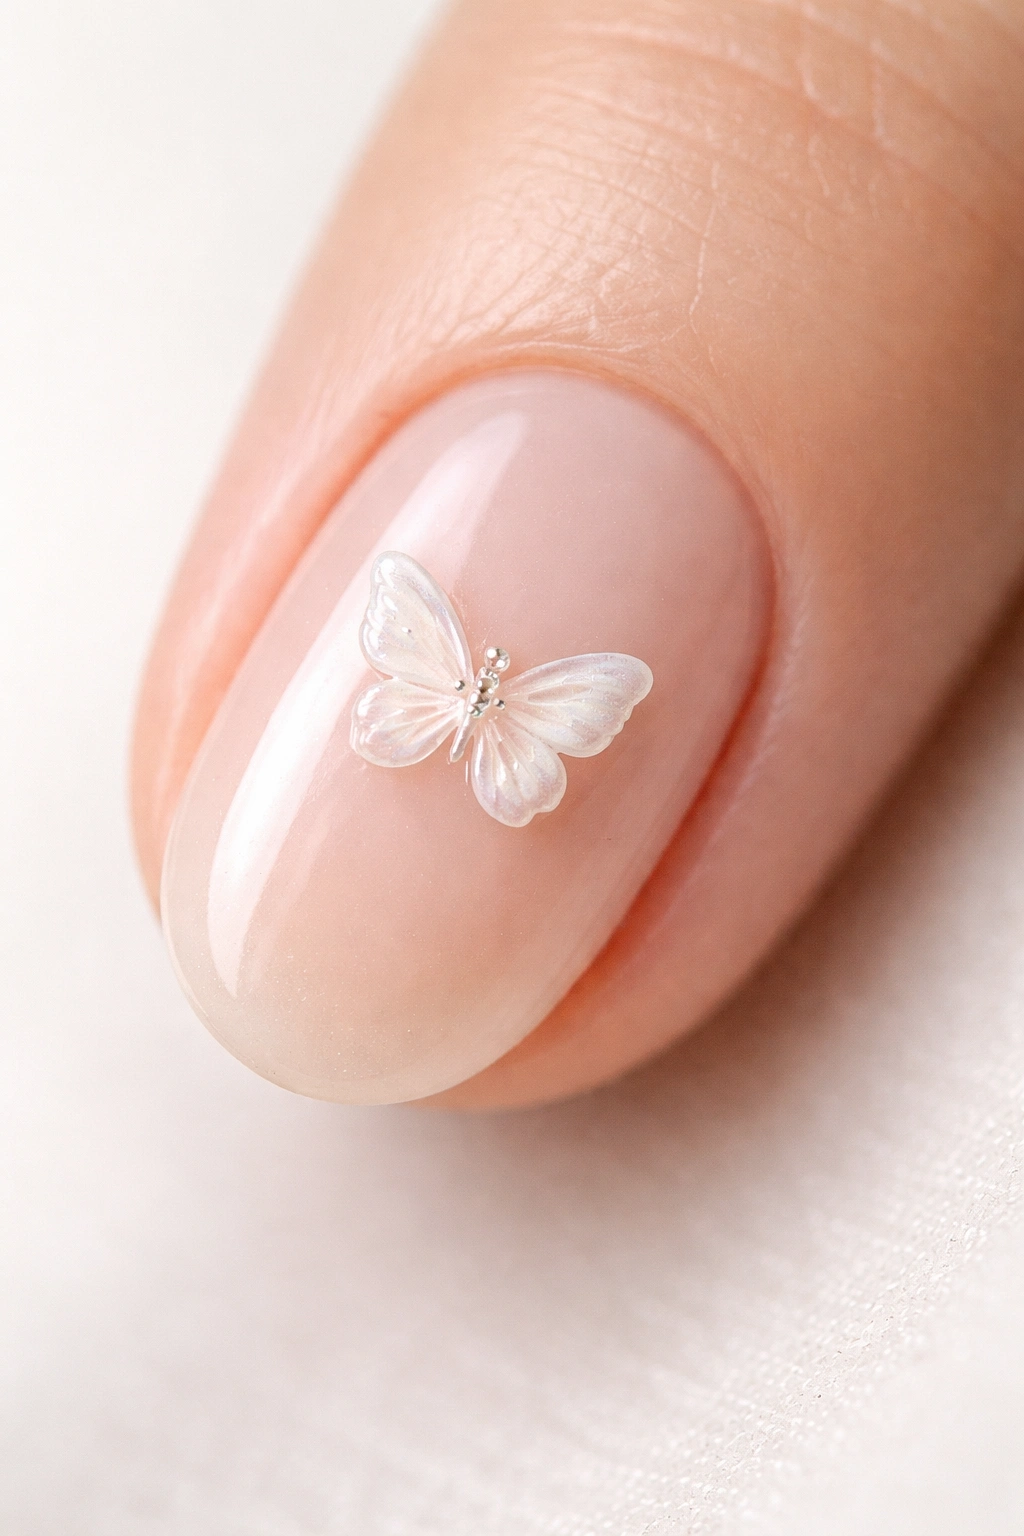
This one is not for people who hate texture. A 3D butterfly appliqué gives the nail a raised, almost jewelry-like finish, and short oval nails can absolutely handle it if the rest of the set stays minimal. One appliqué per hand is often enough.
The base should be simple. Sheer nude, milky pink, or a barely-there peach works best. If the base is already busy, the 3D detail starts to feel cramped. A small raised butterfly near the center or cuticle has more impact than a larger one shoved near the tip.
What makes it wearable
The scale. Again, scale. On short ovals, a 3D piece that sits too high can catch on hair or clothing. Ask for a flatter appliqué or one that tapers into the nail rather than sitting like a sticker. Thin edges matter.
A few ways to use it
- Accent nails only
- One butterfly on the ring finger of each hand
- Pair with gloss, not matte, so the texture reads cleanly
- Keep jewelry simple so the nail remains the focal point
This is the kind of design that looks best when you stop one step before too much.
8. Butterfly Wing Tips in a Soft Almond-Style Oval
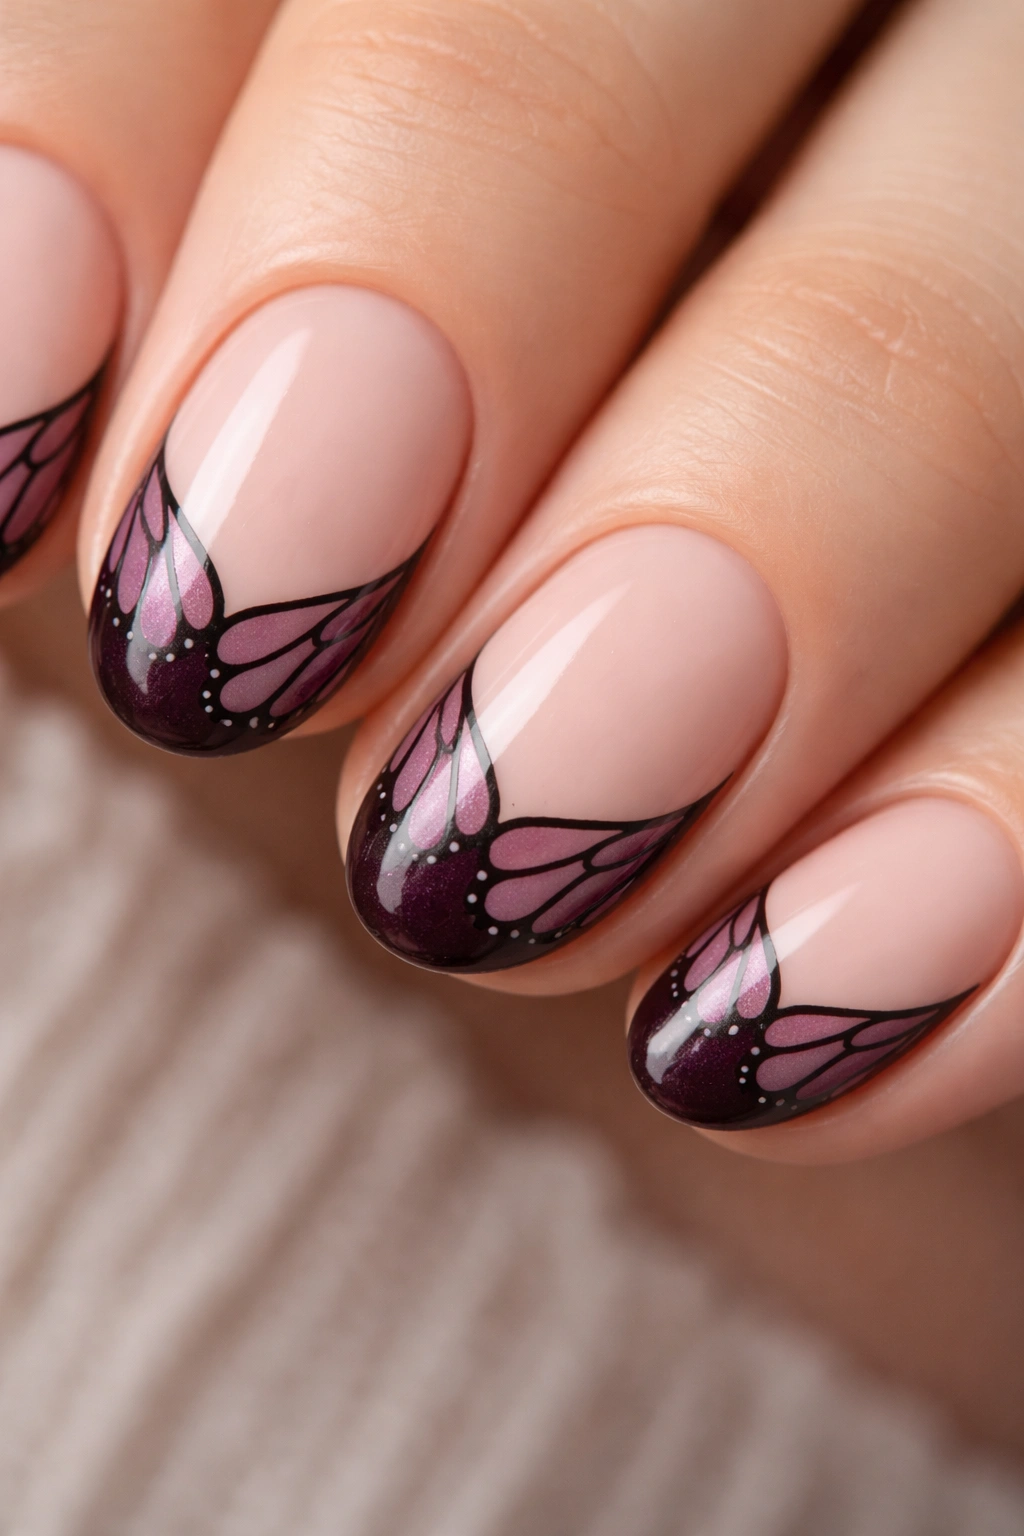
A short oval can borrow a little from almond styling without actually becoming almond. That means you use wing-shaped tips that mimic the curve of butterfly wings rather than a straight or squared French edge. The effect is elegant and a little whimsical.
What I like here is the movement. The wing shape follows the nail’s natural curve, so it feels built in rather than pasted on. On a small nail, that matters more than a lot of people think. The design should look like it belongs to the nail, not like it was dropped on top.
The best way to map the shape
Start the wing shape just off the centerline of the nail. Let the outer edges curve upward slightly, then taper the color toward the sides. A thin black outline or a fine dot detail can make the butterfly idea clearer without needing a full butterfly on every nail.
This style is stronger in darker colors than you might expect. Deep plum, teal, or black with a nude base gives a sharp contrast that still works on short ovals.
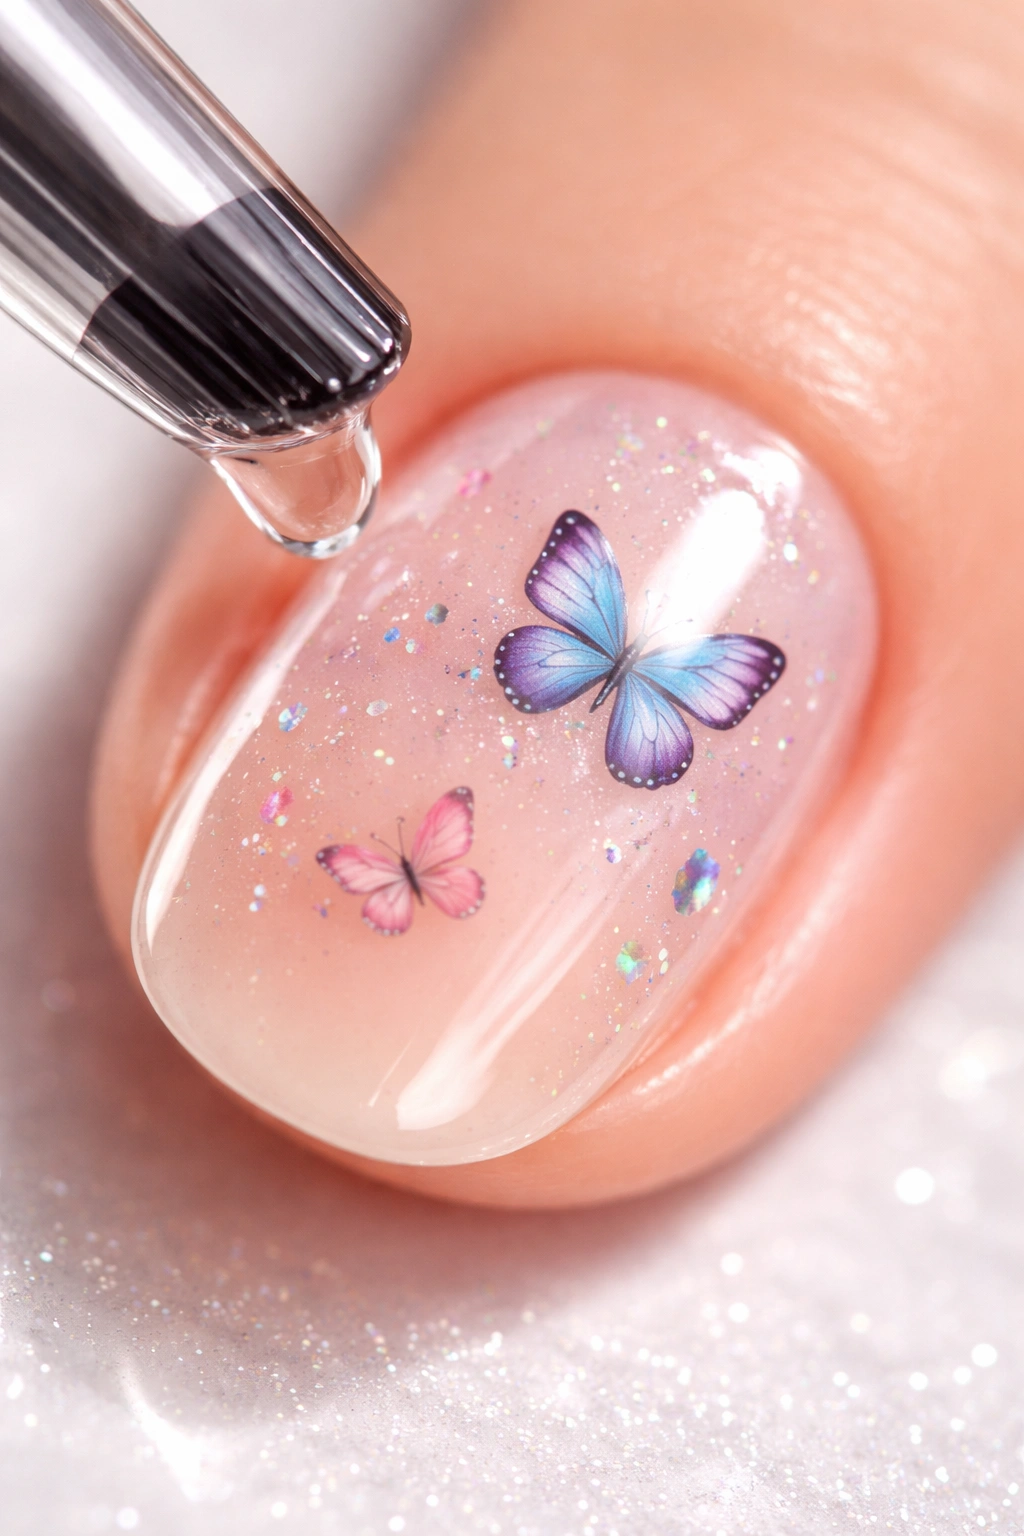
9. Glitter Butterflies Over a Sheer Pink Base
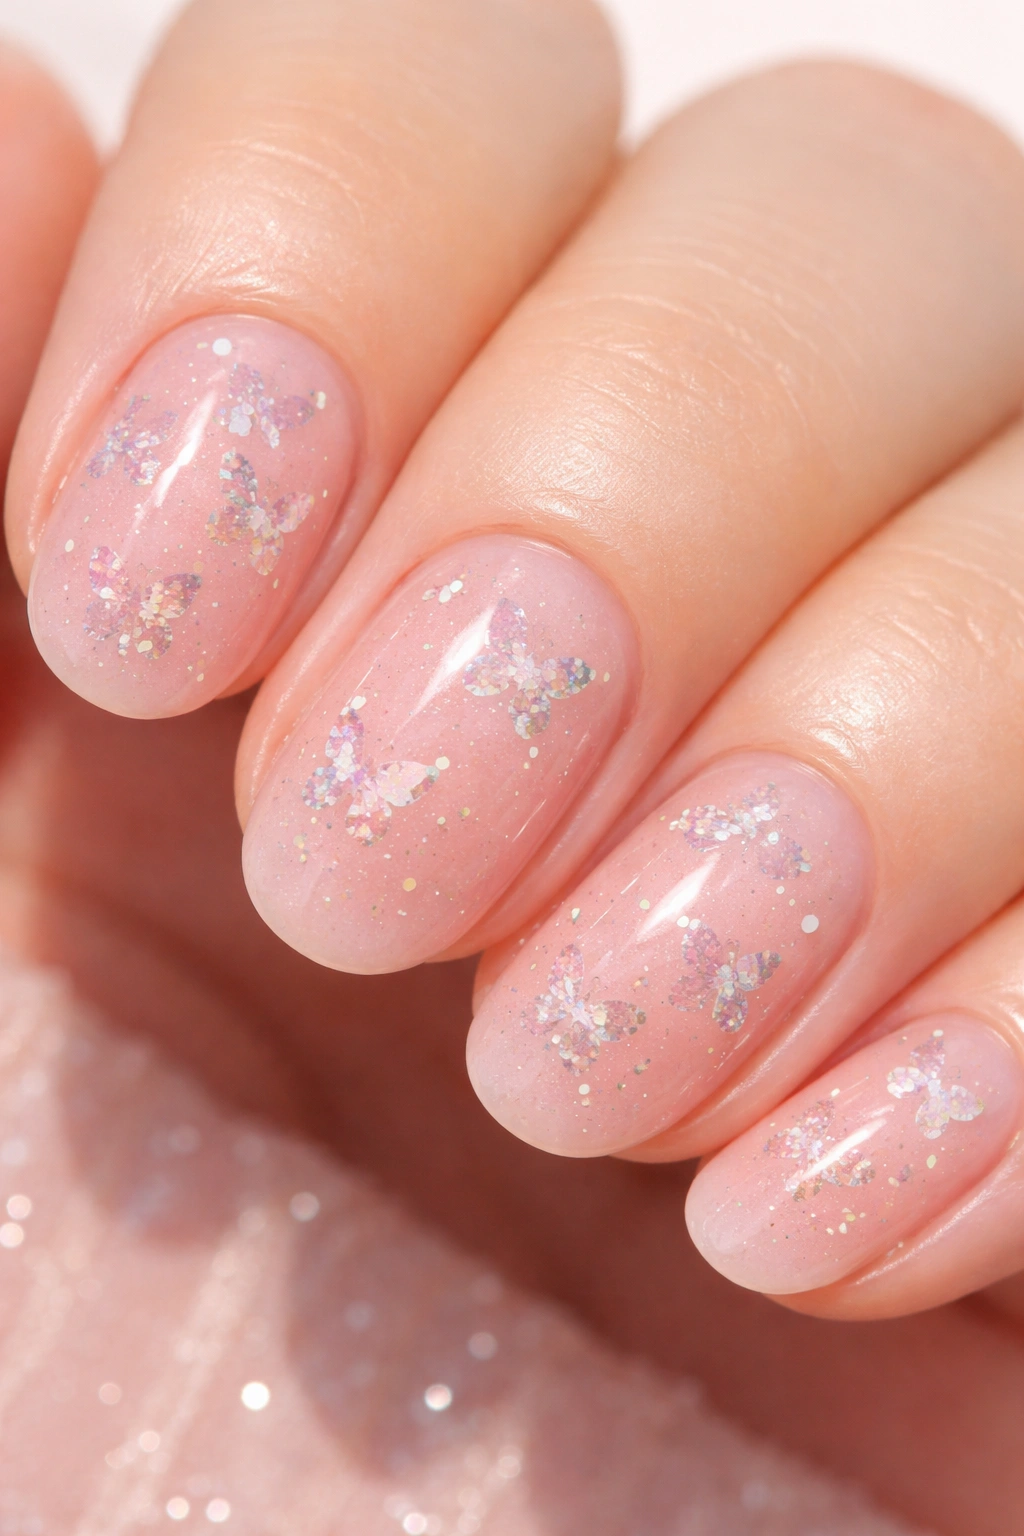
Glitter is easy to ruin on short nails. Too much, and the nail loses definition. Too little, and the effect barely registers. The sweet spot is a sheer pink base with small glitter butterfly accents placed like scattered confetti, not a full blanket of sparkle.
This design has a softer, more celebratory feel than chrome. It works well if you want something pretty for an event, but not the kind of set that only makes sense under salon lights. Fine glitter—tiny particles, not chunky flakes—keeps the shape clean.
Where glitter behaves best
- Along the butterfly wings
- As a small halo around one accent nail
- On just the tip of the wing, which catches the eye nicely
- Mixed with a solid polish on the other nails for balance
Chunky glitter can make short nails look wider. Fine glitter does the opposite. It adds brightness without stealing the whole show.
The base should stay sheer. That way, the butterflies look like they’re floating instead of sitting on top of a heavy sparkle layer.
10. Mismatched Butterfly Set with Mix-and-Match Details
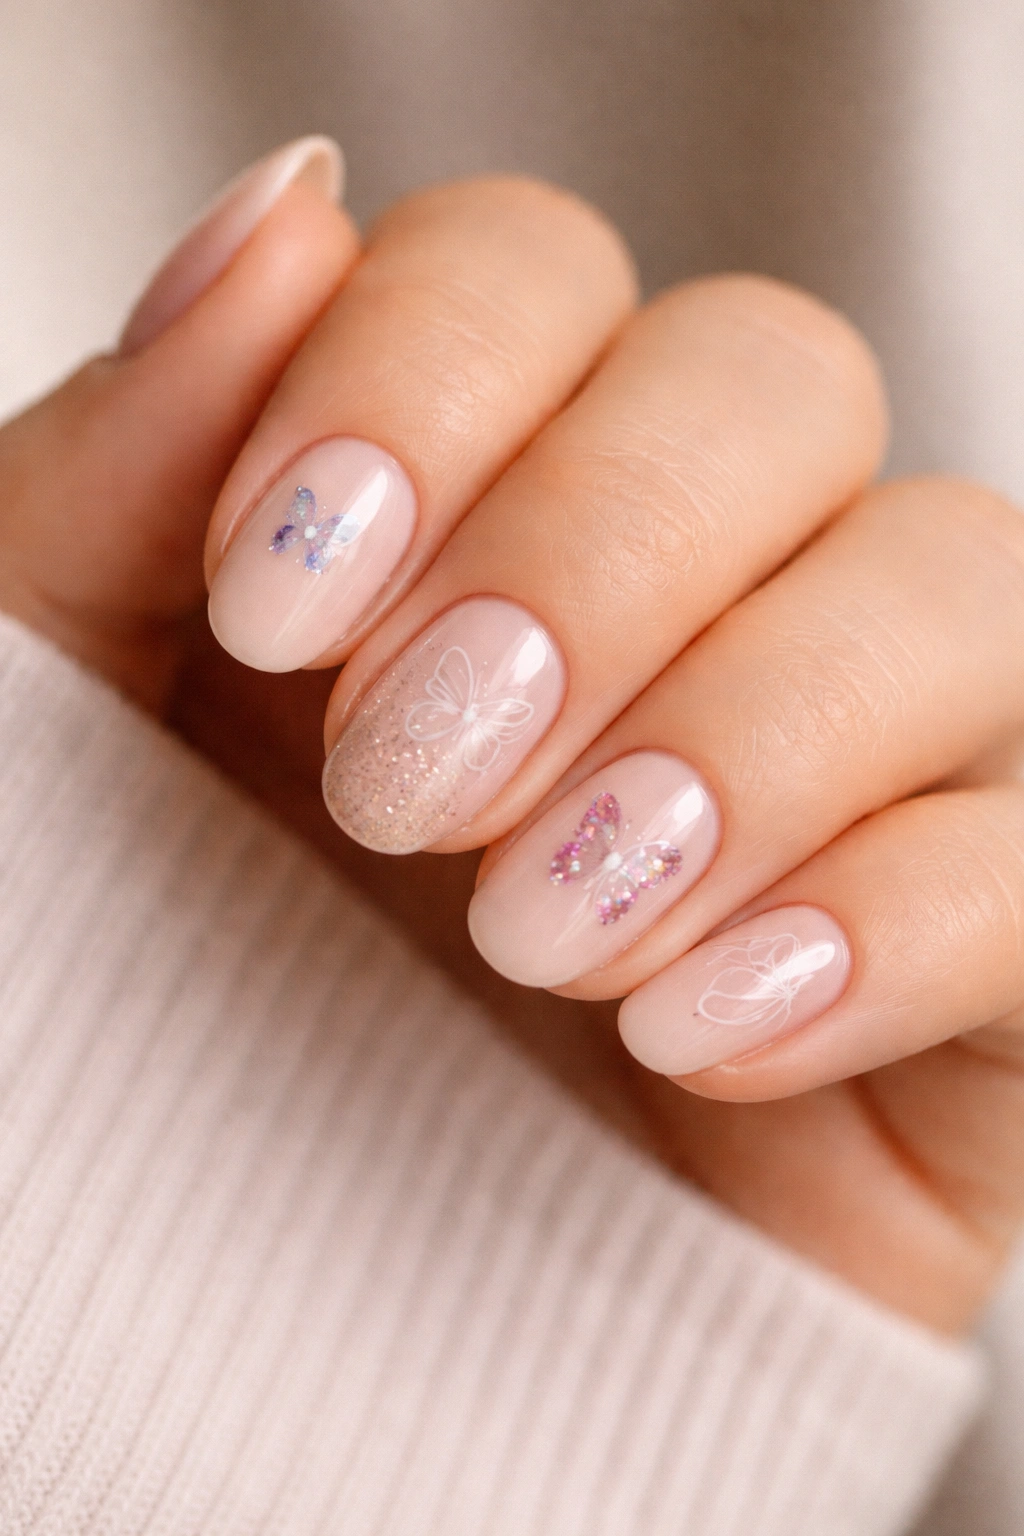
Some people want every nail identical. I do not, at least not with butterfly art on short ovals. A mismatched set can feel more stylish because each nail gets a different treatment: one has a tiny butterfly, another has a French tip, another has dots, another has a wing outline. The set stays cohesive through color, not through repetition.
This is a good option if you like nail art but get bored fast. Short ovals are small enough that a full uniform design can feel stiff. Variety gives them life. You still need a shared palette, though. That part is non-negotiable.
How to keep it from looking messy
Choose 2 to 4 colors max. Keep one polish shade as the anchor, usually nude or milky pink. Then let the butterfly details repeat in different ways: line art, decal, glitter, or a tiny chrome wing. If every nail is shouting, the whole set falls apart.
A strong combo looks like this
- Nude base
- One black line butterfly
- One pastel wing tip
- One glitter accent nail
- One plain glossy nail for breathing room
That last plain nail saves the whole design. People forget that.
Choosing the Right Butterfly Art for Your Nail Length
Short oval nails need restraint more than they need drama. That sounds dull, but it is actually what makes butterfly nail art look good here. The nail shape already gives you softness, so the design should add detail, not bulk.
If your nails are especially short, lean toward tiny motifs, negative space, or micro French layouts. If they’re a little longer on the short-oval spectrum, you can handle chrome, fade work, and even a small 3D accent. The more curved your nail bed, the more important placement becomes. Push the art too close to the free edge and it can look cut off.
A good rule: if the butterfly design is more noticeable than the nail shape itself, it’s probably too much for the length.
Finish, Care, and What Keeps the Design Looking Sharp
Top coat matters more than people admit. Glossy finishes make butterfly details look cleaner and more defined, especially when the art is delicate. Matte can work too, but it dulls the linework fast unless the design is built for that finish from the start.
Short nails also chip at the edges faster when the polish is packed too thick near the tip. Keep layers thin. Seal the free edge. That tiny move saves the look for days.
If you’re using decals, press them down fully before the top coat. If you’re using hand-painted butterflies, let each layer dry before the next one goes on. Rushing is how small nail art gets muddy. And muddy butterfly wings are not the look.
Final Thoughts
Short oval nails are a better canvas for butterfly art than people give them credit for. The shape keeps everything soft, and the smaller size forces the design to be smarter. That usually helps.
My honest favorite? Tiny black line butterflies on a sheer nude base. It’s clean, easy to wear, and it doesn’t fight the nail. But if you want more personality, chrome, pastel wings, or a mismatched set can all work beautifully when the scale stays controlled. The design should look like it belongs on the nail — not like it was squeezed onto it.
